Ever found yourself staring at a multimeter, wondering how to measure resistance without frying your brain or the device? You’re not alone.
Understanding how to measure resistance with a multimeter is a crucial skill for anyone dabbling in DIY electronics, troubleshooting, or even simple household repairs. But don’t worry, it’s easier than you think. Imagine having the power to diagnose electrical issues with confidence, avoiding costly repairs and gaining the satisfaction of solving problems on your own.
In this guide, you’ll learn step-by-step how to use a multimeter to measure resistance, empowering you with the knowledge to tackle electrical challenges head-on. Stick around, and you might just discover that mastering this tool is simpler than you ever imagined.

Credit: www.ariat-tech.com
Choosing The Right Multimeter
Measuring resistance accurately depends on picking the right multimeter. Not all multimeters are the same. Some work better for resistance tests than others. Knowing what to look for saves time and effort.
This guide explains different types of multimeters and key features needed for resistance measurement. Understanding these will help you choose a tool that fits your needs.
Types Of Multimeters
Multimeters come in two main types: analog and digital. Each has strengths and weaknesses for resistance measurement.
- Analog Multimeters:Use a needle and dial to show readings. They are simple but less precise for low resistance.
- Digital Multimeters (DMM):Show readings on a digital screen. They are more accurate and easier to read.
- Auto-Ranging Multimeters:Automatically select the correct range. Good for beginners and fast checks.
- Manual-Ranging Multimeters:Require you to set the range. Offer more control and can be better for advanced use.
For resistance, digital and auto-ranging multimeters are usually the best choice. They provide clear and exact readings.
Key Features For Resistance Measurement
| Feature | Why It Matters | Recommended for Resistance |
| Accuracy | Ensures correct resistance values | High accuracy (±1% or better) |
| Range | Must cover expected resistance values | Wide range including low ohms |
| Continuity Test | Quickly checks if circuit is closed | Helpful but not required |
| Display | Clear numbers reduce reading errors | Backlit digital display preferred |
| Input Protection | Protects meter from damage | Fuse or overload protection recommended |
Choosing a multimeter with these features helps you measure resistance safely and accurately every time.
Preparing The Multimeter
Measuring resistance with a multimeter needs careful preparation. Before testing, you must set up the device correctly.
This guide covers how to prepare your multimeter by setting the dial and checking the battery.
Setting The Dial To Resistance Mode
Turn the dial on your multimeter to the resistance mode. This mode often uses the Greek letter omega (Ω) as its symbol.
- Locate the dial on your multimeter.
- Turn it until the pointer aligns with the resistance symbol (Ω).
- Choose the correct range if your multimeter is not auto-ranging.
- If unsure, start with the highest range to avoid damage.
Checking The Multimeter Battery
A weak battery can cause wrong readings. Check your battery before measuring resistance.
| Battery Status | Effect on Multimeter | Action Needed |
| Good | Accurate readings | No action required |
| Weak | Fluctuating or low readings | Replace battery soon |
| Dead | No readings or error | Replace battery immediately |
Preparing The Circuit Or Component
Measuring resistance requires proper preparation of the circuit or component. This step ensures accurate readings and safety during testing.
Before using a multimeter, you must prepare the item you will test. This involves turning off power and isolating the part.
Powering Off The Circuit
Always turn off the power before measuring resistance. Live circuits can damage your multimeter or cause injury.
Switch off the device or unplug it from the power source. Confirm no electricity flows in the circuit before testing.
- Turn off the power switch
- Unplug the device if possible
- Check with a voltage tester for no power
Isolating The Component
Remove the component from the circuit if possible. This helps avoid incorrect resistance readings from other parts.
If removal is not possible, disconnect one side of the component. This stops current from flowing through other paths.
- Take out the component from the board
- Disconnect one lead from the circuit
- Ensure no parallel paths affect measurement
Connecting The Probes
Measuring resistance with a multimeter needs careful probe connection. The probes must touch the right points on the component.
Good connections help get accurate readings. Loose or wrong contacts can give wrong results.
Proper Probe Placement
Place the probes on the two ends of the resistor or component. Make sure the metal tips touch the metal parts of the component.
Hold the probes steady and avoid touching the metal tips with your fingers. This stops your body from affecting the reading.
- Touch both ends of the resistor with the probe tips
- Keep probes steady for a stable reading
- Do not touch the metal tips with your fingers
- Use the right multimeter ports for resistance measurement
Avoiding Common Mistakes
Do not measure resistance on a powered circuit. Power can damage the multimeter or give wrong readings.
Check that the probes are clean and not damaged. Dirty or broken tips cause poor contact and errors.
- Never measure resistance with power on
- Inspect probes for dirt or damage before use
- Do not touch probe tips during measurement
- Ensure the component is disconnected from the circuit
Reading The Resistance Value
Using a multimeter to measure resistance helps you check if a component works well. The device shows the resistance value on its screen. You need to understand what the numbers mean to use it correctly.
Reading the resistance value is simple once you know how to interpret the display. You also need to handle special cases like infinite or zero readings carefully.
Interpreting The Display
The multimeter screen shows the resistance in ohms (Ω). Sometimes, the value might have a prefix like K (kilo) or M (mega) to show larger amounts.
- Check the unit symbol to know the scale.
- Read the number clearly before taking notes.
- Look for a stable reading; fluctuating numbers may mean poor contact.
- Ignore small changes when the reading is steady.
Handling Infinite Or Zero Readings
Infinite or zero readings tell you important things about the circuit or component. Infinite means no connection or open circuit. Zero means a short circuit or very low resistance.
| Reading | Meaning | Action |
| “OL” or very high number | Open circuit or broken wire | Check connections, replace part if needed |
| Zero or near zero | Short circuit or very low resistance | Inspect for shorts, fix wiring |
| Normal value | Component works properly | Use as reference for testing |
Tips For Accurate Measurements
Measuring resistance with a multimeter needs care to get correct results. Small errors can cause wrong readings.
Following simple tips helps ensure your measurements are accurate and reliable every time.
Maintaining Clean Contacts
Dirty or corroded contacts can block the flow of current. This leads to incorrect resistance readings.
- Clean the test leads before use with a soft cloth.
- Use fine sandpaper or a brush to remove corrosion on contacts.
- Make sure the connection points on the component are free of dirt and grease.
- Apply gentle pressure to ensure good contact without damaging parts.
Dealing With Temperature Effects
Temperature changes affect resistance readings. Metals expand or contract, changing their resistance.
| Temperature | Effect on Resistance |
| Low Temperature | Resistance decreases |
| Room Temperature | Standard resistance value |
| High Temperature | Resistance increases |
Measure resistance at room temperature or note the temperature to adjust readings if needed.
Troubleshooting Common Issues
Using a multimeter to measure resistance can sometimes show no reading or strange values. This can make troubleshooting hard.
Checking the multimeter’s calibration helps ensure accurate measurements and reliable results.
No Reading Or Erratic Values
If the multimeter shows no reading or flickers between values, several causes might exist. The test leads could be loose or damaged. The component you test might be disconnected or broken.
- Make sure the test leads are firmly connected to the multimeter and the circuit.
- Inspect the test leads for cuts or broken wires.
- Check if the component is properly placed in the circuit.
- Try measuring a known resistor to confirm the multimeter’s function.
- Replace the battery if the display is dim or unresponsive.
Multimeter Calibration Checks
Calibration ensures the multimeter measures resistance correctly. You can check calibration with a known resistor or a calibration tool.
| Test Method | Expected Result | Action if Off |
| Measure 100Ω resistor | Close to 100Ω | Recalibrate or service multimeter |
| Measure 1kΩ resistor | Close to 1kΩ | Check leads and contacts |
| Zero adjustment | Set to zero with leads shorted | Adjust dial or reset device |

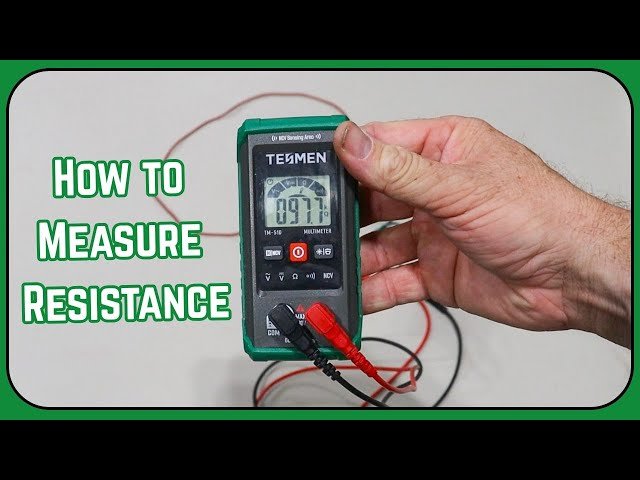
Credit: www.youtube.com

Credit: leetsacademy.blogspot.com
Frequently Asked Questions
How Do I Set A Multimeter To Measure Resistance?
Turn the multimeter dial to the resistance symbol (Ω). Ensure the device is off and disconnected from power. Connect the probes to the circuit or component to measure resistance accurately.
Can I Measure Resistance With The Circuit Powered On?
No, always power off the circuit before measuring resistance. Measuring resistance in a live circuit can damage the multimeter and give inaccurate readings.
Why Is My Resistance Reading Showing Zero Or Infinite?
A zero reading means a short circuit or very low resistance. Infinite reading suggests an open circuit or broken connection. Check probe connections and ensure the component is properly isolated.
What Units Are Used For Resistance Measurement?
Resistance is measured in ohms (Ω). Higher resistance values may use kilo-ohms (kΩ) or mega-ohms (MΩ), depending on the component being tested.
Conclusion
Measuring resistance with a multimeter is simple and useful. Just follow the steps carefully for accurate results. Always check the multimeter settings before starting. Remember to keep the circuit power off to stay safe. Practice this skill to understand electrical parts better.
Soon, reading resistance will feel natural and easy. Keep your multimeter handy for quick checks anytime. This basic tool helps with many electrical tasks. Try it yourself and gain confidence in your work.