Are you tired of wood pieces that don’t fit right or cuts that waste material? Measuring wood accurately for cuts is the key to getting your project just right.
Whether you’re building furniture, crafting a deck, or tackling a simple DIY task, precise measurements save you time, money, and frustration. In this guide, you’ll discover easy-to-follow tips and tricks that will boost your confidence and help you make perfect cuts every time.
Keep reading, and you’ll never struggle with measurement mistakes again.

Credit: www.familyhandyman.com
Essential Tools For Measuring Wood
Measuring wood correctly is important for accurate cuts. Using the right tools helps you get precise results every time.
This guide explains common measuring tools and how to use them well.
Types Of Measuring Tools
There are many tools to measure wood. Each tool has a special use for different tasks.
- Tape measures – flexible and easy to use for long lengths
- Combination squares – good for marking right angles and depth
- Rulers and straight edges – useful for short, straight lines
- Calipers – measure thickness and small distances precisely
Choosing The Right Tape Measure
A tape measure is a basic tool for wood measurement. Pick one that fits your project size.
Look for a tape measure with clear markings and a locking mechanism. A sturdy blade helps prevent bending.
- Length: Choose 16 to 25 feet for most wood projects
- Width: Wider blades stay straight better for longer runs
- Markings: Use both metric and imperial for flexibility
- Durability: A strong case protects the tape from damage
Using A Combination Square
The combination square is a tool for checking angles and measuring short distances. It helps mark cut lines accurately.
Use the ruler part to measure length and the square head to mark 90-degree angles. It also measures depth for grooves or dadoes.
- Place the square head against the wood edge
- Slide the ruler to the desired measurement
- Mark the wood at the ruler’s edge for a straight line
- Use the built-in level to check flatness if needed
Preparing Wood For Accurate Measurement
Measuring wood carefully is key to getting precise cuts. Proper preparation helps avoid mistakes.
Start by making sure the wood is ready and your workspace is stable. These steps save time and material.
Checking Wood Surface
Look over the wood surface for any defects. Cracks, knots, or warps can change your measurements.
- Remove dirt and dust using a clean cloth.
- Check for any uneven spots or warping.
- Note knots that may affect cutting lines.
- Smooth rough areas with sandpaper if needed.
Marking Reference Points
Mark clear points on the wood to guide your measurements. Use a pencil or chalk for visible marks.
| Tool | Purpose |
| Pencil | Fine, precise marks |
| Chalk | Visible on rough surfaces |
| Square | Right angle marking |
| Measuring tape | Measure length accurately |
Ensuring Stable Work Surface
A steady surface stops the wood from moving. This helps keep your measurements exact.
- Clear the workspace of clutter and debris.
- Place wood on a flat, solid table or bench.
- Use clamps to hold the wood firmly in place.
- Double-check the stability before measuring.
Techniques For Precise Measurement
Measuring wood carefully is key to making clean, exact cuts. Small errors can cause pieces to not fit well.
Using good techniques helps you avoid mistakes and saves time and materials. Focus on accuracy before cutting.
Measuring Twice, Cutting Once
Always check your measurements two times before marking the wood. This reduces the chance of errors.
- Use a reliable tape measure or ruler.
- Mark your measurement clearly with a pencil.
- Re-measure from the same starting point.
- Confirm your marks match the needed length.
Reading Measurements Correctly
Understand how to read measurements on your tools well. Know the difference between fractions and decimals.
| Measurement Type | Example | How to Read |
|---|---|---|
| Fractional | 3 1/2 inches | Three inches plus one half inch |
| Decimal | 3.5 inches | Three point five inches |
| Metric | 90 mm | Ninety millimeters |
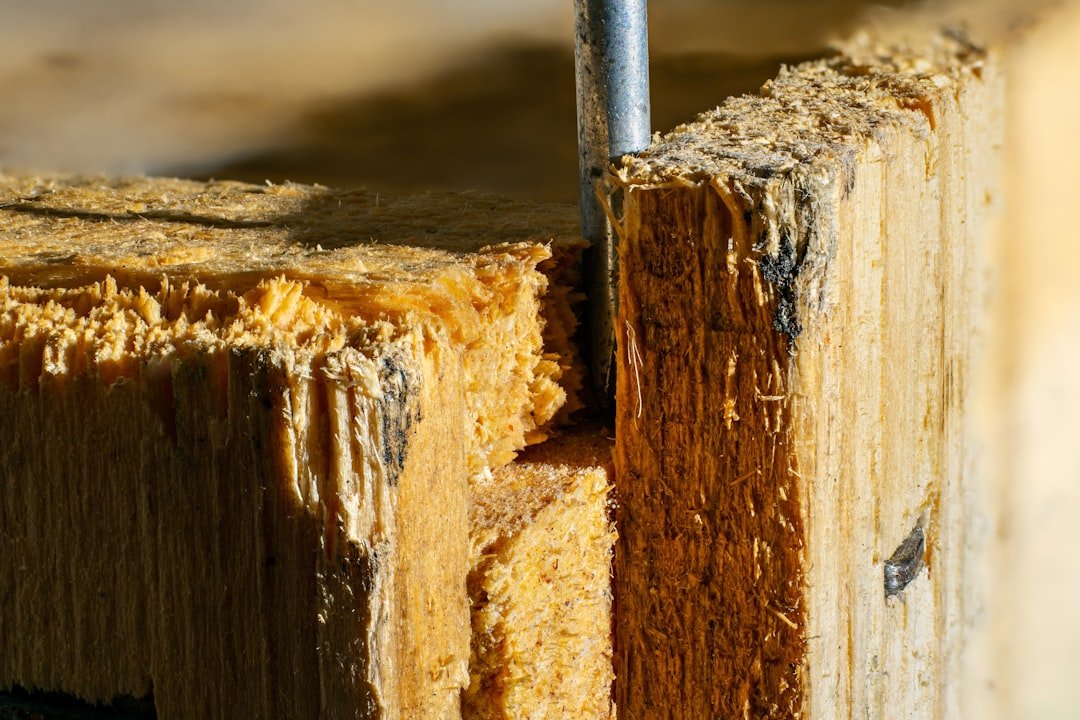
Accounting For Saw Blade Thickness
Saw blades remove some wood as they cut. This is called the kerf. It affects the final length of your piece.
To adjust for kerf, follow these tips:
- Measure the kerf width of your saw blade using a ruler.
- Subtract the kerf from your marked measurement before cutting.
- Make sure your saw blade is sharp to keep kerf consistent.
Tips For Marking Wood Clearly
Marking wood clearly is important for making accurate cuts. Clear marks help you follow the lines without mistakes. Using the right tools and methods makes your work easier and cleaner.
This guide covers how to use sharp pencils and markers, mark both edges, and avoid smudges and errors while working with wood.
Using Sharp Pencils And Markers
Always use a sharp pencil or fine marker for marking wood. A sharp point draws thin lines that are easy to see and follow. Avoid dull pencils because they make thick and unclear marks.
- Use a carpenter’s pencil or a mechanical pencil for fine lines.
- Keep your pencil sharp by regularly sharpening it.
- Choose a marker with a fine tip for darker lines on rough wood.
- Test the pencil or marker on scrap wood before marking your project.
Marking Both Edges
Marking both edges of the wood helps you see the cutting line from any angle. This practice reduces mistakes and saves time while cutting. Make sure both marks line up perfectly.
| Edge | Purpose | Tip |
| Top Edge | Visible when measuring and cutting | Draw a clear, thin line |
| Side Edge | Helps guide saw alignment | Mark with the same tool and thickness |
Avoiding Smudges And Errors
Smudges can blur your lines and cause cutting mistakes. Keep your marks clean and easy to follow. Use these tips to avoid errors and keep your work tidy.
- Let ink or marker dry fully before handling the wood.
- Use painter’s tape on the wood before marking to prevent bleed.
- Wipe off dust and debris before marking to keep lines sharp.
- Hold the pencil or marker steadily to avoid shaky lines.
- If a mistake happens, erase or sand lightly and mark again.
Common Mistakes To Avoid
Measuring wood correctly is key to good cuts. Many people make simple errors that cause mistakes.
Knowing these common mistakes helps you avoid wasted wood and time.
Misreading Tape Measures
Many people read tape measures wrong. They mix up fractions or miss the small marks.
It is important to read the tape slowly and carefully. Always look closely at the numbers and lines.
- Check if the tape shows inches or centimeters
- Understand fraction marks like 1/8 or 1/16
- Use a magnifier if the marks are hard to see
Ignoring Tool Calibration
Tools can lose accuracy over time. Ignoring calibration leads to wrong measurements.
Check your tools often to make sure they are correct. Measure a known length to see if they match.
- Measure a ruler or known object to test your tape
- Adjust your square or other tools if needed
- Replace worn or damaged tools promptly
Rushing The Measuring Process
Rushing leads to mistakes. When you measure too fast, you might miss details or move the tape.
Take your time to measure carefully. Double-check each measurement before marking the wood.
- Hold the tape measure steady
- Mark the wood clearly after measuring
- Repeat measurements if unsure

Credit: www.wikihow.com
Advanced Tricks For Complex Cuts
Cutting wood with precision is vital for quality projects. Complex cuts need careful measuring to avoid mistakes.
These advanced tricks help you measure wood accurately for angled and tricky cuts. Use tools and techniques for better results.
Measuring Angled Cuts
Angled cuts require you to measure both the length and the angle correctly. Use a protractor or angle finder to get exact degrees.
Mark the wood clearly at the measured angle before cutting. Double-check angles to avoid errors that ruin the piece.
- Use an angle finder to measure the cut angle
- Draw the angle line with a pencil and straightedge
- Check the angle twice before cutting
- Measure the length along the angled line, not the flat edge
Using Jigs For Consistency
Jigs hold wood in place and guide your saw for repeat cuts. They help keep angles and lengths the same on each piece.
Build simple jigs or buy adjustable ones. Use clamps to secure wood and prevent movement during cutting.
- Create a jig for common angles like 45° or 30°
- Use stops on jigs to set exact cut lengths
- Clamp wood tightly to avoid slipping
- Test the jig on scrap wood before final cuts
Transferring Measurements Accurately
Transfer measurements carefully from your plan to the wood. Use marking tools that show clear lines on the wood surface.
Try marking directly on the wood edge or use a marking knife for thin, precise lines. Avoid thick pencil marks that reduce accuracy.
- Use a ruler or tape measure for exact lengths
- Mark lines with a sharp pencil or marking knife
- Check measurements twice before cutting
- Keep your measuring tool tight against the wood edge

Credit: www.wikihow.com
Frequently Asked Questions
How Do I Measure Wood For Precise Cuts?
Use a reliable tape measure or ruler for accuracy. Mark measurements clearly with a pencil. Double-check all measurements before cutting to avoid errors.
What Tools Ensure Accurate Wood Measurement?
A tape measure, combination square, and marking gauge provide precise measurements. Use these tools regularly for consistent results.
How To Avoid Common Measurement Mistakes In Woodworking?
Measure twice, cut once to prevent errors. Always align the tape measure properly and mark the cut line clearly.
Can I Measure Wood Without Professional Tools?
Yes, a standard tape measure and pencil can work. However, professional tools improve accuracy and reduce mistakes.
Conclusion
Measuring wood accurately is key to successful projects. Start with quality tools. A sturdy tape measure and a sharp pencil work best. Always double-check your measurements. Mistakes can lead to wasted wood. Mark your wood clearly before cutting. This helps avoid errors.
Practice patience and precision. Each step counts in woodworking. With practice, your skills will improve. Accurate cuts lead to a professional finish. Enjoy the process. Woodworking can be rewarding and satisfying. Keep these tips in mind for better results. Happy woodworking!