Looking to tackle your home projects with confidence? Knowing how to operate a cordless drill can make your work faster, easier, and more precise.
Whether you’re hanging shelves, assembling furniture, or fixing a loose cabinet, mastering this handy tool will save you time and frustration. In this guide, you’ll discover simple steps to use your cordless drill safely and effectively—even if you’ve never held one before.
Stick with me, and soon you’ll feel ready to take on any DIY task with power and ease.
Choosing The Right Drill
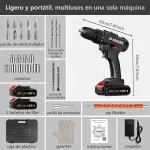
Picking the right cordless drill is important for your home projects. The right drill makes work easier and faster.
We will look at different types of drills, battery options, and key features to help you decide.
Types Of Cordless Drills
There are several types of cordless drills. Each type fits different tasks around the house.
- Standard Drill Driver:Good for drilling holes and driving screws in wood and metal.
- Hammer Drill:Best for drilling into hard materials like concrete and brick.
- Impact Driver:Great for driving large screws and bolts with high torque.
- Right-Angle Drill:Useful for tight spaces where a regular drill won’t fit.
Battery Options
The battery type affects how long you can use the drill and how powerful it is.
| Battery Type | Pros | Cons |
| Nickel-Cadmium (NiCd) | Affordable, durable | Heavier, memory effect reduces life |
| Lithium-Ion (Li-ion) | Lightweight, holds charge longer | More expensive |
| Nickel-Metal Hydride (NiMH) | Less memory effect than NiCd | Heavier than Li-ion, shorter life |
Key Features To Consider
Check these features to make sure the drill meets your needs.
- Power:Higher voltage means more power for tough jobs.
- Speed Settings:Multiple speeds help control the drill better.
- Chuck Size:Common sizes are 3/8 inch and 1/2 inch; bigger sizes hold larger bits.
- Weight:Lighter drills are easier to use for long times.
- Ergonomics:Comfortable grip reduces hand fatigue.
- Additional Features:Look for LED lights, battery indicators, and clutch control.

Credit: www.amazon.com
Preparing For Use
Using a cordless drill safely starts with good preparation. Getting ready helps the drill work well and keeps you safe.
Before drilling, check your drill and tools. Prepare everything you need for the task.
Charging The Battery
Make sure the drill’s battery is fully charged. A strong battery gives steady power and stops the drill from slowing down.
Use the charger that came with your drill. Follow the instructions to avoid damage or poor charging.
- Place the battery in the charger correctly.
- Charge in a cool, dry place.
- Wait until the light shows full charge.
- Do not overcharge the battery.
Selecting Drill Bits
Choose the right drill bit for your project. Different bits work best on wood, metal, or plastic.
Check the drill bit size and type before you start. The right bit makes drilling easier and cleaner.
- Use wood bits for wood projects.
- Use metal bits for metal surfaces.
- Use masonry bits for brick or stone.
- Match bit size to the hole you want.
Safety Gear Essentials
Wear safety gear to protect yourself. Safety glasses keep dust and debris out of your eyes.
Gloves protect your hands from sharp bits and rough materials. Ear protection helps with loud drill noise.
- Safety glasses or goggles
- Work gloves
- Hearing protection
- Close-fitting clothes to avoid snags
Basic Drill Operations
Using a cordless drill is helpful for many home projects. It saves time and effort when driving screws or drilling holes.
Understanding the basic operations makes your work safer and more efficient. This guide explains important parts of drill use.
Inserting And Removing Bits
Start by choosing the correct drill bit for your project. The bit fits into the drill’s chuck at the front.
To insert a bit, open the chuck by turning it counterclockwise. Push the bit in firmly, then tighten the chuck clockwise.
- Make sure the bit is straight and secure
- Do not overtighten the chuck
- To remove, turn the chuck counterclockwise and pull the bit out
Adjusting Speed And Torque
Cordless drills have settings for speed and torque. Speed controls how fast the drill spins.
Torque is the turning force. Use low speed and low torque for small screws. Use high speed and high torque for bigger holes.
- Low speed: good for driving screws
- High speed: best for drilling holes
- Adjust torque to avoid damaging materials or stripping screws
Using The Clutch
The clutch helps control the drill’s power. It stops the drill from turning if the bit gets stuck.
Set the clutch to a low number for delicate work. Use a higher number for harder tasks. This prevents damage to screws and surfaces.
- Lower clutch setting: less power, safer for soft materials
- Higher clutch setting: more power, use for tough materials
- Adjust the clutch before drilling or driving screws
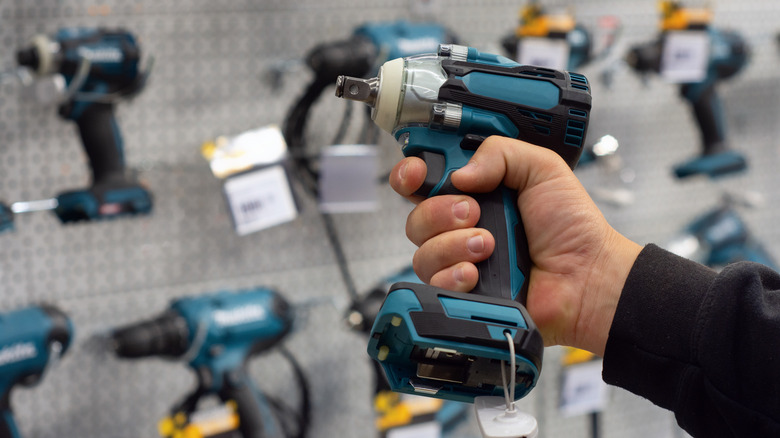
Credit: www.slashgear.com
Drilling Techniques
Using a cordless drill correctly makes home projects easier and safer.
Different materials need different drilling methods to get the best results.
Drilling Into Wood
Wood is soft and easy to drill. Use a wood drill bit for clean holes.
- Mark the spot with a pencil before drilling.
- Start drilling slowly to avoid splintering the wood.
- Increase speed once the bit is inside the wood.
- Pull the drill out slowly to clear wood shavings.
Drilling Into Metal
Metal is hard and needs special drill bits like cobalt or titanium.
Keep the drill speed low and steady to avoid overheating the bit.
| Tip | Reason |
| Use cutting oil | Keeps bit cool and reduces friction |
| Clamp metal piece | Prevents movement and ensures safety |
| Start with a small pilot hole | Makes drilling easier and accurate |
Drilling Into Masonry
Brick, stone, or concrete needs a masonry bit and a hammer drill mode.
Follow these tips for best results:
- Wear safety goggles to protect your eyes from dust.
- Use steady pressure, but do not force the drill.
- Pull the bit out occasionally to clear dust from the hole.
- Start with a smaller bit before using a larger one.
Maintenance Tips
Keeping your cordless drill in good shape helps it last longer. Regular care avoids problems during your projects.
Simple maintenance tasks can keep your drill working smoothly. Follow these tips to maintain your tool.
Cleaning The Drill
After each use, clean dirt and dust from the drill. Use a dry cloth to wipe the surface and vents.
A soft brush helps remove debris from hard-to-reach spots like the chuck and trigger area. Avoid water or harsh cleaners.
Battery Care
Proper battery care keeps your drill ready for use. Charge the battery fully before storing it.
- Charge the battery after use, but avoid overcharging.
- Store batteries in a cool, dry place away from direct sunlight.
- Use the battery regularly to maintain its capacity.
- Replace the battery if it no longer holds a charge well.
Storing The Drill Safely
| Storage Tip | Reason |
|---|---|
| Keep drill in a case or box | Protects from dust and damage |
| Store in a dry place | Prevents rust and electrical problems |
| Remove battery before long storage | Prevents battery drain and damage |
| Place away from children | Ensures safety and prevents accidents |
Troubleshooting Common Issues
Using a cordless drill is easy, but sometimes problems can occur. Knowing how to fix these issues helps you finish projects faster.
This guide covers common problems like the drill not starting, battery troubles, and the drill bit slipping.
Drill Not Starting
If your drill does not start, first check if the battery is fully charged. Also, ensure the trigger switch is pressed firmly.
Look for these causes:
- Battery is dead or not inserted correctly
- Trigger switch is faulty or stuck
- Internal motor issues
- Safety lock is engaged
Battery Problems
Battery issues are common with cordless drills. Sometimes the battery does not hold a charge or drains quickly.
| Problem | Possible Cause | Solution |
| Battery won’t charge | Charger or battery is faulty | Try a different charger or replace battery |
| Battery drains fast | Old battery or extreme temperature | Replace battery or store in cool place |
| Drill stops suddenly | Poor battery connection | Remove and reinsert battery firmly |
Bit Slipping
The drill bit may slip inside the chuck if it is not tightened properly. This reduces drilling accuracy.
Follow these tips to fix bit slipping:
- Make sure the chuck is clean and free of debris.
- Tighten the chuck firmly by hand or with a chuck key.
- Use the correct size bit for your drill.
- Replace worn or damaged bits.

Credit: www.temu.com
Frequently Asked Questions
How Do I Safely Use A Cordless Drill At Home?
Always wear safety goggles and gloves before operating. Check battery charge and drill bits. Keep a firm grip and start drilling at low speed for better control. Avoid loose clothing or jewelry near moving parts.
What Type Of Drill Bit Works Best For Wood?
Use high-speed steel (HSS) or brad-point bits for wood. These bits create clean holes and prevent splintering. Match the bit size to your screw or bolt for optimal results.
How Do I Maintain My Cordless Drill Battery?
Charge the battery fully before first use. Avoid letting it drain completely. Store in a cool, dry place. Clean battery contacts periodically to ensure good connection and longer life.
Can I Use A Cordless Drill For Metal Projects?
Yes, but use cobalt or titanium drill bits designed for metal. Start with a small pilot hole and apply steady pressure. Use slower speeds to prevent overheating and bit damage.
Conclusion
Operating a cordless drill can feel daunting at first. With practice, it becomes easier. Start by selecting the right drill bit for your task. Ensure the battery is fully charged for consistent power. Hold the drill firmly and apply steady pressure.
Remember to use safety goggles to protect your eyes. Always work in a clean, organized space. This prevents accidents and makes your project smoother. Regularly check and maintain your drill. This extends its lifespan and efficiency. Enjoy your home projects with confidence.
With these tips, you’re ready to tackle any task.