Are you tired of spending more time searching for your woodworking tools than actually using them? Imagine the frustration melting away as you walk into your neatly organized workshop, where every tool is in its rightful place, waiting to bring your next project to life.
You deserve a workspace that inspires creativity, not chaos. In this guide, you’ll discover simple yet effective strategies to transform your cluttered space into a haven of efficiency and productivity. Ready to unlock the secrets to a perfectly organized workshop?
Keep reading and take the first step towards crafting with ease and precision.
Choosing The Right Storage
Organizing woodworking tools helps save time and space. The right storage keeps tools safe and easy to find.
Choose storage based on your workshop size and tool types. Good storage improves your work flow and protects tools.
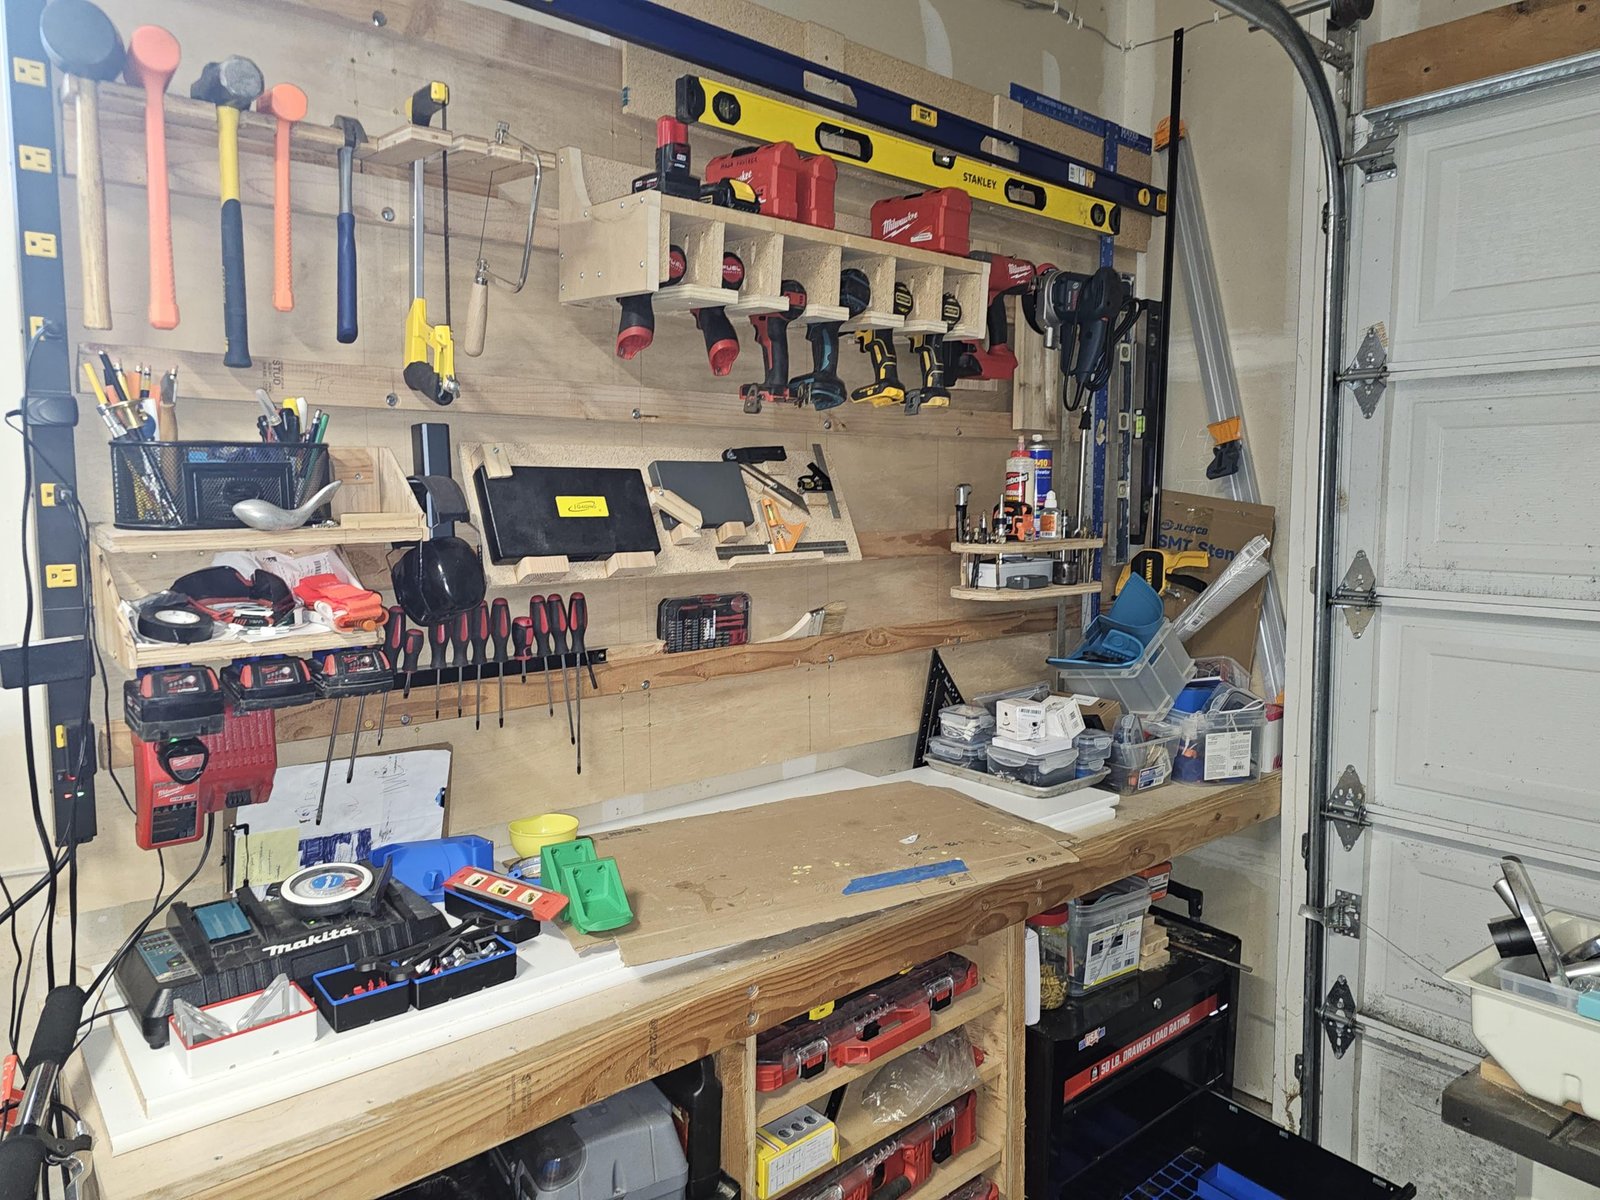
Wall-mounted Solutions
Wall-mounted storage uses vertical space well. It keeps tools visible and easy to grab.
You can install pegboards, hooks, and shelves on walls. This method works well for hand tools and small items.
- Pegboards hold hammers, screwdrivers, and wrenches
- Hooks hang saws, clamps, and measuring tapes
- Shelves store paint cans and toolboxes
Mobile Storage Units
Mobile storage units roll around your workshop. They let you bring tools close to your work area.
These units often have wheels and multiple compartments. You can store power tools, screws, and safety gear inside.
- Rolling carts for easy movement
- Tool chests with drawers and compartments
- Compact and space-saving designs
Drawer Organizers
Drawer organizers keep small tools and parts neat. They prevent clutter and make items easy to find.
Use dividers or trays to separate tools in drawers. Label sections to quickly spot what you need.
- Separate compartments for screws and nails
- Foam inserts for delicate tools
- Clear labels on each section
Sorting And Categorizing Tools
Organizing your woodworking tools helps you work faster. It saves time and keeps your workspace neat.
Sorting tools into groups makes it easy to find what you need. You can store them safely and avoid clutter.
Grouping By Function
Group tools based on what they do. This helps you pick the right tool quickly for each job.
For example, put all measuring tools together and all cutting tools in one place.
- Measuring tools: tape measures, squares, rulers
- Cutting tools: saws, chisels, knives
- Shaping tools: planes, files, sanders
- Assembly tools: hammers, screwdrivers, clamps
Separating Hand And Power Tools
Keep hand tools and power tools in different areas. This avoids damage and makes storage safer.
Hand tools are smaller and easier to store. Power tools need more space and protection from dust.
- Hand tools: hammers, screwdrivers, chisels
- Power tools: drills, saws, sanders
- Use shelves or pegboards for hand tools
- Use sturdy cabinets for power tools
Labeling Techniques
Label shelves and boxes clearly. This helps you find tools fast and return them to the right place.
Use simple labels with big letters. You can use color codes to group similar tools.
- Write tool names on labels
- Use waterproof labels for durability
- Match label colors to tool groups
- Place labels where they are easy to see
Maximizing Workshop Space
Organizing woodworking tools well makes your workshop safer and easier to use. Good storage helps you find tools fast and keeps your space neat.
Use smart methods to save space and keep tools ready. This guide shows ways to get the most out of your workshop.
Utilizing Vertical Space
Wall space is often empty but perfect for tool storage. Mount shelves or pegboards to hold tools off the floor. This frees up bench and floor areas.
- Install pegboards with hooks for hand tools
- Add wall-mounted shelves for small containers
- Use magnetic strips to hold metal tools securely
- Hang larger tools like clamps vertically
- Label storage spots for easy tool return
Creating Multi-use Workstations
Design workstations that serve many purposes. This reduces the need for extra tables and saves space.
| Workstation Type | Uses | Benefits |
| Foldable Workbench | Cutting, assembly | Can be folded to save room |
| Tool Cart with Work Surface | Tool storage, small projects | Mobile and space-saving |
| Wall-Mounted Workstation | Light tasks | Clears floor space |
Folding And Collapsible Storage
Choose storage that folds or collapses when not in use. This type of storage is great for tight workshops.
- Use folding shelves for extra storage
- Get collapsible bins for small parts
- Try fold-down tool racks on walls
- Pick stackable crates to save floor space
- Store folding stools and work tables easily

Credit: www.reddit.com
Maintaining Tool Condition
Keeping woodworking tools in good shape helps them last longer. Regular care ensures your tools work safely and well.
This guide covers cleaning, storing, and inspecting tools to keep them ready for use.
Cleaning And Oiling
Cleaning removes dust and sap that can harm tools. Oiling stops rust and keeps moving parts smooth.
- Wipe blades and handles after each use
- Use a soft cloth and mild cleaner for metal parts
- Apply a light coat of oil to blades and joints
- Use machine oil for hinges and moving areas
- Dry tools completely before storing them
Safe Storage Practices
Store tools where they stay dry and organized. Proper storage protects tools from damage and accidents.
| Storage Method | Benefit |
| Wall-mounted racks | Saves space and keeps tools visible |
| Toolboxes with dividers | Prevents tools from banging together |
| Plastic cases | Keeps moisture away and dust off |
| Magnetic strips | Holds metal tools securely and accessibly |
Regular Inspection Schedules
Checking tools often helps find problems early. Fixing small issues prevents costly repairs.
- Look for cracks, chips, or rust on blades
- Check handles for looseness or splinters
- Test moving parts for smooth action
- Tighten screws and bolts as needed
- Sharpen blades regularly for best cutting
Efficient Workflow Setup
Organizing woodworking tools can help you work faster and safer. A good setup saves time and reduces frustration.
Focus on how you place tools and arrange your workspace for the best flow. Keep cords tidy for safety and ease.
Tool Placement For Accessibility
Place tools where you use them the most. Keep frequently used tools within arm’s reach to save time.
Store heavy or large tools lower to avoid accidents. Use wall mounts or pegboards to keep tools visible and easy to grab.
- Hang hand tools on pegboards near workbenches
- Keep measuring tools in a drawer close to cutting areas
- Place power tools on shelves or carts near power outlets
- Store safety gear like goggles and gloves nearby
Designing Work Zones
Divide your workspace into zones for different tasks. This makes your workflow smoother and more organized.
Set areas for cutting, assembly, finishing, and storage. Keep tools and materials needed for each zone close by.
- Cutting zone with saws and measuring tools
- Assembly zone with clamps and screwdrivers
- Finishing zone with sanders and brushes
- Storage zone for raw materials and finished projects
Cable And Cord Management
Keep cords and cables neat to avoid tripping hazards. Organized cables also protect your tools and plugs.
Use hooks, clips, or cable ties to bundle cords. Label each cord for easy identification and quick access.
- Use cable hooks to hang cords off the floor
- Wrap cords with reusable cable ties
- Label power cords with tape or tags
- Keep extension cords coiled and stored separately

Credit: www.reddit.com
Diy Storage Projects
Organizing woodworking tools keeps your workspace neat. It also makes tools easy to find. DIY storage projects help you build custom solutions that fit your needs.
Simple projects use wood and other materials you may already have. This guide shows ideas for racks, pegboards, and reusing materials.
Custom Tool Racks
Custom tool racks let you store tools in a way that fits your workshop. You can build racks for saws, chisels, or clamps. Use scrap wood to save money.
- Measure your tools before building
- Cut wood pieces to fit tool sizes
- Use screws or nails to join parts
- Sand edges for safety
- Paint or stain for a finished look
Pegboard Systems
Pegboards are easy to install and adjust. They hold many types of tools on hooks. You can arrange tools by size or use.
| Tool Type | Recommended Hook | Placement Tips |
| Hammers | Heavy Duty Hook | Near workbench |
| Screwdrivers | Small Hook | Grouped by size |
| Wrenches | Long Hook | Hang horizontally |
| Measuring Tape | Loop Hook | Easy reach spot |
Repurposed Materials
Use old items to make tool storage. Pallets, drawers, and jars can hold tools and supplies. This saves money and reduces waste.
Ideas for Repurposed Storage
- Turn an old drawer into a small parts organizer
- Mount jars on a board for screws and nails
- Use a wooden pallet as a vertical tool holder
- Make shelves from scrap wood for power tools
Safety And Organization
Organizing woodworking tools keeps your workspace safe and efficient. A tidy area helps prevent accidents and saves time.
Focus on securing sharp tools, proper lighting, and being ready for emergencies in your workshop.
Securing Sharp Tools
Sharp tools can cause serious injuries if not stored properly. Keep blades and edges covered and out of reach.
- Use blade guards or sheaths for knives and chisels
- Store tools in locked drawers or cabinets
- Hang tools on wall racks with secure hooks
- Keep tools dry to avoid rust and damage
Proper Lighting
Good lighting reduces mistakes and eye strain. Bright, even light helps you see details clearly.
| Type of Lighting | Purpose |
| Overhead Lights | Illuminate entire workspace |
| Task Lights | Focus on specific work areas |
| Natural Light | Improve visibility and mood |
Emergency Preparedness
Be ready for accidents by keeping first aid tools and emergency contacts handy.
- Keep a first aid kit near your workspace
- Have fire extinguishers easily accessible
- Know emergency phone numbers by heart
- Wear protective gear like gloves and goggles

Credit: www.reddit.com
Frequently Asked Questions
How Can I Organize Woodworking Tools Efficiently?
Use pegboards, tool chests, and wall-mounted racks. Group tools by type and frequency of use. Label storage areas for quick access. Keep your workspace clean and clutter-free for safety and productivity.
What Are The Best Storage Options For Small Tools?
Magnetic strips, drawer organizers, and small bins work best. These keep small tools visible and easy to reach. Avoid mixing different tools to prevent damage. Clear containers help quickly identify contents.
How Do I Maintain Woodworking Tools Organized Over Time?
Regularly clean and return tools to designated spots. Schedule monthly organization checks and remove unused items. Use tool inventory lists to track tools. Consistency keeps your workspace efficient and safe.
Can I Create Diy Tool Organizers For Woodworking?
Yes, DIY organizers like wooden racks and holders save money. Customize sizes to fit your tools perfectly. Use sturdy materials and simple designs for durability. Many online plans are available for inspiration.
Conclusion
Organizing woodworking tools saves time and reduces stress. Keep your workspace tidy and tools easy to find. Use shelves, racks, and boxes for neat storage. Labeling helps quickly grab the right tool. Regularly clean and sort tools to maintain order.
A well-organized shop boosts work quality and safety. Start small and build your system step-by-step. Enjoy creating with less hassle and more focus.
