Is your belt sander acting up just when you need it most? Don’t let a broken tool slow down your project or drain your wallet.
You can fix your belt sander yourself, even if you’ve never done it before. In this guide, you’ll discover simple steps that anyone can follow to get your sander running smoothly again. By the end, you’ll feel confident tackling repairs on your own and saving time and money.
Ready to bring your belt sander back to life? Let’s dive in.

Credit: www.youtube.com
Common Belt Sander Issues
Belt sanders are useful tools for smoothing wood and other materials. They can stop working well over time.
Many problems happen often. Fixing these issues can make your sander work like new.
Belt Slipping
Belt slipping happens when the sanding belt moves out of place. This causes poor sanding results.
Check if the belt is too loose or worn out. Tighten or replace the belt to fix slipping.
- Inspect belt tension
- Replace worn belts
- Clean belt and rollers
- Adjust tracking knob
Uneven Sanding
Uneven sanding means the surface is rough or has marks. This can happen from a damaged belt or dirty rollers.
Replace the sanding belt if it is torn or clogged. Clean the rollers to ensure smooth movement.
- Check belt for damage
- Clean sanding belt and rollers
- Ensure belt is aligned
- Use correct grit size
Overheating
Overheating happens when the sander gets too hot during use. This can damage the motor and parts.
Make sure the sander is clean and vents are clear. Take breaks to let it cool down during long jobs.
- Clean dust from vents
- Use correct sanding speed
- Do not force the sander
- Allow cooling breaks
Motor Not Running
If the motor does not start, check the power source and switch. Faulty wiring or a blown fuse may cause this.
Inspect the cord and plug for damage. Replace damaged parts or call a professional if needed.
- Check power outlet
- Test power switch
- Inspect cord and plug
- Look for blown fuses

Credit: www.familyhandyman.com
Tools And Materials Needed
Repairing a belt sander needs the right tools and parts. You need simple hand tools, replacement pieces, and safety gear. These help you fix the sander safely and well.
Gathering everything before starting saves time. It also makes the repair smoother. Read on to learn what to have ready.
Basic Hand Tools
You need basic tools to open and work on the belt sander. These tools help you remove screws, bolts, and parts carefully.
- Screwdrivers (flathead and Phillips)
- Wrenches or socket set
- Pliers (needle nose and regular)
- Allen keys (hex wrenches)
- Utility knife for cutting belts
- Small hammer or mallet
- Cleaning brush or cloth
Replacement Parts
Some parts wear out and need replacing. Keep these parts ready if your belt sander needs repair.
| Part | Description | Reason to Replace |
| Belt | The sanding belt | Worn or torn |
| Drive belt | Connects motor to drum | Slipped or broken |
| Rollers | Support and guide belt | Worn or noisy |
| Brushes | Motor carbon brushes | Worn down |
| Switch | On/off control | Faulty or stuck |
Safety Gear
Safety is important when fixing power tools. Use safety gear to protect yourself from harm.
- Safety glasses to protect eyes
- Work gloves to protect hands
- Dust mask to avoid breathing dust
- Ear protection if noise is loud
- Proper clothing to avoid loose fabric
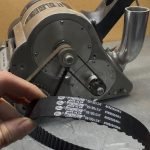
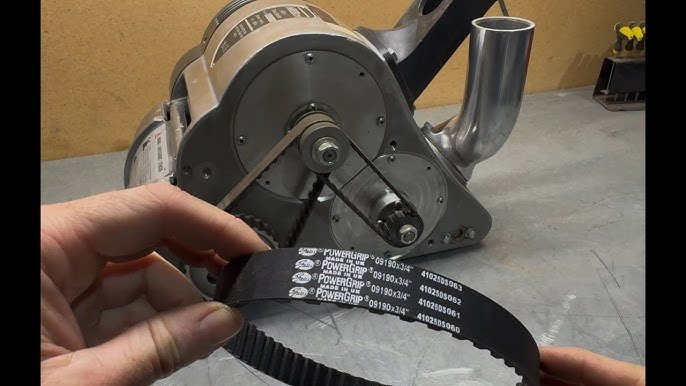
Fixing Belt Slipping
Belt slipping is a common problem in belt sanders. It stops the sander from working correctly. You need to fix the slipping to keep the tool safe and useful.
Slipping happens when the belt is loose or worn out. You can fix it by adjusting the belt tension or replacing the belt.
Adjusting Belt Tension
Check the belt tension if the belt slips during use. A loose belt will not grip the rollers well. Tightening the belt will stop it from slipping.
To adjust the tension, find the tension knob or lever on your sander. Turn it to increase the pressure on the belt. Make small adjustments and test the belt each time.
- Locate the tension adjustment knob or lever
- Turn it to tighten the belt slowly
- Check the belt grip by running the sander briefly
- Stop tightening when the belt stays in place
Replacing Worn Belts
Worn belts can also cause slipping. Look for tears, cracks, or smooth spots on the belt. Replace the belt if you see any damage.
To replace the belt, release the tension and slide the old belt off. Put a new belt on the rollers. Then, adjust the tension again to fit the new belt properly.
- Release belt tension using the knob or lever
- Remove the worn belt carefully
- Place a new belt on the rollers
- Tighten the belt using the tension adjustment
- Run the sander to check the belt fits well
Correcting Uneven Sanding
Uneven sanding is a common problem with belt sanders. It happens when the sanding belt does not run straight.
This causes rough spots and poor finishing on your workpiece. Fixing this issue improves the sanding quality.
Aligning The Belt
Start by turning off and unplugging the sander. Check if the sanding belt sits evenly on the rollers.
If the belt is off-center, loosen the tension lever. Slide the belt so it aligns with the rollers.
- Loosen the tension lever to release the belt.
- Center the belt between the rollers.
- Tighten the tension lever to secure the belt.
- Manually rotate the belt to check alignment.
Checking The Tracking Mechanism
The tracking mechanism controls how the belt moves on the sander. Adjust it to keep the belt straight.
Use the tracking knob to fine-tune the belt’s position. Turn it slowly while the sander runs at low speed.
- Turn on the sander at low speed.
- Rotate the tracking knob to move the belt left or right.
- Stop adjusting when the belt runs in the center.
- If the belt slips off, check the rollers for wear.
Dealing With Overheating
Belt sanders can overheat if not properly maintained. Overheating may cause damage to the motor and reduce the tool’s life. Keeping your sander cool helps it work better and last longer.
This guide covers two key ways to prevent overheating: cleaning dust and debris, and lubricating moving parts. Both are simple tasks that improve your sander’s performance.
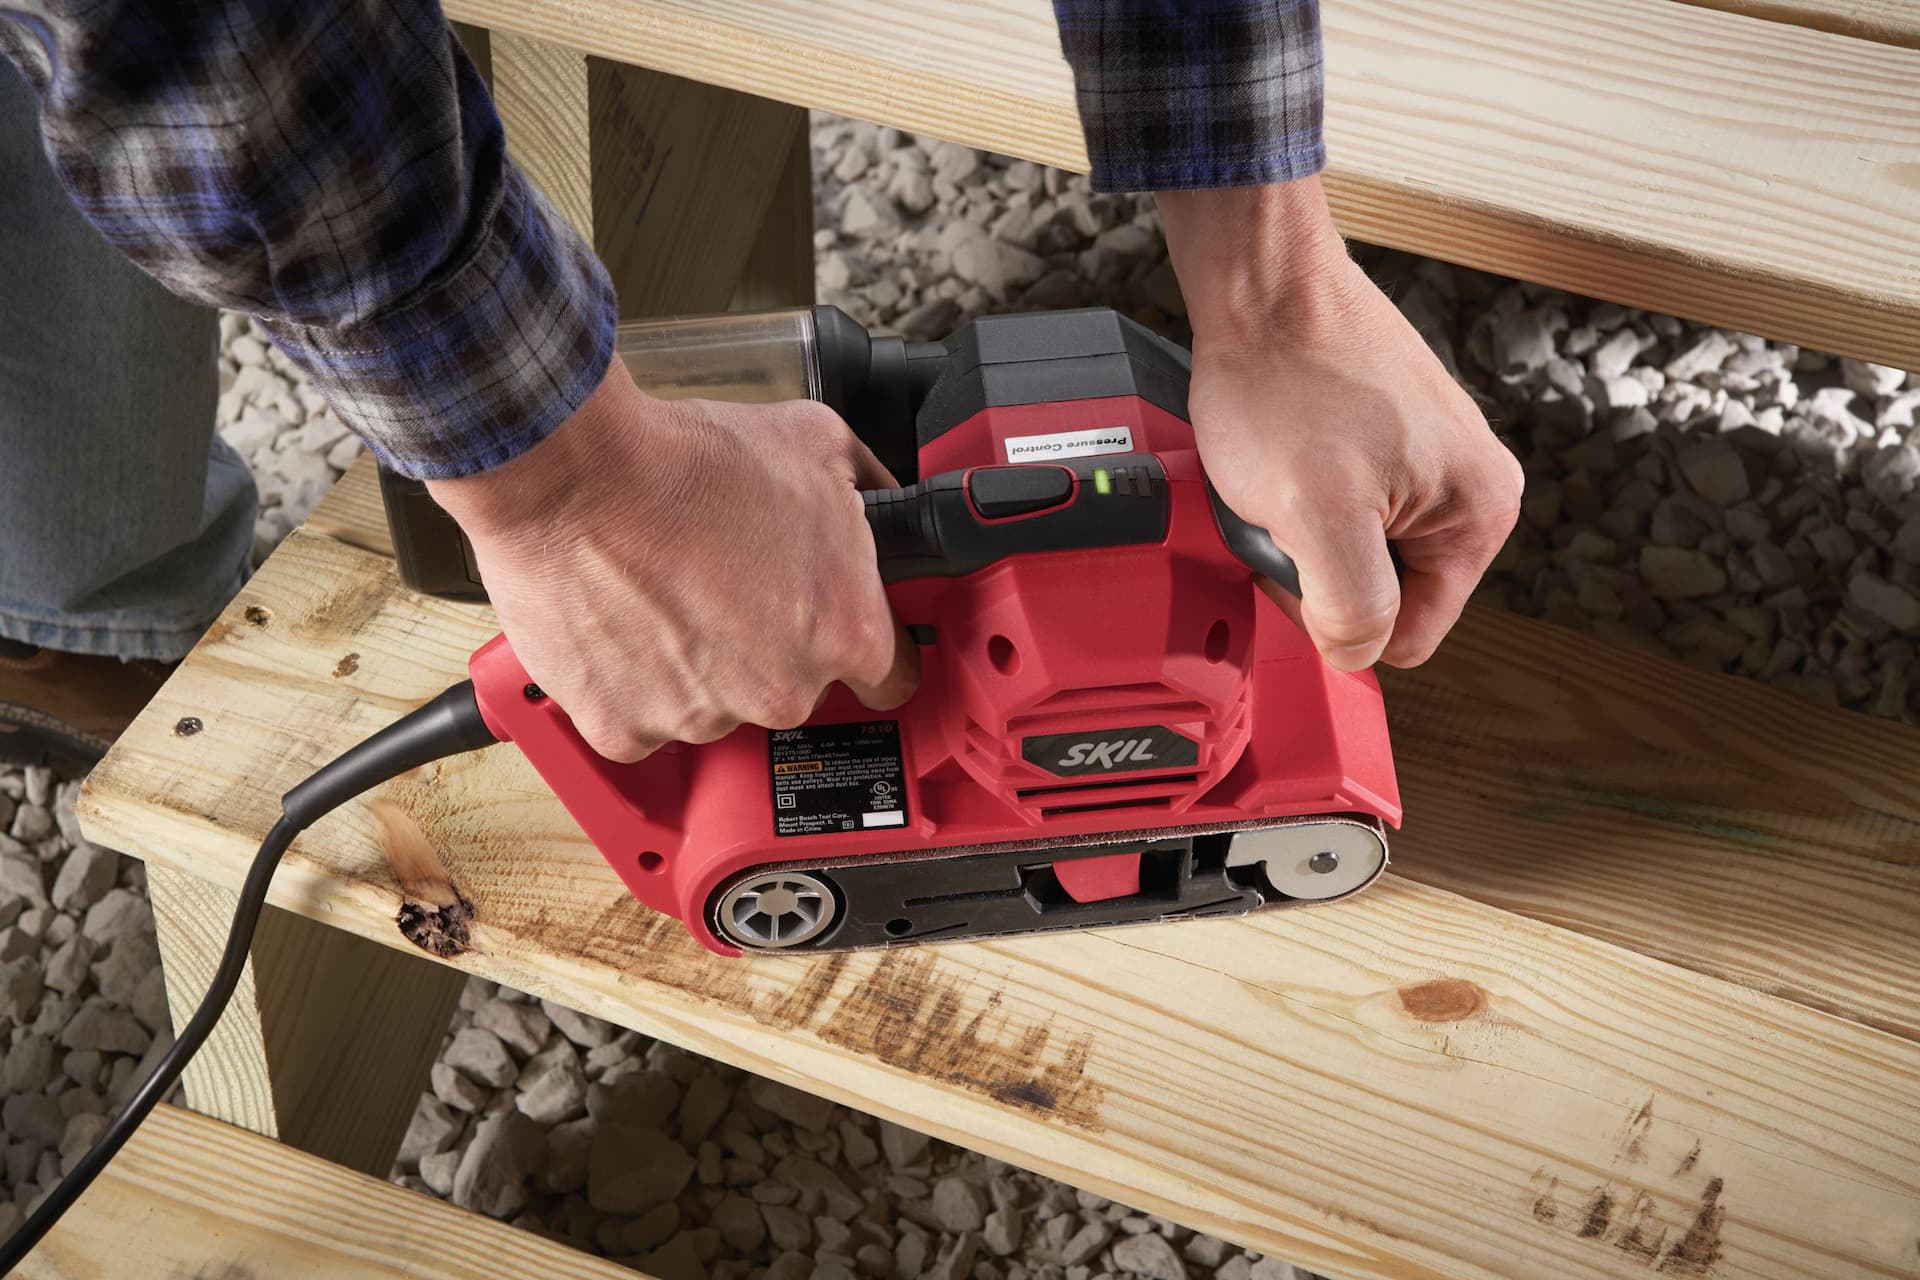
Cleaning Dust And Debris
Dust buildup inside the belt sander blocks airflow. This causes the motor to heat up quickly. Regular cleaning stops dust from causing overheating.
- Unplug the sander before cleaning.
- Remove the sanding belt and covers.
- Use compressed air to blow out dust from vents and motor areas.
- Wipe external surfaces with a dry cloth.
- Check and clean the belt rollers to remove debris.
Lubricating Moving Parts
Friction in moving parts makes the motor work harder. This extra effort creates heat. Lubrication reduces friction and keeps the sander running cool.
| Part | Lubrication Type | Frequency |
| Belt Rollers | Light machine oil | Every 3 months |
| Motor Bearings | Grease or oil (check manual) | Every 6 months |
| Drive Shaft | Light grease | Every 3 months |
Credit: worldcommunity.ca
Repairing Motor Problems
Belt sanders may stop working due to motor issues. Fixing these problems can save money.
This guide shows how to check electrical parts and replace motor brushes safely.
Inspecting Electrical Connections
Loose or damaged wires cause motor failure. Check all electrical connections carefully.
- Unplug the sander before starting.
- Remove the cover to access wires.
- Look for loose, broken, or burnt wires.
- Tighten any loose connectors.
- Replace damaged wires with the same type.
Secure connections ensure the motor gets proper power to run smoothly.
Replacing Brushes
Brushes inside the motor wear out and cause poor performance. Replace worn brushes promptly.
| Brush Condition | Action Needed |
|---|---|
| Less than 1/4 inch length | Replace brushes immediately |
| Cracked or broken brushes | Replace brushes |
| Brushes with heavy wear marks | Replace brushes |
| Brush holders dirty or stuck | Clean or replace holders |
Use manufacturer-approved brushes for best fit and motor life.
Preventive Maintenance Tips
Keeping your belt sander in good shape helps it last longer. Simple care steps stop big problems.
Regular maintenance saves time and money by avoiding repairs. Follow easy tips to keep it working well.
Regular Cleaning
Dust and debris can damage your belt sander. Clean it after each use to keep it safe.
Use a brush or compressed air to clear dust from the belt and motor area. Wipe the surface with a dry cloth.
- Remove the sanding belt before cleaning
- Brush or blow out dust from vents and rollers
- Wipe the exterior with a dry or slightly damp cloth
- Do not use water or harsh cleaners
Proper Storage
Store your belt sander in a dry place to stop rust and damage. Avoid damp or dusty areas.
Keep it in a case or cover it with a cloth to protect it from dirt. Store the sanding belts separately.
- Keep the sander away from moisture and heat
- Store sanding belts flat to avoid warping
- Use a toolbox or shelf to keep it safe
- Check storage area regularly for dust build-up
Frequently Asked Questions
How Do I Fix A Broken Belt Sander?
To fix a broken belt sander, first identify the issue. Check for worn belts or motor problems. Replace damaged belts and ensure the motor functions properly. Clean any debris from the sander. If the problem persists, consult the manufacturer’s guide or seek professional help.
Why Is My Belt Sander Not Working?
Your belt sander may not work due to a worn belt, faulty motor, or electrical issues. Check the belt for wear and replace if necessary. Ensure the motor is operational and that all electrical connections are secure. Regular maintenance can prevent these issues.
How To Replace A Belt Sander Belt?
First, unplug the sander and release the belt tension lever. Remove the old belt and align the new one on the rollers. Adjust the tension lever to secure the belt. Ensure the belt tracks properly before use. Follow the manufacturer’s instructions for specific models.
What Causes Belt Sander Belts To Break?
Belt sander belts break due to excessive tension, misalignment, or wear and tear. Ensure the belt is correctly aligned and tensioned. Regularly check for signs of wear and replace belts as needed. Proper maintenance and storage can extend belt life.
Conclusion
Repairing belt sanders can save time and money. Regular checks keep the tool working well. Tighten loose parts and replace worn belts quickly. Clean dust and debris to avoid damage. Follow simple steps to fix common problems. Keep your sander in good shape for longer use.
Small fixes prevent bigger issues later. Stay safe by unplugging before repairs. Now, your belt sander can work like new again.