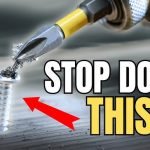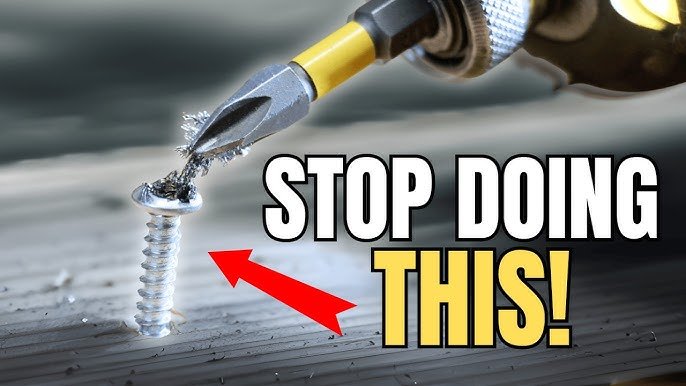
Have you ever been in the middle of an important project when suddenly, disaster strikes? Your drill bit snaps, leaving you frustrated and stuck.
It’s a common problem that can halt your progress and ruin your day. But before you rush out to buy a new one, consider this: you can fix it yourself. Yes, you read that right. With a bit of know-how and the right tools, you can repair your broken drill bits and get back to your work in no time.
Imagine the satisfaction of saving money and learning a new skill. Intrigued? Keep reading to discover the simple steps that will empower you to tackle this issue head-on, and never let a broken drill bit slow you down again.

Credit: www.youtube.com
Common Causes Of Broken Drill Bits
Drill bits can break for several reasons. Knowing these causes helps you avoid damage.
Fixing broken drill bits starts with understanding what makes them fail.
Excessive Pressure
Pushing too hard on a drill bit can cause it to snap. The bit needs space to cut.
Too much pressure makes the bit bend or break quickly during use.
- Use steady, light force
- Let the drill do the work
- Stop if the bit feels stuck
Incorrect Speed Settings
Drilling too fast or too slow can damage the bit. Speed must match the material.
High speed overheats bits. Low speed causes extra pressure on the bit.
- Use low speed for hard materials
- Use higher speed for soft materials
- Check drill speed before starting
Using The Wrong Bit Type
Every drill bit is made for certain materials. Using the wrong type causes breaks.
Metal bits break on wood. Masonry bits break on metal.
- Choose bits for the material
- Match bit shape to the job
- Do not use dull bits on hard materials
Worn Out Or Dull Bits
Dull drill bits need more force. This wears them down faster and causes breaks.
Regularly check bits for dullness. Replace or sharpen them to avoid breakage.
- Inspect bits before use
- Sharpen dull bits properly
- Replace bits that are damaged
Safety Tips Before Repairing
Fixing broken drill bits needs care to stay safe. Follow these safety tips to avoid accidents.
Always prepare your workspace and tools before you start any repair work on drill bits.
Wear Protective Gear
Protect your eyes, hands, and face from metal shards and dust. Wear safety goggles, gloves, and a dust mask.
- Safety goggles to shield your eyes
- Gloves to protect your hands
- Dust mask to avoid breathing metal particles
Disconnect Power Source
Always unplug or switch off the drill before starting repairs. This stops accidental start-ups that can cause injury.
Secure The Workpiece
Hold the drill bit firmly to avoid slips. Use a clamp or a vice to keep the bit steady during repair.
| Tool | Use |
| Clamp | Hold drill bit tightly |
| Vice | Secure bit on a workbench |
| Gloves | Protect hands while handling |
Tools Needed For Repair
Repairing broken drill bits requires some basic tools. Having the right tools makes the job easier and safer.
Below are the essential tools you need to fix broken drill bits properly at home or in your workshop.
Bench Vise Or Clamp
A bench vise or clamp holds the drill bit firmly in place. This prevents it from moving while you work on repairing it.
Choose a sturdy vise or clamp that fits your workspace and can grip the drill bit tightly without slipping.
File Or Grinding Tool
Use a file or grinding tool to smooth out rough edges on the broken drill bit. This helps restore the bit’s sharpness.
- Hand file for small repairs
- Bench grinder for larger or tougher bits
- Diamond file for hardened steel bits
Lubricant
Lubricant reduces heat and friction during the repair process. It helps protect the drill bit and tools.
| Type of Lubricant | Purpose |
| Cutting oil | Cool and lubricate the drill bit |
| WD-40 | Prevent rust and ease filing |
| Machine oil | General lubrication during grinding |
Replacement Parts
Sometimes the drill bit’s tip or shank is too damaged. You may need replacement parts to fix it.
Keep extra drill bits or tips ready. This saves time if you cannot repair the broken one fully.

Credit: www.reddit.com
Fixing A Broken Tip
Broken drill bits can stop your work quickly. Fixing the broken tip saves money and time.
You can repair the tip by trimming, sharpening, and testing the bit for use again.
Trimming The Damaged End
First, remove the broken or bent tip by trimming the end. Use a bench grinder or metal file.
Trim until the end is smooth and straight. This prepares the bit for sharpening and improves safety.
- Wear safety glasses before trimming
- Use steady, even pressure while grinding
- Keep the bit cool by dipping in water
Sharpening The Bit
Sharpen the trimmed tip to restore its cutting edge. Use a sharpening stone or grinder carefully.
Sharpen both cutting edges evenly. Keep the angle at about 59 degrees for most drill bits.
- Hold the bit firmly and steady
- Sharpen each side equally for balance
- Check frequently to avoid over-sharpening
Testing The Repair
After sharpening, test the drill bit on scrap wood or metal. Check if it drills smoothly.
Look for clean holes and no slipping. If needed, sharpen more or trim again for better results.
- Test drill at slow speed first
- Listen for smooth cutting sounds
- Inspect the hole for neat edges
Straightening Bent Bits
Bent drill bits can cause poor drilling and damage your work. Straightening them saves money and keeps tools useful.
This guide shows simple steps to fix bent bits safely and correctly.
Identifying The Bend
Check the drill bit by rolling it on a flat surface. Look for wobbling or uneven spinning.
Hold the bit up to light to spot bends or curves along its length.
- Roll the bit on a flat table
- Look for wobble or unevenness
- Use a flashlight to see bends clearly
Using A Vise For Alignment
Secure the bent bit in a vise to keep it steady. Use soft jaws to avoid damage.
Position the bent part so you can push or pull it straight easily.
- Use a bench vise with soft jaws or cloth
- Clamp the bit firmly but gently
- Expose the bent section for adjustment
Careful Bending Techniques
Apply small, gentle pressure to the bent area. Bend slowly to avoid breaking the bit.
Check the bit often by rolling it again. Repeat until it spins evenly.
- Use pliers or hands to bend carefully
- Make small adjustments step by step
- Test the bit’s shape frequently
- Stop if the bit feels weak or cracks
Removing Broken Bits From Drill Chucks
Broken drill bits can stop your work and damage your drill. Removing stuck bits is important to keep your drill safe. You need the right tools and careful steps.
This guide explains how to remove broken bits from drill chucks. It covers using pliers, applying oil, and drilling out stuck bits.
Using Pliers Or Extractors
Pliers or extractors help grab broken bits tightly. Use needle-nose pliers for small bits. If the bit is deep, use a special extractor tool.
Open the chuck jaws wide. Grip the broken bit firmly. Pull it out slowly to avoid damaging the chuck or drill.
- Open drill chuck fully
- Use needle-nose pliers or extractor
- Grip broken bit tightly
- Pull out slowly and steadily
- Avoid twisting to prevent damage
Applying Penetrating Oil
Penetrating oil loosens rust or dirt around the broken bit. Spray oil where the bit meets the chuck. Let it sit for 10 to 15 minutes.
The oil helps the bit move easier. After waiting, try to remove the bit with pliers or your hands. Repeat if needed.
- Spray oil on stuck bit and chuck
- Wait 10 to 15 minutes
- Try removing with pliers or hand
- Repeat oil application if needed
- Wipe off excess oil before use
Drilling Out Stuck Bits
If the bit is stuck deep inside, drill it out carefully. Use a drill bit slightly smaller than the broken piece. Drill slowly to avoid damage.
Make sure the drill is off before starting. Hold the drill steady and drill into the broken bit until it loosens. Remove the pieces with pliers.
- Choose smaller drill bit than broken piece
- Turn off the drill before starting
- Drill slowly into the stuck bit
- Loosen bit without harming chuck
- Pull out broken pieces with pliers
Preventing Future Breakage
Broken drill bits can slow down your work and cost money. Taking simple steps helps keep bits strong and lasting longer.
Use the right tools and care to avoid breaking drill bits again. This guide covers key ways to protect your bits.
Choosing The Right Bit
Select drill bits designed for the material you are working on. Using the wrong bit can cause quick wear and breakage.
- Use wood bits for soft materials like pine or plywood
- Choose metal bits for steel, aluminum, or iron
- Pick masonry bits for concrete or brick surfaces
- Match the drill bit size to the hole you need
- Avoid cheap or worn-out bits to reduce breakage risk
Proper Drilling Speed
Drill speed affects how well the bit cuts and how long it lasts. Too fast or too slow can cause damage.
| Material | Recommended Speed (RPM) |
| Wood | 1500 – 3000 |
| Metal | 300 – 1000 |
| Plastic | 1000 – 2000 |
| Concrete | 400 – 900 |
Regular Maintenance
Keep drill bits clean and sharp. Dull bits need more force and often break during use.
- Clean bits after each use to remove dust and debris
- Sharpen bits regularly using a file or sharpening tool
- Store bits in a dry place to prevent rust
- Check bits for cracks or wear before drilling
Using Lubricants
Lubricants reduce heat and friction during drilling. This helps bits last longer and prevents breaking.
Common lubricants to use:
- Cutting oil for metal drilling
- Water or soap solution for wood and plastic
- Special masonry lubricants for concrete bits

Credit: www.aaauctions.com
Frequently Asked Questions
How Can I Fix A Broken Drill Bit At Home?
You can fix a broken drill bit by sharpening the tip with a bench grinder or file. Ensure the angle matches the original. Use safety gear and check the bit for cracks before reuse.
What Tools Are Needed To Repair Drill Bits?
Common tools include a bench grinder, sharpening stone, and file. A vise may help hold the bit steady. Safety glasses and gloves are essential during repair.
Is It Safe To Reuse Broken Drill Bits?
Reusing repaired drill bits is safe if cracks or severe damage are absent. Proper sharpening restores functionality. However, replace bits with major damage to avoid accidents.
How Do I Prevent Drill Bits From Breaking?
Use the correct drill speed and pressure. Avoid overheating by drilling slowly and cooling the bit. Use sharp, high-quality bits and apply steady, even force.
Conclusion
Repairing broken drill bits saves money and reduces waste. Start by identifying the damage clearly. Use proper tools to reshape or sharpen the bit. Take safety steps to avoid accidents during repair. Test the bit carefully before full use. Regular maintenance helps prevent future breaks.
Small fixes keep your tools working longer. Practice these simple tips for better results. Keep your drill bits ready for any project.