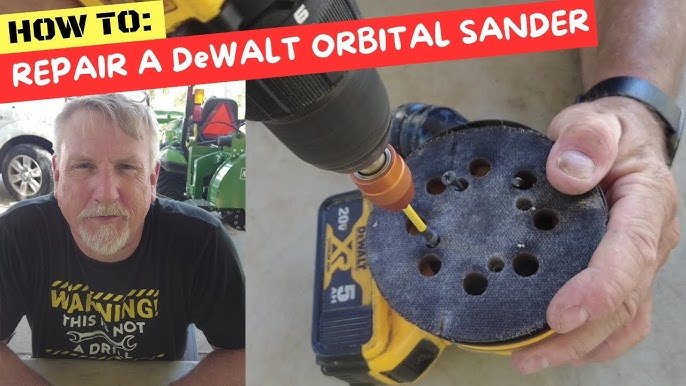
Is your orbital sander acting up just when you need it most? Don’t let a simple problem slow down your project or force you to buy a new tool.
You can fix your orbital sander yourself, save money, and get back to work faster than you think. In this guide, you’ll discover easy steps to identify common issues and repair them quickly—even if you’re not a tech expert. Keep reading, and you’ll gain the confidence to bring your sander back to life today.
Common Orbital Sander Issues
Orbital sanders are useful tools for smoothing surfaces. They can stop working properly due to common problems.
Knowing these issues helps you fix your sander quickly and safely. Here are some common problems and how to spot them.
Power Problems
Your orbital sander may not turn on or may stop suddenly. This often happens because of electrical faults.
Check the power cord for cuts or loose plugs. Also, inspect the switch and motor brushes for damage or wear.
- Damaged power cord can cause no power
- Worn motor brushes reduce performance
- Faulty switch stops the sander from starting
- Loose connections lead to power loss
Unusual Vibrations
Excessive shaking or strange vibrations make sanding hard. This can damage the sander or the surface you work on.
Check if the sanding pad is loose or unbalanced. Dirt or debris under the pad can also cause vibrations.
- Loose sanding pad causes wobbling
- Worn or damaged pad creates uneven vibration
- Debris under the pad disrupts smooth motion
- Imbalanced sanding discs increase shaking
Dust Collection Failures
A good dust collection system keeps your workspace clean. If it fails, dust builds up and blocks airflow.
Check the dust bag or canister for clogs or holes. Clean or replace filters to keep dust moving properly.
- Full or torn dust bag stops dust collection
- Clogged filters reduce suction power
- Blocked dust ports cause dust to escape
- Damaged hoses lower dust removal efficiency
Sanding Pad Wear
The sanding pad wears out over time. A worn pad does not hold sandpaper well and lowers sanding quality.
Look for cracks, hard spots, or uneven surfaces on the pad. Replace the pad if it is damaged or worn thin.
- Cracked pads cause uneven sanding
- Worn pads fail to grip sandpaper securely
- Hardened pads reduce smooth sanding motion
- Replacing pads improves tool performance
Credit: mrsander.co.uk
Tools Needed For Repairs
Repairing orbital sanders requires the right tools. Having these tools makes the job easier and safer.
Different tools help with mechanical, electrical, and parts replacement tasks during repair.
Basic Hand Tools
Basic hand tools help open and fix the sander’s parts. They are essential for most repairs.
Common hand tools include screwdrivers, wrenches, and pliers. These help remove screws and bolts.
- Screwdrivers (flathead and Phillips)
- Adjustable wrench
- Needle-nose pliers
- Socket set
- Allen keys (hex wrenches)
Electrical Testing Equipment
Electrical tools check the power and wiring inside the sander. They find electrical problems fast.
A multimeter is the most useful tool. It measures voltage, current, and resistance in the circuit.
- Digital multimeter
- Continuity tester
- Insulation resistance tester
- Test leads and probes
Replacement Parts
Replacement parts fix worn or broken sections of the sander. Using correct parts keeps the tool working well.
Common parts to replace include sanding pads, brushes, and belts. Have these parts ready before starting repair.
- Sanding pads or discs
- Carbon brushes
- Drive belts
- Bearings
- Switches and power cords
Fixing Power Problems
Orbital sanders may stop working due to power issues. Fixing these problems can save time and money.
Check the power source and parts carefully. This guide helps you find and solve common power problems.
Checking The Power Cord
Look for cuts or breaks on the power cord. A damaged cord can stop electricity from flowing.
Test the cord by gently bending it while the sander is plugged in. If the tool cuts out, the cord is faulty.
- Unplug the sander before inspection
- Look for visible damage along the cord
- Use a multimeter to test continuity
- Replace the cord if damaged
Inspecting The Switch
The switch controls the power to the motor. Dirt or wear can stop it from working properly.
Remove the switch cover and check for loose wires or damage. Clean the contacts with a brush or cloth.
- Unplug the sander first
- Open the switch housing carefully
- Check wires for tight connections
- Clean or replace the switch if needed
Testing The Motor
The motor is the main power part of the sander. If it fails, the tool will not run.
Listen for sounds or smell burning when you turn it on. Use a multimeter to check motor windings for breaks.
- Unplug the sander before testing
- Remove the motor cover
- Use a multimeter to test motor coils
- Replace the motor if it shows no continuity
Reducing Vibrations
Orbital sanders can shake a lot if they are not in good condition. High vibrations make sanding harder and less safe. Fixing the causes of vibration helps the tool work better and last longer.
Check your sander often and keep its parts tight and balanced. This guide shows how to reduce vibrations by tightening loose parts, replacing bearings, and balancing the sanding pad.
Tightening Loose Components
Loose parts cause the sander to shake more. Check screws, nuts, and bolts on your sander regularly. Use the right tool to tighten any loose parts firmly but not too tight.
Focus on the sanding pad, handle, and motor housing. If parts stay loose, vibrations will get worse and can damage the sander.
- Turn off and unplug the sander before working on it
- Use screwdrivers or wrenches that fit well
- Tighten all visible screws and bolts
- Check the sanding pad mounting closely
Replacing Worn Bearings
Bearings help the sander’s motor spin smoothly. Old or worn bearings cause rough spinning and strong vibrations. Replace bearings if you hear grinding sounds or feel shaking.
Get the exact bearing model for your sander. Remove the old bearings carefully and install the new ones with proper tools. This step might need some mechanical skill.
- Identify the bearing size and type in your sander manual
- Use a bearing puller to remove worn bearings
- Clean the area before placing new bearings
- Apply lubricant if needed for smooth operation
Balancing The Sanding Pad
An unbalanced sanding pad creates wobbling and vibration. Check the pad for damage or uneven wear. Replace the pad if it is bent or cracked.
Balance the pad by adding small weights or adjusting its position on the sander. A balanced pad runs smoothly and reduces shaking during use.
- Remove the sanding disc before balancing
- Spin the pad gently and watch for wobble
- Add small tape pieces to heavy spots to balance
- Reinstall the sanding disc securely
Restoring Dust Collection
Orbital sanders work best when dust collection is effective. Dust buildup can reduce performance and make cleanup harder.
Fixing dust collection often involves cleaning parts, replacing filters, and sealing leaks. This guide explains these steps.
Cleaning Dust Ports
Dust ports can clog with fine dust and debris. Clean them regularly to keep airflow strong.
- Detach the dust port from the sander.
- Use compressed air to blow out dust inside.
- Check for any cracks or damage.
- Wipe the port with a dry cloth.
- Reattach securely to prevent leaks.
Replacing Filters
Filters trap dust but wear out over time. Replace them to maintain good dust collection.
| Filter Type | Signs to Replace | Replacement Frequency |
| Foam Filter | Ripped, clogged, or compressed | Every 3-6 months |
| Paper Filter | Discolored or torn | Every 6 months |
| HEPA Filter | Reduced suction or visible dirt | Every 12 months |
Sealing Air Leaks
Air leaks lower dust collection power. Find and seal leaks to improve suction.
Check these common leak spots:
- Where the dust bag attaches
- Along the dust port seams
- Between the sander body and dust collection housing
Use weather stripping or silicone sealant for a tight seal.

Credit: m.youtube.com
Replacing Sanding Pads
Replacing sanding pads on your orbital sander keeps it working well. Worn pads reduce sanding quality and can damage surfaces.
This guide explains how to remove old pads, pick the right replacements, and attach new pads safely.
Removing Old Pads
First, unplug the sander for safety. Most pads attach with hook-and-loop fasteners or adhesive.
- Hold the sander firmly.
- Peel off the old sanding pad from the base.
- If adhesive is used, gently remove residue with a scraper or cloth.
- Clean the base surface before adding a new pad.
Choosing The Right Replacement
Pick sanding pads that fit your sander model and the type of work you do. Pads vary in size, grit, and material.
| Pad Type | Use | Common Sizes |
| Hook-and-loop | Easy to change, for general sanding | 5″, 6″ |
| Adhesive-backed | Strong hold, for heavy sanding | 5″, 6″, 9″ |
| Soft foam | Fine finishing and polishing | 5″, 6″ |
Attaching New Pads Securely
Attach new pads correctly to avoid slipping or uneven sanding. Follow these tips for a secure fit.
- Align the pad center with the sander base.
- Press firmly to engage hook-and-loop fasteners or adhesive.
- Check the edges to ensure full contact.
- Test by running the sander briefly before use.
Maintenance Tips To Prevent Future Issues
Keeping your orbital sander in good shape helps it last longer. Simple care stops many common problems.
This guide shares key maintenance tips to keep your sander working well and avoid costly repairs.
Regular Cleaning
Dust and debris buildup can damage the motor and reduce sanding power. Clean your sander often.
- Unplug the sander before cleaning.
- Use compressed air to blow out dust from vents and moving parts.
- Wipe the outer surface with a dry cloth after each use.
- Remove and clean the sanding pad to prevent clogging.
- Check and clean the dust collection bag or canister regularly.
Proper Storage
Store your sander in a dry, cool place to protect it from moisture and heat.
| Storage Tip | Reason |
| Keep in original case or toolbox | Prevents dust buildup and physical damage |
| Avoid damp areas | Stops rust and electrical issues |
| Store away from direct sunlight | Protects plastic and rubber parts from cracking |
| Keep cords untangled and off the floor | Prevents wear and accidental trips |
Routine Inspections
Check your sander regularly to catch problems early and keep it safe to use.
- Look for worn or damaged sanding pads.
- Check power cord for cuts or frays.
- Test switch and controls for smooth operation.
- Listen for unusual sounds during use.
- Ensure the sander does not overheat quickly.

Credit: www.youtube.com
Frequently Asked Questions
How To Fix A Broken Orbital Sander?
First, unplug the sander and inspect it for visible damage. Check the power cord for cuts and ensure the switch works. Open the sander to look for loose or damaged components. Replace worn brushes or belts and reassemble carefully. Test it after repairs to ensure proper operation.
Why Is My Orbital Sander Not Spinning?
If your orbital sander isn’t spinning, it might be due to worn brushes or a faulty motor. Check for any blockages or debris in the sander. Ensure the sanding pad is attached correctly. If problems persist, consider professional repair or replacing the sander.
How Do I Replace The Sander’s Pad?
Unplug the sander before starting. Remove the screws or clips holding the pad in place. Take out the old pad and position the new one. Secure it with screws or clips, ensuring it’s tightly attached. Check the alignment and test the sander to ensure the new pad works smoothly.
What Causes Excessive Vibration In Sanders?
Excessive vibration in orbital sanders can be caused by worn or damaged pads. Ensure the pad is properly attached and balanced. Check for any loose screws or parts inside the sander. Also, inspect the sander’s bearings for wear. Addressing these issues can reduce unwanted vibrations.
Conclusion
Repairing an orbital sander saves money and extends its life. Check parts carefully for wear or damage. Clean the tool often to keep it working well. Replace broken parts with the right tools. Test the sander after each repair to ensure it runs smoothly.
Small fixes prevent bigger problems later on. Regular care helps you get the best results. Keep your sander ready for any project ahead. Simple steps can make a big difference. Stay patient and follow instructions for safe repairs.