Are you tired of cluttered spaces and constantly searching for tools or supplies? Imagine having all your essentials neatly organized and easily accessible right in front of you.
A wall-mounted pegboard could be the game changer you need. It’s not just about tidying up; it’s about transforming your space into an efficient and inspiring area that boosts your creativity and productivity. In this guide, you’ll discover the simple steps to set up a wall-mounted pegboard that fits your needs perfectly.
From selecting the right materials to creatively arranging your items, we’ll walk you through the process. Ready to reclaim your space and see your efficiency soar? Let’s dive in!
Credit: www.aosom.com
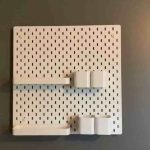
Choosing The Right Pegboard
Selecting the right pegboard is key to organizing your wall space. The right board holds your tools securely and matches your room’s style.
Think about the material, size, and design before you buy a pegboard. These factors affect how well it works and looks.
Material Options
Pegboards come in different materials. Each material has its own strength and look. Choose based on your needs and where you will install it.
- Wood:Strong and classic. Good for heavy tools but can be pricey.
- MDF (Medium-Density Fiberboard):Smooth surface and affordable. Not as strong as wood.
- Metal:Very durable and modern-looking. Great for heavy use but can rust if not coated.
- Plastic:Lightweight and moisture-resistant. Best for light tools and damp areas.
Size And Dimensions
Measure the wall space before buying a pegboard. The size affects how many tools you can hang. Also, check the hole size and spacing.
| Dimension | Recommended Size | Note |
| Height | 24 to 48 inches | Taller boards hold more tools |
| Width | 16 to 48 inches | Choose width based on wall space |
| Hole Diameter | 1/4 inch or 1/8 inch | Standard sizes fit most hooks |
| Hole Spacing | 1 inch apart | Common spacing for tool hooks |
Design And Color
The design and color of your pegboard can match your room’s style. You can paint or buy pre-colored boards.
- Choose neutral colors for a clean, simple look.
- Bright colors make tools easy to spot.
- Patterns or textures add style but may hide small holes.
- Consider finishing options like matte or glossy.
Gathering Tools And Supplies
Setting up a wall-mounted pegboard starts with collecting the right tools and supplies. Being prepared helps the project go smoothly and saves time.
In this guide, we focus on what tools you need and how to pick pegboard hooks and accessories. These parts make your pegboard useful and organized.
Required Tools
You need some basic tools to install the pegboard safely and firmly. Most of these tools are common in home toolkits.
- Drill with drill bits
- Screwdriver or power driver
- Stud finder
- Level
- Measuring tape
- Pencil for marking
- Wall anchors and screws
- Safety glasses
Using a stud finder helps locate wall studs for secure mounting. A level keeps the pegboard straight on the wall.
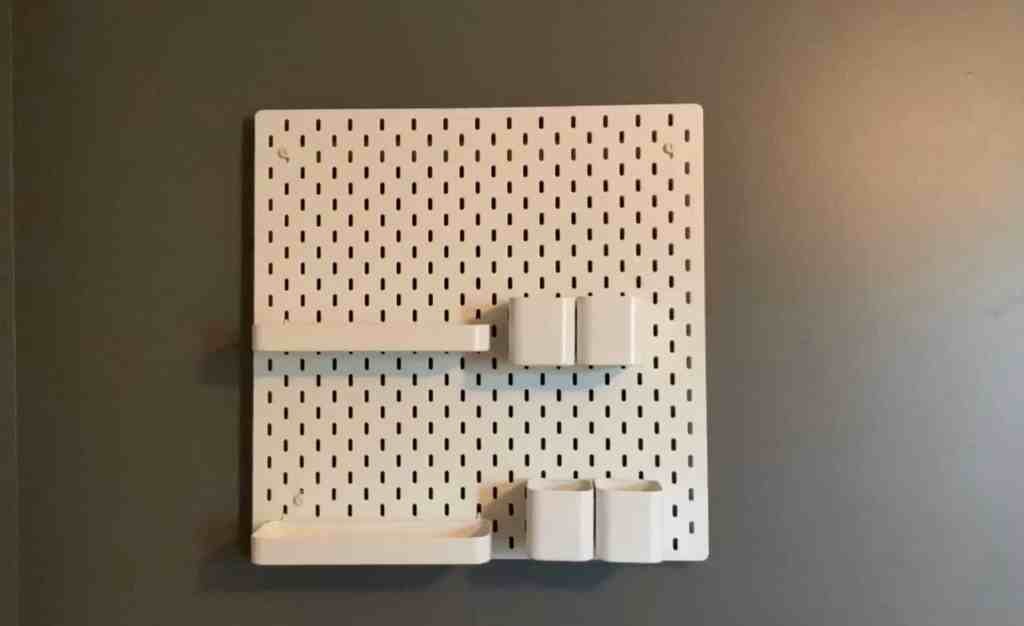
Selecting Pegboard Hooks And Accessories
Choose hooks and accessories that fit your needs and pegboard size. Good choices help keep tools and items organized.
Common pegboard accessories include hooks, shelves, bins, and tool holders. Pick items that match the weight and size of your tools.
- Single hooks for hanging small tools
- Double hooks for larger items
- Shelves for storing boxes or cans
- Bins for loose parts
- Special holders for screwdrivers or pliers
Make sure hooks fit the pegboard hole size. Metal hooks are strong and last longer than plastic ones.
Preparing The Wall
Setting up a wall-mounted pegboard starts with preparing the wall properly. This ensures your pegboard stays secure and holds your tools safely.
Follow these steps to find the best spot, locate the studs, and mark where to mount your pegboard.
Finding The Ideal Location
Choose a wall space that is easy to reach and has enough room for your pegboard size. Avoid areas that get wet or have poor lighting.
Think about the height and nearby electrical outlets. A clear space with good lighting makes using your pegboard easier.
Locating Wall Studs
Wall studs provide the strong support needed to hold your pegboard and tools. Use a stud finder tool to find these wooden supports behind the drywall.
- Run the stud finder slowly along the wall.
- Mark each stud location with a pencil.
- Double-check by tapping the wall and listening for a solid sound.
- Studs are usually 16 or 24 inches apart.
Marking Mounting Points
Mark the exact points where you will drill holes to attach the pegboard. Align these marks with the studs you found for strong support.
| Tool | Purpose |
| Pencil | Mark stud locations and drill points |
| Level | Ensure marks are straight |
| Measuring Tape | Measure spacing and pegboard size |
| Drill | Create holes for mounting screws |

Credit: www.rockler.com
Mounting The Pegboard
Mounting a pegboard on your wall keeps tools and items organized. This guide helps you mount your pegboard safely and evenly.
Follow simple steps to drill holes, install spacers, and secure the pegboard correctly.
Drilling Holes
Mark the wall where you want to place the pegboard. Use a level to keep marks straight. Drill holes at these marks to fit anchors or screws.
- Use a drill bit size that fits your anchors or screws.
- Drill slowly to avoid wall damage.
- Check for pipes or wires before drilling.
Installing Spacers
Spacers keep the pegboard away from the wall. This space lets you hang hooks and tools easily. Attach spacers to the wall before the pegboard.
- Choose spacers about 1/2 inch thick.
- Place spacers at each hole location.
- Secure spacers with screws or anchors.
Securing The Pegboard
Hold the pegboard over the spacers. Align the holes in the pegboard with the wall holes. Use screws to fasten the pegboard tightly.
- Use screws that fit the pegboard holes.
- Do not overtighten to avoid cracking the pegboard.
- Check that the pegboard is flat and secure.
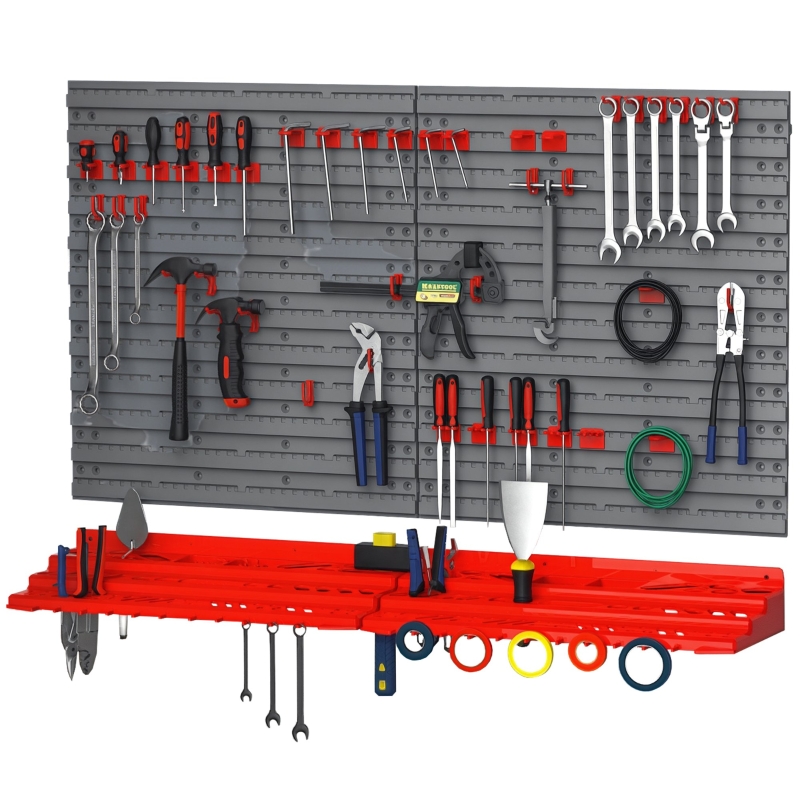
Organizing Tools And Items
A wall-mounted pegboard helps keep your tools and items tidy. It saves space and makes tools easy to find.
You can customize the pegboard to fit different tools. Planning is key to making it work well for you.
Planning Layout
Start by measuring the wall space where you want to mount the pegboard. Think about which tools you use most.
- Group similar tools together
- Leave space for larger tools
- Plan for future additions
- Keep frequently used items at eye level
Using Hooks And Holders
Hooks and holders attach to the pegboard and hold your tools. Choose types that fit your items well.
| Hook Type | Use For |
| Single Hook | Hammers, wrenches |
| Double Hook | Screwdrivers, pliers |
| Basket Holder | Small items like nails, screws |
| Tool Holder | Drills, saws |
Customizing For Different Tools
Different tools need different storage solutions. Adjust your pegboard to keep everything safe and easy to reach.
- Use magnetic strips for metal tools
- Add small containers for tiny parts
- Label each section to find tools quickly
- Place heavy tools near the bottom

Credit: blakleyequipment.com
Maintenance And Tips
Keeping your wall-mounted pegboard clean and organized helps it last longer. Regular care makes sure it stays useful and neat.
Small changes over time can improve how your pegboard works. Using space smartly keeps your tools easy to find and use.
Cleaning The Pegboard
Dust and dirt can build up on the pegboard and hooks. Clean it often to keep it looking good and working well.
- Use a soft cloth or duster to remove dust.
- For sticky spots, wipe with a damp cloth and mild soap.
- Dry the pegboard fully to stop moisture damage.
- Check hooks and hangers for rust or wear.
Adjusting Layout Over Time
Change your pegboard setup as your needs change. Move hooks and shelves to fit new tools or items.
- Plan your new layout before moving pieces.
- Group similar items together for easy access.
- Use different hook types for various tools.
- Test the new arrangement for comfort and space.
Maximizing Space Efficiency
Use every inch of your pegboard well. Organize tools so you can find them fast and keep the area tidy.
| Tip | Description |
| Use vertical space | Place hooks higher or lower to fit all tools. |
| Mix hook sizes | Use small hooks for light items and large for heavy tools. |
| Add shelves | Include small shelves for items that don’t hang well. |
| Label sections | Mark areas for specific tools to keep order. |
Frequently Asked Questions
What Tools Are Needed To Install A Wall-mounted Pegboard?
You need a drill, screws, anchors, a level, a stud finder, and a measuring tape. These tools ensure secure and accurate pegboard installation on your wall.
How Do I Find The Best Wall For Pegboard Mounting?
Choose a sturdy wall like drywall with studs or a solid wood surface. Avoid hollow or weak walls for better pegboard support.
Can I Mount A Pegboard Without Studs?
Yes, use heavy-duty wall anchors or toggle bolts to secure the pegboard. This provides strong support even without hitting studs.
What Height Should I Mount My Pegboard?
Mount the pegboard at eye level or slightly higher for easy reach. Adjust height based on your workspace and tool size.
Conclusion
Setting up a wall-mounted pegboard is simple and practical. It helps keep tools and items organized and easy to find. With a few basic steps, you create extra space on your wall. This keeps your work area neat and saves time.
Choose the right spot, use proper anchors, and arrange hooks as needed. A pegboard can fit any room or workspace. Start today and enjoy a tidier, more efficient space. Small changes make a big difference.