Is your garage or workspace a cluttered mess with tools scattered everywhere? Imagine the satisfaction of having everything neatly organized and within arm’s reach.
A wall-mounted tool organizer can transform your space, making it more efficient and visually appealing. Picture yourself effortlessly finding the tool you need, exactly when you need it. This guide will show you how to set up a wall-mounted tool organizer that not only saves space but also saves you precious time.
Dive in to discover how you can create a workspace that’s both functional and inspiring.
Choosing The Right Location
Setting up a wall-mounted tool organizer starts with picking the best spot. The location affects how easy it is to reach your tools and how much space you have.
Think about where you use your tools most. This helps you decide the perfect place for the organizer.
Assessing Your Workspace
Look around your workspace to find walls that are free and strong enough. Check for any obstacles like doors or windows that might get in the way.
Consider the lighting and how much room you have to move. A clear, well-lit wall is best for organizing tools.
Considering Accessibility
Place the organizer where you can easily reach your tools without stretching or bending too much. Keep often-used tools at eye level.
Think about who will use the tools. Make sure everyone can access the organizer safely and comfortably.
- Keep tools within arm’s reach
- Place heavy tools lower for safety
- Avoid placing tools behind doors or furniture
Measuring Wall Space
Measure the wall area where you want to install the tool organizer. Write down the height and width to know how much space you have.
Check for studs or solid backing in the wall. These spots hold the organizer better and keep it secure.
- Use a tape measure to get exact dimensions
- Mark stud locations with a stud finder
- Leave space for tool handles and extra items
Selecting Materials And Tools
Setting up a wall-mounted tool organizer needs the right materials and tools. Choosing the correct items helps keep your workspace tidy and tools safe.
This guide covers types of wall organizers, the tools you need, and safety gear to use during installation.
Types Of Wall Organizers
Wall organizers come in various styles to fit your space and tool collection. Here are common types you can consider.
- Pegboards:Boards with holes to hang hooks and holders.
- Slatwalls:Panels with horizontal grooves for inserting shelves or hooks.
- Magnetic Strips:Metal strips that hold metal tools with magnets.
- Custom Shelves:Built shelves or racks tailored for your tools.
Essential Tools Needed
You need a few basic tools to install your wall organizer correctly. These tools help measure, mount, and secure the system.
| Tool | Purpose |
| Drill | Make holes in the wall for screws |
| Screwdriver | Tighten screws and anchors |
| Level | Ensure the organizer is straight |
| Measuring Tape | Measure wall space and organizer size |
| Pencil | Mark drill points on the wall |
Safety Gear Checklist
Wear safety gear to protect yourself during installation. Safety prevents accidents and injuries.
- Safety glasses to protect eyes from dust and debris
- Work gloves to protect your hands
- Dust mask if drilling creates dust
- Ear protection if using loud power tools
- Closed-toe shoes to protect feet
Preparing The Wall
Setting up a wall-mounted tool organizer starts with good preparation. Preparing the wall well helps the organizer hold securely and last longer.
This guide covers cleaning and clearing the area, locating studs, and marking mounting points.
Cleaning And Clearing The Area
Clear the wall space where you want to mount the organizer. Remove any nails, hooks, or pictures from the wall.
Use a cloth and mild cleaner to wipe the wall surface. This removes dust and dirt that can stop the organizer from sticking well.
Locating Studs
Find the wall studs to ensure strong support for your tool organizer. Studs are vertical wooden beams behind drywall.
- Use a stud finder tool to scan the wall.
- Look for small changes in the wall surface or nail heads.
- Tap the wall lightly to hear a solid sound where studs are located.
- Mark each stud location with a pencil.
Marking Mounting Points
Mark the exact points where you will install screws or anchors. These points should align with the studs.
| Tool | Purpose | Tip |
| Pencil | Mark mounting spots | Use light marks for easy adjustment |
| Level | Check horizontal alignment | Ensure organizer hangs straight |
| Tape Measure | Measure distance between points | Double-check spacing before drilling |
Credit: houseonaustin.com
Installing The Organizer
Installing a wall-mounted tool organizer helps keep your tools neat and easy to find. Proper installation ensures the organizer holds weight safely.
Follow clear steps to drill, anchor, secure, and check stability before use.
Drilling And Anchoring
Start by marking the wall where you want to place the organizer. Use a level to keep marks straight. Drill holes at the marked points.
Choose anchors that fit your wall type. Use heavy-duty anchors for drywall or masonry anchors for concrete walls. Insert anchors into the drilled holes to hold screws firmly.
- Mark drill points with a pencil
- Use a drill bit matching anchor size
- Insert anchors flush with the wall
- Use anchors suited for wall material
Securing The Organizer
Align the organizer’s mounting holes with the anchors in the wall. Insert screws through the organizer into the anchors. Tighten screws evenly to avoid bending.
Use a screwdriver or drill with a driver bit. Make sure screws are tight but do not overtighten to avoid damage.
- Place organizer against the wall
- Insert screws through mounting holes
- Tighten screws evenly
- Check that the organizer sits flat
Checking Stability
Once installed, gently shake the organizer to check if it is secure. It should not move or wobble. Test by adding some tools to see if it holds the weight.
If the organizer feels loose, check screws and anchors. Tighten or replace them if needed. A stable organizer will keep your tools safe and easy to access.
Organizing Your Tools
Keeping your tools tidy makes your workspace safer and easier to use. A wall-mounted tool organizer helps save space.
Organizing tools well lets you find them quickly. It also protects tools from damage.
Grouping Similar Tools
Group tools that do similar jobs together. This saves time when you search for them.
Keep all screwdrivers in one area and all wrenches in another. It helps keep your wall neat.
- Put hand tools like hammers and pliers close to each other
- Keep measuring tools in one section
- Group power tool accessories together
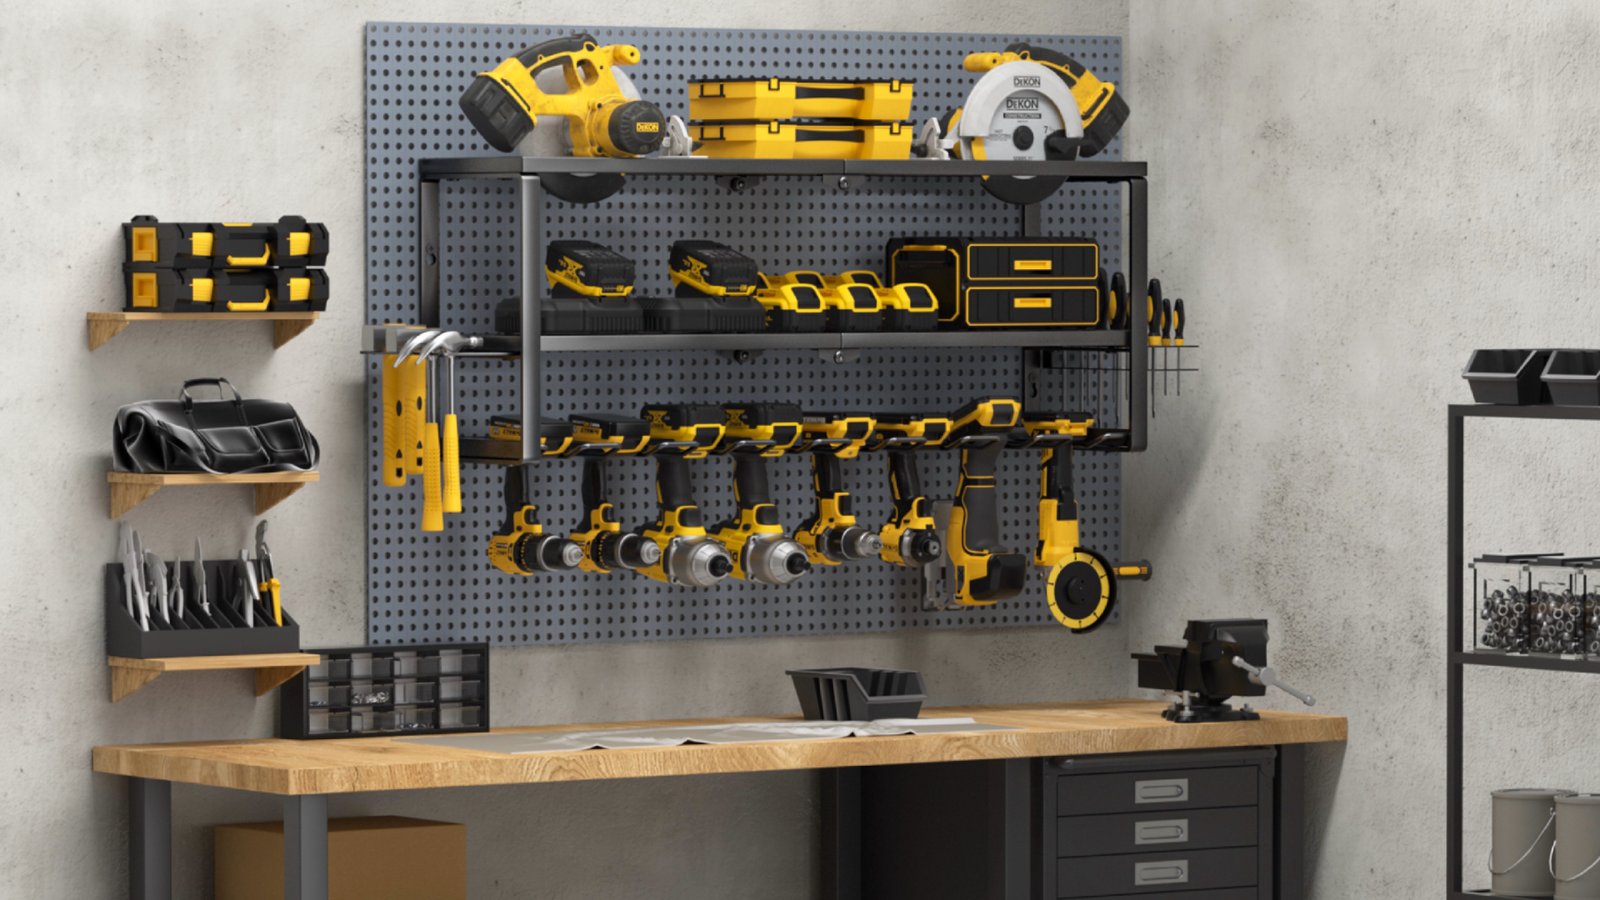
Using Hooks And Holders
Hooks and holders hold your tools securely on the wall. They keep tools visible and easy to grab.
Use different hooks for different tools. Holders work well for small or odd-shaped items.
- S-shaped hooks for hanging wrenches and pliers
- Magnetic strips for screwdrivers and metal tools
- Custom holders for drills and saws
Labeling For Easy Access
Labels help you find tools fast. They reduce the time spent looking for the right tool.
Use clear labels on shelves or hooks. Write the tool name or draw a simple icon.
- Use waterproof labels for durability
- Place labels at eye level for quick reading
- Change labels if you move tools around

Credit: www.amazon.com
Maintenance Tips
Keeping your wall-mounted tool organizer in good shape helps tools stay safe. Regular care saves time and effort later.
Check the organizer often to avoid damage and keep tools easy to find. Use simple steps to maintain it well.
Regular Cleaning
Dust and dirt can build up on the organizer. Clean it often to keep it neat and working well. Use a soft cloth or brush for cleaning.
- Remove all tools before cleaning
- Wipe shelves and hooks with a damp cloth
- Dry the organizer completely to stop rust
- Use mild soap if dirt is tough
Inspecting For Wear
Look at the organizer’s parts for damage. Check hooks, screws, and shelves for cracks or looseness.
| Part | What to Check | Action if Damaged |
| Hooks | Rust or bending | Replace or tighten |
| Shelves | Cracks or warping | Repair or replace |
| Screws | Loose or missing | Tighten or add new screws |
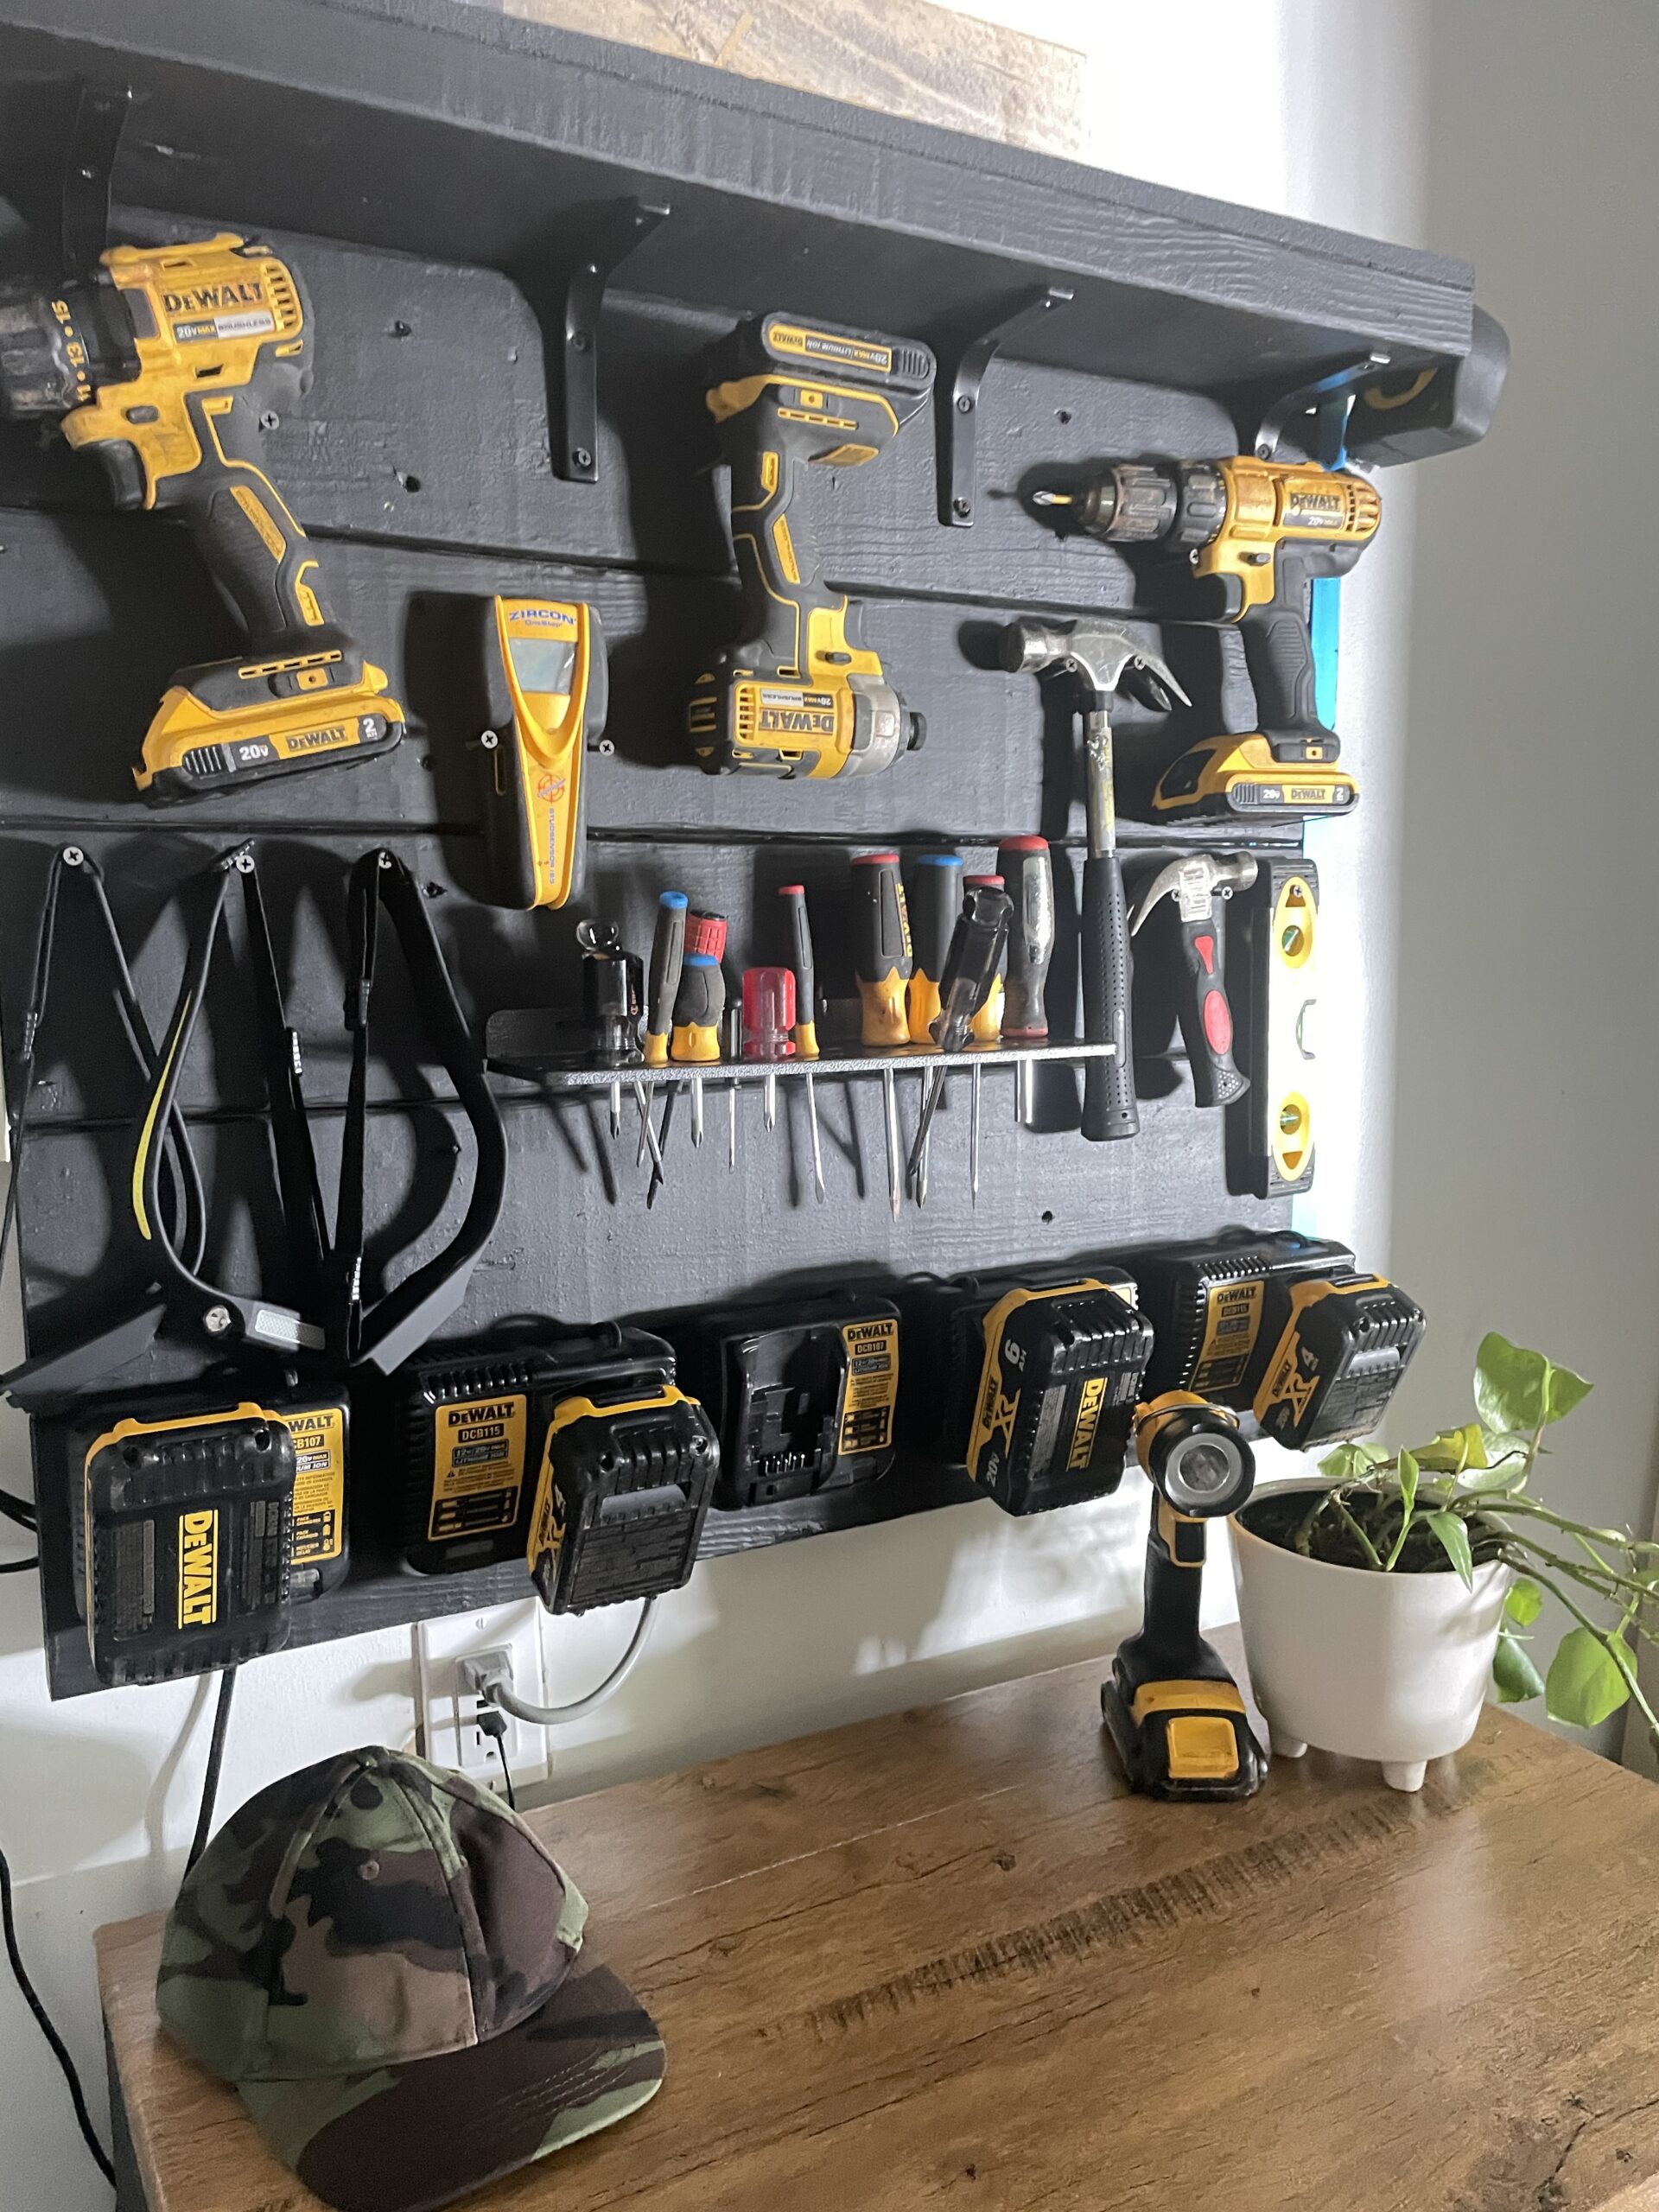
Updating Tool Arrangement
Change how you arrange tools to fit new needs. Keep often-used tools easy to reach. Group similar tools together.
- Remove tools you no longer use
- Place frequent tools at eye level
- Use labels for quick identification
- Adjust hooks or holders as needed

Credit: www.amazon.com
Frequently Asked Questions
What Tools Do I Need For A Wall-mounted Organizer?
You need a drill, screws, anchors, a level, measuring tape, and a pencil. These tools ensure secure and precise installation.
How Do I Choose The Right Wall For Mounting?
Select a sturdy wall like drywall with studs or concrete. Avoid weak surfaces for better support and safety.
What Materials Work Best For A Tool Organizer?
Wood, metal, or heavy-duty plastic are ideal. They offer durability and can hold various tool sizes securely.
How High Should I Mount The Organizer?
Mount it at waist to eye level for easy access. This height prevents strain and improves organization efficiency.
Conclusion
Setting up a wall-mounted tool organizer saves space and keeps tools handy. It helps you work faster and stay organized. Choose a sturdy wall and good hooks. Arrange tools by size and use. Keep the area clean and check for loose parts often.
This simple project improves your workspace and reduces clutter. Start today and enjoy a neat, efficient tool station.