
Have you ever tried to carve or shape wood, only to find your chisels dull and ineffective? You’re not alone.
A sharp chisel is your best friend in woodworking, allowing you to create precise cuts and flawless finishes. But how do you get that perfect edge? In this guide, you’ll discover simple, effective techniques to sharpen your chisels, transforming them into precision tools.
Imagine the satisfaction of gliding through wood with ease and achieving professional-grade results. Are you ready to unlock your full woodworking potential? Let’s dive into the essential steps to keep your chisels razor-sharp and your projects impeccable.
Choosing The Right Chisels
Choosing the right chisels is important for woodworking. The right tool helps you work better and faster. This guide covers chisel types and what to look for in quality.
Understanding different chisels and their materials makes sharpening easier. It also improves your woodworking results.
Types Of Woodworking Chisels
Woodworking chisels come in many shapes and sizes. Each type serves a special purpose in cutting, carving, or shaping wood.
- Bench Chisels:Used for general woodworking tasks. They have a strong blade and comfortable handle.
- Paring Chisels:Thin and long for delicate, precise cuts.
- Mortise Chisels:Thick and strong for cutting mortises and deep joints.
- Corner Chisels:Shaped to clean out square corners.
- Skew Chisels:Angled blade for fine trimming and finishing.
Materials And Quality Factors
The quality of a chisel depends on the steel and handle materials. Good materials last longer and sharpen well.
| Material | Benefits | Considerations |
| High Carbon Steel | Holds sharp edge well | Needs care to avoid rust |
| Chrome Vanadium Steel | Resists rust, durable | May be harder to sharpen |
| Tool Steel | Very hard and sharp | Can be brittle if not tempered properly |
| Wood Handles | Comfortable grip, traditional look | Can crack or swell with moisture |
| Plastic Handles | Durable and moisture resistant | Less comfortable for long use |
Credit: www.anneofalltrades.com
Essential Sharpening Tools
Sharpening chisels is a key skill for woodworking. Using the right tools helps keep your chisels sharp and effective.
This guide covers three main tool types needed for sharpening: stones and grits, honing guides and jigs, and lubricants and accessories.
Sharpening Stones And Grits
Sharpening stones come in different grits. The grit number shows how coarse or fine the stone is. Coarse stones remove metal fast, while fine stones give a smooth edge.
- Coarse stones: 100 to 400 grit, for reshaping edges
- Medium stones: 800 to 1500 grit, for sharpening
- Fine stones: 3000 to 8000 grit, for polishing edges
Honing Guides And Jigs
Honing guides and jigs help keep a steady angle while sharpening. They make the process easier and more accurate, especially for beginners.
| Type | Description | Benefit |
| Clamp-on guide | Attaches directly to the chisel | Keeps a fixed angle during sharpening |
| Sliding jig | Allows angle adjustment and smooth motion | Improves consistency on various chisels |
| Flat guide plate | Used on flat stones for manual control | Helps maintain even contact with stone |
Lubricants And Accessories
Lubricants reduce friction and carry away metal particles. They protect both the stone and chisel edge.
- Water: Used with water stones for smooth sharpening
- Oil: Used with oil stones to prevent clogging
- Leather strop: Polishes and refines the edge after sharpening
- Cleaning cloth: Removes residue from stones and blades
Preparing Your Chisels
Before sharpening chisels, you need to prepare them properly. Good preparation helps you sharpen with better results.
This section explains how to check the blade and clean it before sharpening.
Inspecting The Blade Condition
Look closely at the chisel blade to find any damage or wear. Check for chips, cracks, or dull edges.
- Hold the blade under a light to spot nicks or chips.
- Feel the edge carefully to detect rough spots.
- Look for any bends or warping on the blade.
- Check if the blade has uneven wear or dull patches.
Knowing the blade’s condition tells you how much sharpening is needed.
Removing Rust And Old Sharpening
Rust and old sharpening marks can stop your chisel from cutting well. You should clean them off first.
| Cleaning Method | Purpose | Tools Needed |
| Rust Removal | Remove rust spots on blade | Steel wool, rust remover, cloth |
| Flattening Back | Remove old sharpening marks | Sharpening stone or sandpaper |
| Polishing | Smooth blade surface | Fine grit stone or leather strop |
Clean the blade carefully to avoid damage. This will prepare your chisel for a sharp edge.
Sharpening Techniques
Sharpening chisels is key for smooth woodworking. It keeps your tools precise and safe.
Good sharpening methods improve the cutting edge and extend chisel life. Learn to sharpen right.
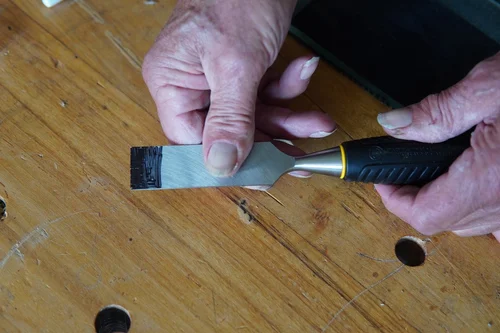
Setting The Correct Bevel Angle
The bevel angle affects how the chisel cuts wood. Most chisels have a 25 to 30-degree bevel.
Use a bevel gauge or angle guide to check the angle. Keeping it consistent helps sharpness last.
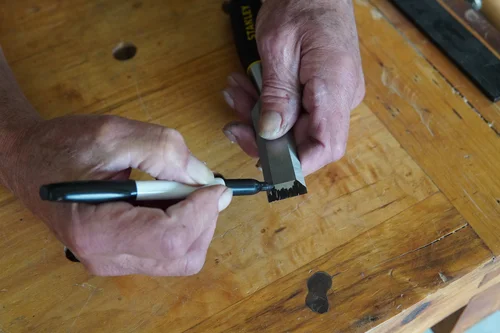
- Place the chisel on the guide at the chosen angle.
- Mark the bevel if needed for reference.
- Maintain this angle during sharpening to avoid damage.
Using Waterstones And Oilstones
Waterstones and oilstones sharpen chisels differently. Waterstones cut fast but wear out quicker.
Oilstones last longer but sharpen slower. Use the one that fits your pace and tool needs.
| Stone Type | Lubricant | Sharpening Speed | Durability |
| Waterstone | Water | Fast | Less durable |
| Oilstone | Oil | Slower | More durable |
Creating A Razor-sharp Edge
Polish the bevel using finer grits to create a sharp edge. Stropping helps remove burrs.
- Start with coarse grit to shape the edge.
- Move to medium grit for smoothing.
- Finish with fine grit for polishing.
- Use a leather strop with polishing compound.
- Check edge sharpness by cutting soft wood.
Honing And Polishing
Sharpening chisels is important for clean woodworking cuts. Honing and polishing make the blade sharp and smooth.
These steps help keep the chisel edge fine and ready to use. They remove small scratches and create a shiny finish.
Using Leather Strops
Leather strops help polish the chisel edge after honing. They remove tiny burrs and make the blade very sharp.
Use a clean leather strip and draw the chisel backward along it. Keep the blade flat and use light pressure.
- Hold the chisel flat on the leather
- Pull the blade backward, away from the edge
- Repeat 10 to 20 times for a smooth finish
Applying Honing Compounds
Honing compounds improve the polishing action on the leather strop. They contain fine abrasive particles.
Rub a small amount of compound onto the strop before stropping. This helps remove tiny scratches faster.
- Choose a fine or extra-fine compound
- Apply compound with a cloth or your finger
- Work the compound evenly on the leather surface
- Strop the chisel blade as usual
Credit: www.anneofalltrades.com
Maintaining Sharpness
Keeping chisels sharp is important for smooth woodworking. Sharp chisels cut better and are safer to use.
Regular care helps your chisels last longer and work well every time you use them.
Proper Storage Tips
Store chisels where they stay dry and safe from damage. Avoid places with moisture to stop rust.
Use a tool roll or a wooden block with slots to keep chisels separated. This stops blades from knocking together.
- Keep chisels dry to prevent rust
- Store blades in protective covers or sleeves
- Separate chisels to avoid blade damage
- Use a clean, dry box or tool roll
Regular Touch-up Routines
Sharpen chisels often to keep the edge fine. Small touch-ups take less time than full sharpening.
Use a honing stone or leather strop with polishing compound to refresh the blade edge.
- Hone the blade after every few uses
- Use light pressure and smooth strokes
- Keep the bevel angle steady during sharpening
- Finish with a leather strop for a sharp edge
Common Sharpening Mistakes
Sharpening chisels is key for good woodworking. Mistakes can harm your tools and work.
This guide covers two common mistakes: over-sharpening and blade damage. Learn how to avoid them.
Avoiding Over-sharpening
Over-sharpening removes too much metal. This shortens the chisel life and wastes time.
- Check the edge often to see if sharpening is needed.
- Use a coarse stone only when the blade is dull or chipped.
- Finish sharpening with fine stones for a smooth edge.
- Stop once the edge is sharp and smooth to the touch.
- Keep a sharpening log to avoid doing it too often.
Preventing Blade Damage
Blade damage can happen during sharpening or use. Protect your chisels with care.
| Common Cause | How to Prevent |
| Using too much pressure | Apply light, even pressure on the stone |
| Sharpening at wrong angle | Maintain consistent correct angle (usually 25-30°) |
| Skipping stone grits | Use progressive grits from coarse to fine |
| Not cleaning the blade | Wipe blade clean before and after sharpening |
| Dropping or hitting the blade | Store chisels safely in a rack or case |
Advanced Sharpening Tips
Sharpening chisels well improves woodworking accuracy and safety. Advanced techniques help keep edges sharp longer and fit specific tasks.
This guide covers using power sharpeners and adjusting bevel angles for different wood types. These tips raise your sharpening skill.
Using Power Sharpeners
Power sharpeners speed up the sharpening process but need careful use. Keep the angle steady to avoid removing too much metal.
- Use a slow speed to reduce heat buildup.
- Hold the chisel firmly and move it evenly across the wheel.
- Dip the chisel in water often to keep it cool.
- Check the edge frequently to avoid over-sharpening.
- Finish with a honing stone for a smooth edge.
Customizing Bevel Angles For Different Woods
Different woods need different bevel angles on chisels. Softer woods use lower angles, while hardwoods need steeper edges for durability.
| Wood Type | Recommended Bevel Angle | Reason |
|---|---|---|
| Softwood (Pine, Cedar) | 25° to 30° | Sharper edge for easier cuts |
| Hardwood (Oak, Maple) | 30° to 35° | Stronger edge to resist chipping |
| Exotic Woods (Rosewood, Ebony) | 35° to 40° | Extra durability for dense fibers |
Credit: www.youtube.com
Frequently Asked Questions
How Often Should I Sharpen Woodworking Chisels?
Sharpen chisels after every few uses or when cuts become rough. Regular sharpening maintains edge quality and precision. Frequent honing between sharpening sessions prolongs sharpness. Proper maintenance saves time and improves woodworking results.
What Tools Do I Need To Sharpen Chisels?
You need sharpening stones (water or oil stones), honing guide, and strop. Optional tools include diamond stones and sharpening jigs. These help achieve a consistent, sharp edge safely and efficiently. Proper tools ensure professional results.
Can I Sharpen Chisels Without Special Equipment?
Yes, you can use sandpaper on a flat surface as a makeshift sharpener. Though less precise, it’s effective for minor touch-ups. For best results, invest in sharpening stones and guides. Regular use improves your chisel’s performance.
What Is The Best Angle To Sharpen Chisels?
Sharpen chisels at a bevel angle between 25 and 30 degrees. This angle balances sharpness and edge durability. Use a honing guide to maintain a consistent angle. Correct angle sharpening enhances cutting efficiency.
Conclusion
Sharpening chisels helps you work with wood more easily. Keep your tools sharp for clean cuts every time. Use the right stones and follow proper steps carefully. Regular sharpening saves time and makes your work better. Practice often to improve your skill and confidence.
A sharp chisel is safer and more effective. Remember, patience and care make a big difference. Enjoy woodworking with tools that are ready to perform well.
