Are you tired of dull drill bits that make your projects feel like a chore? Imagine the ease and satisfaction of working with drill bits that slice through materials like butter.
Sharpening your drill bits can be the game-changer you didn’t know you needed. Not only does it save you money, but it also elevates the precision of your work. In this guide, you’ll discover simple, effective techniques to breathe new life into your drill bits.
Stick around, and you’ll learn how to transform your toolset and make every drilling task a breeze. Ready to unleash your inner DIY expert? Let’s dive in!

Credit: www.temu.com
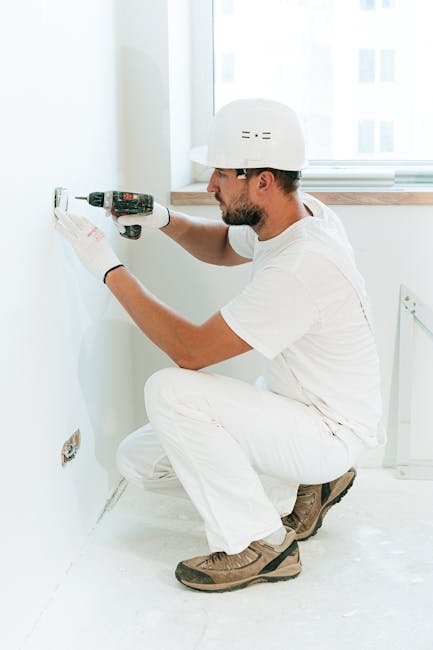
Choosing The Right Drill Bits
Choosing the right drill bit is important for sharp and precise drilling. Different drill bits work best on specific materials and tasks.
Using the correct drill bit helps you sharpen and maintain it properly. This improves your drilling accuracy and tool life.
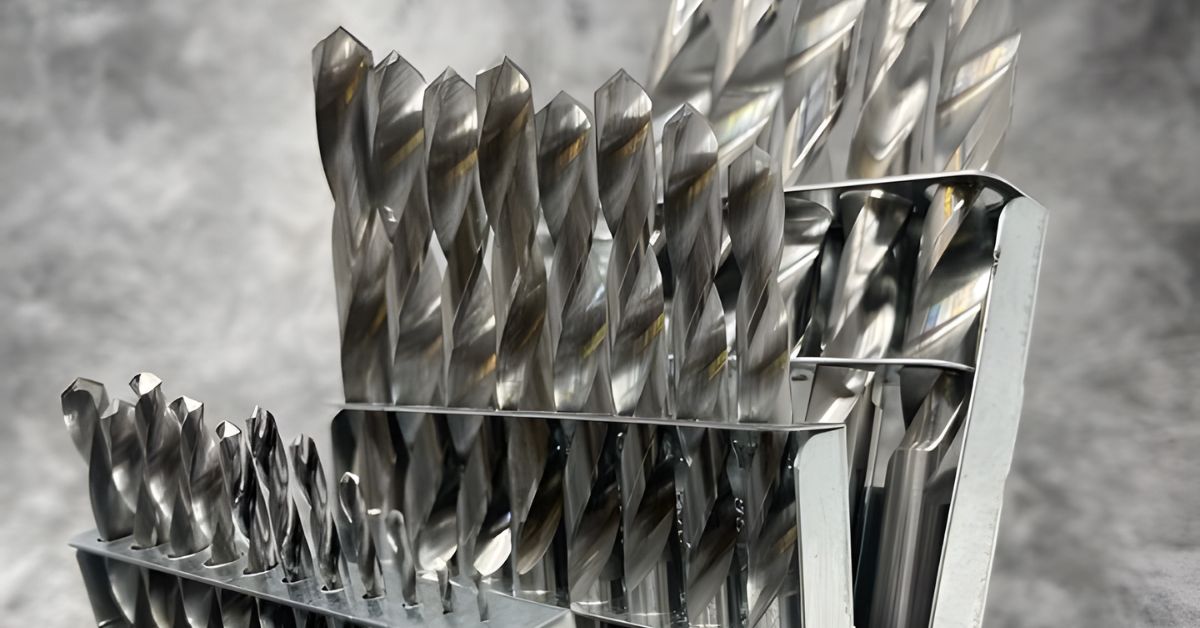
Types Of Drill Bits
There are many types of drill bits. Each type fits a special use or material. Knowing these types helps you pick the best one.
- Twist bits: Most common. Good for wood, plastic, and metal.
- Masonry bits: Made for drilling into stone, brick, or concrete. <librad bits:="" designed="" for="" have="" li="" point="" points="" prevent="" sharp="" slipping.
- Spade bits: Flat and wide. Used for large holes in wood.
- Forstner bits: Create clean, flat-bottom holes in wood.
- Countersink bits: Used to create a conical hole for screw heads.
Materials And Coatings
Drill bits come in different materials and coatings. These affect their sharpness, durability, and use.
Picking the right material and coating helps you keep your drill bits sharp longer and use them safely.
| Material / Coating | Description | Best For |
|---|---|---|
| High-Speed Steel (HSS) | Strong and affordable steel. Easy to sharpen. | Wood, metal, plastic |
| Cobalt | HSS mixed with cobalt. Stays sharp longer. | Hard metals like stainless steel |
| Titanium Coated | HSS bit coated with titanium. Reduces friction. | General purpose drilling |
| Carbide | Very hard and brittle. Holds edge well. | Masonry and hard materials |
| Black Oxide Coating | Improves bit life and corrosion resistance. | Wood and metal |

Credit: www.amazon.co.uk
Tools Needed For Sharpening
Sharpening drill bits helps keep them precise and efficient. Using the right tools makes sharpening easier and safer.
This guide explains three common tools you can use to sharpen drill bits at home or in the workshop.
Bench Grinder
A bench grinder is a powerful tool with spinning wheels. It quickly grinds the edges of drill bits to restore sharpness.
Make sure to hold the drill bit steady and use light pressure. This prevents overheating and damage to the bit.
- Use a fine-grit wheel for better control
- Wear safety goggles to protect your eyes
- Keep the drill bit cool by dipping it in water
Sharpening Stones
Sharpening stones are simple and low-cost tools. They allow you to sharpen drill bits by hand with more precision.
Use a flat stone or diamond stone for best results. Slowly rub the bit’s cutting edge against the stone at the correct angle.
- Keep the stone wet to reduce friction
- Work both sides evenly for balanced edges
- Use light, steady strokes for control
Specialized Drill Bit Sharpeners
Specialized drill bit sharpeners are made just for drill bits. They help keep the correct angle and shape easily.
These devices may be manual or electric. They offer consistent sharpening for better drilling performance.
- Manual sharpeners guide the bit by hand
- Electric sharpeners automate the grinding process
- Both types reduce risk of over-grinding
Preparing Drill Bits For Sharpening
Sharpening drill bits helps keep them working well. Proper preparation makes sharpening easier and safer.
Before sharpening, clean and check the drill bits. Marking cutting edges guides you during the process.
Cleaning And Inspection
Remove dirt and oil from drill bits before sharpening. Clean bits sharpen more evenly and last longer.
Look closely for damage like chips or cracks. Sharp bits with no damage work better and are safer to use.
- Use a brush or cloth to clean bits
- Apply a mild cleaner if needed
- Check for cracks, chips, or rust
- Discard bits with serious damage
Marking Cutting Edges
Marking the cutting edges helps keep the drill bit balanced. It shows where to sharpen and where to avoid.
Use a permanent marker to color the edges lightly. This color will wear off as you sharpen, showing progress.
- Clean the bit before marking
- Use a dark marker for clear visibility
- Color only the cutting edges
- Check marks during sharpening
Sharpening Techniques
Sharpening drill bits improves their cutting power and precision. Proper technique helps extend the life of your tools. This guide covers key ways to sharpen drill bits correctly.
Focus on the right angle, balanced edges, and avoiding heat damage. These factors ensure your drill bits work smoothly and last longer.
Maintaining Proper Angle
Keep the correct angle when sharpening drill bits. Usually, a 59-degree angle works best for most bits. This angle allows for effective cutting and reduces wear.
- Hold the bit at the correct angle against the grinding wheel.
- Move the bit smoothly to keep a consistent angle.
- Check the angle often with a protractor or angle guide.
Balancing The Cutting Edges
Both cutting edges of the drill bit must be equal in size and shape. Uneven edges cause the bit to wobble and reduce drilling accuracy.
| Tip | How to Balance | Effect |
| Edge Length | Grind until both edges match | Stable drilling |
| Edge Angle | Keep angles symmetrical | Even pressure on material |
| Point Center | Center the tip between edges | Precise hole placement |
Avoiding Overheating
Overheating damages the drill bit’s hardness and sharpness. Use these tips to keep the bit cool during sharpening.
- Apply light pressure on the grinding wheel.
- Move the bit frequently to avoid staying in one spot.
- Use water or oil to cool the bit while grinding.
- Take breaks if the bit becomes too hot to touch.
Testing Sharpness And Precision
Testing drill bits after sharpening ensures they work well. Sharp and precise bits make clean holes.
Check your drill bits carefully before use. This helps avoid damage or errors during drilling.
Visual Inspection
Look closely at the drill bit edges and tips. Sharp bits have clean, even cutting surfaces.
Check for chips, cracks, or uneven edges. These flaws reduce sharpness and precision.
- Use good lighting and a magnifier if needed
- Look for smooth and symmetrical cutting edges
- Ensure the tip is centered and not worn out
- Discard bits with visible damage or dull spots
Trial Drilling
Test the drill bit by drilling a sample material. Use the same speed and pressure you plan to use.
Watch how the bit cuts into the material. A sharp bit makes smooth and clean holes with little effort.
- Choose a scrap piece similar to your project material
- Drill slowly to see how the bit performs
- Check the hole edges for smoothness and accuracy
- Notice if the bit overheats or struggles to cut
Adjusting For Optimal Performance
If drilling is hard or holes are rough, adjust the drill bit. Small changes improve sharpness and precision.
Use a sharpening tool to fix uneven edges or dull spots. Keep the original angle of the cutting edge.
- Re-examine the bit after each adjustment
- Sharpen only small areas at a time
- Maintain consistent angles on both cutting lips
- Stop sharpening once the bit cuts smoothly
Maintenance Tips For Drill Bits
Keeping drill bits sharp and well-maintained helps you drill with precision. Proper care extends the life of your bits and improves your work quality.
Follow simple steps to clean, store, and sharpen your drill bits regularly. These tips keep them ready for any project.
Regular Cleaning
Clean drill bits after each use to remove dirt, dust, and metal shavings. Use a stiff brush or cloth to wipe off debris. Avoid water unless you dry the bits immediately to stop rust.
Proper Storage
Store drill bits in a dry place to prevent rust and damage. Keep them organized so you can find the right size quickly. Use a case or holder designed for drill bits.
- Keep bits separated to avoid chipping
- Label storage containers by size
- Store in a cool, dry area
- Avoid tossing bits loosely in toolboxes
Timely Resharpening
Sharpen drill bits as soon as you notice dullness. Use a sharpening tool or a bench grinder carefully. Proper angles and steady pressure improve cutting performance.
| Sharpening Tip | Detail |
| Angle | Keep the original cutting angle, usually 118 degrees |
| Pressure | Apply light, even pressure to avoid overheating |
| Cooling | Use water to cool the bit during grinding |
| Check | Inspect the tip often to keep it sharp and balanced |
Credit: www.drillbitwarehouse.com
Frequently Asked Questions
How Often Should I Sharpen Drill Bits For Precision?
Sharpen drill bits regularly to maintain cutting efficiency. Frequency depends on usage intensity and material hardness. Typically, sharpen after noticeable dullness or poor drilling performance.
What Tools Are Best For Sharpening Drill Bits?
Use a bench grinder, sharpening jig, or specialized drill bit sharpener. These tools ensure precise angle control and consistent edges for accurate drilling.
Can I Sharpen All Types Of Drill Bits?
Most high-speed steel (HSS) and carbon steel bits can be sharpened. Carbide bits require professional sharpening due to their hardness and brittleness.
What Angle Is Ideal For Sharpening Drill Bits?
A 118-degree angle suits general-purpose bits. For harder materials, a 135-degree split point angle improves precision and reduces walking.
Conclusion
Sharpening drill bits improves cutting accuracy and extends tool life. Regular maintenance saves money and ensures better results. Use the right tools and follow steps carefully. Practice makes the process easier and more precise. Keep safety in mind during sharpening.
Well-sharpened bits work faster and reduce damage to materials. Small effort brings big benefits in your projects. Try sharpening your drill bits for cleaner, smoother holes. Your work will look more professional every time.