If you want to fix or install copper pipes in your home, knowing how to solder them is a skill you can’t afford to miss. Soldering copper pipes might sound tricky, but with the right steps, you can do it yourself and save time and money.
Imagine confidently connecting pipes that won’t leak and knowing your plumbing is secure. In this guide, you’ll learn easy-to-follow tips that make soldering simple, even if you’ve never tried it before. Keep reading, and by the end, you’ll have the know-how to handle your plumbing like a pro.
Credit: www.oatey.com
Tools And Materials Needed
Soldering copper pipes is a common plumbing task. You need the right tools and materials for good results.
This guide covers what tools, materials, and safety gear you will need to solder copper pipes properly.
Essential Tools
You need specific tools to prepare and join copper pipes. These tools help you cut, clean, and heat the pipes.
- Pipe cutter – to cut copper pipes cleanly
- Emery cloth or wire brush – to clean pipe ends
- Propane torch – to heat the pipe and fittings
- Flux brush – to apply flux evenly
- Adjustable wrench – to tighten fittings if needed
- Fireproof cloth – to protect nearby surfaces from heat
Required Materials
These materials help the copper pipes join securely and prevent leaks. Use good quality items.
- Copper pipes – cut to the correct length
- Copper fittings – elbows, tees, or couplings
- Lead-free solder – safe for drinking water pipes
- Flux paste – helps solder flow and bond
- Cleaning pads or sandpaper – to remove oxidation
Safety Gear
Soldering involves heat and fumes. Protect yourself with proper safety gear to avoid injury.
- Safety glasses – shield your eyes from sparks
- Heat-resistant gloves – protect hands from burns
- Long-sleeve clothing – reduce skin exposure
- Fire extinguisher – keep nearby for emergencies
- Well-ventilated area – avoid inhaling fumes

Credit: www.youtube.com
Preparing The Copper Pipes
Proper preparation of copper pipes is important for strong plumbing joints. Clean and smooth pipes help solder stick well.
This guide explains how to cut, clean, and fit copper pipes before soldering them.
Cutting The Pipes
Use a pipe cutter to make a clean, straight cut on the copper pipe. Avoid using a saw because it can cause rough edges.
Turn the cutter around the pipe and tighten it slowly until the pipe is cut through.
- Mark the cutting point clearly
- Place the cutter squarely on the mark
- Rotate the cutter evenly for a smooth cut
- Do not force the cutter too hard
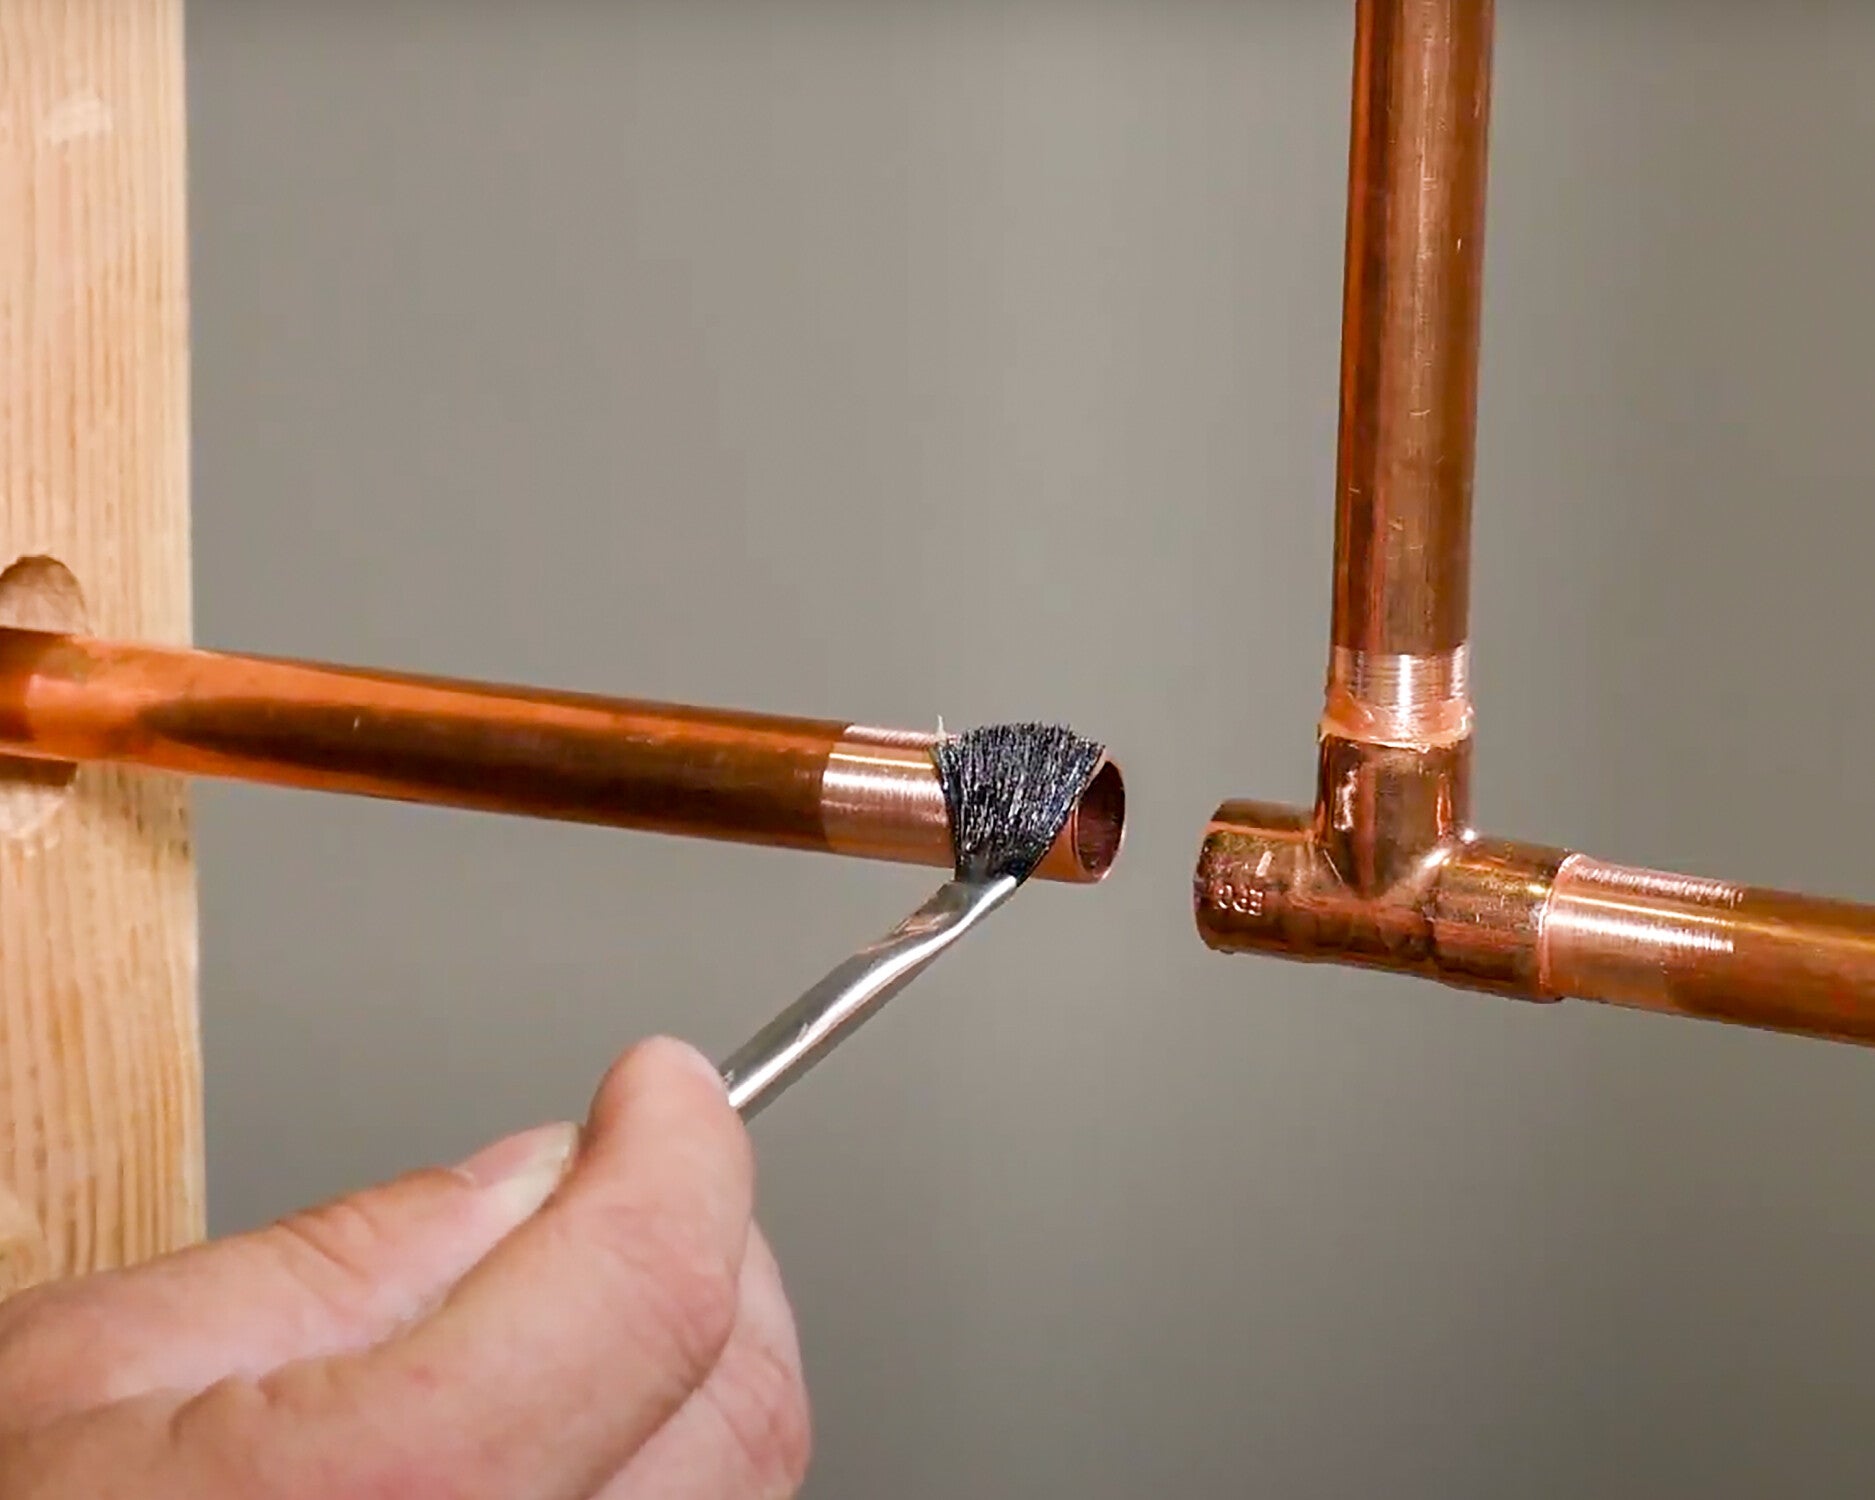
Cleaning And Deburring
Remove any dirt, oil, or oxidation from the pipe surface. Use sandpaper or a wire brush to clean the pipe end.
Deburr the inside edge of the pipe with a deburring tool. This prevents damage to fittings and improves solder flow.
- Use emery cloth or steel wool to clean the outside
- Remove burrs from the inside with a reamer
- Wipe pipes with a clean cloth after cleaning
Fitting The Pipes Together
Test fit the pipe and fitting to make sure they fit snugly. The pipe should slide in easily but not be loose.
Twist the pipe slightly when inserting it. This spreads the flux evenly and prepares the joint for soldering.
- Check the pipe and fitting for a tight fit
- Apply flux evenly on both pipe and fitting
- Insert pipe fully into the fitting
- Twist the pipe a quarter turn for good contact
Applying Flux
Flux is an important material for soldering copper pipes. It helps clean the metal and improve the bond.
Applying flux correctly makes the soldering process easier and stronger. This guide explains how to choose and apply flux.
Choosing The Right Flux
Select flux that is safe for drinking water pipes. Use a flux labeled as “lead-free” and “water approved.”
| Flux Type | Use Case | Notes |
| Water-Soluble | Indoor plumbing | Easy to clean |
| Paste Flux | Standard copper pipes | Good adhesion |
| Liquid Flux | Tight spaces | Flows easily |
| Rosin Flux | Electrical work | Not for plumbing |
Proper Application Technique
Apply flux evenly on both the outside of the pipe and the inside of the fitting. This helps the solder flow well.
- Use a small brush to spread flux thinly.
- Cover all joint surfaces but avoid excess.
- Wipe off any drips to prevent mess.
- Check that flux is fresh and not dried out.
Heating The Joint
Heating the joint is a key step in soldering copper pipes. It melts the solder, joining the pipes tightly.
Use the right tools and methods to heat the joint evenly and safely.
Using A Propane Torch
Hold the propane torch flame about one inch from the joint. Move the flame around the pipe to heat it evenly. Avoid pointing the flame directly at the solder.
- Light the torch using a striker or lighter made for propane torches.
- Adjust the flame to a steady, blue cone.
- Heat the pipe, not the solder directly.
- Keep the flame moving to prevent overheating.
Heating Tips And Safety
| Tip | Reason |
| Wear heat-resistant gloves | Protects hands from burns |
| Keep a fire extinguisher nearby | Quick response to fire accidents |
| Work in a well-ventilated area | Prevents inhaling fumes |
| Do not overheat the pipe | Avoids damaging the pipe and joint |
| Allow joint to cool naturally | Ensures a strong bond |
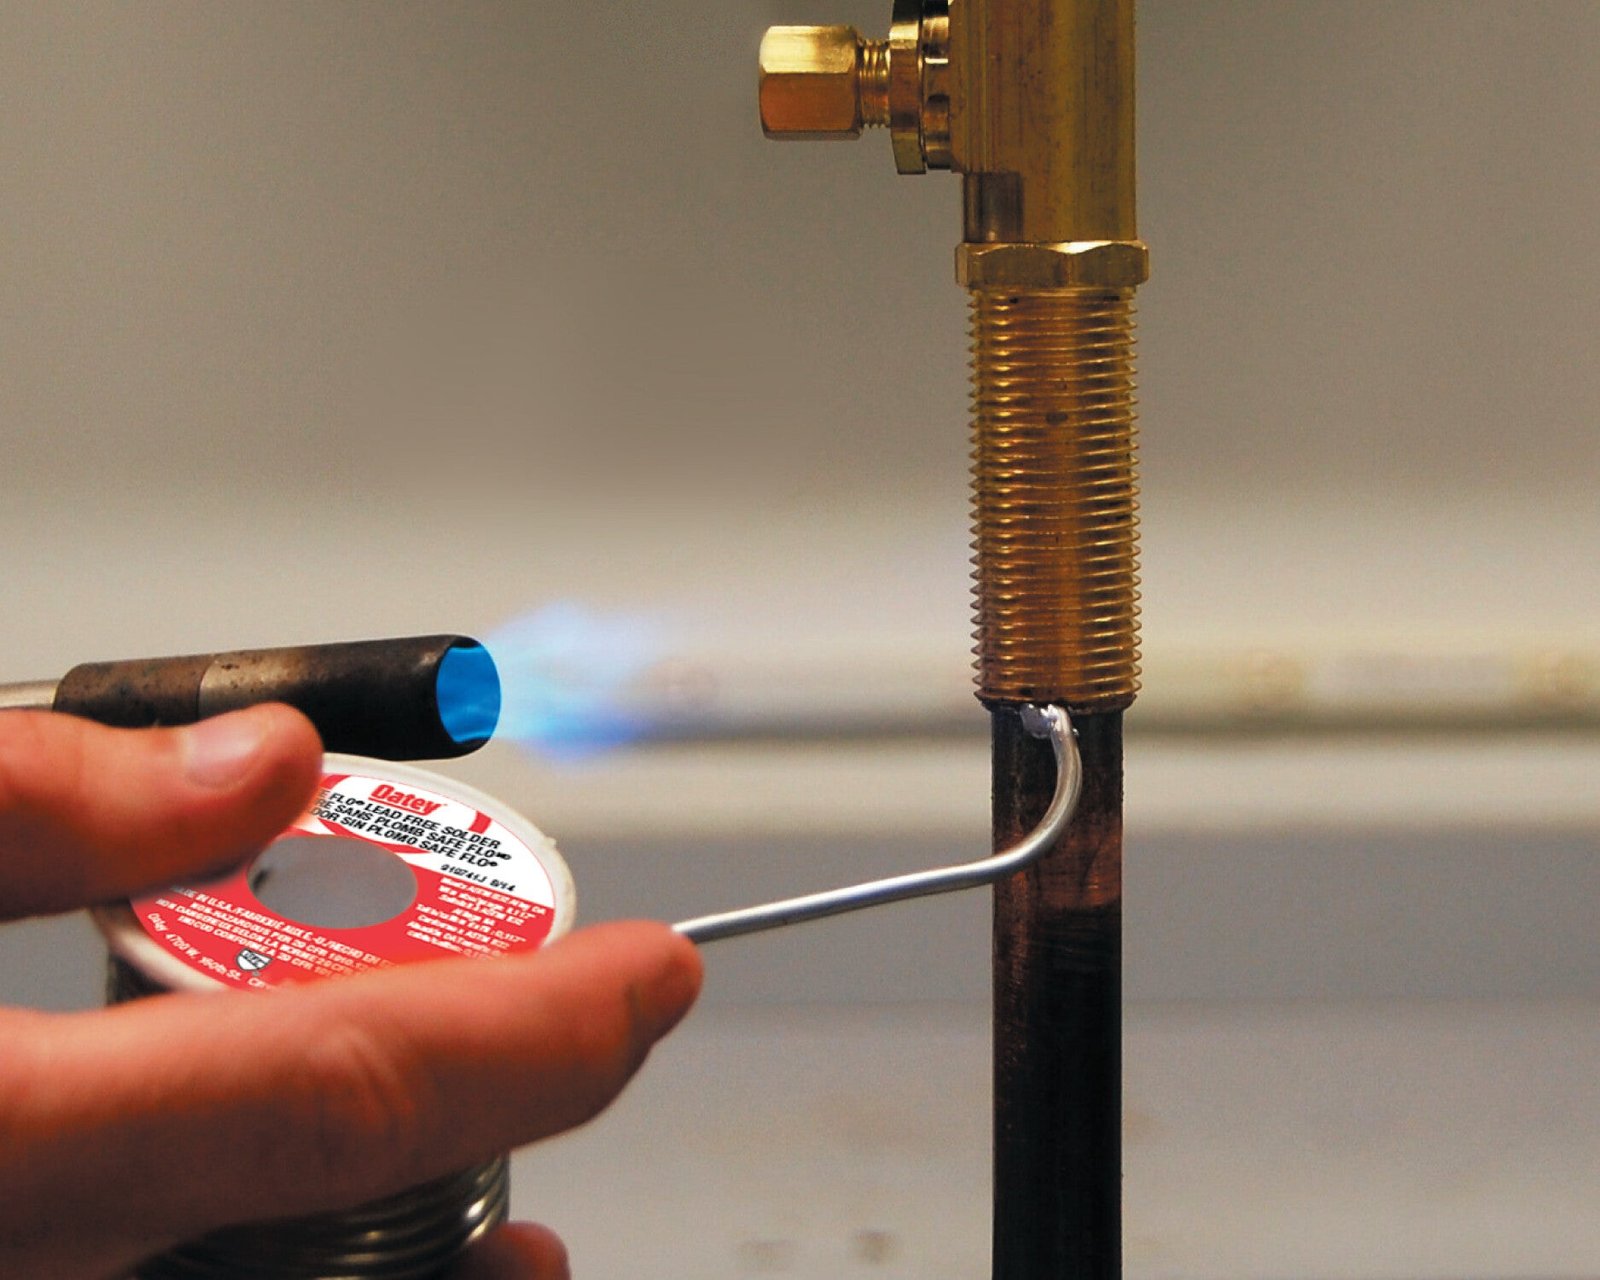
Applying Solder
Soldering copper pipes is a key skill for plumbing repairs. It joins pipes to prevent leaks and water damage.
Applying solder correctly helps make a strong, lasting connection between copper pipes and fittings.
How To Melt Solder Correctly
Use a propane torch to heat the joint evenly. Heat the pipe, not the solder directly.
The solder melts when it touches the hot pipe. Let the heat draw solder into the joint by capillary action.
- Keep the flame moving to avoid overheating
- Heat the pipe and fitting evenly
- Touch solder to the joint, not the flame
- Stop adding solder once it flows all around
Ensuring A Secure Seal
Clean the pipes and fittings before soldering. Dirt and oxidation stop solder from bonding well.
After soldering, let the joint cool naturally. Avoid moving the pipes until the solder hardens.
- Use a wire brush or sandpaper to clean surfaces
- Apply flux to help solder flow smoothly
- Check the joint for gaps or cracks after cooling
- Wipe off excess flux to prevent corrosion
Cooling And Cleaning The Joint
Soldering copper pipes creates strong plumbing joints. After soldering, cooling and cleaning are key steps. These help ensure a leak-free connection and long-lasting pipes.
This section covers how to allow proper cooling time and remove excess flux from the joint.
Allowing Proper Cooling Time
Let the soldered joint cool naturally without touching it. Quick cooling can weaken the joint or cause leaks. Cooling time depends on pipe size and heat used.
- Do not move or disturb the pipes during cooling.
- Wait at least 5 minutes for small pipes to cool.
- Larger pipes may need 10 to 15 minutes to cool fully.
- Check if the joint feels cool to the touch before handling.
- Use caution to avoid burns while waiting.
Removing Excess Flux
Flux helps solder flow but must be cleaned off after cooling. Leftover flux can cause corrosion and damage pipes over time.
| Cleaning Tool | Purpose | Tips |
|---|---|---|
| Wet cloth | Wipes away soft flux residue | Use warm water and clean cloth |
| Brush | Scrubs off dried flux | Use a nylon or brass brush gently |
| Flux remover | Cleans stubborn flux stains | Follow product instructions carefully |
Clean the joint thoroughly to keep your plumbing safe and durable.
Testing For Leaks
After soldering copper pipes, it is important to check for leaks. This step ensures your plumbing works correctly and prevents water damage.
Testing for leaks involves applying pressure and looking for signs of water escaping from joints. There are different ways to do this safely at home or on the job.
Pressure Testing Methods
Pressure testing helps find leaks by pushing water or air through the pipes. You watch for drops in pressure or visible water leaks.
- Fill the pipes with water and close all openings.
- Use a pressure gauge to pump water or air into the system.
- Check the gauge for any pressure drops over 15 minutes.
- Inspect all soldered joints for water or moisture.
- Release pressure carefully once the test is done.
Using water is common because it shows leaks clearly. Air testing is faster but requires caution to avoid accidents.
Fixing Common Leak Issues
Leaks often happen due to poor soldering or dirty pipe surfaces. Fixing these problems needs cleaning, reheating, and adding solder again.
| Leak Cause | Fix Method | Tip |
| Cold joint | Reheat joint and apply fresh solder | Heat evenly for a smooth joint |
| Dirt or oil on pipe | Clean pipe with emery cloth before soldering | Keep pipe dry and clean |
| Insufficient solder | Add more solder while heating | Use flux to help solder flow |
| Cracked pipe or fitting | Replace damaged section | Inspect parts before installation |
Credit: www.youtube.com
Common Mistakes To Avoid
Soldering copper pipes is important for strong plumbing joints. Avoiding common mistakes saves time and keeps pipes leak-free.
Pay close attention to the soldering process. Small errors can cause big problems later.
Overheating The Pipes
Heating copper pipes too much can damage them. Overheating can weaken the pipe and cause leaks.
Use a moderate flame and move the heat evenly around the pipe. Watch the color to avoid burning.
- Keep the flame moving to prevent hot spots
- Stop heating once solder melts and flows
- Use a heat shield if near plastic or other materials
Using Too Much Solder
Applying too much solder creates messy joints. It can block water flow inside the pipe.
Use just enough solder to fill the joint gap. Excess solder wastes material and looks unprofessional.
- Heat the joint, then touch solder to the seam
- Let solder flow naturally with capillary action
- Remove extra solder with a cloth while warm
Skipping Cleaning Steps
Not cleaning pipes and fittings causes weak joints. Dirt and oxidation stop solder from sticking.
Always clean surfaces before soldering. Use a wire brush or sandpaper to remove grime and oxidation.
- Clean pipe ends and inside fittings
- Apply flux to clean surfaces before heating
- Check for shiny metal before soldering
Frequently Asked Questions
What Tools Do I Need To Solder Copper Pipes?
You need a propane torch, solder, flux, pipe cutter, emery cloth, and a wire brush. These tools ensure clean, secure joints for plumbing.
How Do I Prepare Copper Pipes Before Soldering?
Clean pipe ends with emery cloth or a wire brush. Apply flux evenly to ensure proper solder adhesion and a leak-free joint.
How Long Should I Heat Copper Pipes When Soldering?
Heat the pipe and fitting evenly for about 20-30 seconds. Avoid overheating, as it can damage the pipe or cause weak joints.
Can I Solder Copper Pipes With Water Inside?
No, pipes must be dry before soldering. Water cools the pipe, preventing solder from melting and forming a strong bond.
Conclusion
Soldering copper pipes takes practice, but it’s manageable. Start with clean pipes. Use the right tools. Heat the joint evenly. Apply solder carefully. Let it cool undisturbed. Mistakes happen. Don’t worry. Just try again. Safety first. Always wear gloves and goggles.
Check for leaks after soldering. Fix any issues promptly. Patience and practice will improve your skills. Soon, you’ll handle basic plumbing tasks confidently. Remember, each project teaches something new. Keep your tools organized. Stay patient and focused. Happy soldering!