Are you unsure if your outlets are working properly or if they’re safe to use? Testing them yourself can save you time and money, but only if you do it the right way.
Using a multimeter is one of the easiest and most accurate methods to check your outlets, but it requires careful steps to keep you safe. You’ll learn exactly how to test outlets with a multimeter, avoid common mistakes, and protect yourself from electrical hazards.
Keep reading to gain the confidence and knowledge you need to handle this task like a pro.
Tools Needed For Testing
Testing outlets safely requires the right tools. These tools help you check if the outlet works properly. They also protect you from electric shocks.
This guide covers the main tools you need. It focuses on choosing the right multimeter and safety equipment.
Choosing The Right Multimeter
A multimeter measures voltage, current, and resistance. Pick one that is easy to use and reliable. Digital multimeters show clear readings and are best for beginners.
- Look for a multimeter with a clear display
- Choose one with voltage and continuity test modes
- Check that it can measure AC voltage up to 250 volts
- Pick a model with a built-in fuse for safety
- Consider one with a good battery life
Additional Safety Equipment
Safety gear protects you while testing electrical outlets. Always use insulated gloves and wear safety glasses. These items reduce the risk of injury.
| Equipment | Purpose |
| Insulated Gloves | Protect hands from electric shock |
| Safety Glasses | Shield eyes from sparks or debris |
| Non-contact Voltage Tester | Detect live wires without touching |
| Rubber-soled Shoes | Reduce risk of grounding |

Credit: www.familyhandyman.com
Preparing The Outlet
Testing an electrical outlet with a multimeter requires care and attention. Preparing the outlet properly ensures your safety and accurate results.
This guide covers the first steps before testing: turning off the power and removing the outlet cover.
Turning Off Power Safely
Before touching the outlet, always turn off the power at the circuit breaker. This prevents electric shocks.
- Locate your home’s main electrical panel.
- Find the breaker that controls the outlet you want to test.
- Switch the breaker to the “Off” position.
- Use a non-contact voltage tester to confirm no power is present.
- Do not skip this safety check.
Removing Outlet Cover
Removing the outlet cover lets you access the wiring and test points safely.
| Tool | Purpose |
|---|---|
| Flathead or Phillips screwdriver | To remove the screws holding the cover plate. |
| Voltage tester | To ensure no electricity flows before touching wires. |
| Gloves (optional) | To protect your hands from sharp edges. |
Follow these steps to remove the cover safely:
- Turn off power and verify with a voltage tester.
- Unscrew the outlet cover using the correct screwdriver.
- Gently pull the cover off the outlet.
- Avoid touching wires with bare hands.
Setting Up The Multimeter
Testing outlets safely starts with setting up your multimeter correctly. This ensures you get accurate readings and avoid any accidents.
In this section, we focus on selecting the correct mode and adjusting the voltage range on your multimeter before testing an outlet.
Selecting The Correct Mode
To test an outlet, set your multimeter to measure voltage. Most multimeters have modes for AC and DC voltage.
- Look for the “V” symbol with a wavy line (~) for AC voltage.
- Use this AC mode to test household outlets safely.
- Do not use the DC voltage setting for outlet testing.
- Check your multimeter’s manual if you are unsure about the mode.
Adjusting Voltage Range
Setting the right voltage range helps the multimeter measure accurately and protects the device.
| Voltage Range Setting | When to Use |
|---|---|
| 200V AC | Most household outlets (110-120V) |
| 600V AC | High voltage outlets or industrial settings |
| Auto Range | Multimeter automatically selects range |
If your multimeter has auto range, use it for ease and safety. Otherwise, choose a voltage range higher than the outlet voltage.
Testing For Voltage
Testing outlets with a multimeter helps ensure they work safely. Voltage testing shows if electricity flows correctly.
Before starting, always check the multimeter settings. Use the right mode to measure AC voltage from outlets.
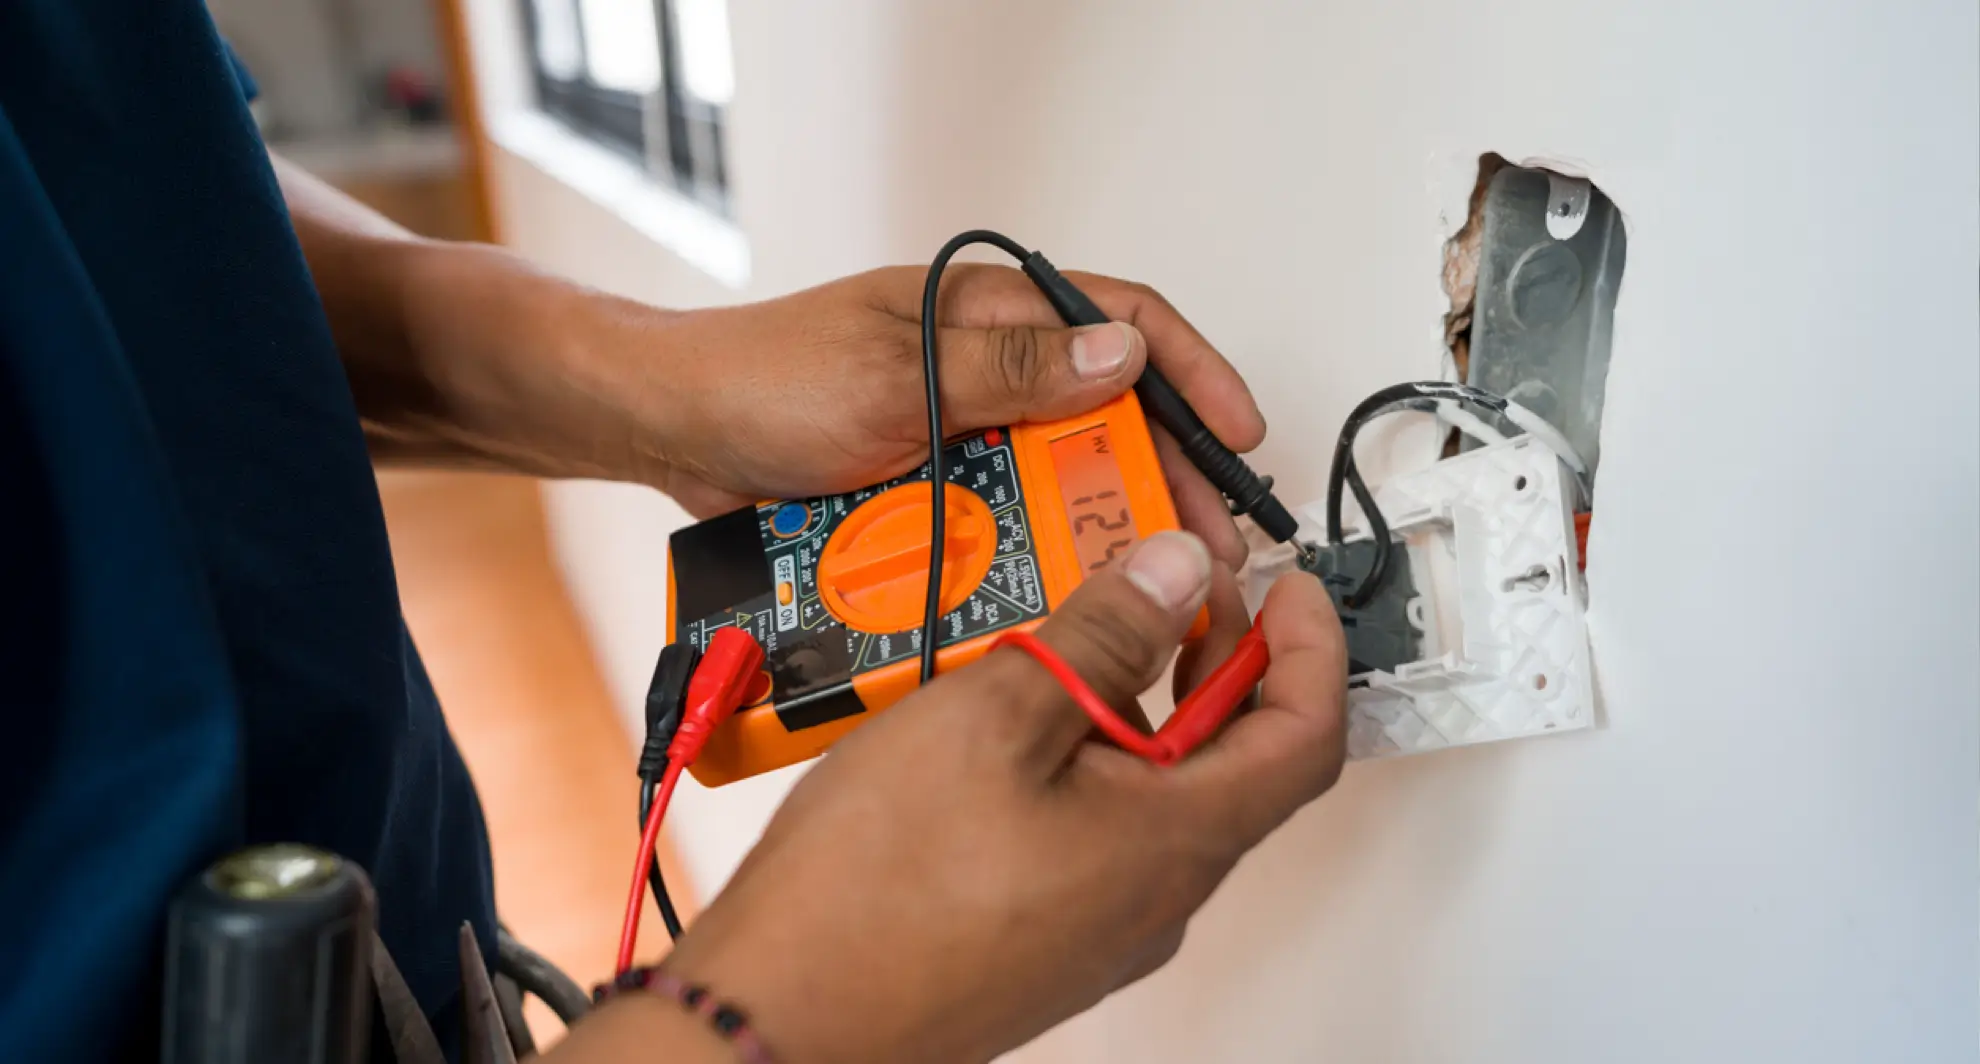
Probing Live And Neutral Slots
Insert the multimeter probes carefully into the outlet slots. The live slot usually carries voltage, and the neutral completes the circuit.
Place the red probe in the live slot and the black probe in the neutral slot. This setup checks the voltage between them safely.
- Use insulated probes to avoid shocks
- Hold probes steadily to get a clear reading
- Do not touch metal parts of the probes
Interpreting Voltage Readings
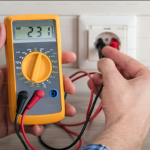
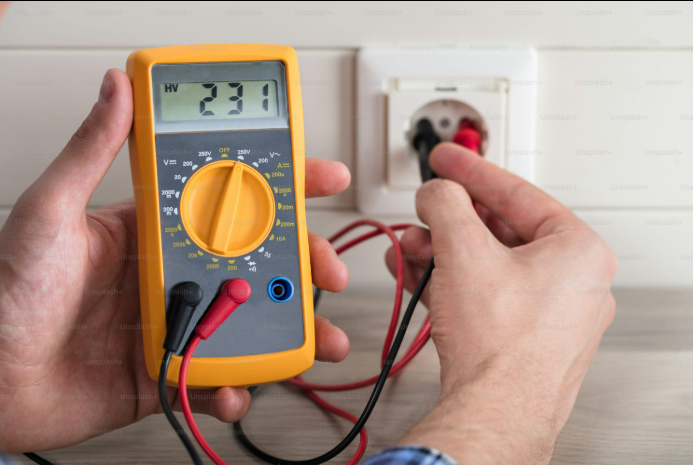
Look at the multimeter screen for voltage numbers. Typical household outlets show about 120 volts in the US or 230 volts in many other countries.
If the reading is zero or very low, the outlet might be off or damaged. Very high or unstable numbers may show a wiring problem.
- Normal voltage means the outlet is working
- Zero or no reading means no power or a fault
- Fluctuating numbers suggest loose wiring
Checking For Continuity
Using a multimeter to check outlet continuity helps find wiring problems. Continuity means electricity can flow through the wires without interruption.
This test shows if the outlet terminals connect correctly. It is a basic way to check if the outlet is safe to use.
Testing Outlet Terminals
First, turn off power to the outlet at the breaker box. Remove the outlet cover to access the terminals.
Set your multimeter to continuity mode. Touch one probe to the hot terminal and the other to the neutral terminal.
- If the multimeter beeps or shows a low reading, there is continuity.
- No beep or a high reading means the terminals are not connected properly.
- Test between each terminal to check wiring connections.
Using Continuity Mode Safely
Always make sure power is off before testing continuity. Never test live circuits with continuity mode.
Use insulated probes and avoid touching metal parts during testing. This prevents electric shock and false readings.
- Turn off power at the breaker box.
- Verify power is off with a voltage tester.
- Use proper safety gear like gloves and goggles.
- Keep hands dry and avoid working in wet areas.

Credit: www.youtube.com
Identifying Wiring Issues
Testing outlets with a multimeter helps find wiring problems. Faulty wiring can cause shocks or damage devices.
Using simple steps, you can check if outlets are safe and working right. Two common wiring issues are open grounds and reverse polarity.
Detecting Open Grounds
An open ground means the outlet’s ground wire is not connected. This can cause electric shocks or equipment damage.
To test for an open ground, set your multimeter to measure AC voltage. Place one probe on the hot slot and the other on the ground slot.
- If the reading is near zero volts, the ground is likely open.
- A proper ground will show the same voltage as between hot and neutral.
- Check outlet screws and wiring for loose or missing ground connections.
Recognizing Reverse Polarity
Reverse polarity happens when the hot and neutral wires are swapped. This can cause devices to work incorrectly or unsafely.
To find reverse polarity, set your multimeter to AC voltage. Measure between the hot slot and neutral slot.
- If the reading is zero or very low, the wires may be reversed.
- Normal outlets show full voltage between hot and neutral.
- Inspect wiring and fix any swapped connections immediately.
Safety Tips During Testing
Testing electrical outlets with a multimeter requires care. You must follow safety rules to avoid accidents.
This guide covers key safety tips to keep you safe during testing.
Avoiding Electric Shock
Electric shock can cause serious injury. Always turn off power before testing if possible.
Never touch metal parts of the multimeter probes while testing. Keep your hands dry and stand on a dry surface.
- Check if the multimeter is working properly before use
- Use one hand to test to reduce shock risk
- Do not test outlets with damaged wires or covers
- Wear rubber-soled shoes to insulate yourself
Using Insulated Tools
Insulated tools protect you from electric shock. Use a multimeter with insulated probes.
Make sure the insulation on your tools is intact. Avoid using tools with cracks or damage.
- Choose multimeter probes with rubber grips
- Wear insulated gloves for extra protection
- Keep tools away from water or wet areas
- Store insulated tools properly to avoid damage
Troubleshooting Common Problems
Testing outlets with a multimeter helps find electrical issues. It is important to test safely to avoid shocks.
Some problems can cause wrong or no readings. Knowing what to check helps fix the outlet fast.
No Voltage Detected
If your multimeter shows no voltage, the outlet may have no power. This can happen if the circuit is off.
Check the circuit breaker or fuse box. A tripped breaker or blown fuse can stop power to the outlet.
- Make sure the multimeter is set to measure AC voltage
- Test another outlet to confirm the multimeter works
- Reset any tripped breakers or replace blown fuses
- Check for loose wiring in the outlet box
Inconsistent Readings
Sometimes the multimeter shows different readings each time you test. This can mean a loose connection or bad wiring.
Try testing the outlet with firm probe contact. Check the outlet wires for signs of damage or looseness.
- Clean the outlet terminals if dirty or corroded
- Tighten any loose screws holding wires in place
- Replace the outlet if it is old or damaged
- Test the multimeter leads for wear or damage
Restoring And Final Checks
After testing an outlet with a multimeter, it is important to restore it safely. This ensures the outlet works properly and prevents electrical hazards.
Follow careful steps to reassemble the outlet and confirm it functions correctly before use.
Reassembling The Outlet
Turn off the power at the breaker before touching any wires. Put the outlet back into its box carefully.
Secure the outlet with screws and attach the cover plate. Make sure no wires are pinched or loose.
- Double-check all wire connections are tight
- Push the outlet gently but firmly into the box
- Screw the outlet in place evenly
- Attach the cover plate securely
Confirming Outlet Functionality
Turn the power back on at the breaker. Use your multimeter or a simple outlet tester to check the voltage.
The outlet should show the correct voltage and no unusual readings. Test by plugging in a small device to confirm power flow.
- Check voltage with a multimeter for accuracy
- Use an outlet tester for quick safety checks
- Plug in a lamp or charger to see if it works
- Look for any sparks, smells, or sounds indicating a problem
Credit: mrelectric.com
Frequently Asked Questions
How Do You Test An Outlet With A Multimeter?
To test an outlet, first set the multimeter to AC voltage. Insert the probes into the outlet slots. A reading between 110-120 volts indicates a properly functioning outlet. If there’s no reading or it’s significantly lower, the outlet might be faulty.
Always ensure safety by wearing rubber gloves.
What Safety Precautions Should I Take?
Before testing, ensure the multimeter is set correctly to avoid damage. Wear rubber gloves for insulation. Stand on a dry, non-conductive surface. Always test with dry hands. If unsure, consult a professional. Safety should always be your top priority when working with electricity.
Can A Multimeter Detect Outlet Wiring Issues?
Yes, a multimeter can help detect wiring issues. By measuring voltage, you can identify inconsistencies. Abnormal readings might indicate faulty wiring. For complex issues, consult a professional. Regular testing helps maintain outlet safety and functionality. Always prioritize safety when dealing with electrical components.
Why Is My Outlet Not Showing Voltage?
If no voltage is detected, the outlet might be faulty. Check the circuit breaker to ensure it’s on. Loose connections can also cause issues. If problems persist, consult an electrician. Regular maintenance can prevent unexpected issues. Always prioritize safety when dealing with electrical problems.
Conclusion
Testing outlets with a multimeter keeps your home safe and sound. Always double-check connections before starting any test. Take your time and follow each step carefully. Use the multimeter to find voltage, continuity, or wiring issues. Stay cautious to avoid electric shocks or damage.
Practicing these simple tips builds your confidence in handling electrical tasks. A safe home starts with smart, careful testing. Keep learning and stay safe.