Are you struggling to find out if your relay is working properly? Testing relays can seem tricky, but with the right tools and simple steps, you can do it yourself quickly.
Your multimeter is the key to unlocking this skill. You’ll learn exactly how to test relays with a multimeter, saving you time and money on repairs. Keep reading, and by the end, you’ll feel confident diagnosing relays like a pro.
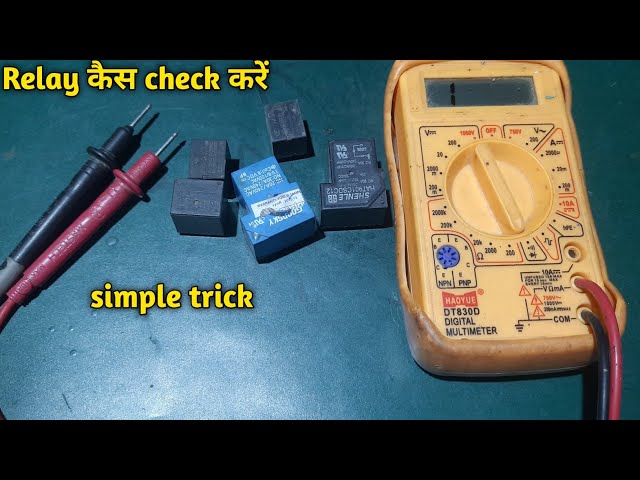
Credit: m.youtube.com
Basics Of Relays
Relays are switches that control electrical circuits. They allow low power signals to switch higher power devices.
Testing relays with a multimeter helps check if they work properly. Understanding relay basics is important before testing.
Types Of Relays
There are several types of relays. Each type has a special function and design.
- Electromechanical Relays:Use a coil and moving parts to open or close contacts.
- Solid State Relays:Use electronic components without moving parts for switching.
- Reed Relays:Have a small coil and reed switch inside a sealed glass tube.
- Thermal Relays:Operate based on temperature changes to protect circuits.
Relay Components
| Component | Description |
| Coil | Creates magnetic field to move switch contacts |
| Armature | Metal lever that moves to open or close contacts |
| Contacts | Conductive parts that open or close the circuit |
| Spring | Returns armature to its original position |
| Frame | Holds all parts of the relay together |
How Relays Work
A relay works by using a small electric current to control a larger current. The coil creates a magnetic field when powered.
- The magnetic field pulls the armature.
- The armature moves the contacts to open or close the circuit.
- When the coil is off, the spring returns the armature to its place.
- This switches the connected device on or off.
Tools Needed
Testing relays requires specific tools to ensure accurate results. Using the right equipment helps you diagnose electrical issues safely.
This guide covers the essential tools you need to test relays with a multimeter effectively.
Choosing The Right Multimeter
Select a multimeter that can measure voltage, resistance, and continuity. A digital multimeter with a clear display is easier to read.
- Auto-ranging feature for simple operation
- Continuity test function to check relay coils
- Resistance measurement for coil and contacts
- Voltage measurement for relay supply check
- Durable probes with insulated handles
Additional Equipment
| Equipment | Purpose |
| 12V or 24V Power Supply | To energize the relay coil for testing |
| Relay Socket or Clip | Secure relay connection during tests |
| Insulated Gloves | Protect from electric shock |
| Small Screwdriver | To access relay terminals |
| Wire Strippers | Prepare wires for connections |
Safety Precautions
Testing relays with a multimeter requires care and attention. Safety is very important to avoid injury or damage.
Always follow safety rules before and during the testing process. This helps keep you and your equipment safe.
Power Off Before Testing
Always turn off the power before testing a relay. Testing with power on can cause electric shock or damage.
Make sure to unplug the device or switch off the circuit breaker. Confirm the power is off using your multimeter first.
- Turn off the main power supply
- Unplug the device from the outlet
- Use a voltage tester to confirm no current
- Never test live circuits without proper training
Handling Electrical Components Safely
Handle relays and wires carefully to avoid electric shock. Use tools with insulated handles and wear safety gloves.
Keep your work area dry and clean. Avoid touching metal parts with bare hands during testing.
- Use insulated tools and gloves
- Work in a dry environment
- Avoid metal jewelry or watches
- Keep hands away from live contacts
- Store components safely after use

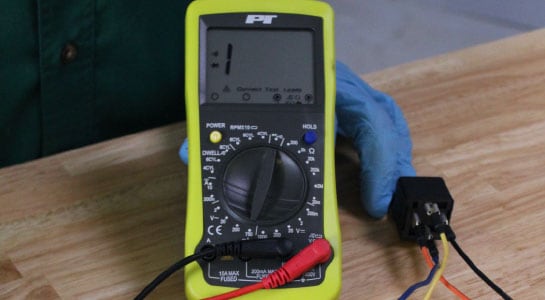
Credit: mechlesson.com
Testing Relay Coil
Testing a relay coil with a multimeter helps find if the coil is working right.
This test checks the coil’s resistance to see if it is damaged or okay.
Setting Multimeter To Ohms
Turn the multimeter dial to the ohms (Ω) setting to measure resistance.
- Switch off the power to the relay.
- Disconnect the relay from the circuit.
- Set the multimeter to the lowest ohm range.
- Ensure the probes are plugged into the correct ports.
Measuring Coil Resistance
Place the multimeter probes on the relay coil terminals to read resistance.
| Coil Terminal | Probe Position |
| Positive (+) | Red Probe |
| Negative (-) | Black Probe |
The meter will show a number. This is the coil resistance in ohms.
Interpreting Results
- If resistance is very high or infinite, the coil may be broken.
- If resistance is zero or very low, the coil might be shorted.
- Normal resistance varies by relay type; check the relay datasheet.
- Consistent readings mean the coil is likely good.
Testing Relay Contacts
Relays control electrical circuits by opening and closing contacts. Testing the relay contacts helps find problems inside the relay.
A multimeter is a tool that checks if the relay contacts open or close correctly. This guide shows how to test relay contacts step-by-step.
Identifying Contact Terminals
Relays have different terminals for contacts and coil. To test contacts, first find the right terminals.
Look at the relay’s diagram or label. Usually, you see three contact terminals:
- Common (COM)
- Normally Closed (NC)
- Normally Open (NO)
The coil terminals are separate and not used for contact testing.
Checking Normally Closed Contacts
Normally Closed (NC) contacts connect when the relay is not powered. This means the circuit is closed at rest.
Set your multimeter to measure resistance or continuity. Place one probe on the COM terminal and the other on the NC terminal.
If the relay is good, the multimeter shows low resistance or beeps. This means the contacts are closed and working.
When the relay coil is powered, the NC contacts should open. Then, the multimeter shows high resistance or no beep.
Checking Normally Open Contacts
Normally Open (NO) contacts are open when the relay is off. They close only when the relay coil is powered.
Set the multimeter to resistance or continuity mode. Place one probe on the COM terminal and the other on the NO terminal.
When the relay is off, the multimeter shows high resistance or no beep. This means the contacts are open.
Power the relay coil, and the NO contacts close. The multimeter should then show low resistance or beep.
Testing Relay Operation
Testing a relay with a multimeter helps ensure it works correctly. You can check if the relay coil and contacts function as expected.
This guide covers key steps to test relay operation safely and accurately.
Applying Voltage To Coil
First, identify the relay coil terminals using the relay diagram or datasheet. Connect the multimeter leads to these terminals.
Apply the recommended voltage to the coil carefully. This voltage activates the relay and triggers contact switching.
Listening For Click Sound
When the coil gets voltage, listen closely for a clicking noise. This sound means the relay is activating.
- A clear click shows the relay coil pulls the contacts.
- No click may mean a faulty coil or no power supply.
- Repeated clicks can indicate a loose connection or relay fault.
Verifying Contact Switching
Use the multimeter to check the relay contacts while voltage is applied to the coil. This test confirms proper switching.
| Contact Type | Multimeter Reading (Ohms) | Expected Result |
|---|---|---|
| Normally Open (NO) | Low (close to 0) | Contacts closed when coil energized |
| Normally Open (NO) | High or infinite | Contacts open without coil voltage |
| Normally Closed (NC) | Low (close to 0) | Contacts closed without coil voltage |
| Normally Closed (NC) | High or infinite | Contacts open when coil energized |
Common Relay Issues
Relays are important parts in many electrical systems. They help control circuits by opening or closing contacts.
Sometimes relays stop working well. Knowing common relay issues helps you test them with a multimeter.
Coil Failures
The coil in a relay creates a magnetic field to move contacts. If the coil is broken, the relay will not work.
Using a multimeter, you can check the coil’s resistance. A very high or low reading shows a coil failure.
- Open coil: infinite resistance on multimeter
- Shorted coil: very low resistance near zero
- Normal coil: resistance value matches relay specs
Contact Wear And Corrosion
Contacts in a relay open or close to allow current flow. Over time, they wear out or get corroded.
Worn or corroded contacts cause poor connection or no connection at all. This can stop the relay from working properly.
- Check contacts visually for damage or rust
- Use multimeter continuity test to check contact function
- No continuity means contacts may be damaged or stuck
Mechanical Problems
Relays have moving parts that can get stuck or broken. Dirt or debris can block the parts from moving.
A relay with mechanical problems might not switch even if the coil works. Testing with a multimeter may show normal coil resistance but no contact change.
- Listen for clicking sound when relay is powered
- No sound may indicate stuck or broken parts
- Check if contacts change state with multimeter while powering coil
Tips For Accurate Testing
Testing relays with a multimeter helps find faults in circuits. Accurate testing saves time and avoids mistakes.
Using the right settings and methods ensures correct results. Follow these tips for better relay testing.
Ensuring Proper Multimeter Settings
Set your multimeter to the correct mode before testing. Use the resistance or continuity setting for relay coils.
Check the multimeter manual if you are unsure about the settings. Wrong settings can give false readings or damage the meter.
- Select Ohmmeter for coil resistance
- Use continuity mode to check switch contacts
- Set voltage mode only if testing relay power
- Ensure probes are connected to correct ports
Avoiding False Readings
False readings happen if the relay is still connected to a circuit. Disconnect the relay before testing.
Clean the relay terminals to remove dirt or corrosion. Dirty contacts may cause wrong results.
- Remove power from the relay circuit
- Disconnect relay from other components
- Wipe terminals with a clean cloth
- Hold probes firmly to avoid loose contact
Testing In Different Conditions
Test the relay in various conditions to check its real performance. Temperature and power affect relay operation.
Try testing the relay when it is cool and after it runs for some time. This shows if it works well in all cases.
- Test relay coil resistance at room temperature
- Check switch contacts when relay is energized
- Test relay after it warms up during use
- Compare results to relay specifications
Credit: www.oreillyauto.com
Frequently Asked Questions
How Do I Test A Relay With A Multimeter?
To test a relay, first set your multimeter to the continuity or resistance mode. Check coil resistance by measuring across coil terminals. Then, apply voltage to the coil and test for continuity between switch terminals. No continuity means a faulty relay.
What Multimeter Setting Is Best For Relay Testing?
Use the continuity or ohms (resistance) setting on your multimeter. Continuity mode confirms if the relay switch closes properly. Resistance mode measures the coil’s resistance to ensure it’s within specifications. Both settings help diagnose relay functionality effectively.
Can A Multimeter Detect A Faulty Relay Coil?
Yes, a multimeter can detect a faulty relay coil by measuring resistance. A healthy coil shows specific resistance, usually between tens to hundreds of ohms. Infinite or zero resistance indicates a broken or shorted coil, signaling a defective relay.
How To Identify Relay Switch Contacts Using A Multimeter?
Identify relay contacts by checking continuity between terminals. When the coil is energized, the switch contacts should close and show continuity. Without coil voltage, normally open contacts show no continuity, while normally closed contacts do. This confirms correct relay operation.
Conclusion
Testing relays with a multimeter is simple and effective. You gain valuable insights into relay functionality. Proper testing ensures safety and efficiency in electrical systems. With clear steps, you can identify issues quickly. This saves time and prevents costly repairs.
Multimeters are essential tools in troubleshooting. Regular checks maintain relay performance. This boosts system reliability. Practicing these techniques makes you more confident. Always ensure your multimeter functions properly. Use this guide to test relays easily. Enjoy the benefits of smooth electrical operations.
Happy testing!