Are you ready to tackle your next plumbing project with confidence? Knowing how to thread pipes correctly can save you time, money, and a lot of frustration.
Whether you’re fixing a leak or building something new, getting the threads right is key to a secure, leak-free connection. In this guide, you’ll discover simple steps and insider tips that make threading pipes easier than you think. Stick with me, and by the end, you’ll have the skills to handle pipe threading like a pro.
Let’s get started!
Credit: dfhydraulics.com
Tools Needed For Pipe Threading
Threading pipes requires the right tools to ensure clean and accurate threads. Using proper equipment saves time and prevents damage.
Below are key tools and materials to prepare before starting any pipe threading job.
Choosing The Right Pipe Threader
Select a pipe threader that fits the pipe size and type. Manual threaders work well for small jobs. Electric threaders speed up larger projects.
- Manual pipe threader for occasional use
- Electric pipe threader for frequent or large jobs
- Dies that match pipe diameter and threading standard
- Threading oil or lubricant for smooth cutting
Essential Accessories And Materials
Along with the threader, you need several accessories to complete the threading process correctly and safely.
| Accessory | Purpose |
| Pipe cutter | Cut pipes to required length |
| Reamer | Remove burrs inside the pipe |
| Threading oil | Lubricate threads to prevent damage |
| Pipe vise | Hold pipes steady during threading |
| Measuring tape | Measure pipe length accurately |
| Wire brush | Clean pipes before threading |
Preparing Pipes For Threading
Preparing pipes correctly is key to good threading. It helps the threads fit tight and last long.
This guide shows how to measure, cut, and clean pipes before threading them.
Measuring And Marking The Pipe
Measure the pipe length carefully with a tape measure. Mark the cutting point clearly using a marker or pencil.
Mark multiple sides of the pipe to ensure a straight cut. Double-check your marks before cutting.
Cutting Pipes Accurately
Use a pipe cutter or a fine-toothed saw for a clean cut. Cut slowly to avoid deforming the pipe.
- Secure the pipe firmly in a vise or clamp.
- Align the cutter with your marks.
- Rotate the cutter around the pipe evenly.
- Tighten the cutter slightly after each rotation.
- Stop cutting when the pipe is fully separated.
Cleaning And Deburring
Remove any dirt, oil, or rust from the pipe surface. Cleaning helps the threading tool cut smoothly.
| Deburring Tool | Description | Purpose |
|---|---|---|
| File | Handheld metal file | Removes sharp edges manually |
| Deburring Blade | Special angled blade | Cleans inside and outside pipe edges |
| Rotary Tool | Powered deburring bit | Speeds up edge smoothing |
Use a deburring tool to smooth both inside and outside edges of the cut pipe. This prevents thread damage.
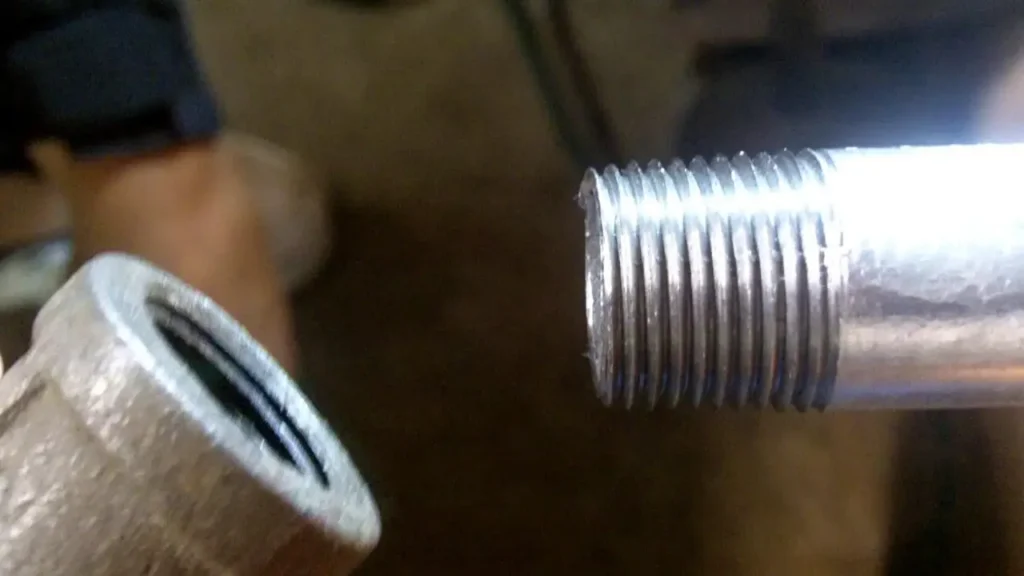
Step-by-step Threading Process
Threading pipes correctly ensures a tight and leak-free fit. This process requires careful preparation and the right tools. Follow these steps to thread pipes safely and accurately.
Each step helps you avoid mistakes and damage to the pipe. Pay close attention to details for the best results.
Securing The Pipe
Start by firmly securing the pipe in a vise. The pipe must not move while threading. Use pipe jaws to avoid marring the surface. Make sure the pipe is held straight and steady.
Aligning The Threader
Place the threading die squarely at the pipe end. Proper alignment prevents uneven threads. Hold the threader level to the pipe axis before turning. This helps create clean and uniform threads.
Applying Cutting Oil
- Apply cutting oil generously to the pipe end
- Use oil designed for threading to reduce friction
- Reapply oil frequently during threading
- Keep the oil on the die and pipe for smooth cutting
Cutting oil protects both the pipe and the threading tool. It helps prevent overheating and produces cleaner threads.
Turning The Threader Properly
| Action | Instruction |
| Start | Turn the threader clockwise with steady pressure |
| Progress | Advance the die slowly, keeping it aligned |
| Backing off | Every full turn, reverse slightly to clear chips |
| Finishing | Continue until thread length is correct |
Turning the threader correctly ensures strong, accurate threads. Backing off helps prevent tool damage and rough threads.
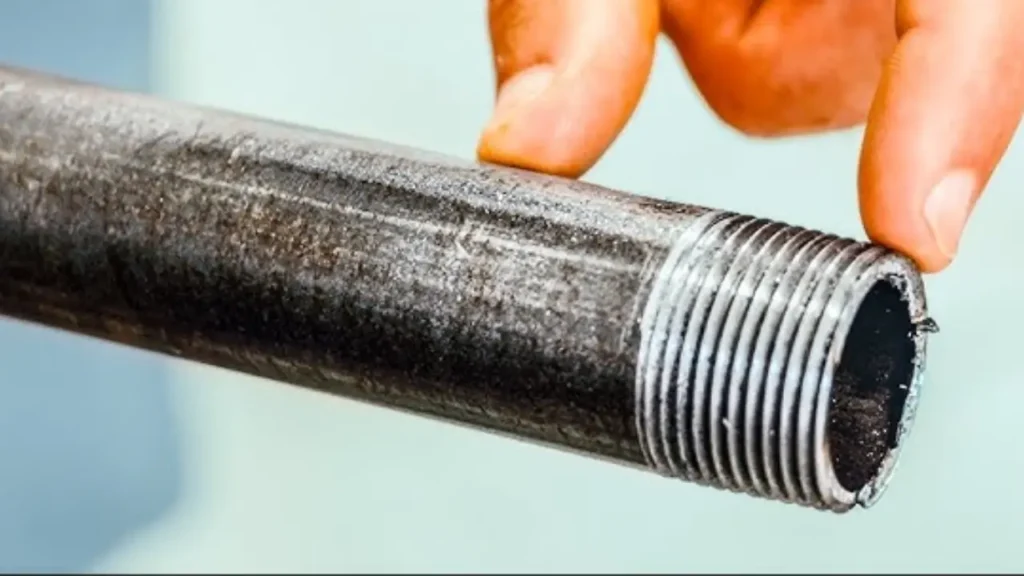
Ensuring Perfect Thread Quality
Threading pipes correctly is important for a strong and leak-free connection. Good thread quality helps pipes fit tightly and last longer.
Focus on the right tools and careful checking during the threading process. This will avoid damage and problems later.
Checking Thread Depth And Pitch
Thread depth must match the pipe size to ensure a tight fit. Too shallow or too deep threads can cause leaks.
Thread pitch is the distance between threads. It should be uniform and fit the matching pipe or fitting.
- Use a thread gauge to measure pitch
- Check thread depth with a caliper
- Compare threads with the fitting before assembly
- Ensure threads are clean and free from debris
Avoiding Common Threading Mistakes
Common mistakes include cross-threading, cutting threads too fast, or using dull tools. These lead to poor quality threads.
Always start threading slowly and keep the tool aligned with the pipe. Stop if you feel resistance or see damage.
- Do not force the threading tool
- Use fresh cutting oil for smooth threads
- Inspect threads for cracks or burrs after cutting
- Clean the pipe before threading
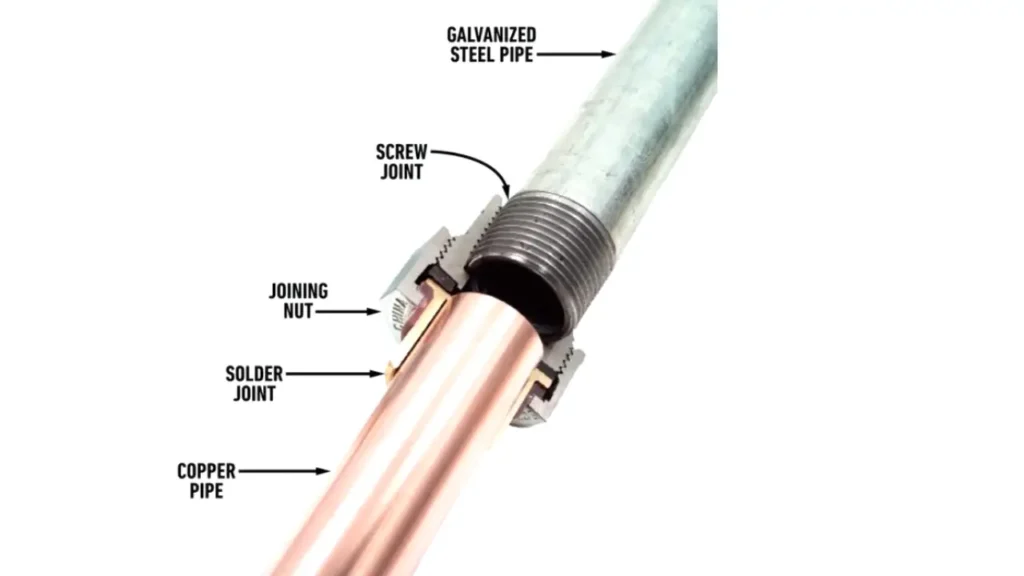
Sealing Techniques For Leak-proof Joints
Creating leak-proof joints in pipe threading is essential for safe plumbing. Proper sealing stops water or gas from escaping the joints. Using the right sealant and method ensures a tight, lasting fit.
This guide explains key sealing techniques: using thread seal tape, applying pipe dope, and combining sealants for extra security.
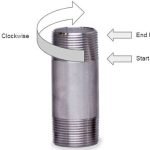
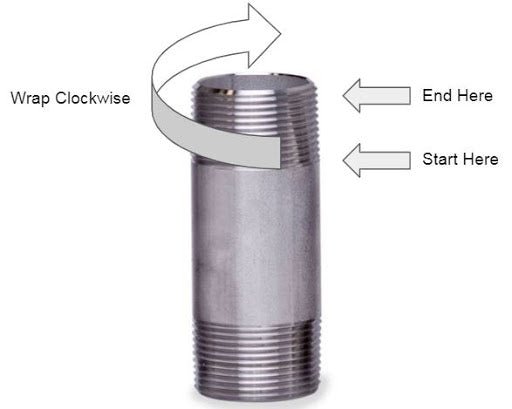
Using Thread Seal Tape
Thread seal tape, also called PTFE tape, wraps around pipe threads. It fills gaps and prevents leaks by creating a tight seal.
- Clean the pipe threads before applying tape.
- Wrap the tape clockwise around the threads three to five times.
- Press the tape into the threads to fit tightly.
- Do not cover the pipe end with tape to avoid blockages.
- Screw the pipes together firmly after taping.
Applying Pipe Dope
Pipe dope is a paste sealant that spreads on pipe threads. It lubricates threads for easier joining and seals gaps to stop leaks.
| Tip | Details |
| Surface Prep | Clean threads of dirt and oil |
| Application | Use a brush to apply an even layer |
| Thread Direction | Apply in the direction of thread tightening |
| Dry Time | Let it set if recommended by manufacturer |
| Safety | Use in well-ventilated areas |
Combining Sealants For Extra Security
Some plumbers use both thread seal tape and pipe dope for a stronger seal. This method adds protection in high-pressure or critical systems.
Here is a simple method to combine both sealants:
- Wrap thread seal tape around the threads as usual.
- Apply a thin layer of pipe dope over the tape.
- Join the pipes tightly to secure the seal.
This combination helps fill all thread gaps and prevents leaks better than using one sealant alone.
Testing And Inspecting Threaded Joints
Threaded joints need careful testing to ensure they hold pressure. Inspecting these joints helps find problems early. This keeps pipes safe and stops leaks.
Proper testing checks the strength of the joint. Inspection shows if the threads fit well and seal tightly. Both steps are important for a secure pipe system.
Pressure Testing Procedures
Pressure testing checks if the threaded joint can handle the system’s pressure. It uses water or air to pressurize the pipes. This reveals weak spots or leaks.
- Close all valves and seal the pipe ends.
- Fill the pipe with water or air slowly.
- Increase pressure to the required test level.
- Hold pressure for the set testing time.
- Watch for pressure drops or visible leaks.
- Release pressure safely after testing.
Identifying And Fixing Leaks
Look closely at each joint for water drops or air bubbles. Leaks often show as wet spots or hissing sounds. Catching leaks early stops damage and waste.
| Leak Sign | What It Means | Fix Method |
| Water droplets | Thread seal failure | Reapply thread sealant and tighten |
| Air bubbles | Small gap in threads | Use thread tape and retighten |
| Hissing sound | High-pressure leak | Replace damaged pipe or fitting |
| Rust or corrosion | Long-term leak | Clean and treat, or replace parts |
Maintenance Tips For Threaded Pipes
Threaded pipes need regular care to stay safe and work well. Maintenance helps avoid leaks and damage.
Following simple steps can extend the life of your pipes and save repair costs later.
Regular Inspection Schedules
Check threaded pipes often to find problems early. Inspections help catch leaks, cracks, and loose threads.
- Inspect pipes every 3 months in dry areas.
- Inspect pipes monthly in wet or corrosive environments.
- Look for signs of wear, rust, and thread damage.
- Test pipe joints for tightness and leaks.
- Record inspection dates and findings for future reference.
Handling Corrosion And Wear
Corrosion and wear weaken pipes. Act fast to fix or replace damaged parts.
| Cause | Effect | Prevention |
| Moisture | Rust and thread damage | Apply pipe sealant and use rust-resistant materials |
| Friction | Thread wear and leaks | Use proper tools and avoid overtightening |
| Chemicals | Material degradation | Choose chemical-resistant pipes and coatings |
| Temperature | Expansion and cracking | Use pipes rated for temperature range |
Credit: dfhydraulics.com
Credit: dfhydraulics.com
Frequently Asked Questions
What Tools Are Needed To Thread Pipes Correctly?
You need a pipe threader, cutting oil, a pipe vise, and a reamer. These tools ensure clean, accurate threads without damaging the pipe.
How Do I Prepare A Pipe For Threading?
Clean the pipe end and remove burrs using a reamer. Apply cutting oil to reduce friction and improve thread quality.
What Is The Correct Threading Technique For Pipes?
Secure the pipe in a vise, align the threader squarely, and turn it steadily clockwise. Apply oil regularly for smooth threading.
How Do I Avoid Common Threading Mistakes?
Use proper tools, keep the threader aligned, and apply cutting oil. Avoid forcing the threader to prevent damaged or uneven threads.
Conclusion
Threading pipes correctly ensures a secure and leak-free fit. Follow each step with care. Use the right tools for the job. Measure and cut pipes accurately. Clean threads thoroughly before assembly. Always check for leaks after installation. Practice makes perfect.
With time, threading becomes easier. Remember, safety first. Wear protective gear when handling tools. Threading pipes may seem challenging. But with patience, it becomes manageable. Keep learning and improving your skills. Soon, you’ll thread pipes like a pro. Your plumbing projects will be successful and efficient.
Enjoy the process and take pride in your work.