
Are you ready to transform your worn-out furniture into stunning pieces that look brand new? Using a belt sander might just be the secret weapon you need.
Picture this: effortlessly smoothing out rough surfaces, revealing the hidden beauty of wood beneath layers of old paint or varnish. It sounds like magic, but with the right guidance, it’s completely achievable. In this guide, we’ll walk you through the step-by-step process of using a belt sander for finishing furniture.
Whether you’re a DIY novice or a seasoned pro, you’ll discover tips and techniques that can dramatically enhance the look of your furniture. Plus, you’ll learn how to avoid common mistakes that could cost you time and money. Curious to see how you can elevate your woodworking projects? Keep reading to unlock the secrets of perfect furniture finishes.
Credit: www.sumake.com
Choosing The Right Belt Sander
A belt sander helps smooth wood fast. Picking the right one makes your furniture look great.
Learn how to choose the best belt sander for finishing your furniture projects.
Types Of Belt Sanders
There are several belt sanders to pick from. Each fits different tasks and wood types.
- Handheld Belt Sanders:Easy to move and good for small to medium jobs.
- Stationary Belt Sanders:Fixed in place, great for precise sanding and large workpieces.
- Detail Belt Sanders:Small and narrow belts for tight corners and edges.
Selecting The Right Grit
Grit size affects how smooth your furniture finish will be. Use the right grit for each step.
| Grit Size | Use |
|---|---|
| 40-60 | Remove old finish or rough wood fast |
| 80-120 | Smooth the wood surface for shaping |
| 150-220 | Final sanding before applying finish |
Safety Features To Consider
Look for safety features to protect yourself while working with a belt sander.
- Automatic belt tracking to keep the belt centered
- Dust collection ports to reduce sawdust in the air
- Safety switches that prevent accidental start
- Comfortable grips to keep control during sanding

Credit: 100things2do.ca
Preparing Your Workspace
Using a belt sander safely starts with a well-prepared workspace. This makes your work easier and keeps you safe.
Organize your area to avoid accidents and set up tools to handle dust and protect yourself.
Clearing And Organizing
Clear the workbench and floor of tools and clutter. Keep only the furniture piece and the sander in the workspace.
- Remove unnecessary items from the work area
- Arrange lighting to see all surfaces clearly
- Keep cords and cables away from the sanding path
- Secure the furniture piece to avoid movement
Dust Collection Setup
Dust can harm your lungs and make a mess. Connect your belt sander to a dust collector or vacuum.
| Dust Control Method | Benefits |
| Vacuum Attachment | Captures dust at the source |
| Dust Collection Bag | Collects dust but may fill quickly |
| External Dust Extractor | High capacity, good for large jobs |
Personal Protective Equipment
Wear protective gear to keep dust and debris from hurting you.
- Safety glasses to protect your eyes
- Dust mask or respirator to avoid breathing dust
- Hearing protection to reduce noise exposure
- Gloves to protect your hands from splinters
Prepping The Furniture Surface
Preparing the furniture surface is important before using a belt sander. It helps create a smooth base for finishing.
Taking time to prep ensures better results and a cleaner final look on your furniture.
Removing Old Finish
Start by removing any old paint, varnish, or stain. This clears the surface for sanding.
Use a chemical stripper or sanding with coarse grit paper to strip the finish.
- Apply stripper evenly if using chemicals
- Let it sit as directed on the label
- Scrape off loosened finish carefully
- Sand rough spots with coarse grit sandpaper
Repairing Surface Imperfections
Check the surface for dents, scratches, or holes. Fix these before sanding with the belt sander.
Use wood filler or putty to fill imperfections. Let it dry completely before sanding.
- Choose filler matching your wood color
- Apply with a putty knife smoothly
- Remove excess filler around edges
- Allow enough time for drying
Marking Sanding Areas
Mark areas that need extra sanding with a pencil or tape. This guides your work with the belt sander.
Marking helps you focus on rough or uneven spots and avoid over-sanding smooth areas.
- Use light pencil marks for visibility
- Mark edges and corners carefully
- Highlight deep scratches or stains
- Check marks as you sand and adjust
Sanding Techniques For Smooth Finish
Using a belt sander correctly helps you get a smooth finish on furniture. It removes rough spots and evens out surfaces quickly.
Focus on good sanding habits to avoid marks and damage. This guide covers key sanding techniques for the best results.
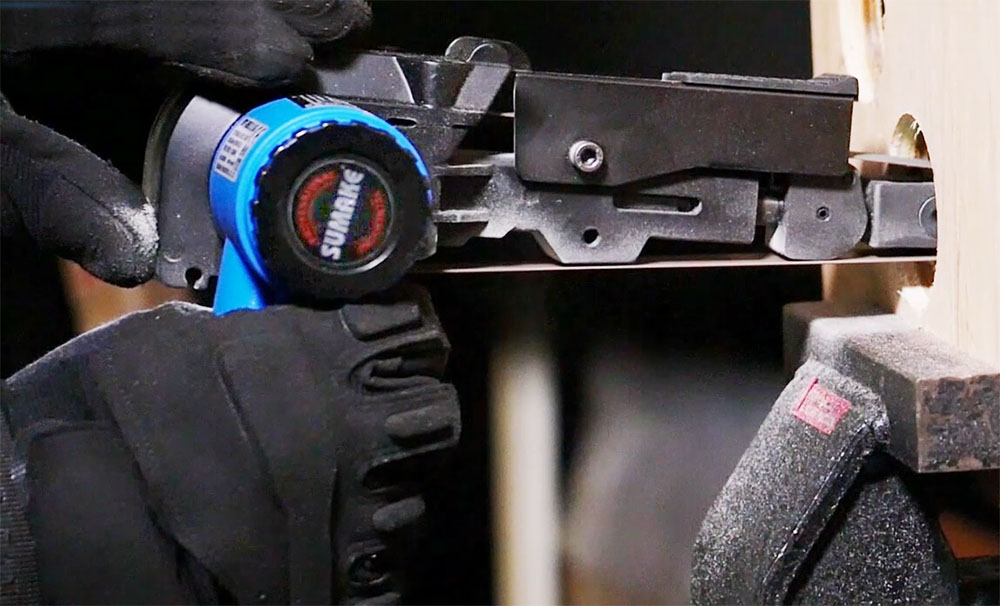
Proper Belt Sander Handling
Hold the belt sander firmly with both hands. Keep it flat against the wood to avoid gouges. Move the sander steadily without forcing it.
- Always wear safety gear like goggles and a mask.
- Check the belt is tight and aligned before starting.
- Start the sander off the wood, then lower it gently onto the surface.
- Keep the sander moving to prevent uneven sanding.
- Turn off the sander before setting it down.
Sanding With The Grain
Always sand in the direction of the wood grain. This reduces scratches and keeps the wood fibers smooth. Cross-grain sanding can leave visible marks.
| Grain Direction | Effect on Finish |
| With the grain | Smooth surface, no visible scratches |
| Against the grain | Rough texture, noticeable scratches |
| Diagonal to grain | Uneven sanding, hard to fix |
Controlling Pressure And Speed
Apply light, even pressure when sanding. Heavy pressure can cause deep scratches or damage the wood. Keep the sander speed moderate and steady.
Tips to control pressure and speed:
- Let the sander do the work; do not push hard.
- Move the sander in slow, smooth strokes.
- Adjust speed if your sander has settings, using a medium pace.
- Check your work often to avoid over-sanding.
Avoiding Common Mistakes
Using a belt sander can speed up furniture finishing. It also needs care to avoid mistakes.
Common errors like gouges, heat damage, and uneven sanding can ruin your work. Learn to prevent these.
Preventing Gouges And Dents
Gouges happen when you press too hard or keep the sander still. Move the sander smoothly and gently.
Always keep the sander flat on the surface. Avoid sanding corners or edges too long.
- Use light, even pressure
- Keep the sander moving at all times
- Check the belt condition before use
- Avoid sanding one spot repeatedly
Managing Heat Build-up
Heat can burn wood and damage the finish. It builds up when sanding too long in one spot.
Let the sander do the work without heavy pressure. Take breaks to cool the sander and wood.
- Keep the sander moving constantly
- Use a lower speed if possible
- Take short pauses to cool down
- Check the wood for heat marks often
Maintaining Even Sanding
Uneven sanding creates rough spots or low areas. Always sand in the direction of the wood grain.
Use overlapping strokes to cover the entire surface evenly. Keep the belt sander flat and moving.
- Sand with the wood grain direction
- Use smooth, overlapping passes
- Check your work often for uneven spots
- Switch to finer grit for a smooth finish
Finishing Touches After Sanding
After using a belt sander on your furniture, some extra steps help improve the final look. These steps clean the surface and prepare it for finishing.
Paying attention to these details gives your furniture a smooth and polished appearance. Let’s explore how to clean dust, do fine sanding, and apply finishes.
Cleaning Dust Residue
Dust from sanding can settle in cracks and on surfaces. Removing this dust is important before any finishing work. Use a soft brush to sweep off loose dust first.
- Use a vacuum with a brush attachment to remove fine dust.
- Wipe the surface with a tack cloth to catch remaining particles.
- Make sure the furniture is dry and free of dust before moving on.
Fine Sanding With Hand Tools
After belt sanding, use hand tools for smooth finishing. Fine sanding removes small scratches and evens the surface.
- Choose fine-grit sandpaper, such as 220 grit.
- Sand along the wood grain to avoid scratches.
- Use sanding blocks or sponges for even pressure.
- Check the surface often to avoid over-sanding.
Applying Sealers Or Stains
Sealers and stains protect the wood and add color or shine. Apply them carefully after sanding and cleaning.
| Finish Type | Purpose | Application Tip |
| Sealer | Protects wood from moisture | Apply with a brush or cloth evenly |
| Stain | Adds color to wood | Test on a scrap piece before use |
| Topcoat | Gives shine and extra protection | Apply thin coats, let dry fully |
Maintaining Your Belt Sander
Keeping your belt sander in good shape helps it work well. Regular care makes sanding easier and safer.
Simple maintenance tasks will save you time and money. Let’s look at how to care for your tool.
Replacing Sanding Belts
Change the sanding belt when it wears out or tears. Using a worn belt can damage your project and tool.
Follow these steps to replace the belt safely:
- Unplug the sander to avoid accidents.
- Release the belt tension lever to loosen the old belt.
- Slide off the worn belt carefully.
- Align the new belt on the rollers, following the arrow direction.
- Tighten the tension lever to secure the new belt.
- Plug in the sander and test the belt for proper tracking.
Cleaning And Storage Tips
Clean your belt sander after each use. Dust and debris can clog the machine and reduce its life.
- Use a brush or compressed air to remove dust from vents and moving parts.
- Wipe the sander with a dry cloth to remove surface dirt.
- Check the sanding belt for stuck debris and clean it if needed.
- Store the sander in a dry, cool place away from moisture.
- Keep the power cord coiled neatly to avoid damage.
Troubleshooting Common Issues
| Problem | Possible Cause | Solution |
|---|---|---|
| Belt slips off rollers | Belt tension too loose | Adjust tension lever to tighten belt |
| Sander vibrates too much | Worn or damaged belt | Replace the sanding belt |
| Motor overheats | Clogged vents or heavy use | Clean vents and allow cool down time |
| Sander does not start | Power supply or switch issue | Check cord, plug, and switch function |

Credit: www.familyhandyman.com
Frequently Asked Questions
How Do I Prepare Furniture For Belt Sanding?
Clean the furniture surface and remove any nails or screws. Secure loose parts and choose the right sandpaper grit. Start sanding with coarse grit and gradually move to finer grits for a smooth finish.
What Safety Gear Is Needed For Belt Sanding?
Wear safety goggles to protect your eyes. Use a dust mask to avoid inhaling particles. Gloves and ear protection are also recommended to ensure full safety during sanding.
Can A Belt Sander Damage Wood Furniture?
Yes, improper use can cause gouges or uneven surfaces. Always keep the sander moving and avoid applying excessive pressure to prevent damage to the wood.
What Grit Sandpaper Is Best For Finishing Furniture?
Start with 80-120 grit for initial sanding. Move to 150-220 grit for smoothing. Use 320 grit or higher for the final finish on delicate surfaces.
Conclusion
Using a belt sander can make furniture finishing easier and faster. Always keep the sander moving to avoid marks. Choose the right grit sandpaper for a smooth surface. Safety matters—wear goggles and a mask to protect yourself. Take your time and check your progress often.
With practice, your furniture will look clean and polished. Enjoy the process and see the great results you create.