
Ever found yourself staring at a rough, uneven surface and wishing you had the skills to make it perfectly smooth? You’re not alone.
Whether you’re a seasoned DIY enthusiast or just beginning to explore the world of home improvement, learning how to use a belt sander for leveling surfaces can be a game-changer. Imagine the satisfaction of transforming a bumpy tabletop or a rugged floor into a sleek masterpiece.
It’s not just about aesthetics; it’s about unlocking the potential of your projects and taking pride in your handiwork. In this guide, you’ll discover the secrets to wielding a belt sander with confidence, ensuring that every surface you touch turns out impeccably level. Ready to elevate your skills and make your projects shine? Let’s dive in.

Credit: www.familyhandyman.com
Choosing The Right Belt Sander
Using a belt sander helps level surfaces quickly and smoothly. Picking the right belt sander is important for good results.
Different projects need different types of belt sanders. Choosing the correct one saves time and effort.
Types Of Belt Sanders
There are several types of belt sanders for different jobs. Each type fits specific sanding needs.
- Handheld Belt Sanders:Portable and easy to use for small to medium surfaces.
- Stationary Belt Sanders:Fixed to a bench for precise control on small pieces.
- Wide Belt Sanders:Used in workshops for large, flat surfaces and heavy sanding.
Selecting The Correct Grit
Sanding belts come in different grit sizes. The grit number shows how coarse or fine the belt is.
Use coarse grits for fast material removal. Fine grits create smooth finishes.
- Coarse Grit (40-60):Remove rough wood or old finishes quickly.
- Medium Grit (80-120):Smooth surfaces and remove small scratches.
- Fine Grit (150-220):Prepare surfaces for finishing or painting.
Power And Size Considerations
Power and size affect how well a belt sander works on different tasks. Choose based on your project needs.
Higher power helps with tough sanding jobs. Larger belt sizes cover more area faster.
- Power:Measured in amps or watts, more power means stronger sanding.
- Belt Size:Common sizes are 3×18 inches or 3×21 inches.
- Weight:Lighter sanders are easier to control but may have less power.
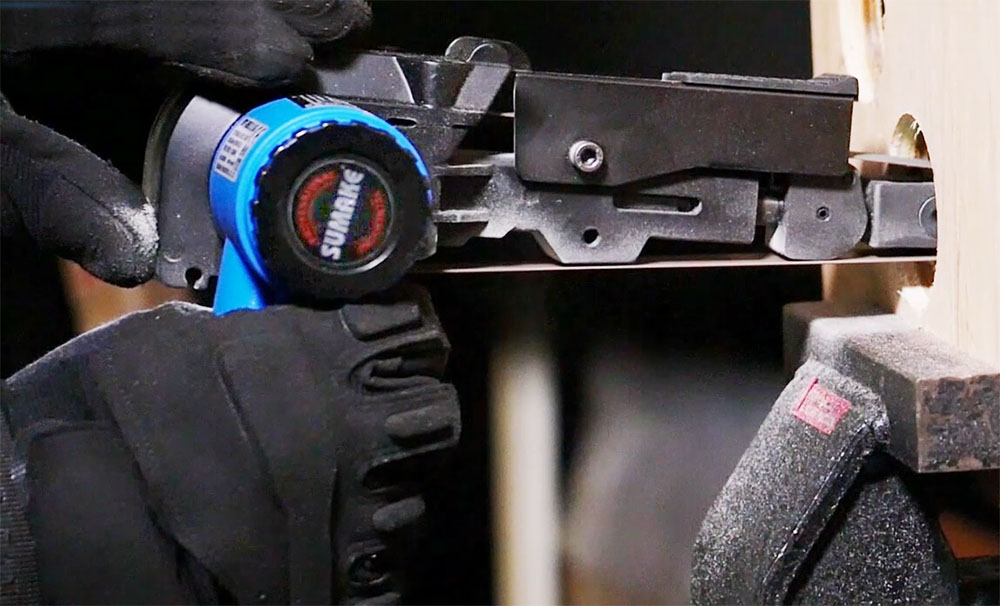
Credit: www.sumake.com
Preparing The Surface
Preparing the surface is important before using a belt sander. It helps get smooth and even results. Proper preparation saves time and avoids damage.
Follow clear steps to clean, mark, and protect yourself. This makes the sanding process safer and more effective.
Cleaning And Securing The Workpiece
Remove dirt, dust, and debris from the surface. This prevents scratches and helps the sander work well. Use a brush or cloth for cleaning.
Secure the workpiece firmly to your workspace. Use clamps to hold it tight. A stable piece stops slipping and ensures even sanding.
- Clear the surface of dust and dirt
- Check for nails or screws sticking out
- Use clamps to hold the workpiece in place
- Make sure the workpiece does not move
Marking High Spots
Identify uneven or raised areas before sanding. Mark these spots with a pencil or chalk. This guides you to focus on leveling them.
| Mark | Purpose |
|---|---|
| Circle | Shows high spots to sand down |
| Cross | Marks edges needing attention |
| Lines | Indicate uneven areas over large surfaces |
Safety Gear Essentials
Wear safety gear to protect yourself during sanding. A belt sander creates dust and can cause injury if not careful.
- Safety glasses to protect your eyes
- Dust mask to avoid breathing in particles
- Ear protection to reduce noise impact
- Gloves to protect your hands
Setting Up The Belt Sander
Setting up a belt sander correctly is important for good results. A proper setup helps you level surfaces safely and smoothly.
This guide covers installing the belt, adjusting speed settings, and checking alignment before you start sanding.
Installing And Tensioning The Belt
First, place the sanding belt on the rollers. Make sure the arrows on the belt match the roller’s rotation direction.
Next, tighten the belt by using the tension lever or knob. The belt should be firm but not overly tight.
- Turn off and unplug the sander before installing the belt
- Fit the belt evenly on both rollers
- Use the tension control to secure the belt
- Check that the belt is centered on the rollers
- Adjust if the belt slips or moves during operation
Adjusting The Speed Settings
Different surfaces need different speeds. Lower speeds work well for soft woods. Higher speeds suit harder materials.
| Speed Setting | Use For |
|---|---|
| Low | Soft wood, delicate surfaces |
| Medium | General sanding tasks |
| High | Hardwood, heavy material removal |
Checking For Proper Alignment
Proper alignment ensures the belt runs straight and does not drift off the rollers.
Turn on the sander briefly and watch the belt. It should stay centered on the rollers.
- If the belt moves to one side, use the tracking knob to adjust it.
- Make small adjustments and check again.
- Stop if the belt slips or makes noise.
- Repeat until the belt stays centered during use.

Credit: www.homebuilding.co.uk
Techniques For Leveling Surfaces
Using a belt sander correctly helps you level rough surfaces quickly. It removes uneven spots to create a smooth finish.
Following proper techniques prevents damage and ensures an even surface. Focus on grit choice, pressure, and sanding motion.
Starting With Coarse Grit
Begin sanding with a coarse grit belt to remove large bumps and high spots. This grit cuts material fast but leaves rough marks.
- Choose a coarse grit belt, such as 40 or 60 grit.
- Turn on the sander and place it flat on the surface.
- Move the sander gently over high areas to reduce them.
- Check the surface often to avoid sanding too much in one spot.
Maintaining Even Pressure
Apply steady, even pressure to avoid creating dips or grooves. Uneven pressure can cause an uneven finish that needs more sanding.
| Pressure Level | Effect on Surface |
| Too Light | Minimal material removal, slow progress |
| Even & Moderate | Consistent material removal, smooth surface |
| Too Heavy | Uneven sanding, possible gouges |
Using Smooth, Controlled Strokes
Move the belt sander in slow, smooth strokes. Avoid stopping in one spot to prevent over-sanding.
- Keep the sander flat and level on the surface.
- Use long, overlapping strokes for even sanding.
- Guide the sander along the grain direction if sanding wood.
- Lift the sander at the end of each stroke to avoid marks.
Avoiding Common Mistakes
Using a belt sander can make surfaces smooth and even. Many people make mistakes that cause damage or poor results. Avoiding these errors saves time and effort.
Learn how to use a belt sander right by preventing common problems. This guide covers key tips to improve your sanding work.
Preventing Gouges And Uneven Spots
Pressing too hard with a belt sander can cause deep gouges. Keep steady pressure and let the sander do the work. Move the sander smoothly in straight lines for even results.
Watch your speed and avoid stopping in one spot. This helps prevent uneven sanding and rough patches on the surface.
- Hold the sander flat and steady
- Do not push down too hard
- Keep the sander moving constantly
- Use even, straight strokes
Managing Belt Wear
Belt wear reduces sanding quality and can cause damage. Change the sanding belt when it looks worn or clogged. Using a clean belt keeps the sander working well.
Check the belt often during work. Using the right grit for your surface helps the belt last longer.
- Inspect belts before starting
- Replace belts when worn or torn
- Use the correct grit for the job
- Keep belts clean from dust and debris
Handling Heat Buildup
Heat buildup can burn the wood or damage the sander. Avoid pressing too hard and keep the sander moving to reduce heat. Take breaks to let the tool cool down if needed.
Use sharp sanding belts and work in a well-ventilated area to help control heat. Watch for smoke or discoloration as signs of overheating.
- Do not apply heavy pressure
- Keep the sander moving constantly
- Take short breaks to cool the tool
- Use sharp belts and good ventilation
- Stop if you see smoke or burning smell
Finishing Touches
Using a belt sander to level surfaces is just the start. The finishing touches make the surface smooth and ready for use.
This section explains how to switch to finer grits, check surface flatness, and keep your sander clean and well-maintained.
Switching To Finer Grits
After rough sanding, use finer grit belts to smooth the surface. Finer grits remove scratches left by coarse belts.
- Start with medium grit belts around 80-120 grit.
- Move to finer grits such as 150-220 for a smoother finish.
- Use even finer belts if needed for polishing or preparing for paint.
- Change belts carefully to avoid damage to the sander.
Checking Surface Flatness
It is important to check if the surface is flat after sanding. This helps avoid uneven spots or dips.
| Tool | Purpose |
| Straightedge | Check for flatness by laying it across the surface |
| Feeler Gauge | Measure gaps between the surface and straightedge |
| Level | Ensure the surface is horizontal or at desired angle |
Cleaning And Maintaining The Sander
Proper cleaning and maintenance keep your belt sander working well and safe to use.
- Unplug the sander before cleaning.
- Remove dust and debris from the belt and motor area.
- Inspect the belt for wear and replace if damaged.
- Check the tension and tracking of the belt regularly.
- Lubricate moving parts as recommended by the manufacturer.
Frequently Asked Questions
How Do I Prepare A Surface Before Using A Belt Sander?
Clean the surface by removing dirt and debris. Secure the workpiece firmly to avoid movement. Choose the right grit sandpaper for initial smoothing.
What Grit Sandpaper Is Best For Leveling Surfaces?
Start with coarse grit (40-60) to remove material fast. Progress to medium grit (80-120) for smoothing. Finish with fine grit (150-220) for a polished look.
How Do I Control A Belt Sander For Even Leveling?
Hold the sander firmly with both hands. Move it steadily along the surface in the grain direction. Avoid pressing too hard to prevent gouges or uneven spots.
Can A Belt Sander Be Used On All Materials?
Belt sanders work well on wood, some plastics, and metals. Avoid using on soft or delicate materials to prevent damage. Always check material compatibility before sanding.
Conclusion
Using a belt sander makes leveling surfaces easier and faster. Always keep the sander moving to avoid uneven spots. Choose the right grit for the best results. Wear safety gear to protect your eyes and hands. Practice on scrap wood before starting your main project.
With patience and care, your surface will become smooth and even. This tool saves time and effort when used correctly. Try these tips, and you will see the difference in your work. Keep sanding simple and steady for great results every time.