If you’ve ever struggled with cutting wires cleanly or damaging the inner metal while trying to strip the insulation, you’re not alone. Using a cable stripper the right way can save you time, effort, and frustration.
Imagine how much easier your projects would be if every wire was perfectly stripped, ready to connect without any hassle. You’ll learn simple, clear steps to use a cable stripper like a pro, even if you’ve never tried it before.
Keep reading to master this essential skill and make your wiring tasks smooth and safe.
Choosing The Right Cable Stripper
Using the correct cable stripper makes wire stripping easier and safer. Picking the right tool protects the wire and helps you work faster.
There are many types of cable strippers. Choosing one depends on the wire size and the job you need to do.
Types Of Cable Strippers
Cable strippers come in different styles. Each type fits certain tasks and wire types better.
- Manual Strippers:Simple tools you squeeze to strip wires. Good for small jobs and thin wires.
- Adjustable Strippers:These let you set the blade depth. They work well with different wire sizes.
- Automatic Strippers:These grip and strip the wire quickly. They save time for larger projects.
- Rotary Strippers:You twist these around the wire to cut the insulation. Useful for thicker cables.
Selecting Based On Wire Gauge
Wire gauge means the thickness of the wire. Using the right stripper for the gauge stops damage to the wire core.
Check the stripper’s gauge range before buying. Some tools work for a wide range, others for specific sizes only.
- Thin wires (22-26 gauge) need delicate strippers to avoid cutting the wire.
- Medium wires (14-20 gauge) work well with adjustable or automatic strippers.
- Thick wires (10 gauge and above) need strong strippers like rotary or heavy-duty types.
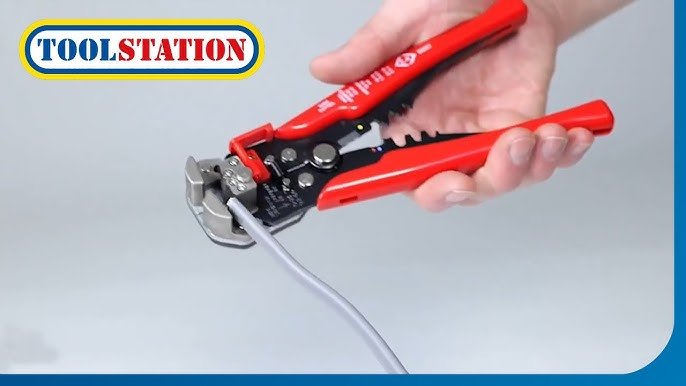
Credit: tradefoxapp.com
Preparing Your Workspace
Before using a cable stripper, set up a clean workspace. A tidy area helps you work safely and faster.
Good lighting and enough space make the task easier. Keep distractions away to focus on your work.
Safety Precautions
Safety is very important when working with wires and tools. Wear gloves to protect your hands.
Make sure no power runs through the wires before you start stripping. Use insulated tools if possible.
- Wear safety glasses to protect your eyes
- Keep your fingers away from the blade
- Work in a well-lit area to see clearly
- Check wires for power before handling
- Keep a first aid kit nearby just in case
Organizing Tools And Materials
Gather all tools and materials before starting. This includes your cable stripper, wires, and any other needed items.
Arrange everything within reach to avoid interruptions. Use trays or containers to keep small parts organized.
- Cable stripper
- Wires to strip
- Wire cutters or scissors
- Electrical tape or connectors
- Tray or container for wire pieces
Identifying The Cable And Wire Type
Knowing the type of cable and wire is important before using a cable stripper. Different wires need different handling. This helps protect the wire and ensures safety.
This guide explains common wire materials and insulation varieties. You will learn how to recognize them to use your cable stripper correctly.
Common Wire Materials
Wires are made from various materials. Each material has unique features. Copper and aluminum are the most common types used in wiring.
- Copper:Copper wires are flexible and conduct electricity well. They are the most popular for home wiring.
- Aluminum:Aluminum wires are lighter and cheaper. They are less flexible and require careful stripping.
- Steel:Steel wires are strong but less conductive. They are used in special cases like armoring cables.
- Tinned Copper:Copper coated with tin to resist corrosion. Used in marine and outdoor wiring.
Insulation Varieties
Wire insulation protects the wire and users from electrical shocks. Insulation types vary by material and thickness. Knowing the insulation type helps set the stripper blade correctly.
| Insulation Type | Description | Common Use |
| PVC (Polyvinyl Chloride) | Flexible and durable plastic insulation | General purpose wiring |
| Rubber | Soft, heat-resistant insulation | Outdoor and heavy-duty cables |
| Teflon (PTFE) | High heat and chemical resistance | High-performance electronics |
| XLPE (Cross-linked Polyethylene) | Strong and moisture-resistant | Power cables and underground wiring |
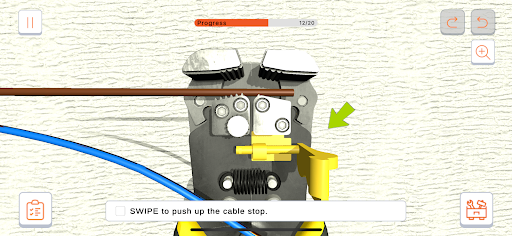
Credit: www.knipex.com
Adjusting The Cable Stripper
Adjusting a cable stripper properly helps you strip wires safely and cleanly. It ensures you do not cut the wire strands inside.
Two main adjustments are important: setting the blade depth and adjusting the grip. These changes fit the tool to your wire type.
Setting The Blade Depth
The blade depth controls how deep the cutter goes into the wire’s insulation. Setting it right stops damage to the wire inside.
To set the blade depth, check if your stripper has a screw or dial. Turn it slowly to increase or decrease blade exposure.
- Start with a shallow blade depth.
- Test on a scrap wire to see if insulation is cut cleanly.
- Increase depth slightly if insulation is not fully cut.
- Avoid setting too deep to protect the wire strands.
Adjusting The Grip
The grip adjustment controls how tightly the stripper holds the wire. Correct grip keeps the wire steady without crushing it.
Most strippers have an adjustable clamp or spring tension. Change the grip to fit different wire sizes and types.
- Loosen the grip for soft or thin wires.
- Tighten the grip for thick or stiff wires.
- Test by holding the wire and feeling if it slips or gets squished.
- Adjust until the wire is held firm but not damaged.
Stripping The Cable Step-by-step
Using a cable stripper helps remove the outer insulation from wires safely. It makes working with wires easier and cleaner.
Follow these steps to strip a cable correctly with a cable stripper.
Positioning The Wire
Hold the wire firmly and place it inside the cable stripper’s notch. The notch should match the wire size for a clean cut.
Make sure the part of the wire you want to strip is lined up with the blade inside the tool.
Rotating And Cutting
Squeeze the handles of the cable stripper to grip the insulation. Rotate the tool around the wire smoothly.
Keep rotating until the blade cuts through the insulation all around the wire without damaging the metal inside.
Removing The Insulation
After cutting, pull the cable stripper away from the wire end. The insulation should slide off easily.
If needed, gently pull the loose insulation with your fingers to fully expose the wire.
Troubleshooting Common Issues
Using a cable stripper for wires may seem easy, but problems can happen. Knowing how to fix these issues helps protect your wires. This guide covers common troubles and how to solve them.
We focus on avoiding wire damage and handling tough insulation. Follow these tips to get better results with your cable stripper.
Avoiding Wire Damage
Wire damage often occurs when the stripper blade is too deep or the wire is pulled too hard. This can cut into the wire strands and reduce conductivity.
- Adjust the blade depth to match the wire thickness.
- Hold the wire steady while stripping to avoid bending or breaking.
- Use smooth, steady pressure instead of quick jerks.
- Inspect the stripped wire for cuts or nicks before use.
- Replace dull blades regularly to keep cuts clean.
Dealing With Tough Insulation
Some wires have thick or hard insulation that is difficult to strip. Using the wrong technique can damage the wire or make the job harder.
| Challenge | Solution |
| Insulation too thick to cut | Use a stripper with adjustable blades or a specialized tool. |
| Insulation slipping during strip | Hold the wire firmly or use a clamp to secure it. |
| Blade not cutting through insulation | Sharpen or replace the blade to improve cutting. |
| Wire strands damaged by excessive force | Apply gentle, repeated cuts instead of one strong cut. |
Maintaining Your Cable Stripper
Keeping your cable stripper in good shape helps it work well for a long time. Simple care and checks prevent problems.
Regular maintenance makes stripping wires safe and easy. Follow these tips to keep your tool ready.
Cleaning Tips
Clean your cable stripper after each use to remove dirt and wire bits. This stops rust and keeps blades sharp.
- Use a dry cloth to wipe the tool’s surface.
- Remove stuck wire pieces with a small brush.
- Apply a drop of machine oil on moving parts to prevent rust.
- Avoid water or harsh chemicals that can damage the metal.
Blade Replacement
Dull blades make stripping wires hard and unsafe. Change blades when they become blunt or damaged.
| Sign of Blade Wear | Action to Take |
| Wire insulation tears or rips | Replace the blade immediately |
| Blade feels rough or uneven | Check blade edge and replace if needed |
| Tool requires more force to cut | Inspect blade and change if dull |
| Visible chips or cracks on blade | Stop using and replace blade |

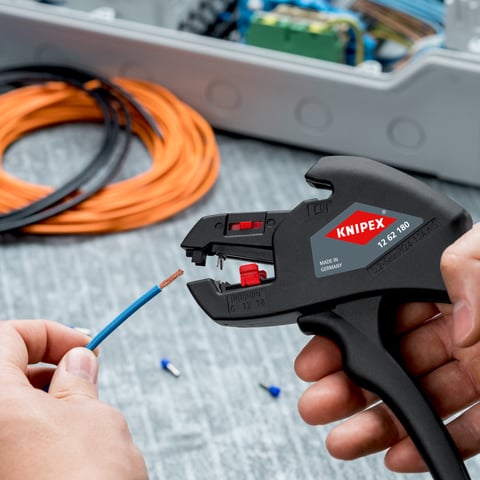
Credit: www.youtube.com
Frequently Asked Questions
What Is The Purpose Of A Cable Stripper For Wires?
A cable stripper removes insulation from wires without damaging the metal inside. It ensures clean, precise stripping for safe electrical connections and reduces the risk of wire damage during installation or repair.
How Do You Properly Use A Cable Stripper?
To use a cable stripper, place the wire in the correct notch, squeeze the handles, and pull off the insulation. This method prevents wire damage and prepares the wire for connection or termination.
Can A Cable Stripper Work On All Wire Types?
Most cable strippers work on common wire types like copper and aluminum. However, check the stripper’s specifications to ensure compatibility with wire gauge and insulation thickness for best results.
Why Is It Important To Strip Wires Correctly?
Proper wire stripping ensures solid electrical connections and prevents short circuits. Incorrect stripping can damage wires, cause poor conductivity, and lead to safety hazards like electrical fires.
Conclusion
Mastering the cable stripper makes wire handling easier. Always ensure you select the right tool for your wire type. Practice on scrap wires to perfect your technique. Stay safe by wearing protective gear. Avoid using excessive force to prevent wire damage.
Regularly check your tools for wear and tear. Store them properly to extend their life. Consistent practice leads to improved skills over time. Remember, patience is key. With these tips, wire stripping becomes a smooth process. Enjoy the efficiency and neatness in your projects.
Happy stripping!