If you want your cabinets to look professional and fit perfectly, knowing how to use a carpenter’s square is a game-changer. This simple tool can help you make precise measurements and ensure every corner is just right.
Whether you’re building new cabinets or fixing old ones, mastering the carpenter’s square will save you time, reduce mistakes, and boost your confidence. Keep reading, and you’ll discover easy steps to use this tool like a pro—no experience needed. Your next cabinet project is about to get a whole lot easier.
Choosing The Right Carpenter’s Square
Using a carpenter’s square correctly helps build cabinets with precision. Picking the right square is important for good results. This guide explains how to choose the best carpenter’s square for cabinet work.
Consider the type, material, and size of the square. Each affects how easy and accurate your work will be.
Types Of Carpenter’s Squares
There are several types of carpenter’s squares. Each type suits different tasks in cabinet making. Knowing these helps you select the right tool.
- Try Square:Used to check right angles and mark straight lines.
- Combination Square:Has a ruler and adjustable head for measuring and marking angles.
- Speed Square:A triangular tool useful for quick marking and measuring.
- Framing Square:Large L-shaped tool for measuring wide boards and making layout lines.
Materials And Durability
Carpenter’s squares come in different materials. The material affects how long the tool lasts and how well it holds its shape.
| Material | Durability | Common Use |
| Steel | High | Professional and heavy use |
| Aluminum | Medium | Lightweight and easy to handle |
| Plastic | Low | Basic and occasional use |
Size Considerations
The size of a carpenter’s square matters for cabinet making. You want a size that fits your work pieces and workspace.
- Smaller squares (6 to 8 inches) are good for small parts and tight spaces.
- Medium squares (10 to 12 inches) work well for most cabinet projects.
- Larger squares (up to 24 inches) help with bigger boards and framing tasks.

Credit: www.reddit.com
Basic Parts Of A Carpenter’s Square
A carpenter’s square is a simple tool used to measure and mark right angles. It helps ensure your cabinets are built straight and fit well.
Understanding the basic parts of the square makes it easier to use. The main parts are the blade and tongue, the handle and stock, and the measurement markings.
Blade And Tongue
The blade is the longer arm of the carpenter’s square. The tongue is the shorter arm that forms a right angle with the blade. Both parts are usually made of metal and meet at a 90-degree corner.
Handle And Stock
The handle is where you hold the square. It connects the blade and tongue. The stock is the thick part of the handle that keeps the square stable and helps you press it firmly against the wood.
Measurement Markings
| Part | Description | Use |
|---|---|---|
| Blade Markings | Marked with inches or centimeters along the blade | Measure length and mark straight cuts |
| Tongue Markings | Similar markings on the tongue | Measure width and verify right angles |
| Notches | Small cutouts near the edge | Mark lines parallel to the edge of wood |
Setting Up For Cabinet Projects
Using a carpenter’s square helps you make straight and accurate cuts. It is a key tool for cabinet projects. Setting up your workspace and materials carefully makes your work easier.
Clear space and prepare your tools before you start. This helps you focus and avoid mistakes.
Preparing Your Workspace
Choose a flat and clean surface to work on. Make sure you have enough room to move large pieces of wood safely.
Good lighting helps you see marks and measurements clearly. Keep your tools close to avoid distractions.
- Clear the area of clutter
- Use a sturdy workbench or table
- Ensure good lighting
- Keep your carpenter’s square and pencil nearby
Selecting Wood And Materials
Pick wood that fits your cabinet design and budget. Common choices are plywood, hardwood, or MDF for cabinets.
Check wood for flatness and no cracks. Good material makes your cabinet strong and neat.
- Choose wood type suitable for cabinets
- Check for flat and smooth surfaces
- Avoid wood with knots or damage
- Gather screws, nails, and glue needed
Marking Reference Points
Use your carpenter’s square to mark straight lines on wood. These lines guide your cuts and assembly.
Mark edges and corners clearly. Make small but visible marks to avoid confusion during cutting.
- Place the square along the wood edge
- Draw straight lines for cuts and joints
- Mark corners for cabinet parts
- Double-check measurements before cutting
Measuring And Marking Right Angles
A carpenter’s square is a key tool for making cabinets. It helps you measure and mark right angles accurately. Using it properly ensures your cabinet parts fit together well.
This guide covers how to align the square, check for squareness, and understand common angle measurements. These steps will help you work with precision and confidence.
Aligning The Square Properly
To get correct right angles, place the carpenter’s square firmly against the edge of your wood piece. The square’s arms must sit flat and not wobble. This alignment helps you mark straight lines.
- Hold the square’s tongue against one edge of the cabinet board.
- Make sure the body of the square rests flat on the adjacent surface.
- Check that the square does not shift before marking.
- Use a sharp pencil for clear, precise lines.
Checking For Squareness
It is important to verify that your square is accurate. An untrue square will cause mistakes in your cabinet assembly. Follow these steps to test squareness.
- Place the square against the edge of a flat board.
- Draw a line along the square’s tongue.
- Flip the square over to the other side of the board.
- Draw a second line along the tongue.
- If the two lines align perfectly, the square is true.
- If the lines do not match, your square is not accurate.
Common Angle Measurements
Besides 90 degrees, a carpenter’s square can help measure other common angles. Knowing these angles helps when cutting or assembling parts for cabinets.
| Angle | Use |
| 90° | Right angle for corners and joints |
| 45° | Making miter cuts and angled edges |
| 30° | Custom cabinet design details |
| 60° | Decorative trims and bevel cuts |
Using The Square For Cabinet Layouts
A carpenter’s square is a helpful tool for making cabinets. It helps measure and mark straight lines. This tool keeps cabinet parts accurate and neat.
Using the square correctly saves time and makes your work look professional. It is easy to use for cutting and fitting cabinet pieces.
Marking Cut Lines
Place the carpenter’s square along the wood edge. Use the square’s inside edge to draw a straight cut line. This line guides your saw for a clean cut.
Make sure the square is tight against the wood. This prevents mistakes and crooked lines. Check the square’s angle before marking each line.
Transferring Measurements
Use the square to move measurements from your plan to the wood. Set the square’s arms to the needed length. Then, mark the wood at the right spot.
This method helps keep all cabinet parts the same size. It also reduces errors in cutting and fitting. Always double-check measurements before cutting.
Ensuring Consistency Across Pieces
Use the carpenter’s square to check corners and edges on all pieces. The square helps keep angles at 90 degrees. This ensures cabinets fit together well.
- Check each piece before assembly
- Compare cut lines on similar parts
- Adjust measurements if needed
- Keep the square clean and accurate
Advanced Techniques With Carpenter’s Square
Using a carpenter’s square goes beyond simple measurements. It helps ensure your cabinets fit perfectly and look professional.
This guide covers advanced ways to use the square for flatness, miters, and custom angles in cabinet making.
Checking For Flatness And Level
Flatness and level are key for cabinet stability. Use the carpenter’s square to spot uneven surfaces and gaps.
- Place the square along cabinet edges to check for gaps.
- Slide the square across surfaces to find high or low spots.
- Use a shim if you detect unevenness for precise adjustments.
- Double-check with a level for complete accuracy.
Using The Square For Miters
Carpenter’s squares help mark perfect miter cuts for cabinet corners. Accurate angles ensure tight joints.
| Step | Action |
| 1 | Align the square’s corner with the wood edge. |
| 2 | Mark the 45-degree angle using the square’s bevel. |
| 3 | Cut along the marked line with a saw. |
| 4 | Test the fit before final assembly. |
Custom Angle Layouts
Not all cabinets use standard angles. The carpenter’s square can help mark and measure custom angles for unique designs.
Use this simple method to find custom angles:
- Place the square on the cabinet edge.
- Adjust until the desired angle matches the square’s arm.
- Trace the angle line carefully on the wood.
- Cut and test the fit before assembly.
Maintaining And Storing Your Square
Keeping your carpenter’s square in good condition helps it last longer. Proper care ensures accurate measurements every time.
Learn how to clean, calibrate, and store your square safely to protect your tool.
Cleaning And Rust Prevention
Remove dirt and dust from your square after each use. Wipe it with a dry cloth to stop moisture buildup.
- Use a soft brush to clean tight spots.
- Apply light machine oil to metal parts.
- Wipe off excess oil to avoid dust sticking.
- Store in a dry place to prevent rust.
Calibration Tips
Check your square’s accuracy regularly. A small error can cause big mistakes in cabinet making.
| Calibration Check | Action |
| Square edge alignment | Place on a flat surface and check for gaps |
| 90-degree angle test | Draw an “L” shape on paper and measure the corner |
| Adjustable squares | Tighten screws and retest after adjustment |
Safe Storage Practices
Store your square where it won’t get knocked or bent. Use a case or hang it on a pegboard.
- Keep it away from heavy tools that may cause damage.
- Use a protective cover if available.
- Do not leave it in damp areas.
- Label your storage spot to avoid losing it.

Credit: www.familyhandyman.com
Common Mistakes To Avoid
Using a carpenter’s square correctly is important for making cabinets. Small mistakes can cause big problems in your work.
Learn the common errors to avoid so your cabinets fit well and look professional.
Misreading Measurements
Reading the wrong number on your carpenter’s square can lead to incorrect cuts. This mistake wastes materials and time.
Always double-check the measurement before marking or cutting wood. Take your time to read the scale clearly.
- Look closely at the markings to avoid confusion between inches and fractions.
- Use good lighting to see the numbers clearly.
- Keep your eyes level with the scale for accuracy.
Incorrect Square Placement
Placing the square in the wrong spot causes angled or uneven cuts. This affects cabinet corners and joints.
Make sure the carpenter’s square touches the edges firmly. Hold it steady before marking or cutting.
- Align the square’s inside edge with the wood’s edge.
- Check that the square is flat against the surface.
- Do not hold the tool at an angle or off-center.
Ignoring Tool Maintenance
A dirty or damaged carpenter’s square gives wrong measurements. Rust or dirt can block the scale lines.
Keep your tool clean and check it often. Fix or replace the square if it is bent or worn out.
- Wipe the square after use to remove dust and glue.
- Store it in a dry place to stop rust.
- Check for dents or bends before starting work.
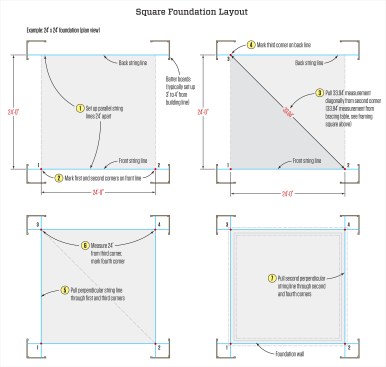
Credit: www.jlconline.com
Frequently Asked Questions
What Is A Carpenter’s Square Used For In Cabinets?
A carpenter’s square ensures accurate 90-degree angles for cabinet corners. It helps measure and mark precise cuts, improving cabinet fit and finish. This tool is essential for maintaining squareness during assembly and installation.
How Do You Measure Cabinet Corners With A Carpenter’s Square?
Place the carpenter’s square inside the cabinet corner. Align one arm with the cabinet edge and the other along the adjoining edge. This confirms a perfect 90-degree angle before fastening or cutting.
Can A Carpenter’s Square Help In Cabinet Door Alignment?
Yes, it helps check and maintain straight, square edges on cabinet doors. Using the square ensures doors fit correctly and align evenly with frames, improving aesthetics and function.
What Types Of Carpenter’s Squares Work Best For Cabinets?
Try a combination square or a framing square for cabinet work. These tools offer versatility and precision for marking, measuring, and checking angles on cabinet parts.
Conclusion
A carpenter’s square helps make cabinet work easier and more precise. Use it to check corners and measure straight lines. Practice using the square often to build confidence. This tool saves time and reduces mistakes. Always keep your square clean and store it safely.
With steady use, your cabinets will fit better and look neater. Simple steps lead to better results in woodworking. Try using a carpenter’s square on your next cabinet project. You will see the difference it makes.