Are you ready to tackle your next DIY project with confidence and precision? Whether you’re crafting a custom piece of furniture or embarking on a home renovation, mastering the use of a circular saw can elevate your skills to the next level.
This versatile tool is your ticket to achieving both straight and curved cuts with ease. Imagine the satisfaction of making clean, accurate cuts every time, transforming your ideas into reality without the frustration of errors. By the end of this guide, you’ll not only understand how to wield a circular saw like a pro but also feel empowered to take on projects you once thought were out of reach.
Your journey to mastering straight and curved cuts starts here, unlocking a world of creativity and craftsmanship. Ready to dive in? Let’s get started!
Credit: www.familyhandyman.com
Choosing The Right Circular Saw
Choosing the right circular saw is important for making straight and curved cuts. Different saws suit different cutting tasks. Picking the correct one makes your work easier and safer.
This guide explains key factors to consider. You will learn about blade types, power and size, and safety features. Use this info to find a saw that fits your needs.
Blade Types For Different Cuts
Blade choice affects the quality of cuts. Some blades work better for straight cuts, while others suit curved cuts. The blade’s teeth count and type matter.
- High-tooth blades give smooth straight cuts.
- Low-tooth blades cut faster but rougher.
- Special blades are made for cutting curves cleanly.
- Use carbide-tipped blades for durability.
- Choose blades that match your material (wood, plastic, metal).
Power And Size Considerations
| Power | Size | Best Use |
| Less than 10 amps | 5 to 6.5 inches | Light tasks, thin materials |
| 10 to 15 amps | 7 to 7.25 inches | General use, thick wood cutting |
| More than 15 amps | 8 inches or larger | Heavy-duty and professional work |
Choose a power level that matches your cutting needs. Larger blades cut deeper but need more power. Small blades offer better control for curved cuts.
Safety Features To Look For
Safety is key when using a circular saw. Look for saws with good safety features to reduce accidents and injuries.
- Blade guard that covers the blade when not cutting
- Electric brake to stop the blade quickly
- Lock-off switch to prevent accidental starts
- Comfortable grip for better control
- Clear visibility of the cutting line
Preparing Your Workspace
Using a circular saw safely and accurately begins with a well-prepared workspace. A clean and organized area helps you focus on cutting without distractions.
Proper preparation also prevents accidents and ensures your cuts are straight or curved as needed.
Setting Up A Stable Cutting Surface
Choose a flat, sturdy surface to place your wood. This keeps the material from moving during cutting and helps you make precise cuts.
If you use a workbench, check that it does not wobble. You can also use saw horses or a solid table for support.
Marking Straight And Curved Lines
Clear lines guide your saw and make your cuts accurate. Use a pencil or chalk to mark where you want to cut.
- For straight cuts, use a ruler or straight edge to draw lines.
- For curved cuts, use a flexible curve ruler or draw freehand slowly.
- Double-check your marks before cutting to avoid mistakes.
Clamping Materials Securely
Clamps hold your wood in place during cutting. This stops the material from shifting, which can cause uneven cuts or accidents.
| Clamp Type | Best For | Tips |
| C- Clamps | Small to medium boards | Place near cutting line but not in saw path |
| Bar Clamps | Large or wide boards | Adjust pressure evenly across the wood |
| Spring Clamps | Quick holds and light materials | Use as a secondary clamp |
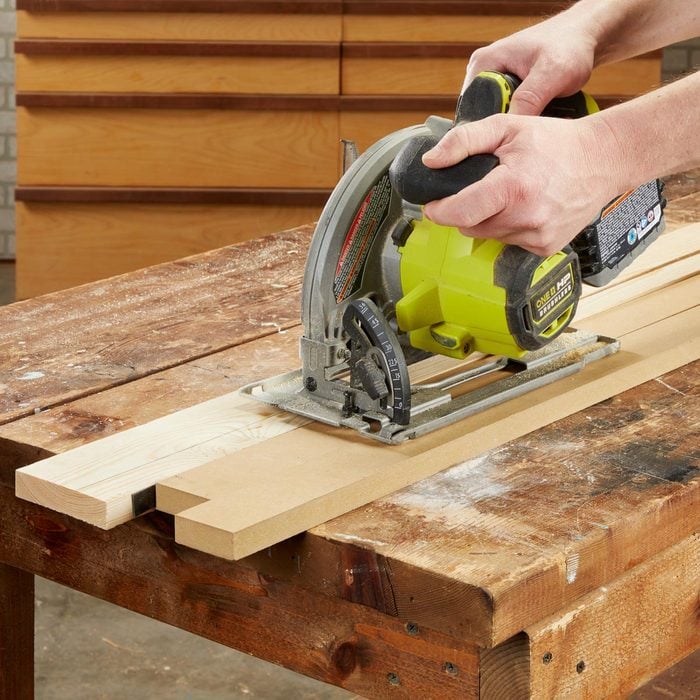
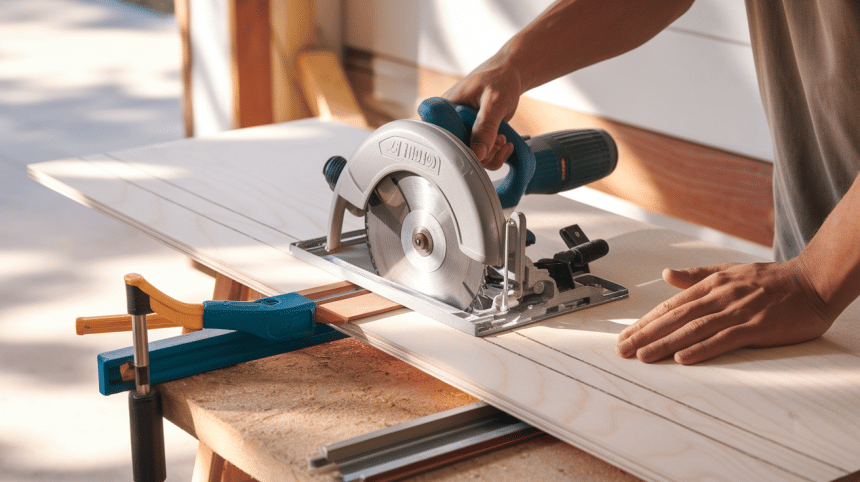
Techniques For Straight Cuts
Using a circular saw for straight cuts needs care and good technique. You want the cut to be clean and accurate. This guide helps you learn the key ways to cut straight lines safely.
Focus on steady movements and correct settings. These tips will help you control the saw and get the best results for your project.
Using A Guide Or Fence
A guide or fence helps you keep the saw straight. It acts like a ruler for your saw to follow. Use clamps to hold the guide firmly to the wood. This reduces mistakes and keeps the cut clean.
- Choose a straight piece of wood or metal for the guide
- Align the guide with your cutting line
- Secure the guide tightly with clamps
- Run the saw along the edge of the guide
Adjusting Depth And Angle
Set the saw blade depth just a little deeper than the wood thickness. This prevents burning and gives a smooth cut. Also, check that the blade angle is straight for a clean edge.
| Adjustment | Recommended Setting |
| Blade Depth | 1/8 inch deeper than wood thickness |
| Blade Angle | 90 degrees for straight cuts |
| Saw Speed | Medium to high for clean cutting |
Maintaining A Steady Hand
Keep your hands steady and control the saw firmly. Use both hands on the saw handles. Move the saw forward slowly and evenly. Do not force it through the wood.
- Stand with feet shoulder-width apart for balance
- Hold the saw handles with a firm grip
- Keep your arms relaxed, not stiff
- Focus on the cutting line, not the saw blade
- Practice slow and smooth movements

Credit: www.klium.com
Techniques For Curved Cuts
Using a circular saw for curved cuts can be tricky. It needs careful control and the right tools. Curved cuts add style to wood projects.
This guide covers key techniques to help you cut curves cleanly and safely with a circular saw.
Selecting The Right Blade
Choose a blade made for curved or fine cuts. Blades with fewer teeth cut faster but rougher. Blades with more teeth give smoother cuts.
Use a blade with a thin kerf. Thin kerf blades make tighter turns easier and reduce wood tear-out.
- Use a fine-tooth blade (40 to 60 teeth) for smoother edges
- Pick a thin kerf blade for better control
- A blade with carbide tips lasts longer and cuts cleaner
Slow And Controlled Cutting
Move the saw slowly along the curve to keep control. Fast cuts can cause the saw to drift off the line or splinter the wood.
Keep a steady hand and avoid forcing the saw. Let the blade do the cutting while you guide it smoothly.
- Start the cut with the saw at full speed
- Follow the curve gently without pushing hard
- Pause if the saw feels stuck, then continue slowly
Following Marked Curves Accurately
Mark your curved line clearly using a pencil or chalk. A visible line helps you guide the saw correctly.
Use your body and eyes to align the saw base with the curve. Watch the blade and adjust your path as needed.
- Draw the curve on the wood before cutting
- Place the saw base flat on the wood, following the line
- Look ahead to keep the saw on the path
- Make small turns with the saw to match the curve
Common Mistakes To Avoid
Using a circular saw can be tricky if you are not careful. Avoiding common mistakes helps you make better cuts.
These mistakes can cause poor cuts, damage the tool, or create safety risks. Learn what to watch out for.
Forcing The Saw Through Material
Do not push the saw too hard. Forcing it can damage the blade and ruin your cut.
Let the saw blade do the work. Move the saw steadily and at a comfortable speed.
- Forcing causes rough, uneven cuts
- It can make the saw jump or bind
- Overheats and wears out the blade faster
- Increases risk of kickback and injury
Ignoring Safety Precautions
Always wear safety gear like goggles and gloves. Ignoring safety can lead to serious injuries.
Check your work area for hazards before cutting. Keep your hands clear of the blade at all times.
- Wear eye and ear protection
- Use a dust mask if needed
- Keep the saw’s safety guard in place
- Secure the material before cutting
- Work in a clean, well-lit space
Improper Blade Maintenance
Keep the blade sharp and clean. A dull blade makes cutting harder and less accurate.
Check the blade often for damage or buildup. Replace or clean the blade as needed.
- Dull blades cause rough, slow cuts
- Dirty blades overheat and wear faster
- Damaged blades can break and cause injury
- Proper blade care extends tool life
Finishing Touches
After cutting wood with a circular saw, you need to finish your work. Finishing touches make your project look neat and last longer.
These steps include smoothing edges, checking the cut, and taking care of your saw. Follow these to get the best results.
Sanding Edges Smoothly
Use sandpaper or a sanding block to smooth rough edges. Sanding helps remove splinters and sharp spots.
For curved cuts, use flexible sanding tools that fit the shape well. Sand lightly to keep the curve clean.
- Start with medium-grit sandpaper (around 120 grit)
- Sand along the wood grain for straight cuts
- Use finer grit (220 or higher) for a smooth finish
- Wipe dust off with a dry cloth after sanding
Checking Cut Accuracy
Measure your cut with a tape measure or ruler to ensure it matches your plan. Check both length and angle.
For curved cuts, compare the shape to your template or drawing. Small errors can affect how parts fit together.
- Use a square tool for straight cuts
- Compare curves with a pattern or stencil
- Mark any corrections before sanding or trimming
Cleaning And Storing Your Saw
After use, unplug your saw and clean it well. Remove sawdust and debris from the blade and body.
Store your saw in a dry place. Proper storage protects the blade and motor from damage.
- Brush off sawdust from the blade and vents
- Use a cloth to wipe the saw’s surface
- Check the blade for any damage before storing
- Keep the saw in a case or covered area
Credit: www.helpwithdiy.com
Frequently Asked Questions
How Do I Make Straight Cuts With A Circular Saw?
To make straight cuts, use a guide or straight edge to follow. Secure your material firmly. Mark your cut line clearly. Adjust the saw blade depth properly. Move the saw steadily along the guide for a clean, straight cut.
Can A Circular Saw Cut Curves Effectively?
Yes, circular saws can cut curves but are best for gentle curves. Use a smaller blade for tighter curves. Cut slowly and carefully, turning the saw gradually. For intricate curves, a jigsaw might be more precise.
What Safety Tips Should I Follow When Using A Circular Saw?
Always wear safety goggles and ear protection. Keep hands clear of the blade. Secure the workpiece firmly. Check the blade condition before use. Unplug the saw when changing blades or making adjustments.
How Do I Adjust The Blade Depth On A Circular Saw?
Locate the blade depth adjustment lever or knob. Loosen it to set the blade depth. The blade should extend about 1/4 inch below the material. Tighten the lever securely before cutting for safety and precision.
Conclusion
Using a circular saw for straight and curved cuts takes practice and care. Always measure and mark your wood clearly before cutting. Keep the saw steady and follow the guide or line closely. Wear safety gear to protect yourself from dust and sparks.
Start with simple cuts and try more curves as you gain confidence. Each cut helps you improve your skills. Soon, you will create clean, smooth edges with ease. Keep your saw sharp and clean for the best results. Enjoy your woodworking projects safely and confidently!