If you’re ready to tackle your next framing project, knowing how to use a claw hammer for framing nails is a skill you can’t skip. Using the right technique will make your work faster, safer, and more precise.
Whether you’re a beginner or just need a refresher, this guide will show you simple steps to master your hammer and get your nails in place like a pro. Keep reading to discover tips that will save you time and frustration on every project.
Credit: www.familyhandyman.com
Choosing The Right Claw Hammer
Using a claw hammer for framing nails needs the right tool. Choosing the right hammer makes your work easier and safer.
This guide covers types of claw hammers, their weight, balance, and handle materials. Learn what fits your framing work best.
Types Of Claw Hammers
There are several types of claw hammers. Each type suits different tasks and user preferences. Knowing them helps you pick the right one.
- Curved Claw Hammer: Best for pulling nails and general framing.
- Straight Claw Hammer: Good for prying and demolition work.
- Milled Face Hammer: Has a textured face to prevent slipping on nails.
- Smooth Face Hammer: Leaves a cleaner finish on wood surfaces.
Hammer Weight And Balance
Hammer weight affects how much force you apply. Balance affects control and comfort during use. Both are important for framing nails.
| Weight | Use | Benefit |
| 16 oz | Most common for framing | Good balance of power and control |
| 20 oz | Heavier framing work | More driving force with fewer swings |
| 12 oz | Lighter tasks and finish work | Less fatigue, better precision |
Handle Materials And Grip
Handle material affects hammer durability and user comfort. The grip should prevent slipping and reduce vibration.
- Wood Handles: Traditional feel, absorbs shock well.
- Fiberglass Handles: Durable and lightweight, absorbs vibration.
- Steel Handles: Very strong but can transfer more shock.
- Rubber Grips: Increase comfort and reduce slipping.

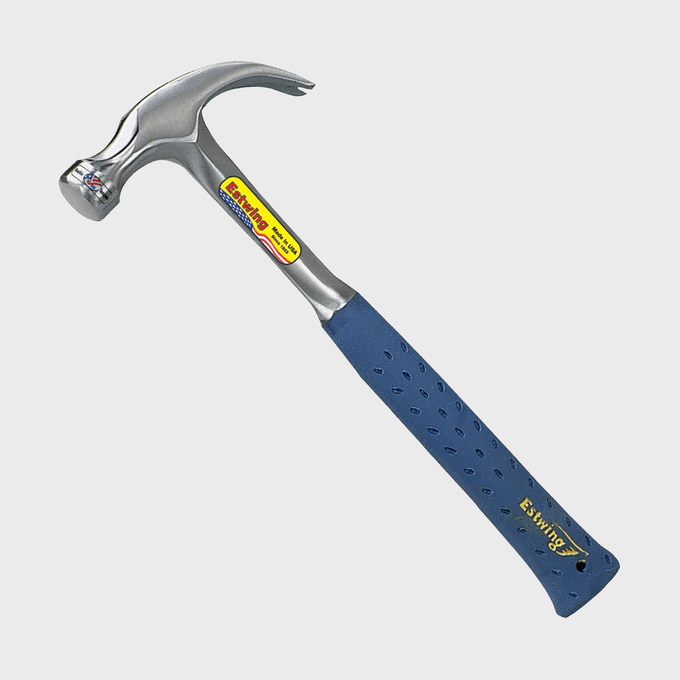
Credit: www.estwing.com
Selecting Framing Nails
Using the right framing nails makes your work stronger and easier. Nails come in different sizes and materials. Choosing the right one helps the claw hammer work better.
Pick nails that fit the wood and the job. The right nails hold the wood pieces firmly without splitting them.
Nail Sizes And Lengths
Framing nails come in many sizes. The size depends on the length and thickness of the nail. Longer nails hold better but need more force to drive in.
- Common lengths: 2 inches, 2.5 inches, 3 inches
- Thicker nails hold heavy wood better
- Use nails that are at least three times longer than the thickness of the wood
Nail Materials
Framing nails are made from different metals. Steel is the most common. Some nails have coatings to stop rust. Choose nails that last in your project conditions.
- Plain steel nails for indoor dry wood
- Galvanized nails resist rust outdoors
- Stainless steel nails for wet or salty places
When To Use Different Nail Types
Different nails suit different tasks. Use the right nail type for safety and strength. Some nails work better with certain woods or conditions.
- Box nails are thinner to prevent wood splitting
- Common nails are thicker for heavy framing
- Sinker nails have a coating to help hammering
- Ring shank nails grip wood better in strong winds
Preparing For Framing
Using a claw hammer for framing nails needs good preparation. This helps keep your work safe and accurate.
Before you start, set up your tools and workspace carefully. Mark where nails go to guide your nailing.
Safety Gear Essentials
Wear the right safety gear to protect yourself while framing. Safety helps prevent injuries.
- Wear safety glasses to protect your eyes from flying nails and wood chips.
- Use work gloves to avoid splinters and give a better grip on the hammer.
- Put on sturdy boots to protect your feet from heavy wood or dropped tools.
- Use ear protection if you work in a noisy area or use power tools nearby.
Work Surface Setup
Prepare a flat and stable surface to work on. This makes nailing easier and safer.
| Work Surface | Why It Matters |
| Flat and level table | Prevents wood from moving while nailing |
| Clean area | Reduces risk of slips or trips |
| Good lighting | Helps you see nail positions clearly |
| Enough space | Allows free movement with the hammer |
Marking Nail Positions
Mark where to place nails before you start hammering. This keeps the frame straight and strong.
Use these tips to mark nails:
- Measure and mark nail spots with a pencil.
- Space nails about 6 to 8 inches apart for strong joints.
- Check marks twice before nailing.
Proper Hammering Technique
Using a claw hammer for framing nails needs the right technique. This helps you work safely and efficiently.
Good hammering skill makes nails go in straight and reduces damage to wood.
Holding The Hammer Correctly
Hold the hammer near the end of the handle. This gives more power to your swing.
Keep a firm but relaxed grip. Avoid holding the hammer too tight or too loose.
- Grip about 1-2 inches from the handle’s bottom
- Wrap your fingers around the handle
- Keep your wrist loose to allow smooth movement
Positioning The Nail
Place the nail upright where you want to join the wood pieces. Hold it steady with your fingers.
Start by tapping the nail lightly to set it in place. This stops it from moving as you hammer.
- Hold the nail near the head between thumb and index finger
- Position the nail perpendicular to the wood surface
- Tap gently to embed the nail tip before full hammering
Effective Swing And Impact
Swing the hammer with a smooth motion from your elbow and wrist. Aim for the nail head center.
Hit the nail firmly but controlled. Avoid wild swings that can bend the nail or miss.
- Lift the hammer about 12 inches for a controlled swing
- Use your wrist to guide the hammer face straight to the nail
- Strike the nail head squarely to drive it in straight
Common Mistakes To Avoid
Using a claw hammer for framing nails needs care. Many people make simple mistakes that can slow work or cause damage.
Knowing these mistakes helps you work faster and keep your materials safe.
Bent Nails And How To Prevent Them
Bent nails happen when you hit the nail at the wrong angle. This wastes nails and slows down your project.
Hold the hammer steady and strike the nail straight to avoid bending it.
- Start nails slowly to keep control.
- Keep the hammer face flat on the nail head.
- Do not hit the nail at an angle.
- Use the right size nails for the job.
Avoiding Hammer Slips
Hammer slips can hurt your hand or damage the wood. Slips happen when your grip is weak or your swing is uncontrolled.
Hold the hammer handle firmly and watch your strike to keep the hammer on target.
- Grip the hammer handle near the end for power.
- Keep your wrist straight when swinging.
- Focus on hitting the nail head squarely.
- Wear gloves for better grip if needed.
Minimizing Wood Damage
Hitting wood too hard or off-center can cause dents and splits. This weakens your framing and looks unprofessional.
Use controlled strikes and protect wood edges to keep the wood intact.
- Hit nails straight to reduce stress on wood.
- Use a nail set to drive nails below the surface.
- Keep nails away from wood edges.
- Check your hammer face for damage before use.

Credit: www.amazon.com
Removing Nails With A Claw Hammer
Removing nails is an important skill when working with wood. A claw hammer is a common tool used to pull out framing nails safely and efficiently.
Using the right technique helps protect the wood and reduces the chance of injury. Learn how to use the claw hammer to remove nails with ease.
Using The Claw For Extraction
The claw on a hammer is shaped like a curved fork. This design helps grip the nail head firmly. Place the claw under the nail head before pulling.
Pull the handle back slowly to lift the nail. Avoid sudden jerks to prevent damaging the wood around the nail.
Leveraging Techniques
Use the hammer’s handle as a lever to increase pulling power. Position the handle so it rests against the wood surface. This gives better control and force.
- Slide the claw under the nail head.
- Rest the hammer handle against the wood.
- Pull the handle back to lift the nail.
- Use a block of wood under the handle for more leverage.
Safety Tips During Nail Removal
Wear safety glasses to protect your eyes from flying debris. Keep your fingers away from the claw area to avoid pinching.
- Always pull nails slowly and carefully.
- Use gloves to protect your hands.
- Check the hammer for damage before use.
- Work in a well-lit area to see clearly.
Maintaining Your Claw Hammer
Keeping your claw hammer in good shape helps it last longer and work better. Regular care makes sure it stays safe and strong.
Check your hammer often and clean it after use. Proper storage protects it from damage and rust.
Cleaning And Storage
Clean your hammer after each use. Wipe off dirt, dust, and any sticky substances with a dry cloth.
If there is rust, use fine steel wool or sandpaper to remove it. Apply a light coat of oil to the metal parts to stop rust from forming.
Store your hammer in a dry place. Keep it in a toolbox or hang it on a tool rack to avoid moisture and damage.
- Wipe hammer clean after use
- Remove rust with steel wool
- Apply oil to metal parts
- Store in a dry place
- Use a toolbox or tool rack
Checking For Damage
Look over your hammer before each use. Check the handle and head for cracks or loose parts.
Make sure the hammerhead is tightly attached to the handle. A loose head can cause accidents and reduce power.
- Inspect handle for cracks or splits
- Ensure hammerhead is secure
- Check for dents or chips on the head
- Replace damaged parts if possible
When To Replace Your Hammer
Replace your hammer if it shows serious damage. A broken handle or loose head means it is unsafe to use.
Also replace the hammer if it no longer feels comfortable or balanced. A poor grip can cause mistakes and injuries.
- Replace if handle is cracked or broken
- Replace if hammerhead is loose and can’t be fixed
- Replace if hammer feels unbalanced or unsafe
- Replace if rust or wear affects performance
Frequently Asked Questions
How Do You Hold A Claw Hammer For Framing Nails?
Hold the claw hammer near the end of the handle for better control and power. Grip it firmly but comfortably to ensure precision when driving framing nails.
What Is The Best Nail Size For Framing With A Claw Hammer?
Use 3 to 3. 5-inch framing nails for most framing tasks. These nails offer strong holding power and are easy to drive with a claw hammer.
How Do You Remove Framing Nails Using A Claw Hammer?
Position the claw under the nail head and pull back gently. Use the hammer’s leverage to lift and remove the nail without damaging the wood.
Can A Claw Hammer Damage Framing Wood?
Yes, improper use can dent or split wood. Always use controlled swings and avoid striking too hard near edges to prevent damage.
Conclusion
Mastering the claw hammer makes framing nails easy. Remember to hold it firmly. Aim with precision for accurate hits. Practice often to improve your skills. Safety is crucial, so wear protective gear. Follow these steps, and you’ll see great results.
Framing projects become less daunting. A claw hammer is essential in every toolbox. Enjoy the satisfaction of completing tasks efficiently. With practice, your confidence grows. Soon, hammering becomes second nature. Keep learning and honing your technique. Every project is a learning opportunity.
Happy hammering!