Are you ready to tackle your next DIY project with confidence? A cordless drill might just be your new best friend.
Whether you’re hanging shelves, assembling furniture, or building a birdhouse, mastering this versatile tool can make your tasks faster, easier, and more enjoyable. Imagine the satisfaction of completing a project with precision and ease. By the end of this article, you’ll know exactly how to use a cordless drill to transform your DIY dreams into reality.
Dive in, and discover the secret to effortless DIY success.
Credit: www.slashgear.com
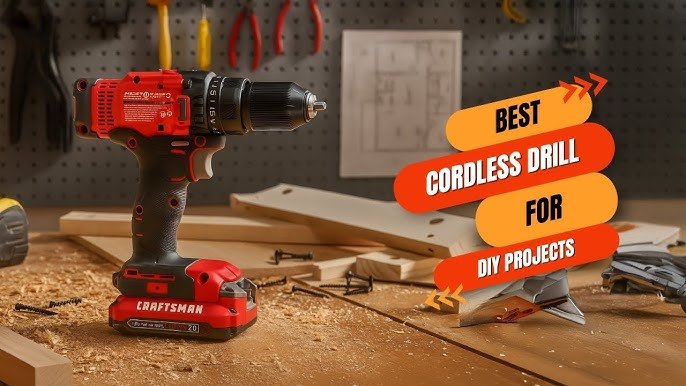
Choosing The Right Cordless Drill
Using a cordless drill can make your DIY projects easier and faster. Picking the right drill is important for good results. This guide helps you choose the best one for your needs.
Consider the drill type, battery options, and key features before buying. These factors affect how well the drill works and how long it lasts.
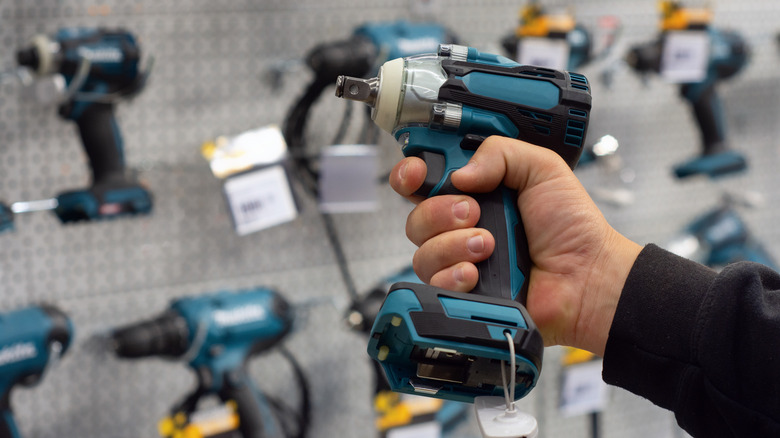
Types Of Cordless Drills
There are different cordless drills for different tasks. Some are light for small jobs. Others are strong for heavy work.
- Compact drills are small and easy to use in tight spaces.
- Standard drills are good for most home projects.
- Hammer drills add a pounding action for drilling into hard materials.
- Impact drivers are best for driving screws quickly and tightly.
Battery Options
The battery powers your cordless drill. Different batteries offer various power levels and run times. Choose one that fits your project needs.
| Battery Type | Pros | Cons |
|---|---|---|
| Nickel-Cadmium (NiCd) | Lower cost, durable | Heavier, memory effect reduces capacity |
| Lithium-Ion (Li-Ion) | Lightweight, long run time, no memory effect | More expensive, sensitive to temperature |
| Nickel-Metal Hydride (NiMH) | Good capacity, less memory effect | Heavier, shorter lifespan than Li-Ion |
Key Features To Consider
Look at features that make your drill easier and safer to use. These features also help you work better and faster.
- Variable speed control lets you adjust the drill speed for different tasks.
- Ergonomic grip reduces hand fatigue during long use.
- LED lights help you see in dark or tight spaces.
- Clutch settings prevent overdriving screws and damage.
- Brushless motors last longer and run cooler than brushed ones.

Credit: store.dekotools.com
Essential Drill Accessories
Cordless drills work best with the right accessories. These tools help you do different jobs safely and quickly. Knowing about common drill bits, attachments, and how to care for your drill is important.
Using the right accessories makes your DIY projects easier. It also protects your drill and helps it last longer. Here are some key accessories every drill user should have.
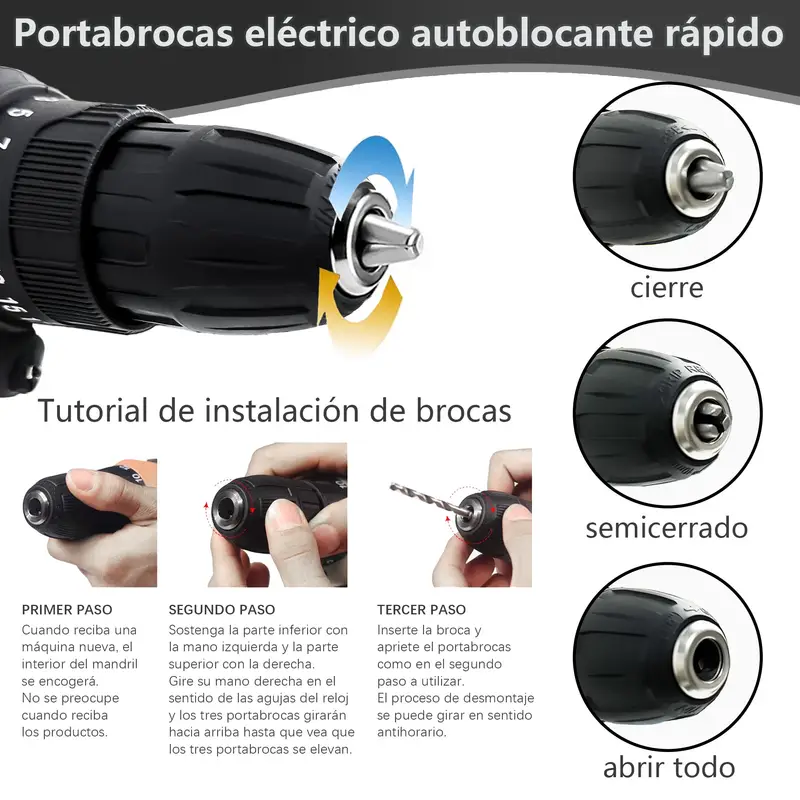
Common Drill Bits
Drill bits come in many shapes and sizes. Each type is made for a specific task like drilling into wood, metal, or masonry. Using the correct bit gives clean holes and prevents damage.
- Twist bits for wood and metal drilling
- Masonry bits for brick and concrete <librad bits="" for="" holes
- Spade bits for larger holes in wood
- Hole saws for cutting bigger circles
Additional Attachments
Besides bits, other attachments expand what your drill can do. These help with driving screws, sanding, or mixing paint. They make your drill more useful for many tasks.
| Attachment | Use |
| Screwdriver bit | Drive screws quickly |
| Sanding drum | Sand wood or metal surfaces |
| Mixing paddle | Mix paint or thin materials |
| Right angle adapter | Drill in tight spaces |
Storage And Maintenance
Proper storage and care keep your drill and bits ready to use. Clean your drill after work and store it in a dry place. This stops rust and damage.
- Wipe bits clean after use
- Oil moving parts occasionally
- Store bits in a case to avoid loss
- Keep the battery charged but not overcharged
- Check for wear and replace damaged parts
Safety Tips For Using A Cordless Drill
Using a cordless drill can make your DIY projects easier. Safety is very important when handling this tool. Follow these tips to avoid accidents and injuries.
Always prepare yourself and your workspace before starting. This guide covers key safety tips in three areas: protective gear, safe handling, and work area preparation.
Protective Gear
Wearing the right gear protects your body from harm. Always use safety glasses to shield your eyes from dust and debris.
- Wear sturdy gloves to protect your hands.
- Use ear protection if you drill for a long time.
- Wear a dust mask if you are drilling materials that create dust.
- Choose closed-toe shoes to protect your feet.
Safe Handling Practices
Handle the drill carefully to prevent accidents. Keep a firm grip and use both hands if needed. Avoid loose clothing or jewelry that can get caught.
| Do | Don’t |
| Check the battery charge before use | Use the drill if it has damaged parts |
| Keep fingers away from the drill bit | Touch the drill bit immediately after use |
| Use the right drill bit for your task | Force the drill if it stops suddenly |
Work Area Preparation
Prepare your workspace to keep it safe and organized. Clear the area of any objects that might cause you to trip or lose balance.
- Make sure the area is well-lit.
- Secure the material you will drill into.
- Keep children and pets away from the work zone.
- Have a first aid kit nearby for emergencies.
Basic Drilling Techniques
A cordless drill is a helpful tool for many DIY projects. Learning the basic drilling techniques will make your work easier and safer.
These tips will help you drill holes cleanly and correctly in different materials. Follow simple steps to get good results every time.
Drilling Straight Holes
Hold the drill firmly and keep it at a right angle to the surface. This helps make straight and even holes.
Start drilling slowly to create a small guide hole. Then push the drill in steadily without forcing it.
- Use a clamp to hold small workpieces
- Mark the drilling spot with a pencil or center punch
- Keep your body steady and drill straight down
Controlling Drill Speed
Adjust the drill speed based on the material you are working on. Slow speeds work best for hard materials.
Use higher speeds for soft materials like wood and plastic. Too fast on hard materials can damage the bit or surface.
- Start drilling at low speed to avoid slipping
- Increase speed gently once the bit is steady
- Use the drill’s speed control feature if available
Dealing With Different Materials
Different materials need different drill bits and techniques. Choose the right bit to avoid damage.
Apply light pressure on soft materials. Use steady pressure on hard materials, but do not force the drill.
| Material | Recommended Drill Bit | Speed |
|---|---|---|
| Wood | Spade or twist bit | High |
| Metal | High-speed steel bit | Low |
| Plastic | Twist bit | Medium |
| Tile or Masonry | Masonry bit | Low |
Driving Screws With A Cordless Drill
Using a cordless drill to drive screws saves time and effort in DIY projects. It helps you work faster than using a manual screwdriver.
Understanding how to use the drill correctly protects your materials and makes your work neat. Focus on the right bits, torque, and technique.
Selecting The Right Screwdriver Bit
Pick a screwdriver bit that matches the screw head type. This ensures a tight fit and reduces slipping.
Using the correct bit prevents damage to both the screw and the drill. Common types include Phillips, flathead, and Torx.
- Phillips bits fit cross-shaped screws
- Flathead bits fit straight slot screws
- Torx bits fit star-shaped screws
- Make sure the bit size matches the screw head
Adjusting Torque Settings
Torque controls how much force the drill uses to drive screws. Adjust it based on the screw size and material.
Start with low torque to avoid overdriving screws. Increase torque if screws do not go in easily.
- Low torque for small screws and soft wood
- Medium torque for general use
- High torque for large screws or hard wood
- Stop when the screw is flush with the surface
Preventing Stripped Screws
Stripped screws happen when the bit slips and damages the screw head. This makes the screw hard to remove.
Use the right bit size and steady pressure to keep the bit from slipping. Avoid pushing too hard or at an angle.
- Match the bit to the screw head size
- Keep the drill straight while driving screws
- Apply firm, steady pressure
- Use low torque settings at first
Maintaining Your Cordless Drill
Keeping your cordless drill in good shape helps it last longer. Regular care makes your drill work better and safer.
Simple maintenance tasks can prevent problems and save you money on repairs. Let’s look at key ways to care for your drill.
Battery Care
Battery health is very important for your cordless drill. Always charge the battery fully before using it for the first time.
Store batteries in a cool, dry place. Avoid leaving them in hot or cold spots. Remove batteries if you won’t use the drill for a long time.
- Charge batteries regularly
- Do not overcharge or fully drain
- Keep battery contacts clean
- Use the charger that came with your drill
Cleaning And Lubrication
Clean your drill after each use to remove dust and dirt. Dirt can damage the motor and moving parts.
Use a dry cloth or soft brush to clean vents and surfaces. Avoid water or harsh chemicals that can cause rust.
Lubricate moving parts like the chuck occasionally. Use light machine oil to keep parts moving smoothly.
- Wipe drill with a dry cloth
- Brush dust from vents
- Apply oil to chuck and gears
- Do not over-lubricate
Troubleshooting Common Issues
If your drill does not start, check the battery charge first. A low battery is the most common cause of power problems.
Listen for unusual sounds or smells. These can indicate motor or gear problems. Stop using the drill if this happens.
- Check battery and charger connections
- Inspect drill for damage or loose parts
- Test the trigger and switch
- Consult the manual for error codes or lights
Diy Project Ideas For Beginners
Using a cordless drill can make many DIY projects easier. It helps you drill holes and drive screws without a cord getting in the way.
This guide shows simple projects for beginners. You will learn how to use a cordless drill safely and effectively.
Simple Woodworking Projects
Start with small woodworking projects to practice using your drill. These projects need basic tools and easy steps.
Build things like small shelves, birdhouses, or picture frames. Drilling holes and screwing parts together are common tasks.
- Wooden shelves for books or decorations
- Birdhouses for your garden
- Picture frames to display photos
- Simple stools or benches
Home Repair Tasks
A cordless drill helps fix things around your home. You can tighten loose screws or drill new holes for repairs.
Common repairs include fixing door hinges, assembling furniture, or hanging shelves on walls.
- Fix loose door handles or hinges
- Assemble flat-pack furniture
- Install curtain rods or shelves
- Repair or replace cabinet knobs
Creative Upcycling Ideas
Upcycling means turning old items into something new and useful. A cordless drill helps you take things apart or add new features.
Try making planters from old containers or turning pallets into furniture. Drilling holes and attaching parts are easy with a drill.
- Turn old jars into hanging planters
- Make a bench from wooden pallets
- Create a lamp from a reused bottle
- Build storage boxes from scrap wood
Credit: www.temu.com
Frequently Asked Questions
What Safety Tips Should I Follow Using A Cordless Drill?
Always wear safety glasses and gloves. Keep hair and loose clothing away. Use clamps to secure materials. Check the drill bit is tight and the battery fully charged before starting.
How Do I Choose The Right Drill Bit?
Select the bit based on the material. Use wood bits for wood and masonry bits for concrete. Match the bit size to your screw or hole requirements for best results.
Can I Use A Cordless Drill For Heavy-duty Projects?
Cordless drills are great for most DIY tasks. For heavy-duty work, choose a high-voltage model with strong torque. Always check the drill’s specifications to ensure it meets your project needs.
How Do I Maintain My Cordless Drill Properly?
Keep the drill clean and dry. Store it in a cool, dry place. Regularly check and replace worn drill bits. Charge the battery fully before storage to extend its life.
Conclusion
Using a cordless drill makes DIY projects easier and faster. It gives you freedom to work anywhere without cords. Always pick the right drill bit for each task. Keep the battery charged for the best performance. Practice safety by wearing goggles and gloves.
With some care and patience, you can build many things yourself. Simple steps lead to great results. Enjoy the satisfaction of completing projects on your own. A cordless drill is a handy tool for every home. Try it out and see the difference it makes.