Imagine transforming your home with just one tool. Yes, a cordless drill can be your best friend in tackling those DIY projects you’ve been eyeing.
Whether you’re hanging a picture frame or building a new shelf, this versatile tool can make your life so much easier. But are you using it to its full potential? You might be surprised at what a cordless drill can do when you truly understand its capabilities.
In this guide, we’ll show you how to use a cordless drill effectively and safely for your home projects. Stick around, because mastering this tool could be the key to unlocking your DIY dreams. Ready to take your home improvements to the next level? Let’s dive in!
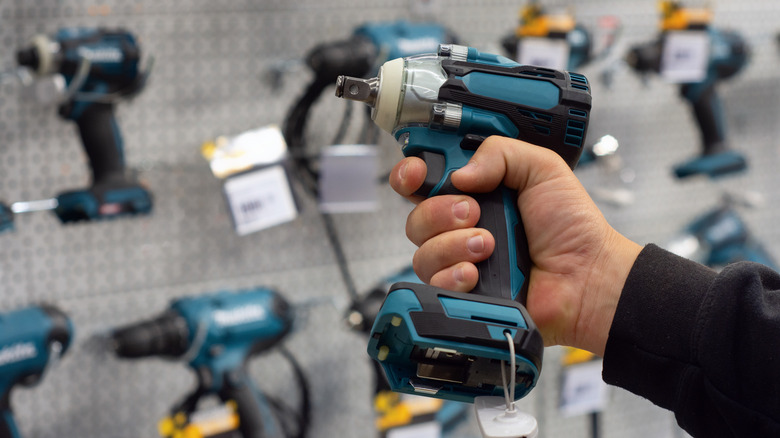
Choosing The Right Cordless Drill
Using a cordless drill makes home projects easier. Picking the right one helps you finish tasks quickly.
Many drills exist for different jobs. Knowing what to look for saves time and money.
Types Of Cordless Drills
Cordless drills come in several types. Each fits specific tasks around the house.
- Drill Driver:Most common for drilling holes and driving screws.
- Hammer Drill:Has a hammer action for drilling into concrete or brick.
- Impact Driver:Delivers high torque for tightening bolts and screws.
- Right Angle Drill:Designed for tight spaces and corners.
Battery Options And Lifespan
| Battery Type | Pros | Cons | Typical Lifespan |
| Nickel-Cadmium (NiCd) | Affordable, durable | Heavier, memory effect | 2-3 years |
| Nickel-Metal Hydride (NiMH) | Lighter than NiCd, less memory effect | More expensive, shorter run time | 2-4 years |
| Lithium-Ion (Li-Ion) | Lightweight, holds charge longer | Higher cost | 3-5 years |
Key Features To Consider
Look for these features to get the best drill for your needs.
- Power:Measured in volts; higher volts mean more power.
- Chuck Size:Common sizes are 3/8 inch and 1/2 inch; bigger chucks hold larger bits.
- Speed Settings:Multiple speeds help with different materials.
- Weight:Lighter drills are easier to handle for long tasks.
- Ergonomics:Comfortable grip reduces hand fatigue.
- LED Light:Helps see in dark work areas.
Essential Accessories
Using a cordless drill well needs more than just the drill. Accessories help you do many tasks easily. They make your work safer and better.
Here are some important accessories to use with your cordless drill. They help you get good results on home projects.
Drill Bits And Their Uses
Drill bits come in many types. Each bit fits a specific job. Choosing the right bit makes drilling easier and cleaner.
- Twist Bits:Good for drilling wood and metal.
- Masonry Bits:Made for drilling into brick or concrete.
- Spade Bits:Used for making large holes in wood.
- Hole Saw Bits:Cut big round holes in wood or drywall.
- Brad Point Bits:Create clean holes in wood without splintering.
Additional Attachments
Attachments add more ways to use your drill. They help with tasks like driving screws or sanding surfaces.
- Screwdriver Bits:Drive screws quickly and easily.
- Right Angle Attachments:Reach tight or awkward spaces.
- Sanding Drums:Smooth wood or metal surfaces.
- Mixing Paddles:Stir paint or thin concrete.
Safety Gear
Safety gear protects you from accidents while drilling. Always wear the right gear to avoid injuries.
- Safety Glasses:Protect eyes from dust and flying debris.
- Gloves:Keep hands safe from sharp edges and rough materials.
- Ear Protection:Reduce noise from loud drilling.
- Dust Mask:Prevent inhaling dust and particles.
Preparing For Your Project
Using a cordless drill can make home projects easier and faster. Before you start, it is important to prepare well. Good preparation helps you work safely and get better results.
This guide covers key steps to prepare for your project. You will learn how to read the manual, set up the drill, and mark and measure your work.
Reading The Manual
Each cordless drill comes with a manual. It explains how to use the drill safely and correctly. Reading the manual helps you understand the drill’s parts and functions.
Look for safety tips and instructions for charging the battery. The manual also tells you how to change drill bits and maintain the tool.
Setting Up The Drill
Charge the battery fully before using the drill. Insert the battery into the drill until it clicks. Choose the right drill bit for your task and secure it tightly in the chuck.
Adjust the drill’s speed and torque settings based on your project. Make sure the drill is clean and in good working condition before you start.
- Charge the battery fully
- Insert the battery securely
- Select and install the correct drill bit
- Set speed and torque as needed
- Check the drill for damage or dirt
Marking And Measuring
Measure carefully where you want to drill holes or attach screws. Use a pencil or marker to make clear marks on your material. This helps you drill in the right spot.
Double-check your measurements to avoid mistakes. Use a ruler, tape measure, or square tool for accuracy. Proper marking saves time and prevents damage.
- Measure the exact spot for drilling
- Mark with a pencil or marker
- Use measuring tools for precision
- Check marks before drilling
Basic Drilling Techniques
Using a cordless drill is useful for many home projects. Learning basic drilling techniques helps you work safely and accurately.
This guide covers how to hold the drill, drill straight holes, and adjust speed and torque for different tasks.
Holding The Drill Correctly
Hold the drill firmly with both hands. One hand should grip the handle and the other support the drill body.
Keep your wrist straight to avoid strain. A steady grip helps control the drill better and improves accuracy.
Drilling Straight Holes
To drill straight holes, position the drill bit at a right angle to the surface. This keeps the hole clean and precise.
Use a level or square tool to check the angle if needed. Start drilling slowly to guide the bit into place.
Adjusting Speed And Torque
Adjust the drill speed depending on the material. Use lower speed for hard materials and higher speed for soft ones.
Set the torque to control the drill’s force. Low torque is good for small screws; high torque works for large screws or tough materials.
- Low speed and high torque for metal or dense wood
- High speed and low torque for soft wood or plastic
- Use clutch settings to prevent overdriving screws
Driving Screws With A Cordless Drill
Using a cordless drill to drive screws makes home projects faster and easier. This tool saves effort compared to manual screwdrivers.
To get good results, you need to pick the right bit, control the screw depth, and avoid damaging the screws.
Selecting The Right Bit
Choose a drill bit that matches the screw head. This ensures a tight fit and better control.
- Use Phillips bits for cross-shaped screw heads.
- Use flathead bits for slotted screws.
- Use Torx bits for star-shaped screws.
- Match the bit size to the screw size to avoid slipping.
Controlling Depth
Set the drill to stop driving the screw once it reaches the correct depth. This prevents damage to the material.
| Depth Setting | Best Use |
| Shallow | Soft wood or drywall |
| Medium | Hardwood or plywood |
| Deep | Thick or dense materials |
Avoiding Stripped Screws
Stripped screws happen when the drill bit slips or pressure is too high. Follow these tips to avoid this problem.
- Hold the drill steady and straight over the screw.
- Use the correct bit size and type.
- Start drilling slowly to keep control.
- Do not push too hard; let the drill do the work.
- Replace worn bits to maintain grip.

Credit: www.vecteezy.com
Maintenance And Troubleshooting
Using a cordless drill for home projects is easier when you keep it well maintained. Regular care helps your drill last longer and work better.
If your drill stops working or has issues, simple fixes can save you time and money. Learn how to clean, care for the battery, and solve common problems.
Cleaning Your Drill
Keep your drill clean to avoid dust and dirt buildup. Clean the vents and chuck regularly to stop overheating and jamming.
Use a dry cloth to wipe the drill. Avoid water or harsh cleaners that can damage parts.
- Remove dust from vents with a small brush
- Clean the chuck to prevent drill bit slipping
- Wipe the body to remove grease and dirt
Battery Care Tips
Proper battery care keeps your drill ready to use. Charge batteries fully and store them in a cool, dry place.
Do not let the battery drain completely before charging. Avoid exposing batteries to heat or cold.
- Charge batteries before they are empty
- Store batteries away from direct sunlight
- Use the charger that matches your battery type
- Remove batteries if you won’t use the drill for a long time
Common Issues And Fixes
Your drill may face problems like not starting or losing power. Check simple causes before seeking help.
Loose drill bits, dead batteries, and clogged vents are common problems you can fix yourself.
| Issue | Possible Cause | Fix |
| Drill won’t start | Battery is dead or not connected | Charge battery or reattach it properly |
| Drill bit slips | Chuck is loose or dirty | Tighten chuck and clean it regularly |
| Drill overheats | Vents clogged with dust | Clean vents and let drill cool down |
| Drill loses power | Battery low or damaged | Replace or fully charge the battery |
Safety Tips For Home Projects
Using a cordless drill is common in many home projects. Safety should always be your top priority. Taking simple precautions helps prevent injuries and accidents.
Follow these safety tips about protective clothing, a safe work environment, and handling emergencies to work with confidence.
Protective Clothing
Wear the right clothing to protect yourself while using a cordless drill. Avoid loose clothes that can catch on moving parts.
- Use safety goggles to protect your eyes from debris.
- Wear gloves to protect your hands but make sure they fit well.
- Wear closed-toe shoes to protect your feet.
- Consider ear protection if drilling for long periods.
Safe Work Environment
Prepare your work area before starting. A clean and organized space reduces risks.
| Safety Tip | Reason |
| Clear the floor | Prevents tripping hazards |
| Good lighting | Helps see clearly |
| Keep tools organized | Reduces clutter and accidents |
| Check battery charge | Ensures drill works properly |
Handling Emergencies
Be ready to act if something goes wrong. Knowing what to do can prevent serious injury.
- Turn off the drill immediately if you lose control.
- Keep a first aid kit nearby for minor injuries.
- Know how to call for help in case of serious accidents.
- Keep a fire extinguisher nearby when working with batteries.
Credit: www.slashgear.com
Project Ideas To Practice
Using a cordless drill can make many home projects easier and faster. It is good to start with simple tasks to build your confidence.
Try these project ideas to practice your drilling skills and get familiar with your tool.
Simple Shelves
Building simple shelves is a great way to learn how to use a cordless drill. You will practice drilling holes and driving screws into wood.
Start with small shelves for books or decorations. You will need wood boards, screws, and brackets.
- Measure and mark where you want to drill
- Drill pilot holes to prevent wood from splitting
- Use the drill to drive screws and attach brackets
- Secure the shelf to the wall with anchors if needed
Furniture Assembly
Many furniture pieces come unassembled. Using a cordless drill helps you put them together quickly.
You will practice driving screws and handling different drill bits. This will improve your control and precision.
- Read the assembly instructions carefully
- Use the drill to insert screws into the furniture parts
- Switch drill bits if needed to fit different screws
- Tighten screws without overdoing it to avoid damage
Wall Hanging Tasks
Hanging pictures, mirrors, or clocks is a common home project. A cordless drill helps you drill holes in walls easily.
Practice choosing the right drill bit and using wall anchors for stability.
- Mark the spots where you want to hang items
- Use a drill bit suitable for your wall type (drywall, brick, etc.)
- Drill holes carefully and insert wall anchors if needed
- Drive screws into the anchors and hang your items securely

Credit: www.temu.com
Frequently Asked Questions
What Safety Tips Should I Follow When Using A Cordless Drill?
Always wear safety goggles and gloves. Keep hair and loose clothes away. Use the correct drill bit and secure your workpiece to avoid accidents.
How Do I Choose The Right Drill Bit For Projects?
Match the drill bit type and size to your material. Wood, metal, and masonry require different bits. Using the correct bit ensures clean, efficient drilling.
How Can I Maintain My Cordless Drill’s Battery Life?
Charge the battery fully before first use. Avoid overcharging and store batteries in a cool, dry place. Remove batteries when the drill is not in use.
What Are Common Cordless Drill Mistakes To Avoid?
Don’t apply excessive pressure; let the drill do the work. Avoid drilling at an angle unless needed. Always secure materials properly before drilling.
Conclusion
Using a cordless drill makes home projects easier and faster. It fits in your hand and does many jobs. Remember to choose the right drill bit for each task. Keep the battery charged to avoid delays. Practice safety by wearing goggles and working carefully.
With some effort, you can complete many repairs and builds yourself. A cordless drill is a useful tool for every home. Try it out and see how it helps you. Simple steps lead to better results. You can handle your projects with confidence and ease.