If you want to create strong, beautiful joints for your woodworking projects, learning how to use a dovetail jig is a game-changer. You might think this tool is only for experts, but with the right steps, you can master it too.
Imagine your drawers and boxes fitting together perfectly, without gaps or weak spots. In this guide, you’ll discover simple tips and tricks to get the most out of your dovetail jig. Ready to make your work look professional and last longer?
Keep reading, because the secret is easier than you think.
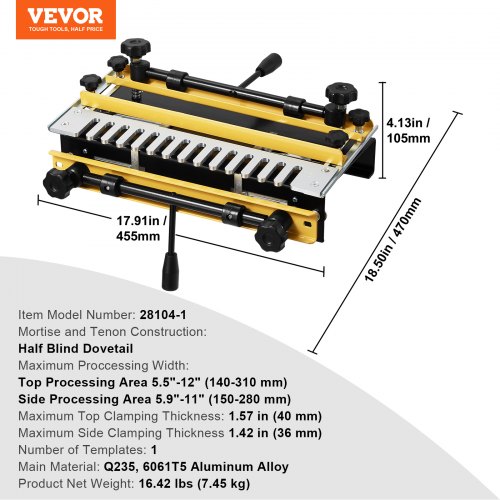
Credit: www.vevor.ca
Choosing The Right Dovetail Jig
A dovetail jig helps you make strong, neat joints in wood projects. Picking the right jig makes your work easier and better.
There are different types of dovetail jigs. Each one fits certain needs and skill levels. Learning about them helps you choose well.
Types Of Dovetail Jigs
Dovetail jigs come in several styles. Some are simple for beginners. Others are complex for detailed work.
- Manual Jigs:You move the wood by hand. Good for small projects.
- Template Jigs:Use fixed guides to shape the wood. Offer consistent results.
- Adjustable Jigs:Let you change the size and angle of the joints. Great for varied work.
- Router Table Jigs:Attach to a router table for easier cutting. Best for larger projects.
Factors To Consider
Think about your project type and skill before buying a jig. Not every jig suits every job.
Look at how easy the jig is to use and adjust. Also, check what size wood it handles.
- Skill level: Choose a jig that matches your experience.
- Project size: Make sure the jig fits the wood sizes you use.
- Adjustability: More options let you create different joint styles.
- Durability: Strong materials last longer and stay accurate.
- Price: Pick a jig within your budget but with good quality.
Recommended Brands
Some brands are known for making reliable dovetail jigs. They offer good quality and support.
- Porter-Cable:Popular for easy-to-use and sturdy jigs.
- Rockler:Offers adjustable jigs with precise guides.
- JessEm:Known for durable jigs with smooth adjustments.
- Makita:Makes router table jigs for serious woodworkers.
Essential Tools And Materials
Using a dovetail jig requires certain tools and materials to work well. Preparing these items before starting helps you get clean and accurate joints.
This guide covers key points about selecting a router, choosing router bits, and preparing wood for dovetail joints.
Router Selection
Choose a router that fits your project size. A fixed-base router is good for steady control. A plunge router helps adjust depth easily during cuts.
Look for a router with variable speed control. This feature lets you adjust speed for different wood types and bit sizes.
Router Bits
Use sharp and high-quality bits to make clean dovetail cuts. The common types are dovetail bits and straight bits.
- Dovetail bits:Cut angled tails and pins.
- Straight bits:Clean up edges and remove waste.
- Material:Carbide bits last longer and stay sharp.
- Size:Match bit size to the joint size.
Wood Preparation
| Step | Action |
| 1 | Select straight, dry wood without knots |
| 2 | Cut boards to size with square edges |
| 3 | Mark the wood pieces clearly for tails and pins |
| 4 | Clamp wood firmly to the jig before routing |
Setting Up Your Dovetail Jig
Setting up your dovetail jig correctly is key to making strong, precise joints. This guide covers the basics to get your jig ready for use.
Follow simple steps to align, clamp, and adjust the jig. Proper setup saves time and improves your woodworking results.
Aligning The Jig
Start by placing the jig on a flat work surface. Make sure the base is level to avoid crooked cuts. Position the jig so you have easy access to both sides.
Use a square to check that the jig is aligned at a right angle to your workbench. Adjust the position until it is perfectly straight.
Clamping Workpieces
Secure your wood pieces firmly in the jig’s clamps. Tight clamping stops the pieces from moving during cutting. This ensures clean, accurate dovetails.
- Place the tail board and pin board in their slots.
- Adjust the clamps to hold each board tightly.
- Check that both boards are flush at the ends.
- Tighten clamps securely without damaging the wood.
Adjusting Guides And Templates
Set the guide fences and template pins to match your desired dovetail size. Adjusting these parts controls the shape and spacing of the joints.
| Adjustment | Purpose |
| Guide Fence Position | Controls pin board placement |
| Template Pins | Shapes the dovetail cuts |
| Router Depth | Determines cut depth |
Cutting Tails And Pins
Using a dovetail jig helps you cut strong and precise joints. These joints connect wood pieces with interlocking parts called tails and pins.
This guide shows how to cut tails and pins using a dovetail jig. Follow the steps carefully for good results.
Routing The Tails
Start by setting up the wood board in the jig for tails. The tails are the wider parts of the dovetail joint.
Use a router with the correct bit to cut along the tail template. Move the router slowly to avoid mistakes.
- Clamp the board tightly in the jig
- Set the router bit depth as needed
- Follow the template shape carefully
- Remove the board after routing the tails
Routing The Pins
Next, place the matching board in the jig to cut the pins. Pins are the narrow parts that fit between the tails.
Use the same router bit and set the depth. Cut along the pin template to match the tails exactly.
- Align the board using the tail board as a guide
- Clamp it securely in the jig
- Route slowly along the pin template
- Check the fit between pins and tails
Tips For Clean Cuts
Clean cuts make the joint fit tightly and look good. Use sharp bits and steady hands for best results.
Keep the wood and jig clean. Dust or debris can cause rough cuts and poor fitting joints.
- Use sharp router bits
- Make slow and steady passes
- Keep the jig and work area clean
- Clamp boards firmly to avoid movement
- Test fit the joint before final assembly
Assembling And Testing The Joint
After cutting your dovetail joints, the next step is to assemble and test them. This ensures the pieces fit well before final gluing. Proper assembly helps avoid mistakes and weak joints.
Testing the joint fit lets you see if any adjustments are needed. Take your time to check each part carefully. A good fit means a strong and clean-looking joint.
Dry Fitting The Pieces
Dry fitting means joining the pieces without glue. This step helps check if the tails and pins align properly. Insert the pieces gently to avoid damage.
- Align the tails and pins carefully.
- Push the pieces together by hand.
- Look for gaps or tight spots.
- Note any parts that need sanding or trimming.
Making Adjustments
If the joint is too tight or loose, make small adjustments. Use a chisel or sandpaper to fine-tune the fit. Remove small amounts at a time for better control.
| Problem | Adjustment |
| Joint too tight | Lightly sand pins or tails |
| Joint too loose | Add thin wood shims or re-cut edges |
| Misaligned pieces | Check jig setup and recut if needed |
Gluing And Clamping
Once the fit is perfect, apply glue to the joint surfaces. Spread glue evenly on all tails and pins. Avoid using too much glue to prevent messes.
After gluing, clamp the joint tightly. Use clamps that apply even pressure across the joint. Wipe off excess glue before it dries.
- Apply wood glue to all joint surfaces.
- Join the pieces carefully.
- Use clamps to hold the joint firmly.
- Clean any glue squeeze-out immediately.
- Let the glue dry as per instructions.
Common Mistakes To Avoid
Using a dovetail jig can be tricky for beginners. Many people make simple mistakes that hurt their results.
Knowing what to watch out for saves time and wood. Avoid these common errors for better joints.
Misalignment Issues
Misalignment is a common problem when setting up the jig. If the parts do not line up, the joint will not fit.
Check the jig’s fence and clamps carefully before cutting. Even small shifts cause gaps in the joint.
- Secure the wood firmly in the jig to prevent movement
- Use the guide pins to align the boards accurately
- Double-check measurements before cutting
Incorrect Depth Settings
Setting the wrong cutting depth leads to weak or loose joints. Too deep or too shallow cuts cause problems.
Adjust the router depth carefully. Test on scrap wood before cutting your project pieces.
- Set the router bit depth to match the jig instructions
- Make small depth adjustments if joints do not fit properly
- Use test cuts to confirm settings
Poor Wood Handling
Wood that is warped, rough, or dirty causes poor joints. Handle wood pieces with care.
Prepare the wood by sanding and cleaning it. Make sure the boards fit well before using the jig.
- Choose straight, dry wood for best results
- Sand edges smooth for clean cuts
- Remove dust and debris before clamping wood in the jig
Advanced Techniques For Better Joints
Using a dovetail jig can improve the strength and look of your woodworking projects. Advanced techniques help create tighter, cleaner joints. These tips focus on precision and skill for better results.
Careful setup and understanding wood behavior are key. This guide covers half-blind dovetails, mixing wood types, and finishing details to enhance your joints.
Creating Half-blind Dovetails
Half-blind dovetails hide the joint from the front view. This style is common for drawers and fine furniture. Use a dovetail jig that supports half-blind cuts for accuracy.
- Set the jig to the half-blind dovetail mode.
- Adjust the depth stop for the tail board thickness.
- Cut the tails first, then use them to mark pins.
- Test fit on scrap wood to check tightness.
- Smooth edges with a chisel for a clean look.
Using Different Wood Types
Mixing hardwood and softwood affects joint strength and appearance. Hardwoods hold sharp edges well. Softwoods may compress during fitting.
| Wood Type | Best Use | Note |
| Hardwood (e.g., oak) | Tails | Strong and durable |
| Softwood (e.g., pine) | Pins | Easy to shape |
| Mixed woods | Contrast joints | Visual interest |
Finishing Touches
After cutting, smooth the joint surfaces. Sand lightly to remove rough spots. Use a chisel to clean corners for a tight fit.
- Apply wood glue evenly on both joint surfaces.
- Clamp the joint firmly until the glue dries.
- Remove excess glue before it hardens.
- Use a finish that matches the wood type.
- Check the joint for gaps and adjust if needed.

Credit: www.adamstarpntool.com
Maintenance And Storage Tips
Using a dovetail jig correctly ensures accurate joints. Keeping it clean and safe helps it last longer.
Good care includes cleaning, storing properly, and checking parts often. This keeps your jig working well.
Cleaning The Jig
Remove sawdust and debris after each use. Dust can cause parts to stick or wear out faster.
Use a soft brush or compressed air to clean hard-to-reach areas. Avoid using water to prevent rust.
- Brush off sawdust regularly
- Use compressed air for tight spots
- Wipe metal parts with a dry cloth
- Apply light oil to metal to stop rust
Storing Safely
Store the jig in a dry place to prevent rust and damage. Avoid damp or dusty areas.
Keep the jig in its case or cover it with a cloth. This protects it from dirt and knocks.
- Choose a dry, clean storage spot
- Use a protective case or cover
- Keep away from heavy tools that can fall
- Store parts and accessories together
Routine Checks
Inspect the jig before each use. Check for loose screws, worn parts, or damage.
Tighten all screws and bolts. Replace any parts that show signs of wear to keep joints accurate.
- Look for loose or missing screws
- Check guides for wear and tear
- Test clamps for secure holding
- Replace damaged parts promptly

Credit: www.youtube.com
Frequently Asked Questions
What Is The Purpose Of A Dovetail Jig?
A dovetail jig helps create precise, strong dovetail joints quickly. It guides the router for accurate cuts, improving woodworking accuracy and efficiency.
How Do I Set Up A Dovetail Jig Correctly?
Clamp the jig securely, align the wood pieces, and set the guide fences. Adjust the router depth for perfect joint fit.
Can Beginners Easily Use A Dovetail Jig?
Yes, dovetail jigs simplify complex joints. With practice, beginners can create professional-quality dovetail joints quickly and confidently.
What Type Of Wood Works Best With A Dovetail Jig?
Hardwoods like maple, oak, and cherry are ideal. They hold joints firmly and offer durability and a clean finish.
Conclusion
Mastering the dovetail jig takes practice. Start with simple projects. Build confidence. Patience and focus ensure great results. Always measure precisely. Avoid rushing the process. Safety comes first. Wear protective gear. Clean tools for longer life. Keep learning new techniques.
Different woods need different approaches. Seek advice from experienced woodworkers. They offer valuable tips. Experiment with creative designs. Enjoy the woodworking journey. Your skills will improve over time. Happy woodworking!