Planting bulbs can transform your garden into a vibrant haven, but getting it right starts with the right tool — your garden trowel. If you’ve ever struggled with digging the perfect hole or wondered how to avoid damaging delicate bulbs, this guide is made for you.
Learning how to use a garden trowel properly will save you time, protect your plants, and help your garden flourish like never before. Keep reading, and soon you’ll be planting bulbs with confidence and ease.
Choosing The Right Trowel
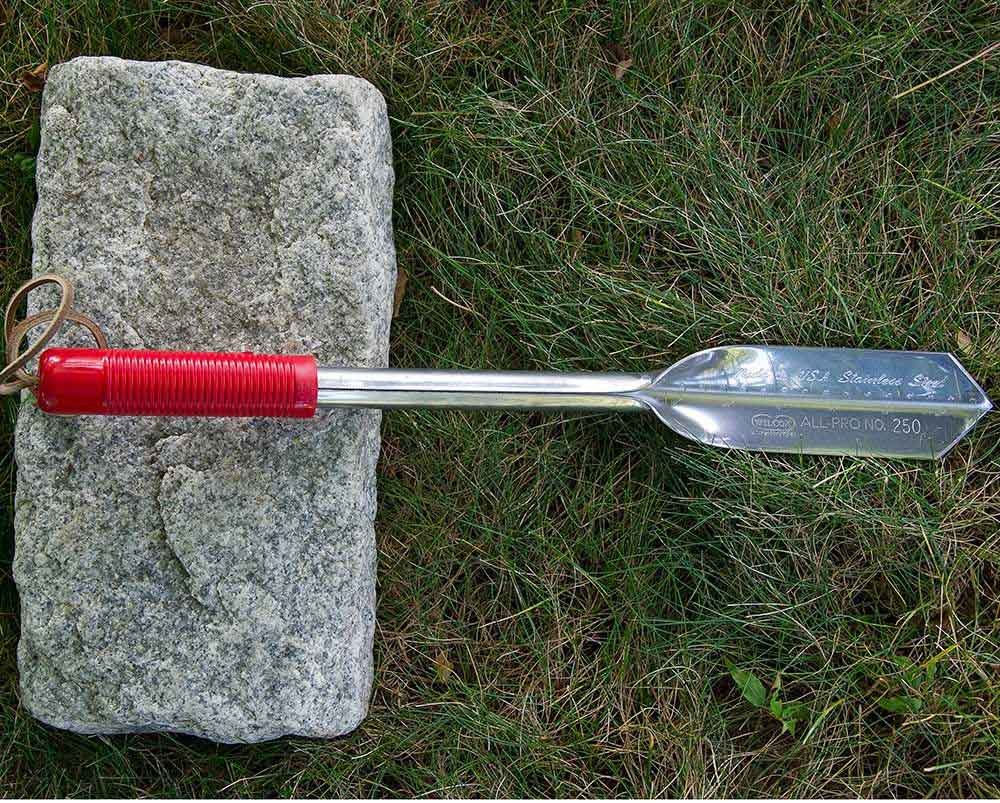
A garden trowel is a small hand tool used for digging holes and planting bulbs. Picking the right trowel helps you work faster and easier. It also protects your hands and plants.
Look at the trowel’s type, material, and size before buying. Each factor changes how well the trowel works for planting bulbs.
Types Of Garden Trowels
There are different types of garden trowels for various tasks. The right type depends on your soil and the bulbs you plant.
- Standard Trowel:Has a pointed blade for digging holes.
- Transplanting Trowel:Narrow blade for moving small plants.
- Weeding Trowel:Has a sharp edge to cut through weeds.
- Digging Trowel:Wider blade for loose soil or sand.
Material And Durability
Garden trowels come in different materials. Choose one that lasts and resists rust. This keeps the tool strong during planting.
- Stainless Steel:Rust-resistant and easy to clean.
- Carbon Steel:Very strong but may need oil to prevent rust.
- Aluminum:Lightweight but not as durable.
- Plastic:Good for light use and small jobs.
Size And Handle Comfort
Pick a trowel size that fits your hand and job. A comfortable handle reduces hand pain during long work.
- Blade Length:Short blades work well in tight spaces.
- Handle Shape:Ergonomic handles support your grip.
- Material:Wooden handles feel natural, rubber handles reduce slips.
- Weight:Choose a light trowel for less fatigue.

Credit: gardenerspath.com
Preparing The Soil
Using a garden trowel helps prepare the soil well for planting bulbs. Good soil lets bulbs grow strong roots and healthy plants.
Before planting, prepare the soil by clearing debris, loosening the ground, and adding nutrients. These steps make planting easier.
Clearing Debris
Start by removing leaves, sticks, and rocks from the soil surface. Debris can block bulbs from getting enough water and air.
Use your hands or the garden trowel to clear the area. Make sure the spot is clean before digging holes for bulbs.
Loosening The Ground
Use the garden trowel to dig into the soil and break it up. Loose soil helps bulb roots grow and spread easily.
Dig down about 6 to 8 inches. Remove large clumps and stones while loosening the soil to create a soft bed for bulbs.
Adding Nutrients
Bulbs need nutrients to grow well. Mix compost or bulb fertilizer into the loosened soil using the trowel.
- Spread a thin layer of compost over the soil
- Use the trowel to mix it evenly into the top 6 inches
- Check the soil moisture after adding nutrients
Measuring Bulb Depth
Planting bulbs at the right depth helps them grow strong and healthy. Using a garden trowel makes measuring this depth easy and accurate.
Too shallow or too deep planting can affect bulb growth. Learning how to measure depth ensures your bulbs get the best start.
Using The Trowel As A Guide
Use the trowel to check how deep to plant each bulb. Most garden trowels have a pointed blade that helps dig holes at the right depth.
After digging, mark the depth on the trowel handle with tape or a marker. This way, you can quickly dig the same depth for each bulb.
- Push the trowel into soil until the tip reaches the desired depth.
- Note where the soil meets the blade or handle.
- Use this mark to measure each hole.
Depth Recommendations For Common Bulbs
Different bulbs need different planting depths. Planting bulbs too shallow or too deep can stop them from growing well.
| Bulb Type | Planting Depth |
|---|---|
| Tulips | 6 to 8 inches (15 to 20 cm) |
| Daffodils | 6 inches (15 cm) |
| Crocus | 3 to 4 inches (7.5 to 10 cm) |
| Hyacinths | 6 inches (15 cm) |
| Alliums | 8 inches (20 cm) |
Check the size of the bulb too. Larger bulbs need deeper holes. Smaller bulbs can be planted shallower.

Credit: savvygardening.com
Digging The Hole
Using a garden trowel to dig holes for planting bulbs is simple. It helps create the right space for bulbs to grow well. Proper digging protects bulbs from damage and supports healthy roots.
Let’s look at how to dig the hole correctly and avoid harming the bulbs during planting.
Correct Technique For Digging
Hold the garden trowel firmly by the handle. Push the blade into the soil with a slight forward angle. Lift the soil gently and remove it to form a hole deep enough for the bulb size. The hole should be about two to three times the bulb’s height.
- Clear the soil surface of debris.
- Insert the trowel blade straight down.
- Loosen soil around the hole to improve drainage.
- Remove soil carefully without making the hole too wide.
- Check hole depth before placing the bulb.
Avoiding Damage To Bulbs
Handle bulbs with care to keep them healthy. Avoid sharp tools or rough soil that can cut the bulb. Make sure the hole edges are smooth and free of hard soil clumps. This prevents bruising or breaking the bulb skin.
| Risk | How to Avoid |
| Cutting the bulb | Use a clean, smooth trowel blade and dig gently |
| Bruising the bulb | Handle bulbs softly and avoid dropping them |
| Drying out bulbs | Plant bulbs soon after digging the hole |
| Planting too shallow | Dig hole deep enough, about 2-3 times bulb height |
Planting The Bulb
Using a garden trowel makes planting bulbs easier and cleaner. It helps dig the right size hole quickly.
Planting bulbs correctly gives flowers the best chance to grow strong and healthy.
Positioning The Bulb
Place the bulb in the hole with the pointed end facing up. The roots grow from the bottom.
If you plant the bulb upside down, it will have trouble growing properly. Use your trowel to make the hole deep enough.
Spacing Between Bulbs
Keep enough space between bulbs so they do not crowd each other. Crowding can stop flowers from growing well.
- Small bulbs need about 2-3 inches of space
- Medium bulbs need about 3-5 inches of space
- Large bulbs need 5-6 inches or more of space
Covering And Firming Soil
Using a garden trowel helps you cover bulbs with soil easily. It also lets you firm the soil around the bulbs for good growth.
Covering and firming the soil is important. It protects bulbs and keeps them in place.
Refilling The Hole
After placing the bulb, use your trowel to refill the hole. Gently push soil back over the bulb until the hole is full.
Make sure the soil covers the bulb completely. This keeps the bulb safe from cold and animals.
Tamping Down Gently
Use the flat side of the trowel to press the soil down softly. Firm soil helps the bulb stay in place and stops air pockets.
Do not press too hard. Too much pressure can damage the bulb or soil structure.
Watering And Maintenance
Using a garden trowel to plant bulbs is only the first step. Proper watering and care help bulbs grow strong and healthy. Good maintenance ensures your flowers bloom well each season.
Watering and regular upkeep protect bulbs from drying out or rotting. Learn how to water bulbs correctly and care for them over time.
Initial Watering Tips
After planting bulbs with your garden trowel, water the soil gently but deeply. This helps settle the soil around the bulbs and starts their growth.
Use a watering can or hose with a soft spray to avoid washing away soil. Keep the soil moist but not soaked.
- Water immediately after planting
- Apply enough water to moisten soil 6 inches deep
- Avoid overwatering to prevent bulb rot
- Check soil moisture regularly
Long-term Care
Bulbs need steady care after planting to grow well. Water them during dry spells in fall and spring. Let the soil dry between waterings.
Remove dead leaves and flowers to keep plants healthy. Mulching helps keep soil moist and reduces weeds.
- Water during dry periods only
- Remove dead foliage after blooming
- Apply mulch to retain moisture
- Check bulbs yearly for signs of disease

Credit: www.freepik.com
Frequently Asked Questions
What Is A Garden Trowel Used For?
A garden trowel is used for digging, planting, and transplanting. It’s essential for bulb planting as it helps create the perfect hole depth. Its pointed blade allows for precise soil penetration, ensuring bulbs are planted at the correct depth and spacing.
It’s a versatile tool for any gardener.
How Do You Plant Bulbs With A Trowel?
To plant bulbs with a trowel, start by digging a hole twice as deep as the bulb’s height. Place the bulb in the hole with the pointed side up. Cover it with soil and water thoroughly. Ensure proper spacing between bulbs for optimal growth.
Can A Garden Trowel Be Used For Weeding?
Yes, a garden trowel can be used for weeding. Its sharp edge helps remove weeds effectively. Simply dig around the weed, loosening the soil, and pull it out. This prevents weed regrowth and keeps your garden healthy.
What Material Is Best For A Trowel?
Stainless steel is the best material for a garden trowel. It’s durable, rust-resistant, and easy to clean. A stainless steel trowel ensures longevity and efficient gardening. It maintains sharpness for precise digging and planting tasks.
Conclusion
Using a garden trowel makes planting bulbs simple and neat. It helps dig the right hole size quickly. You can place bulbs gently without damage. This tool saves time and effort in your garden work. Keep your trowel clean and sharp for best use.
Enjoy watching your bulbs grow and bloom beautifully. Gardening becomes more fun with the right tools in hand. Try planting bulbs with a trowel for great results.