Are you ready to take your DIY skills to the next level? Knowing how to use a hand drill for screwing projects can save you time, effort, and money.
Whether you’re building furniture, fixing something around the house, or working on a creative project, mastering this simple tool gives you more control and precision. In this guide, you’ll discover easy steps and practical tips that anyone can follow—no experience needed.
Keep reading, and you’ll soon handle your screwing tasks like a pro.
Choosing The Right Hand Drill
Using a hand drill for screwing projects makes work easier and faster. Picking the right drill helps you do the job well.
You should know about different drills, drill bits, and safety gear before starting your project.
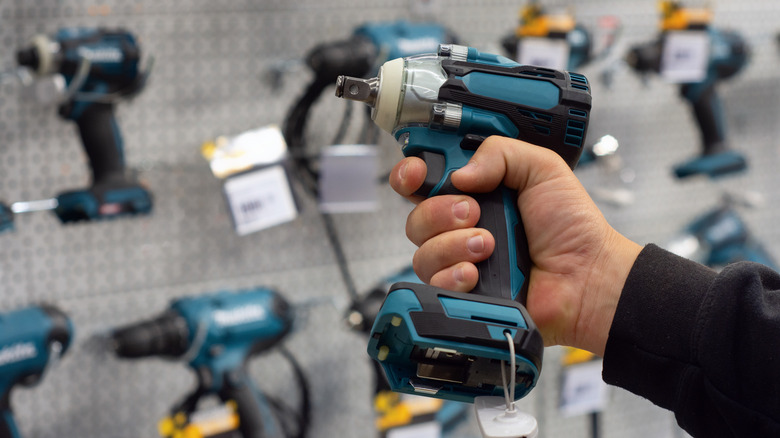
Types Of Hand Drills
Hand drills come in different types. Each type fits certain tasks better than others.
Manual hand drills need you to turn the handle by hand. They work well for small jobs or where no power is available.
Electric hand drills run on batteries or power cords. They give more speed and power for bigger projects.
- Manual drills: simple and quiet, good for light tasks
- Electric drills: fast and strong, ideal for heavy work
- Cordless drills: portable and easy to use anywhere
Selecting Drill Bits
Choosing the right drill bit helps you screw into wood, metal, or plastic easily.
Use wood drill bits for wooden surfaces. Use metal bits for metal parts. Use special bits for plastic materials.
- Twist bits: good for wood and metal
- Spade bits: best for large holes in wood
- Masonry bits: used for concrete and brick
Safety Gear Essentials
Wearing safety gear protects you from injuries while drilling.
Always wear safety glasses to protect your eyes from dust and debris. Use gloves to protect your hands.
- Safety glasses to shield your eyes
- Gloves for hand protection
- Ear protection if the drill is loud
- Wear a dust mask if working in dusty places

Credit: community.preciousplastic.com
Preparing Your Workspace
Before using a hand drill for screwing projects, organize your workspace well. A clean and safe area helps you work faster and avoid mistakes.
Taking time to prepare will make your project easier and safer. Follow these steps to get ready.
Clearing The Area
Remove all items that can get in your way or cause accidents. A tidy space reduces distractions and hazards.
- Clear tools and clutter from your workbench.
- Make sure the floor is free of debris and spills.
- Keep cords and cables out of your path.
- Ensure good lighting so you see clearly.
Securing The Material
Hold your material firmly before drilling. This prevents slipping and helps you drill straight screws.
| Method | Use |
| Clamps | Hold wood or metal securely to a table |
| Vise | Grip small parts tightly for precision |
| Workbench with Stops | Keep large pieces from moving side to side |
| Assistant | Hold material steady if clamps are not available |
Marking Screw Positions
Mark where screws go to keep spacing even and avoid mistakes. Clear marks guide you during drilling.
- Use a pencil or marker to make small dots.
- Measure distances with a ruler or tape measure.
- Double-check marks before drilling.
- For multiple screws, mark all positions before starting.
Setting Up The Hand Drill
Using a hand drill for screwing projects needs careful setup. A proper setup helps you work safely and efficiently.
Before starting, you must install the drill bit, adjust torque settings, and test the drill rotation.
Installing The Drill Bit
First, choose the right drill bit for your screw size. Use a screwdriver bit that fits the screw head well.
Open the chuck by turning it counterclockwise. Insert the drill bit fully into the chuck. Tighten the chuck by turning it clockwise until it is secure.
- Pick a bit that matches the screw type
- Open the chuck to fit the bit
- Insert the bit fully
- Tighten the chuck securely
Adjusting Torque Settings
Torque controls how much force the drill uses. Set the torque to avoid damaging screws or material.
Lower torque settings are good for small screws or soft materials. Higher torque is best for big screws or hard materials.
- Find the torque ring near the chuck
- Turn the ring to a low number for soft materials
- Turn to a high number for hard materials
- Adjust as needed during your work
Testing Drill Rotation
Check the drill rotation before screwing. This ensures the drill moves the right way.
Switch the drill on briefly. The bit should spin clockwise for screwing in. Reverse the drill to remove screws.
- Turn on the drill for a short time
- Watch the bit spin clockwise
- Use reverse to unscrew if needed
- Stop if the drill sounds strange or wobbles
Drilling Techniques For Screwing
Using a hand drill for screwing projects helps make your work easier and faster. Proper drilling techniques improve accuracy and prevent damage.
Focus on key steps like starting the pilot hole, controlling speed and pressure, and keeping the drill aligned. These tips help you screw securely.
Starting The Pilot Hole
Begin by drilling a small pilot hole before inserting the screw. This hole guides the screw and stops the wood from splitting.
Choose a drill bit slightly smaller than the screw’s diameter. Mark the spot to keep the hole in the right place.
Controlling Speed And Pressure
Use a slow to medium speed when drilling pilot holes. This control prevents the bit from slipping and keeps the hole clean.
Apply steady, moderate pressure. Pressing too hard can damage the material or break the drill bit.
- Start drilling gently to create a guide
- Increase speed only after the bit grips the material
- Maintain even pressure throughout the drilling
Maintaining Drill Alignment
Keep the drill bit straight and aligned with the screw’s direction. This ensures the screw goes in straight and holds firmly.
Hold the drill steady with both hands. Check the angle often and adjust if the drill starts to tilt.
- Position the drill perpendicular to the surface
- Use a guide or clamp if needed for accuracy
- Slow down if the drill bit moves off course
Handling Common Challenges
Using a hand drill for screwing projects can be tricky at times. Certain problems may slow down your work. Learning how to handle these challenges helps you finish tasks smoothly.
This guide covers three common issues: stripped screws, wood splitting, and drill bit slippage. Each section gives tips to fix or avoid these problems.
Dealing With Stripped Screws
Stripped screws happen when the drill slips or the screw head wears down. It makes removing or driving screws hard. Using the right tools and techniques can help fix this.
- Use a rubber band between the screw and drill bit for extra grip.
- Try a screwdriver with a wider or different head size.
- Tap the screw lightly with a hammer to create a better grip surface.
- Apply some glue or epoxy on the screw head to help hold the bit.
- Use pliers to turn the screw if the head is exposed.
Avoiding Wood Splitting
Wood splitting happens if you force screws too hard or drill too fast. It can damage your project. Use these tips to keep wood intact while screwing.
| Cause | Prevention Method |
| Driving screws without pilot holes | Drill pilot holes before screwing |
| Using too large screws | Choose screw size matching wood thickness |
| Applying too much force | Turn screws slowly and steadily |
| Drilling near wood edges | Start drilling a bit away from edges |
Fixing Drill Bit Slippage
Drill bit slippage causes uneven holes and wasted effort. It happens when the bit does not hold well in the drill chuck or slips on the screw head.
To fix bit slippage:
- Check the drill chuck is tight and secure the bit firmly.
- Use bits with sharp, clean edges to grip screws better.
- Place the drill bit straight on the screw and apply steady pressure.
- Use drill bits designed for screwing, like screwdriver bits.
- Clean any dirt or oil from the drill bit and screw head.
Credit: www.slashgear.com
Maintaining Your Hand Drill
Keeping your hand drill in good shape helps it last longer. Regular care makes sure it works smoothly for all your screwing projects.
Follow simple steps to clean, lubricate, and store your drill properly. This care prevents damage and keeps your tool ready to use.
Cleaning After Use
After each use, remove dust and debris from your hand drill. Use a soft brush to clean hard-to-reach parts. Wipe the drill body with a dry cloth to avoid rust.
- Brush off dust and wood chips
- Use a dry cloth to wipe the handle and body
- Check for stuck dirt in the chuck and gears
- Do not use water; keep the drill dry
Lubricating Moving Parts
Lubricate the drill’s moving parts to reduce friction. This keeps the drill turning smoothly and prevents wear. Use light machine oil or a lubricant made for tools.
| Part | Lubrication Frequency | Recommended Lubricant |
| Chuck | After every 5 uses | Light machine oil |
| Gears | Monthly | Grease or tool lubricant |
| Handle joints | Monthly | Light machine oil |
Storing Properly
Store your hand drill in a dry place to prevent rust. Keep it away from moisture and dust. Use a toolbox or hang it on a pegboard to avoid damage.
- Keep the drill in a dry, cool area
- Use a protective case or toolbox
- Hang on a pegboard if possible
- Avoid stacking heavy items on top
Credit: www.genuinsky.com
Frequently Asked Questions
How Do I Choose The Right Bit For A Hand Drill?
Select a bit that matches your screw head type and size. Using the correct bit ensures a secure fit and prevents damage to screws and materials. Check bit compatibility before starting your project for efficient screwing.
What Safety Tips Should I Follow Using A Hand Drill?
Always wear safety goggles and gloves to protect yourself. Keep hair and loose clothing away from the drill. Work in a well-lit area and maintain a firm grip on the drill to avoid accidents.
Can I Use A Hand Drill On Different Materials?
Yes, hand drills work on wood, plastic, and light metals. Choose the correct drill bit and adjust pressure accordingly. Avoid forcing the drill to prevent bit damage and ensure clean screw insertion.
How Do I Prevent Screws From Stripping With A Hand Drill?
Use the right bit size and apply steady, controlled pressure. Avoid over-tightening screws and keep the drill speed moderate. This helps maintain screw integrity and ensures strong, lasting connections.
Conclusion
Mastering a hand drill for screwing is simple and effective. Following these steps ensures success in your projects. Begin with the right drill bit. Ensure proper alignment for smooth operation. Use steady pressure to avoid damaging materials. Practice improves skill, making tasks easier over time.
Safety is always a priority. Wear protective gear and stay focused. With practice, confidence grows. Projects become quicker and more efficient. A hand drill remains a vital tool in any toolkit. Happy drilling, and enjoy your newfound skills!