Are you ready to take your DIY woodworking projects to the next level? Knowing how to use a hand saw correctly can make all the difference between a clean, precise cut and a frustrating mess.
Whether you’re building a simple shelf or crafting a detailed piece, mastering this essential tool will save you time, effort, and headaches. In this guide, you’ll discover easy steps and insider tips to help you handle your hand saw like a pro.
Keep reading, and soon you’ll feel confident and in control every time you pick up your saw.

Credit: www.anneofalltrades.com
Choosing The Right Hand Saw
Using the right hand saw makes woodworking easier and safer. Picking a saw depends on your project and the type of wood.
This guide helps you choose the best hand saw for your DIY woodworking tasks.
Types Of Hand Saws
There are many hand saws for woodworking. Each saw has a special use. Knowing their types helps you pick the right one.
- Crosscut Saw: Cuts wood across the grain.
- Rip Saw: Cuts wood along the grain.
- Back Saw: Has a stiff spine for precise cuts.
- Keyhole Saw: Cuts small shapes or curves.
- Bow Saw: Good for rough cutting and pruning.
Selecting Based On Wood Type
Different woods need different saws. Hardwoods require a saw with sharp, strong teeth. Softwoods need fewer teeth per inch.
Choose a saw with the right tooth count for the wood type. This helps make clean cuts without much effort.
- Hardwood: Use saws with more teeth per inch (TPI).
- Softwood: Use saws with fewer TPI for faster cutting.
- Plywood: Use a fine-tooth saw to avoid splintering.
Blade Features To Consider
Blade design affects how well a saw cuts. Look for blade length, tooth shape, and flexibility when choosing a saw.
These features help you get smooth cuts and control the saw better.
- Blade Length: Longer blades cut faster but need more space.
- Tooth Shape: Different shapes suit different cutting styles.
- Flexibility: Rigid blades give control; flexible blades help with curves.
- Handle Comfort: A good handle reduces hand fatigue.

Credit: www.youtube.com
Preparing For A Safe Cut
Using a hand saw safely is important for any woodworking project. Preparing well helps you avoid accidents and get clean cuts.
This guide covers setting up your workspace, securing the wood, and wearing the right safety gear.
Setting Up Your Workspace
Choose a clean, well-lit area for sawing. Make sure you have enough space to move freely and handle the wood easily.
- Clear the area of clutter and obstacles
- Set your workbench or sawhorse at a comfortable height
- Ensure good lighting to see cutting lines clearly
- Keep tools and materials within reach but out of your cutting path
Securing The Wood
Hold the wood firmly to prevent slipping during the cut. Use clamps or a vise to keep the wood steady and safe.
| Tool | Purpose |
| Clamps | Hold wood firmly on a work surface |
| Vise | Secure wood in place for precise cuts |
| Workbench | Provides stable base for cutting |
Personal Safety Gear
Wear the right gear to protect yourself while cutting wood. Safety equipment reduces the risk of injury from sawdust and sharp edges.
- Safety goggles to protect your eyes
- Work gloves to protect your hands
- Dust mask to avoid breathing sawdust
- Closed-toe shoes to shield your feet
Proper Hand Saw Techniques
Using a hand saw correctly helps you cut wood safely and accurately. Good techniques save time and reduce mistakes.
Learn the right grip, stance, and cutting methods to improve your woodworking skills.
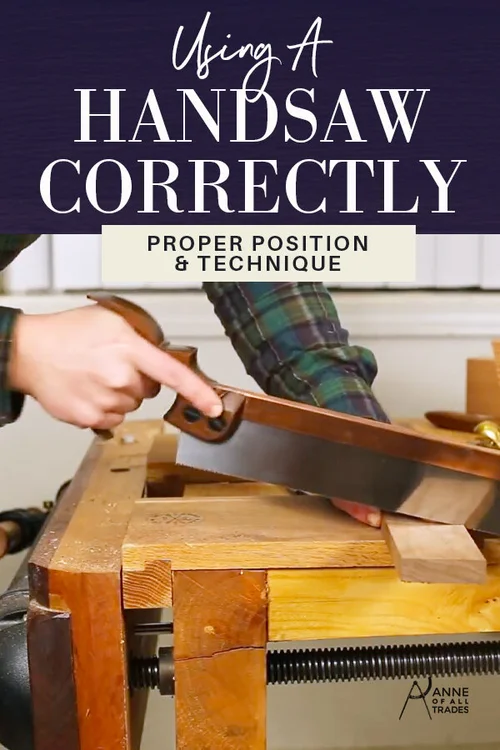
Correct Grip And Stance
Hold the saw handle firmly but not too tight. Your grip should feel comfortable and steady.
Stand with your feet shoulder-width apart. Position your body so the saw can move freely in a straight line.
- Use your dominant hand to hold the saw
- Keep your wrist straight to avoid strain
- Place your non-dominant hand on the wood for support
- Face the cutting line directly for better control
Starting The Cut
Begin the cut by placing the saw teeth on the wood edge. Use slow, short strokes at first.
Make a small groove to guide the saw blade during the cut. This prevents slipping and uneven lines.
- Mark your cut line with a pencil
- Hold the saw at a low angle (about 45 degrees)
- Use light pressure to start the groove
- Check that the saw teeth follow the line
Maintaining A Straight Line
Keep your eye on the marked line as you saw. Adjust your angle to stay on track.
Use your free hand to steady the wood and feel the saw’s movement. This helps keep the cut straight.
- Look down the saw blade, not just the tip
- Keep the saw blade vertical to the wood surface
- Stop and realign if the cut starts to drift
- Use smooth, even strokes for better control
Controlling Speed And Pressure
Move the saw at a steady pace. Too fast can cause mistakes, too slow wastes energy.
Apply light pressure on the forward stroke. Let the saw teeth do the cutting work.
- Push the saw gently forward
- Release pressure on the return stroke
- Keep a rhythm to avoid tiring your arms
- Stop if the saw binds or stalls
Common Mistakes To Avoid
Using a hand saw correctly helps you finish woodworking projects faster and safer.
Many beginners make simple mistakes that cause poor cuts or damage the saw. Avoid these errors to get better results.
Misalignment Issues
Cutting with a misaligned saw blade leads to crooked edges and wasted wood.
- Always mark your cut line clearly with a pencil or chalk.
- Hold the saw handle steady and start the cut slowly.
- Check the blade angle to keep it straight along the line.
- Use a guide or clamp a straight edge if needed.
Using Excessive Force
Pushing too hard can bend the blade or cause rough cuts. Let the saw do the work.
| Force Level | Effect on Cut |
| Light | Smooth, controlled cut |
| Medium | Good speed, less fatigue |
| Heavy | Blade bends, rough edges |
Neglecting Blade Maintenance
Dull or dirty blades slow down work and reduce cut quality.
- Clean the blade after each use to remove sap and dust.
- Sharpen the teeth regularly with a file or take it to a professional.
- Store your saw in a dry place to avoid rust.
Maintaining Your Hand Saw
Keeping your hand saw in good shape helps you cut wood smoothly. Regular care makes the saw last longer.
Simple steps like cleaning, sharpening, and proper storage protect your tool. These habits improve your DIY woodworking results.
Cleaning After Use
Remove sawdust and resin from the blade after each use. This keeps the saw sharp and safe from rust.
Use a dry brush or cloth to clean the teeth and blade. Avoid water to stop rust formation.
- Brush off sawdust with a stiff brush
- Wipe the blade with a dry rag
- Use mineral spirits for sticky resin
Sharpening The Blade
Dull blades make cutting hard and unsafe. Sharpen your hand saw blade to keep it effective.
Use a file designed for saw teeth. File each tooth evenly to restore sharpness.
- Clamp the saw blade firmly
- File each tooth in one direction
- Keep the file angle consistent
- Check teeth for even height
Storage Tips
Store your hand saw in a dry place to avoid rust. Protect the blade from damage by covering it.
Hang the saw or keep it in a toolbox. Avoid stacking heavy items on top of it.
- Use a blade guard or sheath
- Keep saw in a dry, cool area
- Hang saw on a pegboard or nail
- Avoid humid or wet storage spots
Advanced Tips For Smooth Cuts
Using a hand saw for woodworking takes skill and care. Smooth cuts make your projects look better and fit well.
These tips help you improve your cutting technique and get cleaner results with less effort.
Using Guide Tools
Guide tools help keep your saw straight. This reduces mistakes and uneven edges. A simple guide is a straight edge clamped to the wood.
You can also use a miter box to guide your saw for precise angle cuts. These tools help you saw with confidence and accuracy.
- Clamp a straight edge to your wood
- Use a miter box for angle cuts
- Mark your cut line clearly before sawing
Cutting Curves And Angles
Cutting curves needs a steady hand and the right saw. Use a fine-toothed saw for smoother curves. Move slowly and follow your marked line closely.
For angled cuts, position your saw at the correct angle before you start. Saw with short strokes to keep control and avoid splintering.
- Choose a saw designed for curves
- Mark your curves clearly
- Saw gently with short strokes
- Check your angle before cutting
Combining Hand Saw With Other Tools
Using other tools with your hand saw can improve your cuts. A pencil and square help you mark straight lines. Sandpaper smooths edges after cutting.
A chisel can clean up small areas where the saw can’t reach. Clamps hold your wood steady, making it safer and easier to cut.
- Mark cuts with pencil and square
- Clamp wood firmly before sawing
- Use a chisel to clean tight spots
- Sand edges for smooth finishes

Credit: www.anneofalltrades.com
Frequently Asked Questions
What Type Of Hand Saw Is Best For Diy Woodworking?
A crosscut saw is best for cutting wood across the grain. A rip saw works well for cutting along the grain. Choose a saw based on your specific woodworking project and the type of cuts you need.
How Do I Hold A Hand Saw Correctly?
Grip the saw handle firmly but not too tight. Keep your wrist straight and your elbow close to your body. Use smooth, controlled strokes to ensure precise and safe cutting.
How Can I Make Straight Cuts With A Hand Saw?
Mark your cutting line clearly using a pencil and square. Secure the wood firmly with clamps. Start slowly and follow the line steadily with the saw blade for a straight cut.
How Often Should I Sharpen My Hand Saw?
Sharpen your hand saw when you notice it cuts slowly or requires extra effort. Regular sharpening ensures clean cuts and extends the tool’s life. Use a proper file or take it to a professional.
Conclusion
Mastering a hand saw opens new DIY possibilities. Practice makes perfect. Start with simple projects. Focus on safety and technique. Choose the right saw for each task. Remember, patience is key. A steady hand ensures clean cuts. Enjoy the process.
Celebrate your woodworking creations. Happy sawing!
