Imagine trying to hang a picture, install a shelf, or lay tiles without knowing if they’re perfectly straight. Frustrating, right?
That’s where a level comes in, and mastering its use can save you time, effort, and money. You might think using a level is simple, but there’s a knack to getting it just right. Do you ever wonder why some DIY projects look professional while others seem off?
The secret often lies in precise alignment, and a level is your best friend in achieving that. In this guide, you’ll discover easy steps to use a level effectively, ensuring your projects are always spot-on. Ready to transform your DIY skills and impress everyone with your perfectly aligned creations? Let’s dive in!
Choosing The Right Level
Using a level helps you keep surfaces even and straight. Picking the right level makes your work easier and more accurate.
Many types of levels exist. Each type fits different projects and needs. Learn about levels to pick one that works best for you.
Types Of Levels
Levels come in various shapes and sizes. Each type measures alignment in a unique way.
- Spirit Level:Uses liquid and bubble to show levelness.
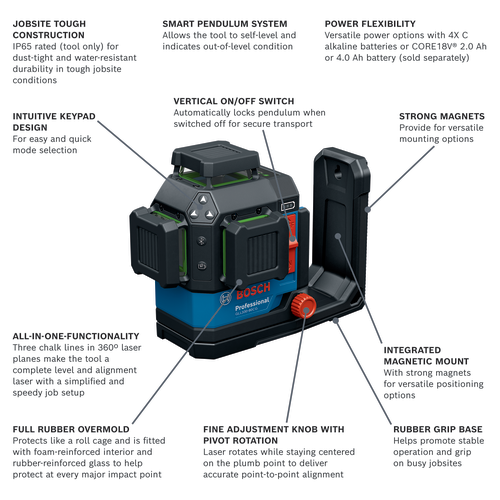
- Laser Level:Projects a laser line for long-distance alignment.
- Digital Level:Gives a digital reading of angles.
- Carpenter’s Level:A long, straight tool for checking flat surfaces.
- Torpedo Level:Small and handy for tight spaces.
Features To Consider
Look for features that match your tasks. The right features improve accuracy and ease of use.
| Feature | Why It Matters |
| Size | Fits the space you work in |
| Material | Durability and weight |
| Vials | Number and type affect accuracy |
| Laser Range | Distance you can project the line |
| Digital Display | Easy-to-read angle measurements |
Level Accuracy Ratings
Levels come with accuracy ratings. These ratings show how precise the tool is.
- A rating like 0.5 mm/m means the bubble moves half a millimeter over one meter.
- Lower numbers mean better accuracy.
- Choose an accuracy rating that fits your project needs.
- Professional jobs need higher accuracy.
- Simple home projects may not need very high accuracy.

Credit: www.shutterstock.com
Preparing For Alignment
Using a level helps you align objects accurately. Preparing well ensures better results and less hassle.
This guide covers how to prepare your work area and set up your level for precise alignment.
Selecting The Surface
Choose a flat and stable surface for placing the object you want to align. Uneven surfaces can cause errors in measurement.
Hard surfaces like wood, concrete, or metal work best for accurate leveling.
Cleaning The Area
Remove dust, dirt, and debris from the surface and the level tool. Dirt can affect the level’s reading and cause mistakes.
- Wipe the surface with a clean cloth.
- Check the level for any stuck particles.
- Clean the level’s vial to ensure clear visibility.
- Keep your hands clean to avoid smudges.
Setting Up The Level
| Action | Details |
|---|---|
| Place the level | Set it on the surface or object to check alignment. |
| Adjust position | Move the level until the bubble is centered between the lines. |
| Check multiple spots | Test different areas to confirm consistent alignment. |
| Secure the level | Hold it steady or clamp it to avoid movement during measurement. |
Using A Level Correctly
A level is a simple tool that helps you check if surfaces are straight or even. Using it right makes your work look neat and accurate.
Knowing how to hold and read a level ensures you get the best results every time. Let’s look at the key steps.
Holding The Level Properly
Hold the level firmly with both hands. Keep it steady on the surface you want to check.
Make sure the level is flat and not tilted. Holding it at an angle can give wrong readings.
Reading The Bubble
Look at the bubble inside the tube. The bubble shows if the surface is level or not.
The surface is level when the bubble sits exactly between the two lines in the tube.
- Bubble centered = level surface
- Bubble to one side = surface is tilted
Adjusting For Accuracy
If the bubble is not centered, adjust the surface or object. Move it until the bubble rests between the lines.
Check the level more than once to make sure it is accurate. Small changes can affect the reading.
Credit: www.gosupps.com
Techniques For Different Projects
Using a level helps you align things straight and even. It works well for many home projects.
Each project needs a slightly different way to use the level. This guide shows how to use it for wall hanging, furniture assembly, and flooring.
Wall Hanging
To hang pictures or shelves, place the level on top of the item. Adjust until the bubble is in the center.
Mark the wall where the ends are level. This helps you drill holes in the right spots.
- Hold the level on the item’s top edge
- Move the item until the bubble centers
- Mark the wall at the level ends
- Use these marks to guide your nails or screws
Furniture Assembly
When building furniture, place the level on flat surfaces. Check if parts are even and adjust before tightening screws.
Use the level on shelves, tabletops, and cabinet sides. This ensures the furniture is stable and looks good.
- Check each surface with the level
- Adjust parts until the bubble is centered
- Tighten screws after confirming levelness
- Repeat checks during assembly to avoid mistakes
Flooring Installation
Use a level to check the floor surface before laying tiles or wood. A flat floor helps the materials fit well.
Check multiple spots across the floor. Use shims or sanding to fix any uneven areas.
- Place the level on different floor areas
- Look for bubbles away from center showing dips or rises
- Fix uneven spots before installing flooring
- Check level again after installation for best results
Common Mistakes To Avoid
Using a level tool correctly is key for precise alignment. Many people make simple errors that cause wrong results.
Knowing these common mistakes helps you get better and more accurate measurements every time.
Ignoring Calibration
Calibration means checking if your level tool is accurate. Ignoring this can lead to wrong readings. Always test your level before use.
- Place the level on a flat surface and note the bubble position.
- Flip the level 180 degrees and check if the bubble stays in the same spot.
- If the bubble moves, adjust the tool or mark the error.
- Repeat calibration regularly to keep results reliable.
Misreading The Bubble
Many users do not focus on the bubble correctly. The bubble must be centered between the lines for a true level.
| Common Bubble Mistakes | How to Fix |
|---|---|
| Bubble not centered but close | Adjust tool position slowly |
| Bubble jumps or moves quickly | Hold the level steady and avoid shaking |
| Reading from an angle | Look straight at the bubble for accuracy |
Uneven Surfaces
Placing a level on uneven surfaces causes false readings. Always find a stable, flat area to measure.
- Check the surface visually for bumps or gaps.
- Use a small piece of wood or flat board if surface is rough.
- Recheck the level after adjusting the surface.
Maintaining Your Level
Keeping your level in good condition helps you get accurate results. Regular care ensures it works well for a long time.
Simple maintenance steps prevent damage and keep the tool reliable. Follow these tips to maintain your level properly.
Regular Calibration
Check your level often to make sure it is accurate. Calibration helps find any errors in the bubble or digital reading.
Test the level by placing it on a flat surface, then flip it over. Both readings should match closely.
- Place the level on a flat surface
- Mark the bubble’s position or reading
- Flip the level and check again
- Adjust or replace if readings differ
Proper Storage
Store your level in a dry, safe place to avoid damage. Keep it away from heavy objects that may cause dents.
Use a protective case or hang it on a wall hook. Avoid leaving the level in extreme temperatures or direct sunlight.
- Use a soft case or pouch
- Keep away from moisture and dust
- Store on a stable shelf or wall hook
- Do not place heavy items on top
Cleaning Tips
Clean your level regularly to remove dirt and dust. Use a soft cloth and mild soap with water for the best results.
Avoid harsh chemicals that can damage the surface or bubble vial. Dry the level completely before storing it.
- Wipe with a soft, damp cloth
- Use mild soap if needed
- Do not soak or immerse in water
- Dry fully before storage
Advanced Tips For Precision
Using a level helps you align objects straight and even. For more accuracy, try advanced techniques.
This guide shares tips to improve your precision with levels and related tools.
Using Laser Levels
Laser levels project a straight line across a surface. They are great for precise alignment over long distances.
Place the laser level on a stable surface or tripod. Adjust it until the laser line is perfectly horizontal or vertical.
- Check the laser beam’s brightness for clear visibility.
- Use the laser line to mark exact points on walls or floors.
- Keep the laser level steady to avoid errors.
Combining Tools For Accuracy
Use a spirit level with a laser level to double-check measurements. This reduces mistakes.
Other tools like measuring tapes and squares help confirm angles and distances.
- Measure distances first with a tape measure.
- Use a square to check corners and edges.
- Use a spirit level to verify the laser’s line.
Troubleshooting Alignment Issues
If your level readings seem off, check if the tool is calibrated correctly. Misalignment can cause errors.
Uneven surfaces or shaky hands also affect accuracy. Make sure the surface is flat and steady your hands.
- Clean the level to remove dust or debris.
- Check battery power in laser levels.
- Use clamps or supports to hold tools steady.
- Test the level on a known flat surface before use.

Credit: rumbointerior.com
Frequently Asked Questions
What Is The Purpose Of Using A Level Tool?
A level tool ensures surfaces are perfectly horizontal or vertical. It helps achieve precise alignment in construction and DIY projects, preventing unevenness and structural issues.
How Do You Read A Bubble Level Correctly?
Place the level on the surface, then check the bubble position. When the bubble centers between the marked lines, the surface is level.
Can A Level Be Used On Uneven Surfaces?
Yes, a level can be used on uneven surfaces to find the highest or lowest points. This helps in adjusting materials for proper alignment.
What Types Of Levels Are Best For Precise Alignment?
Spirit levels and laser levels are best for precision. Spirit levels are simple and reliable, while laser levels provide more accuracy for large projects.
Conclusion
Using a level helps keep your work straight and even. Check your tool often to avoid mistakes. Small adjustments can make a big difference. Practice using the level to gain confidence. Accurate alignment saves time and effort. Remember, careful measuring leads to better results.
Keep your projects neat and professional with this tool. Simple steps create a strong foundation for success.
