If you want your woodworking projects to be precise and professional, mastering the marking gauge is a must. This simple tool might seem basic, but it can make a huge difference in how accurately you measure and cut your wood.
Imagine cutting perfectly straight lines every time without guesswork or wasted material. You’ll learn exactly how to use a marking gauge step-by-step, so you can improve your skills and take your woodworking to the next level. Keep reading, and soon you’ll wonder how you ever worked without it.
Choosing The Right Marking Gauge
A marking gauge helps you make accurate lines on wood. Picking the right one saves time and improves your work.
Consider the type, material, and size before buying. These factors affect how well the tool works for you.
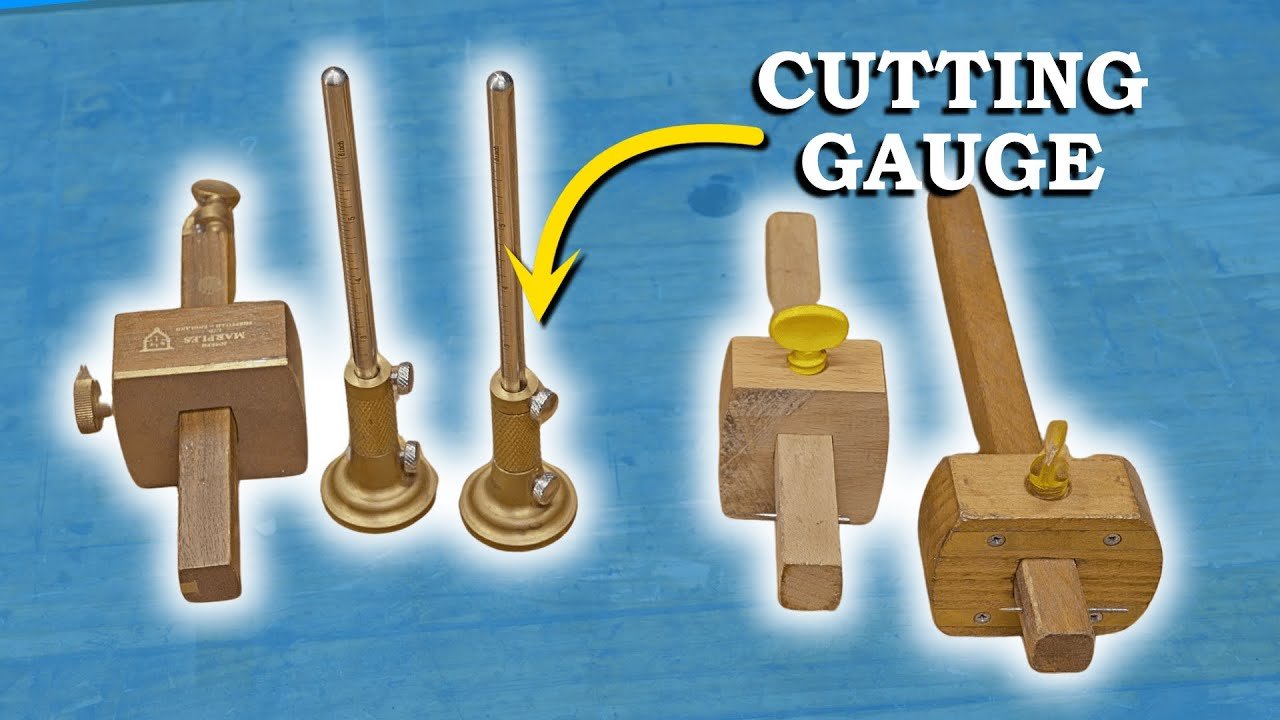
Types Of Marking Gauges
Marking gauges come in different styles. Each style suits different woodworking tasks and preferences.
- Pin gauge uses a sharp pin to mark lines. It works well for softwood and delicate work.
- Knife gauge has a blade to cut a fine line. It is best for hardwood and precise cuts.
- Wheel gauge has a small wheel that scores the wood. It is easy to use and good for curved lines.
Material And Build Quality
Good materials make a gauge last longer and work better. Look for sturdy and smooth parts.
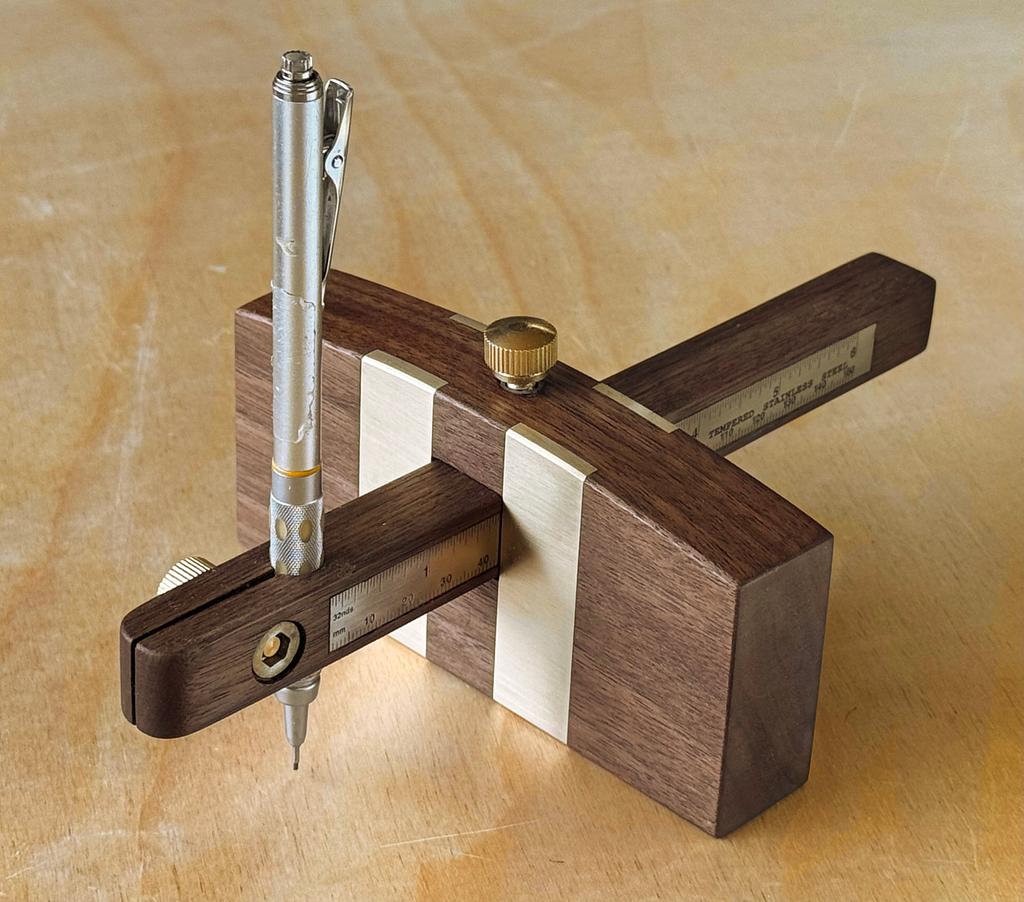
- Wooden gauges are traditional and feel nice in hand. They need careful maintenance.
- Metal gauges are strong and durable. They hold settings firmly and resist wear.
- Combination gauges mix wood and metal parts. They balance comfort and strength.
Selecting The Appropriate Size
Size matters for comfort and accuracy. Choose a size that fits your hand and project needs.
Smaller gauges are easy to control on small pieces. Larger gauges work better on big boards.
- Check the beam length; longer beams mark wider boards.
- Ensure the fence slides smoothly but locks tight.
- Pick a gauge that feels balanced and steady in your hand.
Credit: craftisian.com
Preparing Your Marking Gauge
A marking gauge helps you make precise marks on wood. Proper setup ensures accuracy and ease of use.
Before starting, you need to adjust parts of the gauge. This guide covers adjusting the fence, setting the marking pin, and sharpening the pin or blade.
Adjusting The Fence
The fence controls how far the pin reaches into the wood. Adjust it to get the right distance for your project.
- Loosen the locking screw on the fence.
- Slide the fence to the desired measurement.
- Check the distance with a ruler or tape measure.
- Tighten the locking screw to hold the fence in place.
Setting The Marking Pin
The marking pin or blade makes the line on the wood. Set it to the correct depth for a clear mark without damaging the wood.
| Pin Position | Effect on Marking |
| Too shallow | Marks are faint and hard to see |
| Correct depth | Clear, clean lines on wood surface |
| Too deep | Pin may dig too far, causing damage |
Sharpening The Pin Or Blade
A sharp pin or blade makes cleaner marks. Sharpen it regularly using the correct tools.
Use this simple sharpening routine:
- Clamp the marking gauge securely.
- Use a fine file or sharpening stone.
- Gently file the pin or blade edge at a consistent angle.
- Remove any burrs by stropping or light sanding.
- Test the mark on scrap wood and repeat if needed.
Marking Techniques For Precision
A marking gauge helps you draw lines on wood with accuracy. It guides your cuts and joins. Using it well means cleaner, sharper woodworking projects.
Learn how to mark straight lines, curves, and work with different wood types. These tips improve your precision and save time.
Marking Straight Lines
Set the marking gauge to the width you need. Hold the gauge firmly against the wood edge. Slide it smoothly to draw a straight line. Keep steady pressure to avoid slips.
- Check the gauge setting before marking.
- Hold the stock of the gauge tight to the wood edge.
- Slide the gauge slowly for a clean line.
- Repeat the line if needed for visibility.
Scribing Curves And Circles
Use the marking gauge to scribe curves by adjusting the length of the arm. Anchor the gauge at the curve center and rotate the wood or gauge to draw smooth arcs.
| Curve Type | Marking Technique |
|---|---|
| Small Circles | Shorten the gauge arm and rotate the wood |
| Large Curves | Extend the arm, keep steady pivot point |
| Irregular Curves | Mark in small sections, adjust gauge frequently |
Using The Gauge On Different Wood Types
Wood hardness affects how the marking gauge works. Softer wood can dent easily. Hard wood needs a sharper point for a clear mark.
- Softwoods: Use light pressure to avoid deep marks.
- Hardwoods: Sharpen the gauge point for clean scribing.
- Grain direction: Mark across the grain for clearer lines.
- Test on scrap wood before marking the final piece.

Credit: www.youtube.com
Common Mistakes To Avoid
Using a marking gauge helps you make precise lines on wood. Avoiding common mistakes will improve your results. These errors can cause uneven cuts and wasted material.
Read on to learn about common pitfalls and how to prevent them when using a marking gauge.
Applying Too Much Pressure
Pressing too hard with the marking gauge can damage the wood surface. It may leave deep grooves or uneven lines that are hard to follow. This makes your woodworking less accurate.
Use just enough pressure to make a clear mark. Practice on scrap wood to find the right amount of force.
Incorrect Gauge Adjustment
Setting the marking gauge too loose or too tight affects your measurements. A loose gauge causes the line to shift. A tight gauge can make it hard to slide smoothly.
Check the gauge before each use. Adjust it carefully to keep marks consistent and clean.
- Loosen the locking screw before adjusting
- Slide the fence to the desired measurement
- Tighten the screw firmly but not overly tight
Ignoring Wood Grain Direction
Marking against the wood grain can cause splintering. The gauge pin may tear the surface instead of cutting a clean line. This makes cutting and fitting harder.
Always mark with the grain direction. This keeps the wood fibers intact and your lines neat.
- Look at the wood grain before marking
- Move the gauge in the grain’s direction
- Adjust your technique for different wood types
Maintaining Your Marking Gauge
Keeping your marking gauge in good shape helps you work better. Regular care makes your tool last longer.
Follow these simple tips to clean, store, and check your marking gauge. Fix or replace parts if needed.
Cleaning And Storage Tips
Clean your marking gauge after each use. Remove dust and wood bits to avoid damage.
Store the tool in a dry place. Avoid damp areas that can cause rust or wood swelling.
- Wipe the marking pin and body with a dry cloth
- Use a soft brush to clear tight spots
- Apply a light coat of oil on metal parts to stop rust
- Keep the gauge in a toolbox or case
Regular Calibration
Check your marking gauge’s accuracy often. A small error can ruin your project.
Adjust the fence to match your needed measurement. Tighten it to keep it steady.
- Set the gauge on a ruler or measuring block
- Move the fence until the pin marks the exact line
- Tighten the locking screw firmly
- Test on scrap wood before marking your workpiece
Replacing Worn Parts
Over time, parts like the marking pin may wear down. Replace these to keep clean lines.
Check screws, pins, and fences for damage. Swap out parts that are bent or dull.
- Use the right size replacement pin for your gauge
- Keep spare screws and washers handy
- Follow manufacturer instructions for part replacement
- Test the tool after replacing parts to ensure accuracy
Advanced Tips For Expert Woodworkers
Using a marking gauge well can improve your woodworking accuracy. These tips help experts push their skills further.
Learn how to handle complex layouts, combine tools smartly, and customize gauges for unique projects.
Using Dual Pins For Complex Layouts
Dual pins let you mark two parallel lines quickly and accurately. This is useful for joinery and detailed cuts.
Set the pins to the exact distance needed, then slide the gauge along the wood edge. It saves time and ensures even spacing.
- Adjust each pin carefully for consistent line spacing
- Use dual pins to mark mortise and tenon joints
- Check pin sharpness to get clean, clear lines
Combining Marking Gauge With Other Tools
Pair your marking gauge with squares or calipers for better precision. These tools help verify measurements before cutting.
Use a marking gauge to score lines, then confirm angles with a try square. This reduces errors during layout.
- Mark lines with the gauge, check with a square
- Use calipers to measure the gauge setting exactly
- Combine with a bevel gauge for angled markings
Customizing Your Gauge For Specific Projects
Modify your marking gauge by changing pins or adjusting the beam length. This makes it fit your project needs better.
Swapping to a knife pin gives cleaner cuts in hardwood. Extending the beam helps mark wider boards without moving the fence.
- Use knife pins for sharper, precise lines
- Add longer beams for large timber marking
- Attach stops or clamps for repeatable measurements

Credit: www.youtube.com
Frequently Asked Questions
What Is A Marking Gauge Used For In Woodworking?
A marking gauge helps woodworkers scribe precise lines on wood. It ensures accurate measurements and consistent cuts. This tool improves joinery and layout work. Using it reduces mistakes and saves time in projects.
How Do You Adjust A Marking Gauge Correctly?
Loosen the locking screw to move the fence along the beam. Set the desired measurement by aligning the marking pin. Tighten the screw firmly to secure the fence in place. Always check the marking depth before use.
What Types Of Marking Gauges Are Available?
Common types include pin, wheel, and cutting marking gauges. Pin gauges use a sharp pin to scribe lines. Wheel gauges have a small rotary blade for clean cuts. Cutting gauges are ideal for scoring deep marks on wood.
Can A Marking Gauge Improve Woodworking Accuracy?
Yes, it provides consistent, repeatable measurements and lines. This tool helps create precise joints and smooth cuts. Using a marking gauge minimizes errors and improves overall project quality. It is essential for detailed woodworking tasks.
Conclusion
Using a marking gauge in woodworking can improve precision. It’s a simple tool that helps create straight, accurate lines. Practice is key to getting comfortable with it. Always ensure the gauge is set correctly. Proper use prevents mistakes and saves time.
A marking gauge is essential for any woodworking project. Keep it sharp and maintained for the best results. With patience, your skills will grow. Experiment with different techniques to find what works best for you. Embrace the process, and enjoy creating beautiful pieces with accuracy.
Happy woodworking!