Are you ready to transform your home with the timeless elegance of crown molding? Mastering the use of a miter saw for this task might seem daunting at first, but it doesn’t have to be.
In this guide, you’ll discover how simple it is to achieve those perfectly angled cuts that make all the difference. Imagine the satisfaction of seeing your rooms framed with precision and style. Whether you’re a seasoned DIY enthusiast or a beginner looking to tackle your first crown molding project, this article will provide you with the tips and techniques you need.
Stay with us, and you’ll learn how to turn a seemingly complex task into a rewarding experience, boosting both your confidence and your home’s charm. Ready to get started?

Credit: www.youtube.com
Choosing The Right Miter Saw
Selecting the right miter saw is important for clean cuts on crown molding. The right tool makes your work easier and more accurate.
This guide covers types of miter saws and blade choices to help you cut crown molding well.
Types Of Miter Saws
There are three main types of miter saws: standard, compound, and sliding compound. Each type has features that suit different cutting needs.
- Standard Miter Saw:Cuts at fixed angles left and right. Best for simple miter cuts.
- Compound Miter Saw:Can tilt the blade for bevel cuts. Useful for angled crown molding.
- Sliding Compound Miter Saw:The blade slides forward and backward. It handles wider pieces easily.
Blade Selection For Crown Molding
Choosing the right blade is key for smooth cuts on crown molding. A blade with many teeth gives a cleaner finish.
| Blade Type | Number of Teeth | Best Use |
| General Purpose | 40-50 | Basic wood cutting |
| Fine Finish | 60-80 | Clean cuts on molding |
| Ultra Fine | 80-100 | Very smooth cuts on delicate trim |
Setting Up For Accurate Cuts
Cutting crown molding with a miter saw needs careful setup. Accurate cuts help the molding fit perfectly in corners.
Before cutting, prepare your tools and measure the angles correctly. This reduces waste and saves time.
Measuring Crown Molding Angles
Crown molding sits at an angle between the wall and ceiling. Measure this angle to cut the molding precisely.
Use a protractor or angle finder to get the exact angle of the corner. This helps set the saw correctly.
- Place the angle finder inside the corner.
- Read the angle shown on the tool.
- Divide the angle by two for the miter cut.
Adjusting Saw Angles
Set the miter saw to the correct angle based on your measurements. This ensures the molding pieces fit together tightly.
Adjust the bevel if needed for angled crown molding. Double-check the angle before making the cut.
- Turn the miter gauge to half the corner angle.
- Set the bevel angle if the molding is angled.
- Lock the saw in place to keep the angle steady.
Securing The Workpiece
Hold the crown molding firmly on the saw. Secure it to prevent movement during the cut.
Use clamps or hold the molding against the fence tightly. This helps make clean, safe cuts.
- Place the molding with the bottom edge flat on the saw base.
- Use clamps to keep the molding from shifting.
- Keep your hands away from the blade during cutting.
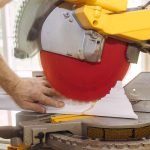
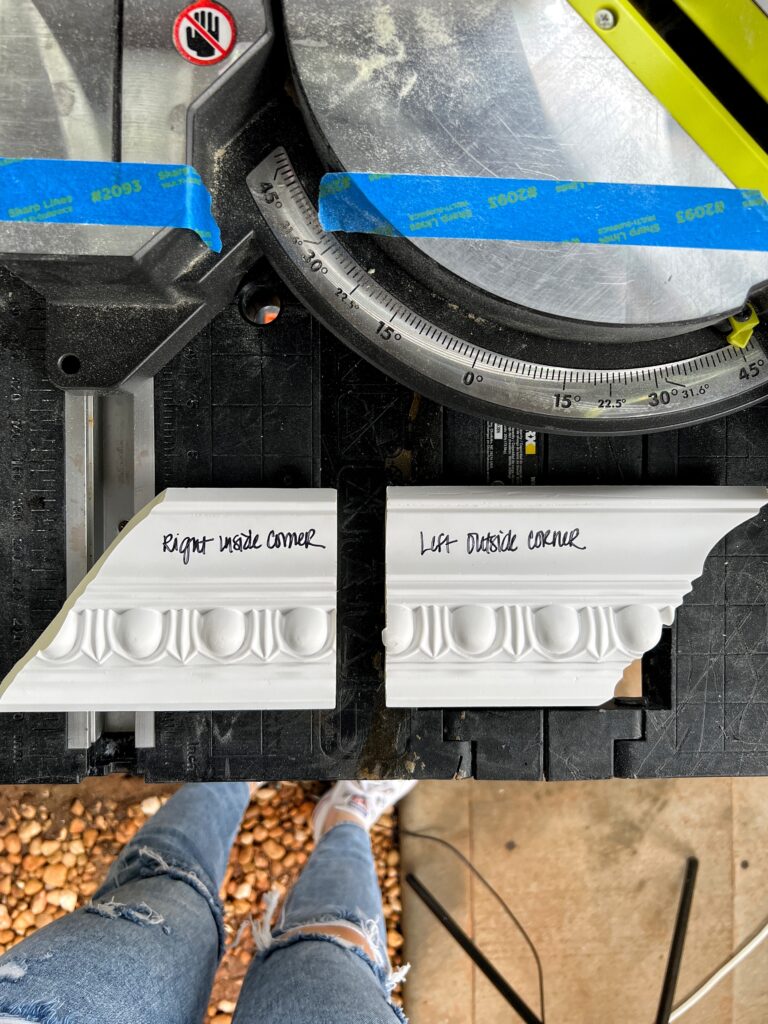
Cutting Techniques For Inside Corners
Cutting crown molding for inside corners requires accuracy and proper technique. Using a miter saw helps you get clean, tight joints that fit well.
This guide shows how to position the molding, make the first cut, and complete the joint for perfect inside corners.
Positioning The Molding
Place the crown molding upside down on the saw. The bottom edge should rest against the fence, and the top edge should lie flat on the base. This position mimics how the molding sits on the wall and ceiling.
Make sure the molding is held firmly and does not move during the cut. Proper positioning reduces mistakes and ensures the angles are accurate.
Making The First Cut
Set your miter saw to 45 degrees for the first cut. This angle creates the bevel needed for the inside corner joint.
- Hold the molding firmly in position.
- Set the saw blade to a 45-degree angle, turning the saw to the left.
- Make a smooth, precise cut through the molding.
This cut forms one half of the inside corner joint. The other piece will need a complementary 45-degree cut.
Completing The Joint
After cutting both pieces, check their fit together. The inside corner joint should form a clean 90-degree angle.
| Piece | Saw Angle | Blade Direction |
|---|---|---|
| First molding | 45° | Blade tilted left |
| Second molding | 45° | Blade tilted right |
If the joint does not fit tightly, trim small amounts and test again. Sand edges lightly for a smooth finish.
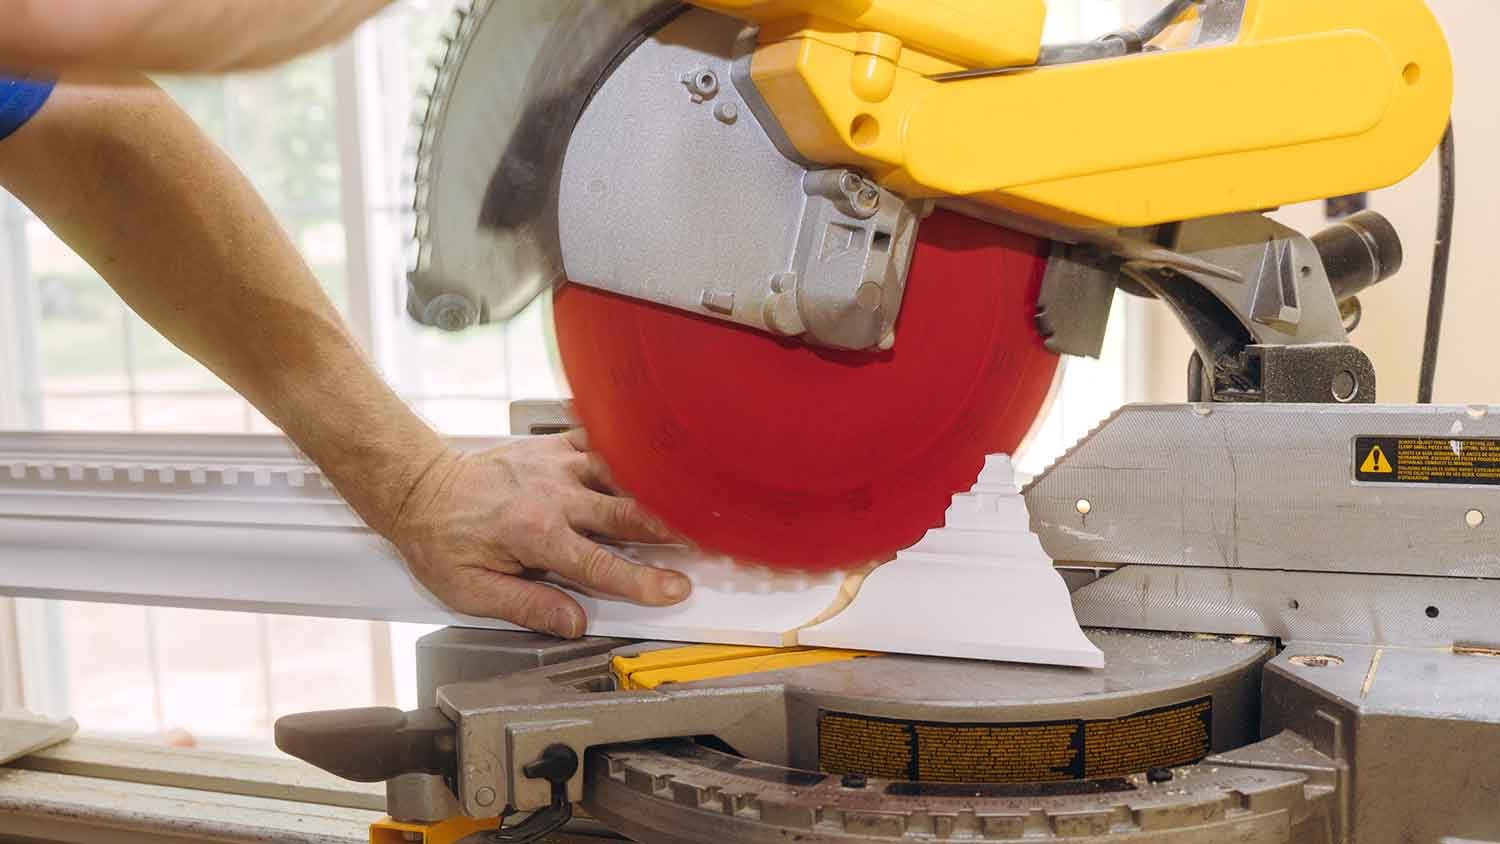
Cutting Techniques For Outside Corners
Cutting crown molding for outside corners requires precision. Using a miter saw correctly helps get clean, tight joints.
This guide shows how to cut outside corners with a miter saw. Follow these steps to make your molding fit well.
Aligning The Molding
Place the molding upside down on the saw table. The bottom edge should touch the fence.
Make sure the molding is tight against the fence. This setup helps get the right angle for the cut.
- Flip molding so the top edge faces down
- Press the bottom edge against the saw fence
- Hold molding firmly to avoid movement
Executing The Bevel Cut
Set the miter saw to the correct angle, usually 45 degrees for outside corners. Tilt the blade to the needed bevel angle.
Slowly lower the blade to cut through the molding. Use a smooth motion to avoid splintering the wood.
- Adjust miter angle to 45 degrees
- Set bevel angle according to molding type
- Cut slowly and steadily
Fitting The Pieces Together
After cutting both pieces, place them on the wall corner. Check how they fit and adjust if needed.
Use fine sandpaper to smooth edges. This helps create a tight joint for a clean look.
- Place cut pieces on the corner
- Check for gaps or misalignment
- Sand edges gently if needed
- Make minor angle adjustments if required
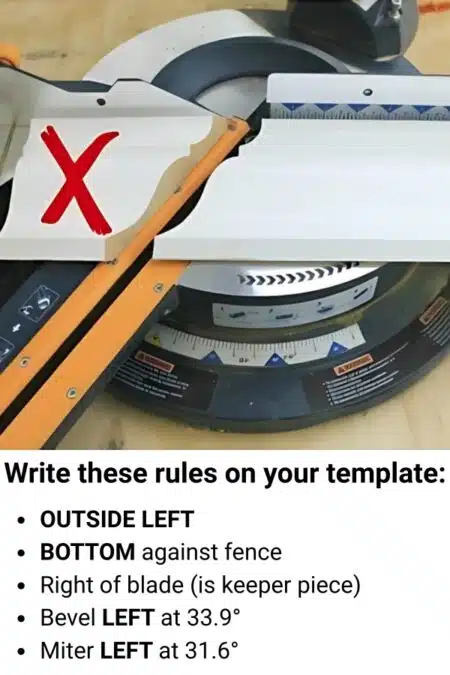
Common Mistakes To Avoid
Cutting crown molding with a miter saw can be tricky. Many people make errors that cause poor fits or unsafe work. Avoiding these mistakes helps you get clean cuts and stay safe.
Below are some common mistakes to watch for. Fixing these will improve your results and protect you during work.
Incorrect Saw Angles
Setting the wrong angle on your miter saw leads to gaps and uneven corners. Crown molding needs precise bevel and miter angles for a perfect fit.
- Check the molding’s spring angle before cutting.
- Use a protractor or angle finder for accuracy.
- Test cuts on scrap wood to confirm angles.
- Adjust the saw bevel and miter settings carefully.
Poor Measurement Practices
Wrong measurements waste material and time. Measuring twice and cutting once is a good rule to follow.
| Common Measurement Errors | How to Avoid |
| Measuring wall length incorrectly | Use a tape measure and note corners carefully |
| Forgetting molding spring angle | Note and apply the correct angle in measurements |
| Ignoring saw blade width (kerf) | Account for kerf in cuts to prevent short pieces |
| Rushing measurements | Take your time and double-check numbers |
Unsafe Handling
Handling the miter saw or molding carelessly risks injury. Safety always comes first on the job.
- Keep hands at least 6 inches from the blade.
- Wear safety glasses to protect your eyes.
- Secure molding firmly before cutting.
- Do not remove safety guards from the saw.
- Turn off and unplug the saw before adjustments.
Finishing Touches
After cutting crown molding with a miter saw, finishing touches make the project look great. These steps help the molding fit perfectly and look smooth.
Careful sanding, caulking, and painting will hide gaps and rough edges. This makes your molding look clean and professional.
Sanding And Smoothing Edges
Use sandpaper to smooth rough edges on your crown molding cuts. This removes splinters and uneven spots for a clean finish.
Start with medium-grit sandpaper, then use fine-grit for a smooth surface. Sand both ends and any cut surfaces carefully.
- Hold the molding firmly while sanding
- Sand along the grain of the wood
- Check edges by touch to ensure smoothness
Applying Caulk And Paint
Apply caulk to fill gaps between the molding and wall or ceiling. This seals spaces and creates a seamless look.
After the caulk dries, paint the molding to match your room. Use a small brush for clean lines and even coverage.
- Use painter’s tape to protect walls and ceiling
- Apply caulk smoothly with a caulking gun
- Let caulk dry completely before painting
- Use paint that matches your molding or room color
- Apply two coats of paint for best results
Safety Tips When Using A Miter Saw
Using a miter saw is helpful for cutting crown molding accurately. Safety is very important to avoid injuries. Follow these tips to stay safe while working.
This guide covers the protective gear you should wear and safe operating steps to take. Always work carefully and stay focused.
Protective Gear
Wearing the right protective gear helps protect your body from injuries. Always wear safety glasses to protect your eyes from flying dust and wood chips.
Use hearing protection to guard against loud saw noise. Wear gloves that fit well to keep your hands safe but avoid loose gloves that can catch in the saw.
- Safety glasses or goggles
- Hearing protection like earplugs or earmuffs
- Close-fitting work gloves
- A dust mask to prevent breathing sawdust
Safe Operating Procedures
Always check the miter saw before use. Make sure the blade is sharp and properly installed. Keep the work area clean and free of clutter.
Use clamps to hold the crown molding steady. Keep your hands away from the blade and never reach behind the blade while it is moving.
- Inspect the saw and blade before each use
- Secure the molding with clamps
- Keep hands at least 6 inches from the blade
- Wait for the blade to stop before moving the workpiece
- Use a firm stance and steady grip on the saw
Credit: ouraestheticabode.com
Credit: sawdustgirl.com
Frequently Asked Questions
How Do You Set Up A Miter Saw For Crown Molding?
To set up a miter saw for crown molding, position the molding upside down and tilted at 45 degrees. Adjust the saw blade angle to match the molding’s spring angle. This ensures accurate and clean cuts for perfect fitting corners.
What Angle Do You Cut Crown Molding Corners?
Cut crown molding corners at a 45-degree angle for inside and outside corners. The miter and bevel angles depend on the molding’s spring angle. Correct angles ensure tight joints and professional-looking results.
Can A Miter Saw Cut Crown Molding Safely?
Yes, a miter saw can safely cut crown molding when used properly. Always wear safety glasses, secure the molding firmly, and follow the manufacturer’s instructions. Proper setup and caution prevent accidents and ensure precise cuts.
Why Is The Spring Angle Important In Cutting Crown Molding?
The spring angle affects how crown molding fits against walls and ceilings. It determines the bevel and miter angles on the saw. Knowing the spring angle helps make accurate cuts and seamless joints.
Conclusion
Cutting crown molding with a miter saw takes practice and patience. Always measure carefully before making cuts. Use the right angles to ensure pieces fit perfectly. Keep your work area clean and safe. Take your time to avoid mistakes and save materials.
With steady hands and attention, you can create neat, professional-looking molding. Enjoy the process and watch your room’s style improve. Each cut brings you closer to a beautiful finish. Keep practicing, and your skills will grow with every project.