If you’ve ever tried cutting molding, you know it can be tricky to get those perfect angles. A miter saw is the tool that can make your job easier and your cuts cleaner.
But if you’re not sure how to use it right, you might end up with wasted material and frustration. This guide will show you exactly how to use a miter saw for cutting molding, step by step. By the end, you’ll feel confident tackling your next project and creating sharp, professional-looking edges every time.
Ready to save time and get flawless results? Let’s dive in.
Choosing The Right Miter Saw
Choosing the right miter saw helps you cut molding accurately. It makes your work easier and safer.
This guide explains types of miter saws, blade choices, and safety features. Use it to pick the best saw for your project.
Types Of Miter Saws
There are three main types of miter saws. Each type suits different cutting needs and spaces.
- Standard Miter Saw:Cuts angled crosscuts. It is good for basic molding work.
- Compound Miter Saw:Cuts angles and bevels. Useful for crown molding and frames.
- Sliding Compound Miter Saw:Has a sliding arm for wider cuts. Best for large molding pieces.
Blade Selection For Molding
Choosing the right blade ensures clean, smooth cuts on molding. Blade size and tooth count matter.
| Blade Size | Common Tooth Count | Cut Type |
| 10 inches | 60-80 teeth | Fine, clean cuts for small molding |
| 12 inches | 80-100 teeth | Smoother cuts on larger molding |
Carbide-tipped blades last longer and cut better. Choose a blade with more teeth for smoother edges.
Safety Features To Look For
Safety features protect you from injury. Look for these key parts on your miter saw.
- Blade Guard: Covers the blade when not cutting.
- Electric Brake: Stops the blade quickly after release.
- Clamp or Fence: Holds molding steady during cuts.
- Safety Switch: Prevents accidental starts.
Credit: youcandiyblog.com
Preparing Your Workspace
Before using a miter saw to cut molding, prepare your workspace carefully. A safe and organized area helps you work faster and avoid mistakes.
Take time to set up a good workbench, proper lighting, and organize your tools. This will make your cutting tasks easier and safer.
Setting Up A Stable Workbench
Use a sturdy workbench that can hold your miter saw and molding firmly. Make sure it does not wobble or move during cutting.
If needed, add clamps or non-slip pads to keep the molding steady. This prevents errors and keeps your hands safe.
- Check workbench legs for stability
- Use clamps to secure molding pieces
- Add rubber pads under saw to reduce movement
Proper Lighting And Visibility
Good lighting helps you see the cutting line clearly. Place your workspace near a window or use bright lamps.
Avoid shadows on the saw and molding. This reduces mistakes and helps you cut more precisely.
- Use overhead lights or portable lamps
- Position lights to avoid shadows
- Keep the area clean to improve visibility
Organizing Tools And Materials
Keep all your tools and molding pieces close by. This saves time and stops you from searching during work.
Use containers or small shelves to sort nails, screws, and measuring tools. Arrange molding pieces by size for easy access.
- Place measuring tape and pencil nearby
- Sort molding by length or type
- Store safety gear within reach
Measuring And Marking Molding
Cutting molding with a miter saw needs careful measuring and marking. Good preparation helps you get clean, exact cuts.
Take your time to measure and mark the molding before using the saw. This reduces mistakes and saves material.
Accurate Measurement Techniques
Use a tape measure to get precise lengths for your molding pieces. Measure twice before marking to avoid errors.
Hold the tape measure tight and straight along the molding. Write down the measurements clearly for reference.
- Start measuring from the edge of the molding
- Check the length against the wall space
- Use a pencil for light marks that can be erased
Marking Cut Lines Clearly
Use a sharp pencil to mark cut lines on the molding. Draw thin, straight lines for better saw guidance.
Make marks on the face of the molding where the saw blade will touch. This helps you line up the blade correctly.
- Mark the exact spot where the cut starts
- Double-check the line angle before cutting
- Use a square tool for straight, accurate lines
Accounting For Wall Angles
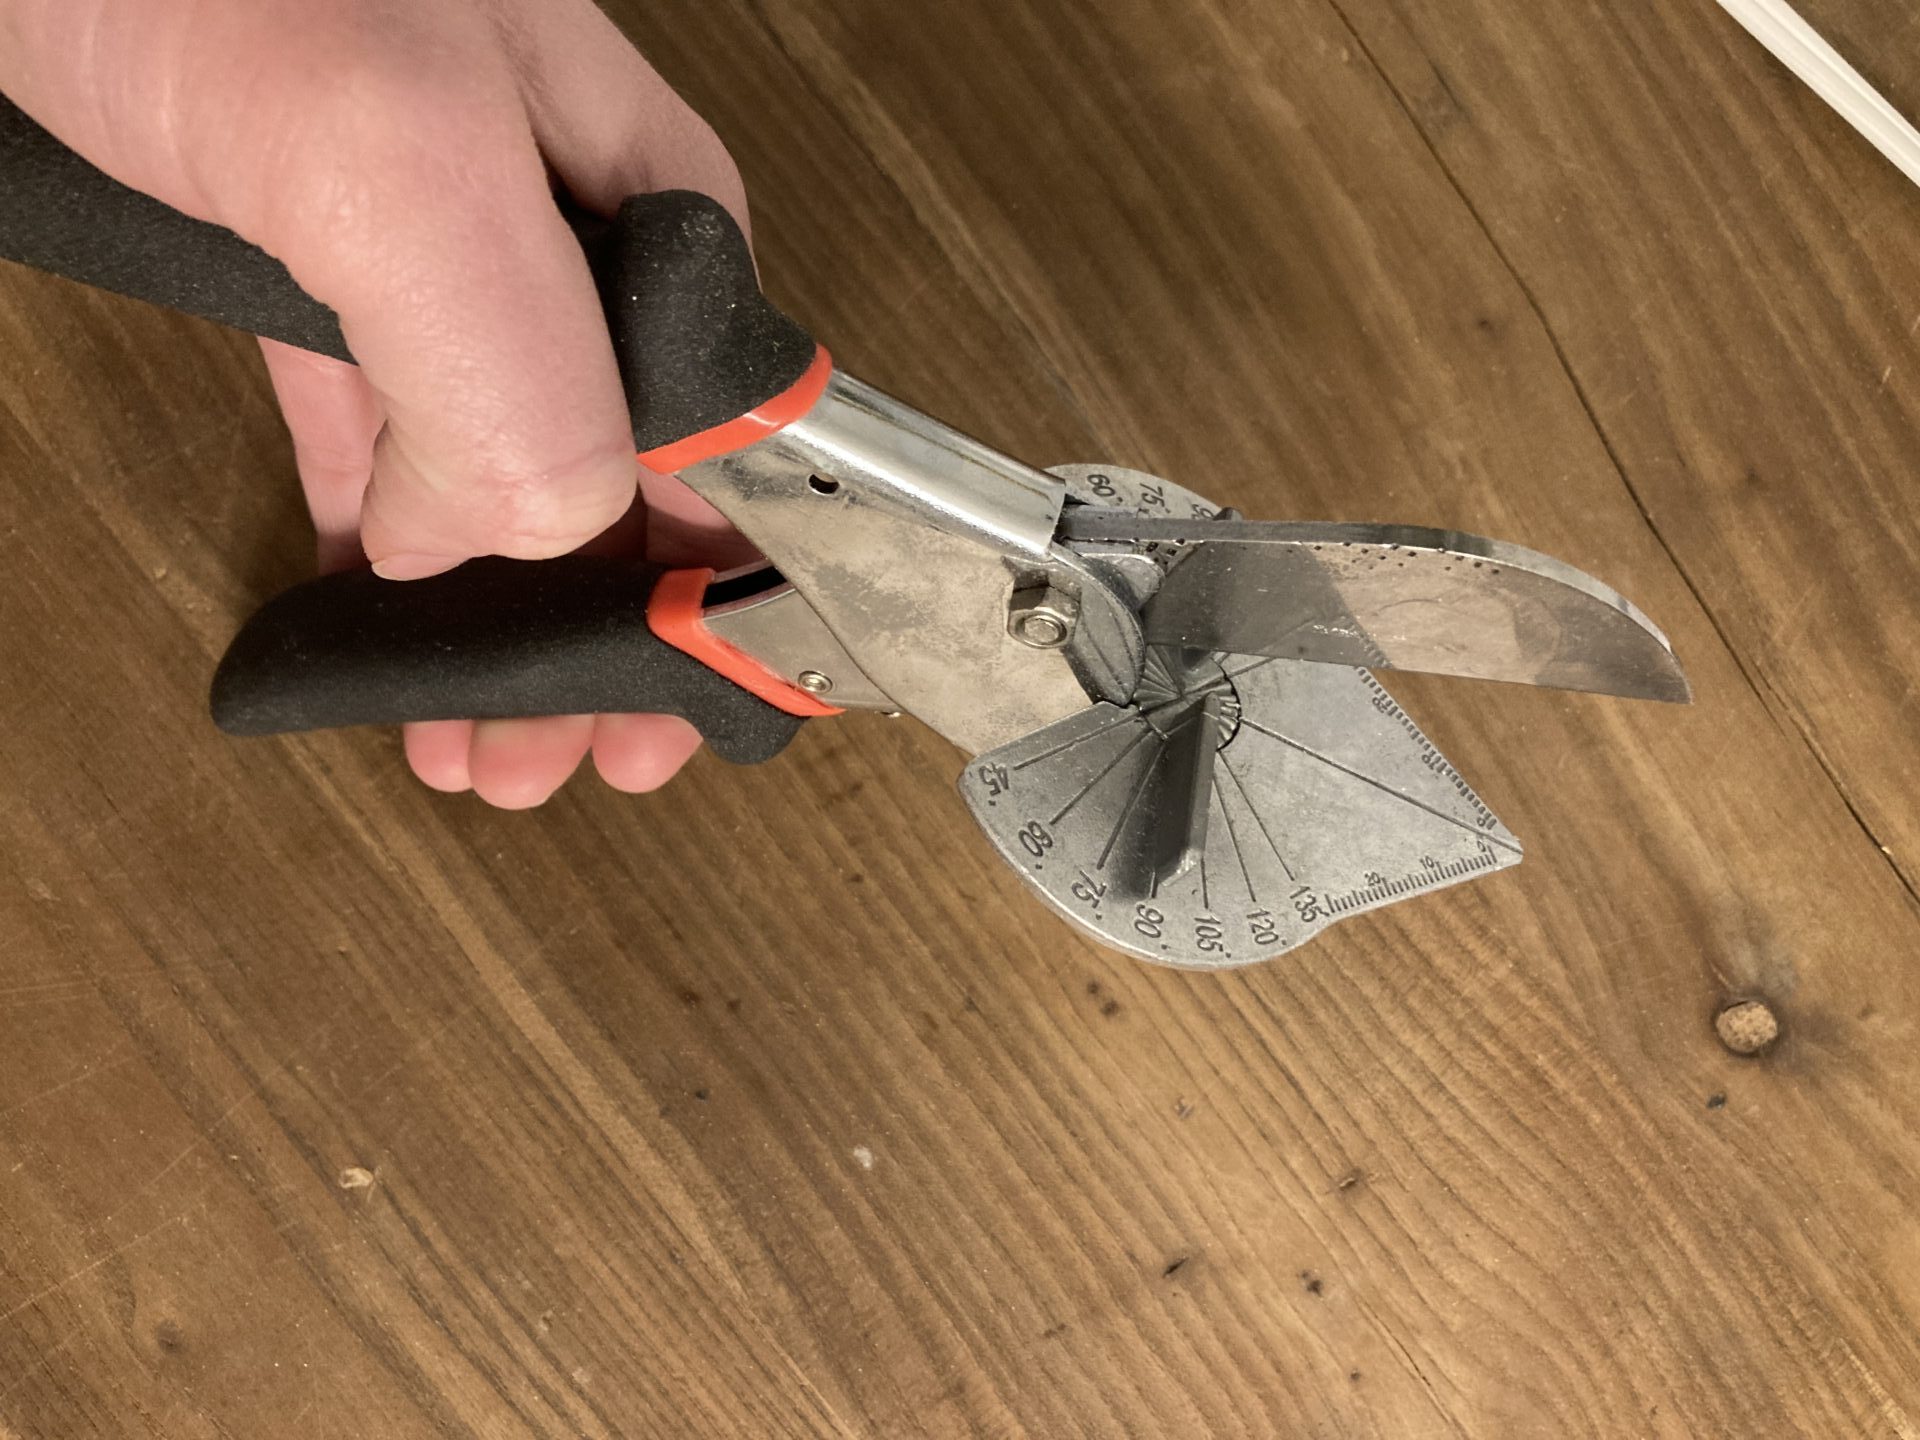
Walls are not always perfectly square. Measure the wall angle with an angle finder or protractor.
Adjust your cut angle on the miter saw to match the wall angle. This ensures molding fits tightly in corners.
- Place the angle finder in the corner of the wall
- Note the angle and set the saw accordingly
- Test cut scrap pieces before the final cut

Credit: www.familyhandyman.com
Adjusting The Miter Saw Settings
Adjusting the settings on your miter saw is key for cutting molding accurately. Proper settings help you make clean and precise cuts.
You need to adjust the miter angle, the bevel angle, and use stops for repetitive cuts. These steps improve your cutting efficiency.
Setting The Correct Miter Angle
The miter angle controls the horizontal tilt of the blade. This angle changes how the saw cuts across the molding.
To set the miter angle, unlock the miter handle and rotate the saw base. Align the pointer with the desired angle on the scale.
- Common angles for molding are 45° and 90°
- Use a protractor for unusual angles
- Lock the handle firmly to keep the angle steady
Adjusting The Bevel Angle
The bevel angle tilts the blade sideways. It is useful for cutting molding that needs an angled edge.
Lift the bevel lock lever and tilt the blade to the correct angle. Check the bevel scale for accuracy, then lock it in place.
- Bevel angles usually range from 0° to 45°
- Use bevel cuts for inside and outside corners
- Double-check the angle before cutting
Using Stops For Repetitive Cuts
Stops help you make the same cut size many times. They improve speed and keep all pieces uniform.
Attach a clamp stop to the saw fence or use the built-in stop block. Measure the first cut carefully, then lock the stop in place.
- Stops prevent measuring each piece separately
- They reduce mistakes and wasted material
- Use stops for cutting multiple moldings of the same length
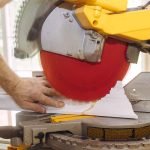
Cutting Techniques For Molding
Using a miter saw to cut molding needs care and skill. Accurate cuts help molding fit perfectly in corners.
This guide explains key cutting techniques for molding. Learn how to make inside corners, outside corners, and compound cuts.
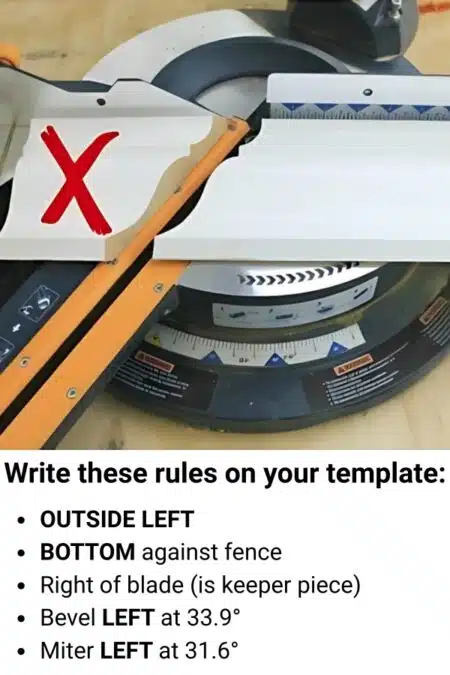
Making Inside Corner Cuts
Inside corners are where two moldings meet at a 90-degree angle inside a room. Cut these pieces to fit tightly together.
Set the saw blade to 45 degrees. Cut one piece with the blade angled left. Cut the other piece with the blade angled right.
- Measure the corner angle carefully.
- Set the saw blade to half the corner angle (usually 45 degrees).
- Cut the first molding with the bevel to the left.
- Cut the second molding with the bevel to the right.
- Test fit the pieces before final installation.
Making Outside Corner Cuts
Outside corners are where molding wraps around a corner sticking out. These cuts need the opposite angle from inside corners.
Set the saw blade to 45 degrees. Cut one piece with the blade angled right. Cut the other piece with the blade angled left.
- Measure the outside corner carefully.
- Set the saw blade to half the corner angle.
- Cut the first molding with the bevel to the right.
- Cut the second molding with the bevel to the left.
- Check the fit before gluing or nailing.
Handling Compound Cuts
Compound cuts combine a miter and bevel angle. These cuts are needed for angled walls or crown molding.
Adjust the miter angle on the saw table and the bevel angle on the saw head. Both angles work together for a perfect fit.
- Measure the wall angle with an angle finder.
- Set the miter angle to half the wall angle.
- Set the bevel angle according to molding type.
- Make test cuts on scrap molding first.
- Fine-tune angles if pieces do not fit perfectly.
Credit: sawdustgirl.com
Common Mistakes To Avoid
Using a miter saw for cutting molding can be tricky if you do not avoid some common errors. These mistakes can ruin your project and waste materials. Take time to learn what to avoid for better results.
Here are three common mistakes people make and tips on how to prevent them when cutting molding with a miter saw.
Cutting Without A Test Piece
Many people cut directly on their final molding without trying a test piece first. This can lead to wrong angles or lengths. Always cut a scrap piece of wood to check your settings before making the real cut.
Ignoring Blade Sharpness
A dull blade makes rough cuts and can damage the molding. It also puts extra strain on your saw. Keep your blade sharp and clean. Replace it if you notice any chipping or burning on the wood.
- Check the blade for dullness before starting.
- Clean resin and pitch off the blade regularly.
- Replace the blade if cuts are not clean or smooth.
Not Securing The Workpiece
If the molding moves during a cut, it can cause uneven edges and be dangerous. Always secure your workpiece firmly against the fence and table. Use clamps or hold it tightly with your hand in a safe position.
| Problem | Effect | Solution |
| Workpiece moves | Uneven, unsafe cuts | Use clamps or hold firmly |
| Blade dull | Rough cuts, burns wood | Sharpen or replace blade |
| No test cut | Wrong angles or length | Cut scrap piece first |
Finishing Touches
After cutting molding with a miter saw, some final steps make the project look neat. These finishing touches help the pieces fit well and look smooth.
Paying attention to details like sanding, fitting joints, and cleaning up the work area ensures a professional result.
Sanding And Smoothing Edges
Use fine-grit sandpaper to smooth rough edges left by the saw. Sand all cut edges gently until they feel even and clean.
- Wrap sandpaper around a small block for better control
- Smooth both sides of the cut edges
- Check for splinters and remove them carefully
- Wipe away dust with a dry cloth before assembly
Fitting And Adjusting Joints
Test the molding pieces by placing them in their final positions. Make sure the joints fit tightly without gaps.
| Issue | Fix |
| Gap between joints | Trim edges slightly with the saw or sandpaper |
| Too tight fitting | Lightly sand edges to ease the fit |
| Uneven corners | Check angles and recut if needed |
| Pieces do not align | Adjust the saw angle and recut the molding |
Cleaning Up The Work Area
Keep your workspace safe and tidy by cleaning sawdust and scraps. This prevents accidents and keeps tools in good shape.
Follow these tips to clean up:
- Use a broom or vacuum to remove sawdust
- Collect scrap pieces in a container for disposal
- Wipe down the miter saw and work surface
- Store tools safely after use
Frequently Asked Questions
How Do I Set The Miter Saw Angle For Molding?
To set the angle, unlock the miter saw’s bevel and miter settings. Adjust to the specific angle needed for your molding cut. Use an angle guide or protractor for accuracy. Lock the settings firmly before cutting to ensure precise and safe cuts.
What Safety Tips Are Essential When Using A Miter Saw?
Always wear safety goggles and hearing protection. Keep hands away from the blade. Secure the molding firmly before cutting. Work in a clean, well-lit area. Follow the manufacturer’s instructions and never remove safety guards.
Can I Cut Different Molding Types With One Miter Saw?
Yes, a miter saw can cut wood, MDF, and PVC molding. Adjust blade type and speed according to material. Always test cut on scrap material first to ensure clean edges and accurate angles.
How Do I Achieve Perfect Inside Corner Cuts?
Set the miter saw to 45 degrees for inside corners. Make precise, slow cuts to avoid splintering. Use a sample piece to test fit before cutting final molding. Accurate angle setting ensures tight, clean joints.
Conclusion
Mastering the miter saw makes cutting molding easier and precise. Always ensure safety by wearing protective gear. Maintain a steady hand and follow marked lines closely. Practice improves skill and confidence. Remember to select the right blade for the material.
Clean, accurate cuts enhance your project’s final look. With these tips, you’ll achieve professional results at home. Cutting molding becomes less daunting with experience. Enjoy the satisfaction of a job well done. Keep experimenting and refining your technique. Your skills will only grow with time.
Happy cutting and crafting!