Are you ready to transform your home with beautifully cut molding and trim? Using a miter saw is the key to achieving those clean, precise cuts that make all the difference in your DIY projects.
Imagine the satisfaction of seeing perfectly aligned corners and seamless joints, all crafted by your own hands. Whether you’re sprucing up a room or tackling a full renovation, mastering the miter saw can elevate your work from amateur to professional.
In this guide, you’ll discover how to confidently handle a miter saw, ensuring each cut is precise and safe. Say goodbye to frustrating mistakes and wasted material. With the right techniques, you can create stunning results that will impress anyone who steps into your home. Ready to unlock the secrets of flawless molding and trim? Let’s dive in and make your next project a success!

Credit: sawdustgirl.com
Choosing The Right Miter Saw
Using a miter saw for cutting molding and trim needs the right tool. Picking the correct miter saw makes your work easier and cleaner. This guide helps you choose the best saw for your project.
Look at the types of miter saws, blade options, and safety features. These factors affect how well you cut and your safety during work.
Types Of Miter Saws
Miter saws come in different styles. Each style fits certain tasks better. Knowing the types helps you pick one that fits your needs.
- Standard Miter Saw:Cuts angled crosscuts. Good for simple trim work.
- Compound Miter Saw:Can tilt blade for angled cuts. Ideal for crown molding.
- Sliding Compound Miter Saw:Has sliding arms. Can cut wider boards.
- Dual Bevel Miter Saw:Tilts both left and right. Saves time on complex cuts.
Blade Selection For Trim
The blade choice affects cut quality. Trim and molding need clean, smooth edges. Look for blades with many teeth and fine tips.
| Blade Type | Tooth Count | Best Use |
| High-tooth Count (60+ teeth) | 60-80 | Fine cuts on delicate trim |
| Carbide-Tipped Blades | 50-70 | Durable, smooth cuts on wood |
| Crosscut Blades | 40-60 | Fast, clean cuts on molding |
Safety Features To Consider
Safety is key when using a miter saw. Choose a saw with features that protect you from injury and keep work steady.
- Blade Guard: Covers the blade when not cutting.
- Electric Brake: Stops blade quickly after cutting.
- Locking Mechanism: Keeps the saw arm in place.
- Dust Collection: Reduces dust and keeps air clean.
- Non-Slip Base: Prevents saw from moving during use.

Credit: www.familyhandyman.com
Preparing For Accurate Cuts
Making accurate cuts with a miter saw is key to fitting molding and trim perfectly. Careful preparation helps avoid mistakes and wasted materials.
Focus on measuring, setting angles, and securing the workpiece to get clean, precise cuts every time.
Measuring And Marking Molding
Measure the length needed for the molding carefully. Use a tape measure and mark the cut points clearly with a pencil.
- Hold the molding in place to check fit before measuring.
- Mark both the front and back edges for better visibility.
- Use a square to draw straight cut lines across the molding.
- Double-check measurements to avoid errors.
Setting The Miter And Bevel Angles
Adjust the miter saw to the correct angles for your cuts. Miter angles handle side-to-side cuts, while bevel angles tilt the blade for angled edges.
| Cut Type | Typical Angle | Purpose |
| Miter Cut | 45° | Corner joints for molding |
| Bevel Cut | 33° | Angled edges on crown molding |
| Compound Cut | 45° miter + 33° bevel | Complex trim corners |
Clamping And Securing The Workpiece
Hold the molding firmly in place before cutting. Use clamps or the saw’s built-in clamp to stop movement.
- Place the molding flat on the saw base.
- Secure it with a clamp close to the cut line.
- Check that the molding does not shift or lift during cutting.
- Keep your hands clear of the blade area.
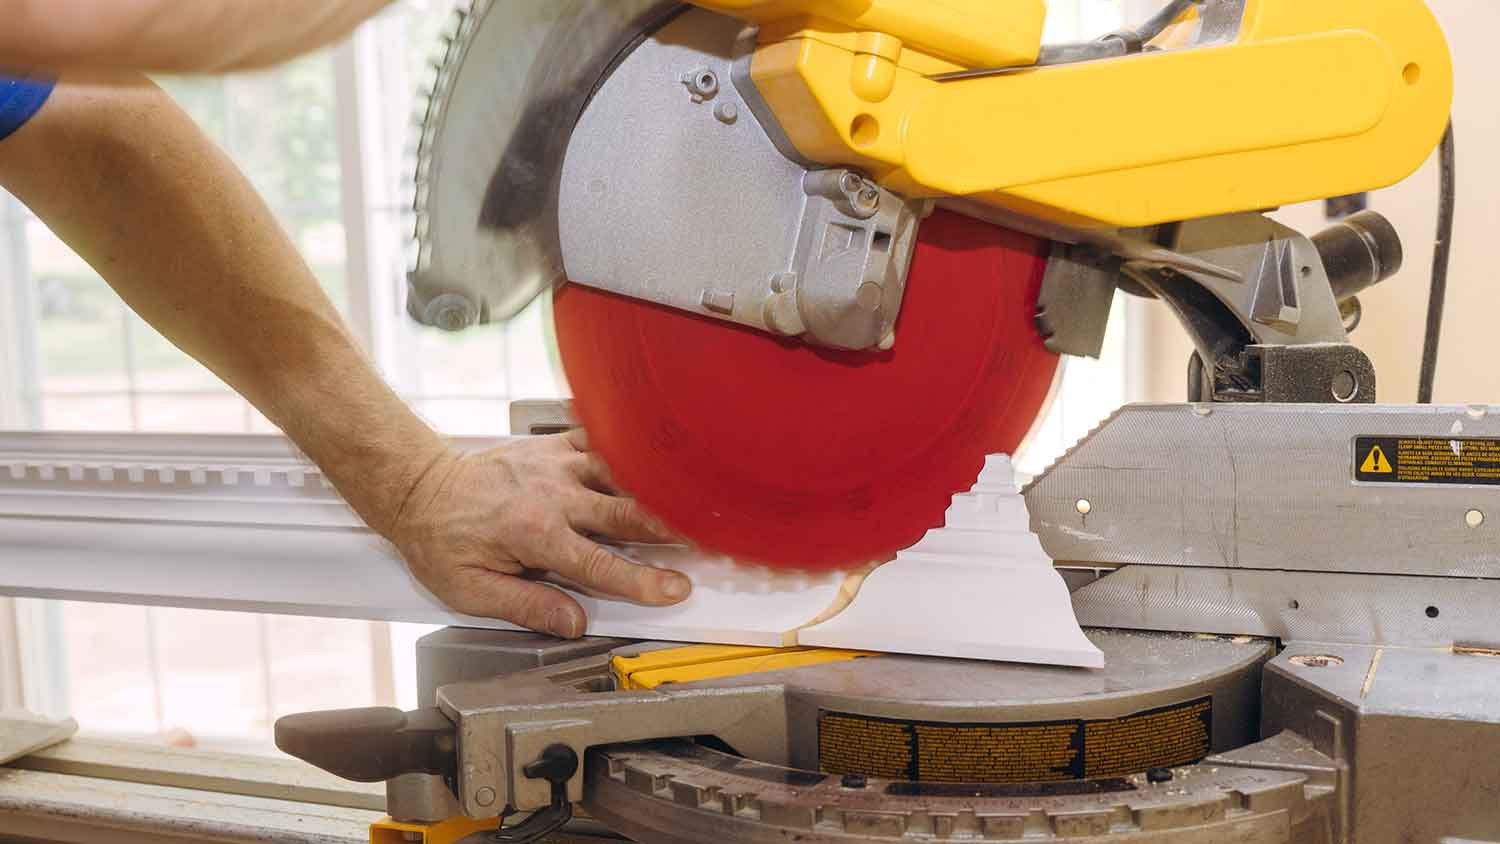
Cutting Techniques For Molding
Cutting molding and trim with a miter saw needs care and the right technique. Accurate cuts help pieces fit well on walls.
Learn how to make straight cuts, inside and outside corners, and compound cuts for a clean finish.
Making Straight Cuts
Straight cuts are simple but must be precise for molding to fit properly. Use the saw’s fence to hold the molding steady.
Measure twice and mark the cut line clearly. Keep the molding flat on the saw table before cutting.
- Set the saw blade at 90 degrees for a straight cut
- Hold the molding firmly against the fence
- Cut slowly to avoid splintering
- Check the cut edge for smoothness and sand if needed
Executing Inside And Outside Corners
Inside and outside corners need angled cuts to fit molding pieces together. The miter saw angle must match the corner angle.
For inside corners, cut the molding ends at 45 degrees towards the back. For outside corners, cut 45 degrees towards the front.
- Measure the corner angle with a protractor or angle finder
- Set the miter saw to 45 degrees or the measured angle
- Cut each piece so edges meet at the corner
- Test fit before final installation
Handling Compound Cuts
Compound cuts combine miter and bevel angles. These cuts are needed for crown molding and angled walls.
Adjust both the bevel and miter settings on the saw to match the molding angle. This helps the molding sit flat on walls and ceilings.
- Find the correct miter and bevel angles using a crown molding calculator or angle tool
- Set the saw’s miter angle first, then the bevel angle
- Make test cuts on scrap molding to check the fit
- Trim edges lightly if needed for a perfect joint
Tips To Avoid Common Mistakes
Cutting molding and trim with a miter saw needs care to avoid errors. Simple mistakes can ruin your work.
Use these tips to cut clean edges and fit your pieces perfectly.
Preventing Tear-out And Splintering
Tear-out happens when wood fibers pull away during cutting. It makes edges rough and weak.
To stop tear-out, use a sharp blade designed for fine cuts. Slow down the saw speed near the end of the cut.
- Place painter’s tape on the cut line to hold fibers.
- Cut with the good side facing down for most saws.
- Use a zero-clearance insert on the saw table if possible.
- Make a shallow scoring cut before the full cut.
Ensuring Consistent Angles
Wrong angles cause gaps in corners and poor fits. Keep your angles exact for tight joints.
Check your miter saw’s angle settings before each cut. Use a protractor or angle finder if needed.
- Set the saw to the exact angle required, usually 45° or 90°.
- Use stop blocks to repeat the same cut size and angle.
- Test cuts on scrap pieces to verify angles.
- Hold the trim firmly to avoid movement during cutting.
Dealing With Irregular Walls And Corners
Walls and corners are not always square or straight. Trim must fit these irregularities for a good finish.
Measure corners carefully with a digital angle finder or bevel gauge. Adjust your miter saw angle to match.
- Check for walls that lean in or out and mark angles accurately.
- Cut test pieces and hold them in place to check the fit.
- Use coping saws or flexible trim for tricky inside corners.
- Make small adjustments before cutting the final piece.
Finishing Touches After Cutting
After cutting molding and trim with a miter saw, the work is not done. Finishing touches make the pieces fit well and look great. These steps ensure a neat and professional result.
Taking time to smooth edges, fit pieces together, and apply caulk and paint helps your trim look clean and complete.
Sanding And Smoothing Edges
Cut edges from a miter saw can be rough or splintered. Sanding smooths these edges and removes any splinters. Use fine-grit sandpaper for the best finish.
Lightly sanding the edges helps the trim pieces fit better and makes painting easier. Always sand along the grain for a smooth result.
- Use 120 to 150 grit sandpaper
- Sand gently along the wood grain
- Check edges for splinters or rough spots
- Wipe dust off with a dry cloth after sanding
Fitting And Assembling Trim Pieces
After sanding, place the trim pieces in their final position. Check the corners and joints closely. They should fit tightly without gaps.
If pieces do not fit perfectly, mark and trim small areas with the miter saw or sandpaper. Assemble the pieces carefully with nails or adhesive to hold them in place.
- Dry fit pieces before nailing
- Use a level to keep trim straight
- Check corners for tight joints
- Secure trim with finishing nails or glue
Using Caulk And Paint For A Clean Look
Gaps or nail holes can spoil your trim’s appearance. Apply caulk to fill small gaps between trim and walls. This creates a smooth transition.
After caulk dries, paint the trim to match your room. Paint hides imperfections and protects the wood. Use painter’s tape for clean lines.
- Apply paintable caulk to gaps and nail holes
- Smooth caulk with a wet finger or tool
- Wait for caulk to dry before painting
- Use quality trim paint for best results
- Remove painter’s tape carefully after painting

Credit: www.findbuytool.com
Frequently Asked Questions
How Do I Set The Miter Angle For Molding Cuts?
Adjust the miter saw’s angle to match your corner joint’s degree. Common angles are 45° for standard corners. Use a protractor or angle finder for accuracy. Always test cut scrap pieces before final cuts.
What Safety Tips Should I Follow Using A Miter Saw?
Wear safety goggles and keep hands away from the blade. Secure the molding firmly before cutting. Avoid loose clothing and ensure the saw is on a stable surface. Always disconnect power before changing blades.
How Can I Prevent Molding From Splintering?
Use a sharp blade designed for fine cuts. Apply painter’s tape along the cut line to reduce splintering. Cut slowly and steadily without forcing the saw. Always support the molding properly during the cut.
What Is The Best Blade Type For Cutting Trim?
Choose a fine-toothed blade with at least 80 teeth for clean cuts. Carbide-tipped blades last longer and provide smoother edges. Avoid blades meant for rough cutting as they cause splinters and uneven edges.
Conclusion
Using a miter saw for molding and trim cuts makes your work neat and precise. Always measure twice before cutting to avoid mistakes. Keep the saw blade sharp and clean for smooth cuts. Practice safety by wearing goggles and keeping hands clear.
With patience and care, your trim will fit perfectly. This tool helps you create a professional look in your home projects. Take your time, and enjoy the process of crafting beautiful finishes.