Are you struggling to figure out how to measure resistance with a multimeter? You’re not alone.
Understanding how to use a multimeter for resistance can save you time, money, and frustration when working on electrical projects or fixing gadgets. Imagine being able to quickly check if a wire or component is faulty without guesswork. You’ll discover simple, step-by-step instructions that anyone can follow.
By the end, you’ll feel confident using your multimeter to get accurate resistance readings every time. Keep reading—you’re about to unlock a skill that makes troubleshooting easier and more effective.
Choosing The Right Multimeter
A multimeter helps you measure resistance in electrical circuits. Picking the right one makes the job easier and more accurate.
There are different types of multimeters. Each has features that suit certain tasks. Knowing these helps you choose the best tool for resistance measurement.
Types Of Multimeters
Multimeters come in two main types: analog and digital. Analog meters use a needle to show values. Digital meters show numbers on a screen.
Digital multimeters are easier to read and more common. Analog meters can be useful for quick changes but are less precise.
- Analog Multimeter: Uses a moving needle
- Digital Multimeter: Shows results on a screen
- Auto-Ranging Multimeter: Automatically selects the range
- Manual-Ranging Multimeter: User selects the range
Key Features For Measuring Resistance
Look for features that help measure resistance accurately. A good multimeter should have a wide resistance range and clear display.
Other useful features include auto-ranging and a low battery indicator. These make measuring resistance easier and more reliable.
- Wide resistance range (ohms)
- Clear digital display
- Auto-ranging for ease of use
- Low battery warning
- Durable probes for good contact

Credit: www.ariat-tech.com
Preparing The Multimeter
Using a multimeter to measure resistance needs careful preparation. You must set up the tool correctly for accurate results.
First, check your multimeter and its parts. Make sure the probes and wires are not damaged.
Setting The Dial To Resistance Mode
Turn the multimeter’s dial to the resistance setting. It is usually marked with the Greek letter omega (Ω), which stands for ohms.
Check the dial carefully to avoid choosing the wrong mode. Using the wrong mode can give false readings or damage the meter.
Selecting The Correct Range
Pick the right range on the multimeter for the resistance you expect. Some meters have automatic range detection.
If your multimeter does not have auto range, start with the highest range. Then lower the range step by step to get a clear reading.
- High range for unknown or large resistances
- Low range for small resistances
- Adjust range to get stable and clear numbers
Safety Tips Before Testing
Using a multimeter to measure resistance can be safe if you follow key safety tips. Always prepare before testing electrical circuits.
These safety tips help prevent injury and damage to your tools and circuits.
Power Off The Circuit
Turn off all power sources before measuring resistance. Testing a live circuit can cause electric shock or damage your multimeter.
- Switch off the main power supply or unplug the device.
- Discharge any stored energy in capacitors.
- Check with a voltage tester to confirm no voltage is present.
- Never test resistance on a powered circuit.
Avoiding Common Hazards
Watch for common hazards that may cause accidents during resistance testing.
| Hazard | How to Avoid |
| Electric Shock | Always power off and confirm no voltage |
| Damaging the Multimeter | Use the correct settings and test leads |
| Incorrect Readings | Ensure clean connections and dry components |
| Short Circuits | Keep test leads from touching each other |
Measuring Resistance Step-by-step
Using a multimeter to measure resistance is simple. It helps check if wires or devices work properly.
This guide shows how to measure resistance with clear steps. Follow each part carefully.
Connecting The Probes
Start by turning off power to the circuit you want to test. This avoids damage or wrong readings.
Plug the black probe into the common (COM) port on the multimeter. Insert the red probe into the port marked with the omega symbol (Ω) for resistance.
- Turn the multimeter dial to the resistance (Ω) setting.
- Touch the probes together to check the meter reads zero or near zero.
- Place the probes on each side of the component or wire to test.
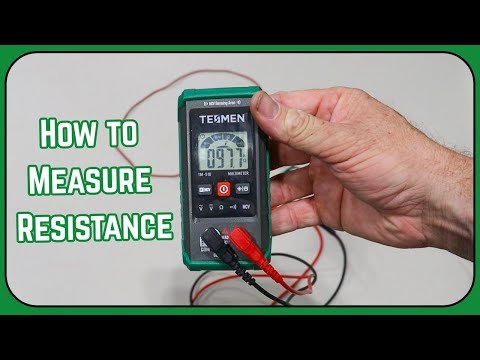
Reading The Display
Look at the multimeter screen to see the resistance value. It shows in ohms (Ω).
If the display shows “OL” or a very high number, it means the resistance is too high or the circuit is open.
- A low number means good conductivity or low resistance.
- A very high number or “OL” means no connection or broken wire.
- Fluctuating numbers can mean a loose connection or bad probe contact.
Interpreting The Results
Compare the reading with the expected resistance value. Check the device’s manual or label for this information.
Resistance close to the expected value means the part works well. Large differences may mean a problem.
- Zero or near zero resistance means a short circuit.
- Very high or infinite resistance means the circuit is broken.
- Normal resistance values show the component is likely good.
Troubleshooting Common Issues
Using a multimeter to check resistance can sometimes show strange results. Knowing how to fix these helps you get accurate readings. This guide covers two common problems and how to solve them.
Let’s look at why readings may jump around or show infinite resistance. Then you can troubleshoot like a pro.
Inconsistent Readings
Sometimes your multimeter shows different resistance values even if you test the same part twice. This can confuse your diagnosis.
- Check if the test leads are properly connected to the multimeter and the component.
- Make sure the probes touch clean metal surfaces without dirt or rust.
- Hold the probes steady and avoid moving them during measurement.
- Replace the multimeter batteries if they are low.
- Try a different range setting on your multimeter for better accuracy.
Multimeter Shows Infinite Resistance
Infinite resistance means the meter reads no continuity or an open circuit. This can happen for many reasons.
| Possible Cause | What to Check |
| Broken wire or open circuit | Inspect wires and connections for breaks or damage |
| Component is faulty | Test the component separately or replace it |
| Incorrect multimeter setting | Set the meter to the right resistance range or continuity mode |
| Loose or dirty test leads | Clean probe tips and ensure firm contact |

Credit: www.youtube.com
Practical Applications Of Resistance Measurement
Measuring resistance helps find problems in electrical parts. It shows how much a component stops electric flow.
Using a multimeter to check resistance is useful in many tasks. It helps keep circuits safe and working well.
Testing Resistors
Resistors control the flow of electricity in a circuit. Testing them with a multimeter shows if they work right.
Set the multimeter to the resistance mode. Touch the probes to each end of the resistor. The screen shows the resistance value.
- A correct reading means the resistor is good.
- A much higher or lower reading means it is damaged.
- Open circuit means no resistance reading; the resistor is broken.
Checking Continuity In Circuits
Continuity means electricity can flow through a path. A multimeter checks this by measuring resistance or beeping if connected.
Set the multimeter to continuity mode. Touch the probes to two points in the circuit. A beep or low resistance shows good connection.
- No beep and high resistance means a break in the circuit.
- Continuity tests help find broken wires or bad connections.
- This test is quick and saves time fixing circuits.

Credit: www.youtube.com
Frequently Asked Questions
What Is The Purpose Of Using A Multimeter For Resistance?
A multimeter measures electrical resistance to check circuit components. It helps identify faults like broken wires or damaged resistors, ensuring proper functionality. Resistance testing is crucial in troubleshooting and maintaining electronic devices.
How Do I Set My Multimeter To Measure Resistance?
Turn the dial to the resistance setting, often marked as Ω. Select the appropriate range if your multimeter is not auto-ranging. This prepares the device to accurately measure resistance values in ohms.
Can I Measure Resistance On A Powered Circuit?
No, always ensure the circuit is powered off before measuring resistance. Measuring resistance on a live circuit can damage the multimeter and give false readings. Safety and accuracy depend on disconnecting power first.
What Do The Resistance Readings On A Multimeter Indicate?
Resistance readings show how much a component opposes electrical current. Low resistance means good conductivity; high resistance suggests a poor or broken connection. These readings help diagnose circuit health and component conditions.
Conclusion
Using a multimeter for resistance is straightforward with practice. First, gather your tools. Then, set the multimeter correctly. Ensure safety by turning off power sources. Touch the probes to the component. Read the display for the resistance value. Frequent practice builds confidence.
Mistakes can teach valuable lessons. Remember to handle your multimeter with care. It’s a valuable tool for many tasks. Now, you can measure resistance like a pro. Keep learning and practicing for better results. Happy measuring!