Are you ready to take your cabinet projects to the next level? Using a nail gun can save you time and give your cabinets a professional finish that’s hard to beat.
But if you’ve never used one before, it might feel a bit intimidating. Don’t worry—this guide will walk you through every step, making it simple and safe. By the end, you’ll have the confidence to handle your nail gun like a pro and create cabinets that look amazing.
Keep reading, and let’s get started!

Credit: www.livowalny.com
Choosing The Right Nail Gun
Using a nail gun makes cabinet building faster and easier. Picking the right nail gun is important for good results.
Different nail guns work best for different tasks. This guide helps you choose the right one for cabinets.
Types Of Nail Guns For Cabinetry
There are several nail gun types used for cabinets. Each type uses different nails and works for specific jobs.
The main types are brad nailers, finish nailers, and pin nailers. Brad nailers use small nails for thin wood.
- Brad Nailers:Use 18-gauge nails, good for light trims and small pieces.
- Finish Nailers:Use 15- or 16-gauge nails, strong for cabinet frames and doors.
- Pin Nailers:Use tiny 23-gauge nails, ideal for delicate molding without splitting wood.
Selecting The Correct Nail Size
Choosing the right nail size is key for cabinet strength and appearance. Nails that are too big can split wood.
Smaller nails leave less visible holes but may not hold as well. Larger nails hold better but may need filling.
- Use 1 to 1.5 inch nails for cabinet trims and panels.
- Choose smaller gauge nails for thin or delicate wood.
- Pick larger gauge nails for heavy or thick wood parts.
Corded Vs. Cordless Models
Corded nail guns need to plug into power. They offer consistent power and do not run out of charge.
Cordless nail guns run on batteries. They give freedom to move but may need recharging during work.
- Corded:Best for long projects near power outlets.
- Cordless:Good for working in tight spaces or far from power.
- Consider weight and battery life when choosing cordless models.
Safety Precautions
Using a nail gun for cabinets can speed up your work. It also needs careful attention to safety. Following safety rules helps prevent accidents and injuries.
Always prepare yourself before starting. This guide shows key safety tips to protect you and others.
Essential Protective Gear
Wear the right gear before using a nail gun. It protects your body from flying nails and dust.
- Safety glasses to shield your eyes
- Hearing protection like earplugs or earmuffs
- Work gloves to protect your hands
- Long sleeves and pants to cover your skin
- Non-slip shoes to keep your footing stable
Safe Handling Practices
Handle the nail gun carefully to avoid accidents. Treat it like a loaded gun at all times.
- Read the manual before use
- Keep fingers away from the trigger until ready
- Hold the gun firmly and steady
- Never point the gun at yourself or others
- Disconnect the power source when not in use
- Use the correct nails for your gun
Avoiding Common Injuries
Injuries happen if the nail gun is used carelessly. Watch out for these common risks.
| Injury Type | Cause | Prevention |
| Finger punctures | Touching trigger accidentally | Keep finger off trigger until ready |
| Eye injuries | Flying nails or debris | Wear safety glasses |
| Hearing damage | Loud gun noise | Use ear protection |
| Falls | Slipping on work area | Wear non-slip shoes and clean area |
Preparing Your Workspace
Using a nail gun for cabinets needs a safe and tidy workspace. Organizing your area helps you work faster and avoid accidents.
Prepare your space by arranging tools, setting up surfaces, and checking the lighting. These steps make the job easier and more accurate.
Organizing Tools And Materials
Keep all tools and materials close and ready to use. This reduces time spent looking for items and keeps your work steady.
- Gather the nail gun, nails, safety goggles, and gloves
- Arrange a hammer, measuring tape, and pencil nearby
- Place wood glue and clamps within reach
- Clear away any unnecessary items from the workspace
Setting Up Work Surfaces
Choose sturdy and flat surfaces to support cabinets during nailing. A proper surface keeps cabinets steady and helps precise work.
| Surface Type | Purpose |
| Workbench | Strong support for heavy cabinet parts |
| Sawhorses with a plank | Portable and adjustable height |
| Non-slip mats | Prevent cabinet pieces from moving |
| Clean cloth or foam padding | Protect cabinet finish from scratches |
Ensuring Adequate Lighting
Good lighting helps you see nails and cabinet edges clearly. This lowers mistakes and improves safety.
- Use bright overhead lights or LED lamps
- Place lights to avoid shadows on the work area
- Keep extra batteries or bulbs ready for portable lights
- Consider natural light if working near windows
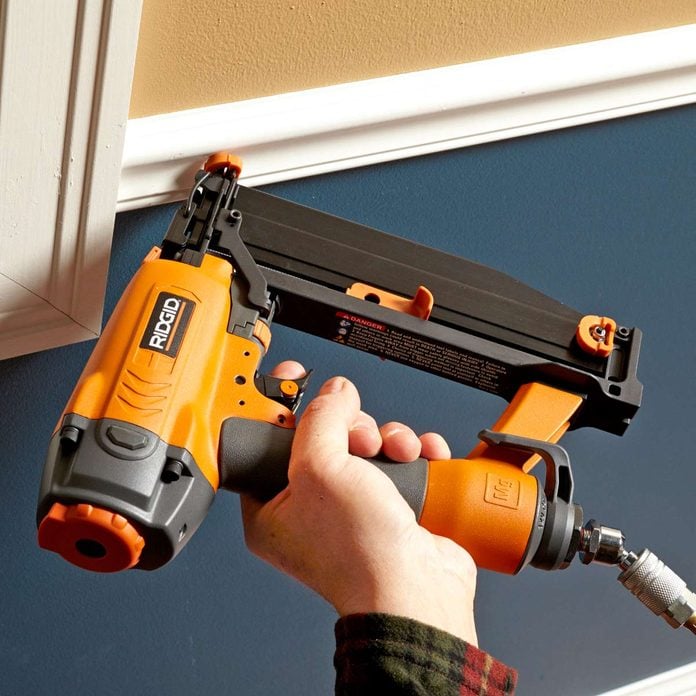
Credit: www.familyhandyman.com
Loading And Operating The Nail Gun
Using a nail gun for cabinets saves time and improves accuracy. It is important to know how to load and operate the tool safely.
This guide explains how to properly load nails, adjust depth settings, and maintain control during use.
Properly Loading Nails
Always use nails that fit your nail gun model. Check the user manual for correct nail size and type.
Open the nail gun’s magazine carefully. Insert the nails with the pointed ends facing out. Close the magazine securely to avoid jams.
- Use clean, dry nails to prevent rust and jams
- Load nails straight to avoid misfires
- Do not overload the magazine beyond capacity
Adjusting Depth Settings
Adjust the depth to control how far the nails go into the wood. This helps avoid damage to cabinets.
Most nail guns have a dial or lever to change depth. Test the setting on scrap wood before working on cabinets.
- Shallow depth is good for thin or delicate wood
- Deeper nails hold heavier pieces firmly
- Adjust as needed for different cabinet materials
Maintaining Control During Use
Hold the nail gun firmly with both hands. Keep your fingers away from the trigger until ready to fire.
Position the tip flat against the cabinet surface. This reduces the risk of misfiring or nail bending.
- Wear safety glasses to protect your eyes
- Keep your body balanced and stable
- Do not rush; fire nails one at a time
Techniques For Cabinet Installation
Using a nail gun for cabinet installation saves time and improves accuracy. Proper technique ensures strong joints and avoids damage to the wood.
This guide covers key techniques like positioning nails for strength, avoiding wood splitting, and working with different wood types.
Positioning Nails For Strength
Place nails where two pieces of wood meet tightly. This creates a strong hold and keeps cabinets stable.
- Nail near the edges but not too close to avoid splitting.
- Use multiple nails spaced evenly along the joint.
- Drive nails at a slight angle for better grip.
- Focus on corners and areas with high stress.
Avoiding Wood Splitting
Wood can split if nails go too close to edges or if too much force is used. Prevent damage by preparing the wood first.
| Technique | Description |
|---|---|
| Pre-drilling | Make small pilot holes before nailing to reduce pressure. |
| Choose correct nail size | Use nails that fit the wood thickness to avoid splitting. |
| Use clamps | Hold wood pieces firmly to prevent movement and cracks. |
| Drive nails slowly | Apply steady pressure to avoid sudden splits. |
Working With Different Wood Types
Different woods need different handling. Hardwoods are dense, while softwoods are easier to nail but more prone to damage.
Follow this advice for common wood types:
- Hardwoods:Use sharp nails and pre-drill holes.
- Softwoods:Use thinner nails and nail slowly.
- Plywood:Avoid nailing near edges to prevent layers from separating.
Troubleshooting Common Issues
Using a nail gun for cabinets can speed up your work. Sometimes, problems happen that stop the tool from working well.
This guide will help you fix common issues quickly. You will learn how to clear jams, fix misfires, and keep your nail gun working smoothly.
Clearing Jams Quickly
Nail jams happen when nails get stuck inside the gun. This stops it from firing nails properly. Clear jams right away to avoid damage.
First, unplug or remove the battery from the nail gun. Open the nail chamber and gently remove the jammed nails. Use pliers if nails are hard to reach.
- Turn off the nail gun before clearing jams
- Open the magazine or nail chamber carefully
- Remove stuck nails with pliers or your fingers
- Check for bent or broken nails and discard them
- Close the chamber securely before restarting
Fixing Misfires
Misfires occur when the nail gun fires no nail or fires slowly. This can be caused by wrong nails, low air pressure, or dirty parts.
Check if you use the correct nails for your gun. Make sure your air compressor has enough pressure. Clean the nail gun’s nose and trigger to avoid dirt build-up.
- Use nails that fit your nail gun model
- Keep air pressure within the recommended range
- Clean nail gun nose and trigger regularly
- Replace damaged or worn parts immediately
Maintaining Nail Gun Performance
Regular maintenance keeps your nail gun working well for a long time. Clean, oil, and check parts often to prevent problems.
Use the right oil to lubricate moving parts. Tighten screws and bolts to avoid loose parts. Store the nail gun in a dry place to stop rust.
- Oil the nail gun as the manual suggests
- Clean dust and debris after each use
- Tighten screws and check for wear
- Store the tool in a cool, dry place
- Inspect the air hose and connections regularly
Cleaning And Maintenance Tips
Keeping your nail gun clean helps it work well for a long time. Regular care stops problems before they start.
Follow simple steps to clean and maintain your tool safely and easily.
Regular Cleaning Routines
Clean your nail gun after each use to remove dust and debris. This prevents jams and damage.
- Unplug or disconnect the tool before cleaning.
- Use a soft brush to clear dirt from the magazine and nosepiece.
- Wipe the outside with a dry cloth to remove dust.
- Check the air vents to make sure they are clear.
Lubrication And Parts Replacement
Lubricate moving parts often to reduce wear. Use the recommended oil for your nail gun model.
| Part | Lubrication Frequency | Replacement Signs |
| O-rings | Weekly | Leaks or cracks |
| Driver blade | Monthly | Slow or missed nails |
| Magazine spring | Monthly | Weak nail feed |
Replace worn parts quickly to keep your nail gun safe and effective.
Storage Best Practices
Store your nail gun in a dry, cool place. Proper storage stops rust and damage.
- Keep the tool in its case or a protective bag.
- Remove nails and air source before storing.
- Check the tool for damage before each use after storage.
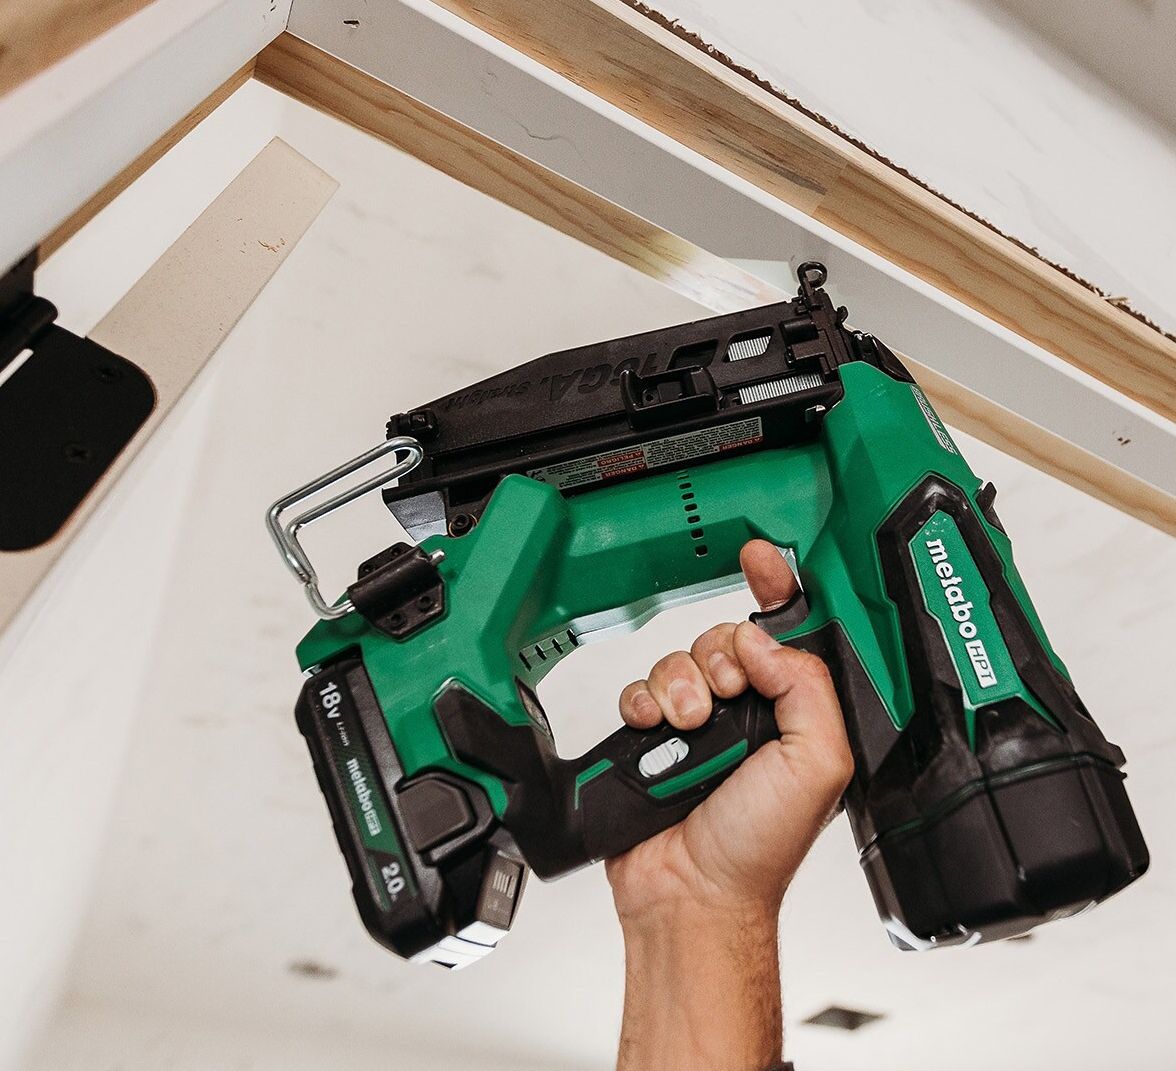
Credit: www.popularmechanics.com
Frequently Asked Questions
How Do I Safely Operate A Nail Gun For Cabinets?
Always wear safety glasses and keep fingers clear of the trigger. Check the nail gun’s pressure settings and use the correct nails. Follow the manufacturer’s instructions closely to prevent accidents and ensure a smooth cabinet assembly.
What Type Of Nails Work Best For Cabinet Installation?
Use 18-gauge finish nails or brad nails for cabinet work. These nails are thin enough to avoid splitting wood yet strong enough to hold parts securely. Choose nails the right length to prevent damage or weak joints.
Can A Nail Gun Damage Cabinet Surfaces?
Yes, improper use can cause dents or splits in wood. Use the correct nail size and adjust depth settings on the nail gun. Always test on scrap wood to avoid visible marks on cabinets.
How Do I Maintain A Nail Gun For Cabinet Projects?
Regularly clean and oil the nail gun to prevent jams. Check for loose screws and worn parts before each use. Proper maintenance ensures efficient, safe operation and extends the tool’s life.
Conclusion
Mastering the nail gun simplifies cabinet projects. Safety first. Always use protective gear. Choose the right nail size for your material. Hold the nail gun firmly. Practice on scrap wood to gain confidence. Align nails properly to avoid damage. Regular maintenance keeps tools in good shape.
Clean the nail gun after each use. This ensures longevity. With these steps, your cabinet projects become more efficient. Enjoy crafting with ease and precision.