
Are you ready to take control of your next plumbing or DIY project? Learning how to use a pipe bender can save you time, money, and frustration.
Whether you’re shaping metal pipes for a custom railing or fixing a plumbing issue, mastering this tool gives you the power to create clean, precise bends without damaging your materials. In this guide, you’ll discover simple steps and insider tips that make pipe bending easier than you think.
Keep reading to unlock the skills that will make your work look professional and get the job done right the first time.
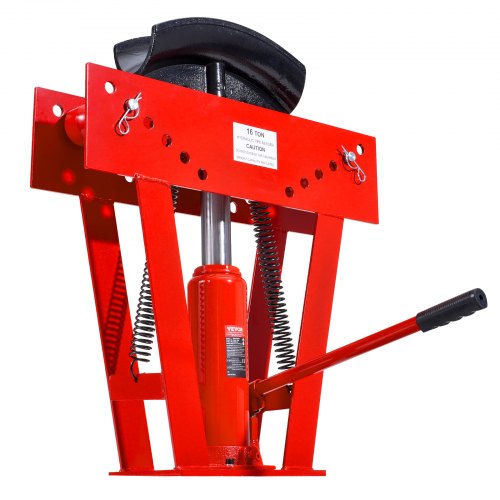
Credit: www.vevor.ca
Choosing The Right Pipe Bender
Using a pipe bender makes bending pipes easier and more accurate. Picking the right pipe bender helps you get the job done well.
Different pipe benders work better for different pipes and bending needs. Learn how to choose the best one for your work.
Types Of Pipe Benders
There are several types of pipe benders. Each type suits different bending tasks and pipe sizes.
- Manual benders use hand power for small jobs and thin pipes.
- Hydraulic benders use fluid pressure for thick pipes and heavy work.
- Electric benders have motors and make bending fast and easy.
- Rotary draw benders create smooth bends by pulling the pipe around a die.
Selecting Based On Pipe Material
Pipe material affects the type of bender you need. Some benders work better with certain materials.
Soft metals like copper bend easily with manual benders. Hard metals like steel need stronger benders like hydraulic types.
- Copper and aluminum: manual or electric benders
- Steel and stainless steel: hydraulic or electric benders
- Plastic pipes: specialized plastic pipe benders
Considering Bend Radius
Bend radius is how tight the bend is. The pipe bender must support the needed bend radius.
Choosing a bender with the right bend radius prevents pipe damage and keeps the pipe strong.
| Bend Radius | Use | Pipe Type |
|---|---|---|
| Large radius (gentle bend) | Long curves, smooth flow | Water pipes, HVAC |
| Small radius (tight bend) | Compact installations, space-saving | Automotive, construction |
Preparing The Pipe And Workspace
Before bending a pipe, get your pipe and workspace ready. This helps ensure accurate bends and safe work.
Proper preparation avoids mistakes and keeps your area clear of hazards.
Measuring And Marking Bend Points
Use a tape measure to find the exact spot where the pipe will bend. Mark this point clearly with a marker or pencil.
- Measure twice to avoid errors
- Mark the pipe with a visible line
- Check marks from different angles
Securing The Pipe
Keep the pipe steady before bending. Use a vice or clamps to hold it in place. This helps you bend the pipe exactly where you marked.
| Tool | Purpose |
| Bench Vice | Holds pipe firmly |
| Pipe Clamp | Keeps pipe from moving |
| Rubber Pads | Protect pipe surface |
Clearing The Work Area
Clear your workspace to avoid accidents. Remove tools and materials that are not needed for the job.
- Keep the floor clear
- Ensure good lighting
- Place tools within easy reach
- Wear safety gear like gloves and goggles
Step-by-step Bending Process
Using a pipe bender is simple if you follow the steps carefully. This guide shows you how to bend pipes with the right technique.
Each step ensures your pipe bends smoothly without damage. Take your time and check your work often.
Positioning The Pipe In The Bender
Place the pipe into the bender’s groove carefully. The pipe should sit firmly against the bending form.
Make sure the pipe end lines up with the starting mark on the bender. This helps you bend at the right spot.
- Clean the pipe to remove dirt or grease
- Check the pipe size matches the bender size
- Insert the pipe fully to avoid slipping
Applying Steady Pressure
Push or pull the bender handle slowly. Use steady pressure to bend the pipe evenly.
Do not rush or force the pipe quickly. A slow bend reduces the risk of kinks or cracks.
- Hold the pipe firmly while bending
- Keep your hands steady and controlled
- Stop if the pipe feels too hard to bend
Checking Bend Angle
Use a protractor or angle gauge to check the bend. Make sure the angle matches your project needs.
Adjust the pipe if the bend is too small or too large. Small corrections keep the pipe safe.
- Mark the desired angle on the pipe before bending
- Check the angle several times during bending
- Stop bending once the correct angle is reached

Credit: www.eliterooter.com
Avoiding Common Bending Mistakes
Bending pipes can be tricky if you do not pay attention to details. Mistakes can cause damage or waste materials. Using a pipe bender correctly helps you get the job done right.
This guide will help you avoid common errors. Follow these tips to bend pipes smoothly and accurately.
Preventing Pipe Wrinkles And Flattening
Wrinkles and flattening happen when the pipe wall collapses during bending. This weakens the pipe and looks bad. To avoid this, use the right pipe bender and supports.
Filling the pipe with sand or using a bending spring can keep its shape. Also, bend slowly and evenly to reduce damage.
- Use sand or bending springs inside the pipe
- Bend slowly and avoid sharp movements
- Choose the correct size die for your pipe
- Support the pipe well during bending
Ensuring Accurate Angles
Accurate angles make your pipes fit well in your project. Mark the pipe with a pencil before bending. Use angle guides on the bender for precision.
Check your angle with a protractor or angle finder after bending. Adjust if needed by bending a little more or less.
- Mark the pipe before bending
- Use angle guides on the pipe bender
- Measure the angle after bending
- Make small adjustments if necessary
Maintaining Pipe Integrity
Pipe integrity means the pipe stays strong and does not crack or weaken. Avoid over-bending or forcing the pipe too fast. Use the correct pipe type for bending.
Inspect the pipe before and after bending. Look for cracks, dents, or weak spots. Replace damaged pipes to keep your work safe.
- Do not bend pipes too fast or too far
- Choose bendable pipe materials
- Check pipes for damage before bending
- Replace pipes if you find cracks or dents
Advanced Bending Techniques
Using a pipe bender is easy for simple bends. Advanced techniques help with tricky jobs. These methods improve accuracy and save time.
Learning special bends is important for tight spots and tough pipes. Use the right tools and steps for better results.
Back Bending For Tight Spaces
Back bending lets you bend pipes in small areas. It bends the pipe in the opposite direction first. This creates space to make the main bend.
This technique is good for corners or near walls. It helps avoid damage and keeps the pipe neat.
- Mark the pipe where the back bend starts
- Bend the pipe slightly backward
- Make the main bend in the correct direction
- Straighten the back bend as needed
Using Heat For Tough Materials
Some pipes are hard to bend. Heat softens metals like steel and copper. Use a torch or heat gun carefully.
Heat the pipe evenly to avoid weak spots. Do not overheat or burn the pipe. Let it cool slowly after bending.
- Wear safety gear like gloves and goggles
- Heat the pipe area you want to bend
- Use the pipe bender to shape the pipe
- Cool the pipe naturally for best strength
Combining Multiple Bends
Sometimes pipes need more than one bend. Plan all bends before starting. This avoids mistakes and pipe damage.
Use marks and measurements for each bend. Bend slowly and check angles after each one. This keeps the pipe accurate.
- Measure and mark all bend points clearly
- Bend the pipe at the first mark carefully
- Check the angle and position after each bend
- Make small adjustments as needed
- Use a protractor or angle guide for accuracy
Maintaining Your Pipe Bender
Keeping your pipe bender in good condition helps it last longer and work better. Regular care prevents damage and ensures safety during use.
Follow simple maintenance steps to keep your tool ready for the next project. Proper cleaning, inspection, and storage are key.
Cleaning And Lubrication Tips
Clean your pipe bender after each use to remove dirt and metal shavings. Use a brush or cloth to wipe all parts.
- Use a dry cloth to wipe dust and debris
- Apply light machine oil to moving parts
- Remove rust with fine sandpaper if needed
- Wipe off excess oil to avoid attracting dirt
Regular Inspections
Check your pipe bender often for damage or wear. Look closely at the bending shoe, handles, and hinges.
| Part | What to Check | Action if Damaged |
| Bending Shoe | Cracks or deep scratches | Replace part |
| Handles | Loose or bent | Tighten or straighten |
| Hinges | Rust or stiffness | Clean and lubricate |
Storage Recommendations
Store your pipe bender in a dry place to avoid rust and damage. Keep it away from moisture and direct sunlight.
- Keep in a toolbox or cabinet
- Use a protective cover or wrap
- Store away from heavy tools that can cause dents
- Place on a flat surface to avoid bending parts
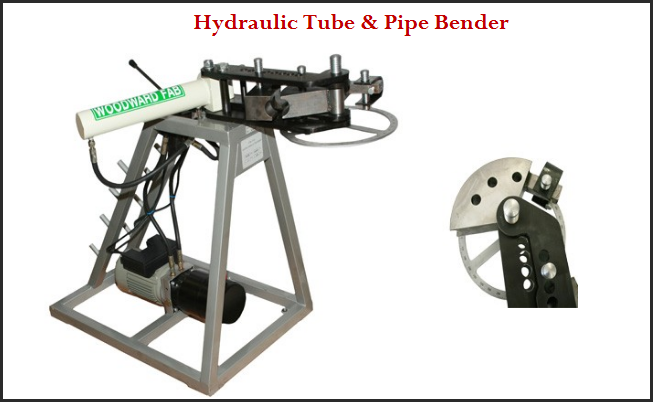
Credit: www.woodwardfab.com
Frequently Asked Questions
What Is The Best Pipe Bender For Beginners?
The best pipe bender for beginners is a manual hand bender. It is easy to use and affordable. It allows precise control for small projects. Look for one that fits your pipe size for best results.
How Do I Avoid Kinks When Bending Pipes?
To avoid kinks, always use the correct pipe bender size. Bend slowly and evenly. Support the pipe firmly and avoid sharp angles. Using a pipe bender with a proper radius helps maintain pipe integrity.
Can I Bend Any Type Of Pipe With A Pipe Bender?
Most pipe benders work with metals like copper, steel, and aluminum. Some benders are adjustable for different pipe sizes. However, plastic or very thick pipes may require specialized tools or techniques.
How Do I Measure Pipe Bends Accurately?
Measure the pipe length and mark the bend location clearly. Use a protractor or angle finder to set the desired bend angle on your bender. Double-check measurements before bending to ensure precision.
Conclusion
A pipe bender can be simple to use with practice. Always choose the right bender for your pipe size. Remember to measure accurately before bending. This ensures a perfect fit every time. Follow safety guidelines to avoid accidents. Keep your tools clean and maintained for best results.
Practice makes bending easier and more precise. Over time, you’ll gain confidence. Proper technique leads to better bends and less waste. Enjoy the process. Bending pipes can be rewarding. With these tips, you can bend pipes like a pro.
