Imagine this: you’re about to start a home improvement project or dig in your yard, and suddenly you realize the risk of hitting hidden pipes. Without the right tool, this can be a nightmare.
But don’t worry! There’s a solution that can save you a lot of time, money, and headaches: a pipe locator. By understanding how to use a pipe locator, you can confidently locate hidden lines and avoid costly mistakes. Curious about how this tool can make your life easier?
Stick around to discover the ins and outs of using a pipe locator effectively, ensuring your project goes off without a hitch. You’ll soon wonder how you ever managed without it!
Credit: www.mepserviceslbk.com
Choosing The Right Pipe Locator
Finding hidden pipes underground can be tricky. A pipe locator helps you find pipes safely and quickly.
Choosing the right pipe locator makes the job easier. You need one that fits your needs and budget.
Types Of Pipe Locators
There are different types of pipe locators. Each type works best in different situations.
Some locators use signals to find pipes. Others use magnetic fields or sound waves.
- Electromagnetic Locators: Send signals to detect metal pipes.
- Acoustic Locators: Use sound to find leaks or pipes.
- Magnetic Locators: Detect pipes with metal content.
- Ground Penetrating Radar (GPR): Shows pipes without needing a signal.
Key Features To Consider
Look for features that make pipe locating easier and more accurate. These features help you find pipes faster.
Battery life, depth range, and ease of use are important. Also, check if the locator works on different pipe materials.
- Depth Range:How deep the locator can find pipes.
- Signal Strength:Strong signals help detect pipes clearly.
- Display Type:Easy-to-read screens improve accuracy.
- Portability:Lightweight and easy to carry models are best.
- Battery Life:Long battery life allows longer work time.
- Compatibility:Works on metal and non-metal pipes.

Credit: xzhjdkj.en.made-in-china.com
Preparing For The Search
Using a pipe locator helps find hidden pipes underground or inside walls. Preparing well makes the search easier and safer.
This guide covers the tools you need and important safety steps to follow before starting.
Gathering Necessary Tools
Having the right tools ready saves time and improves the accuracy of your search for hidden pipes.
- Pipe locator device with batteries fully charged
- Signal transmitter for sending signals through pipes
- Protective gloves and safety glasses
- Measuring tape to mark distances
- Metal detector to check for other buried objects
- Maps or blueprints of the area if available
- Marker flags or spray paint for marking pipe locations
Safety Precautions
Safety is very important before and during pipe locating. Follow these precautions to avoid accidents and damage.
| Safety Rule | Description |
| Wear protective gear | Use gloves and glasses to protect hands and eyes |
| Check for electric lines | Use a voltage detector to avoid shocks |
| Work in daylight | Good light helps you see clearly and avoid hazards |
| Keep area clear | Remove obstacles to prevent tripping or falling |
| Follow local regulations | Obey rules about digging or using locating devices |
Setting Up The Pipe Locator
Using a pipe locator helps find hidden pipes underground. Correct setup ensures accurate detection.
Start by reading the device manual. Prepare the area by clearing debris and marking known lines.
Calibrating The Device
Calibration adjusts the pipe locator to the environment. It helps the device detect signals clearly.
Place the locator on a flat surface away from metal objects. Follow the device’s calibration instructions carefully.
- Turn on the locator and wait for it to start
- Set the device to calibration mode
- Keep the locator steady until calibration ends
- Confirm calibration success by checking the display
Adjusting Sensitivity Settings
Sensitivity controls how well the locator detects pipes. Too high or low sensitivity can cause errors.
Start with medium sensitivity. Increase it to find smaller pipes or reduce it to avoid false signals.
- Use lower sensitivity in areas with many metal objects
- Increase sensitivity for deep or small pipes
- Test different settings to find the best result
- Adjust sensitivity during scanning if needed
Locating Hidden Pipes
Hidden pipes are often buried underground or inside walls. Finding them helps avoid damage during construction or repairs.
A pipe locator is a tool that detects metal or plastic pipes beneath surfaces. It sends signals and reads responses to find the pipe’s path.
Techniques For Accurate Detection
Hold the pipe locator steady and move it slowly over the area. Sudden moves can cause wrong readings.
Mark spots where the signal is strongest. These points often show the pipe’s exact location.
- Scan the surface in a grid pattern for full coverage
- Use the correct settings for the pipe material
- Check the battery before starting to ensure strong signals
- Repeat scans to confirm the pipe path
Interpreting Signals And Readings
The pipe locator shows signals as sounds, lights, or screen readings. Stronger signals mean you are closer to the pipe.
Weak or no signals can mean the pipe is deeper or non-metallic. Adjust settings or try a different detection mode.
- High beep frequency means strong signal
- Low beep frequency means weak signal
- Flashing lights often match signal strength
- Digital displays may show distance or depth
Dealing With Common Challenges
Using a pipe locator can be tricky in some situations. Certain problems make it hard to find hidden pipes accurately.
Knowing how to handle these challenges helps you get better results with your pipe locator.
Handling Interference
Metal objects and electrical cables can cause interference. This interference can confuse your pipe locator signals.
To reduce interference, move slowly and keep the locator steady. Try changing the locator’s frequency if possible.
- Avoid areas near power lines or metal fences
- Check for known underground utilities before starting
- Use shielding or grounding techniques if available
- Perform multiple scans from different angles
Locating Pipes In Difficult Terrain
Rough or rocky ground can make it hard to scan for pipes. Steep slopes and thick vegetation also block the signal.
Use a pipe locator with good sensitivity and adjust settings to match the terrain. Take your time to cover the area carefully.
- Clear vegetation where possible before scanning
- Use additional tools like ground-penetrating radar if needed
- Mark found pipe sections clearly to avoid missing spots
- Walk slowly and follow the pipe path patiently

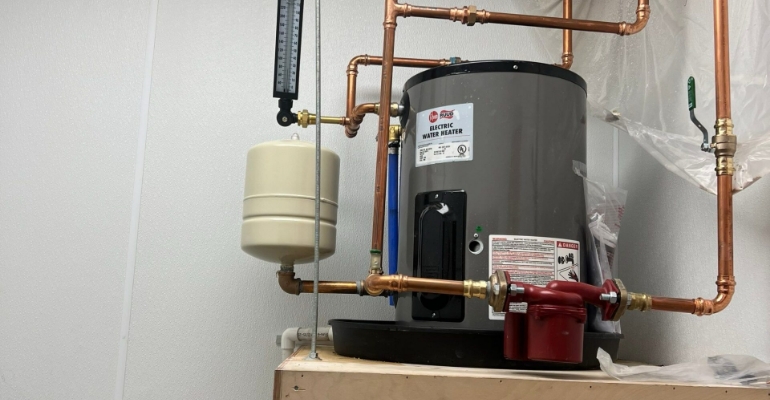
Credit: storetech.com.pe
Maintaining Your Pipe Locator
Keeping your pipe locator in good shape helps it work well for a long time. Regular care prevents damage and ensures accurate detection of hidden lines.
This guide covers important cleaning, storage, and routine maintenance tips to keep your device ready for use.
Cleaning And Storage Tips
Clean your pipe locator after every use to remove dirt and dust. Use a soft cloth dampened with water. Avoid harsh chemicals that can harm the device.
- Wipe the surface gently to avoid scratches
- Remove batteries if storing for a long time
- Keep the locator in a dry, cool place
- Store in a protective case to prevent damage
Routine Checks And Repairs
Check your pipe locator regularly for any signs of wear or malfunction. Fix small issues early to avoid costly repairs later.
| Maintenance Task | Frequency | Notes |
| Battery check | Before each use | Replace if low or leaking |
| Button and dial function test | Monthly | Ensure all controls respond correctly |
| Sensor inspection | Every 3 months | Clean any debris or corrosion |
| Calibration | As recommended by manual | Keep detection accurate |
Expert Tips For Success
Using a pipe locator helps find hidden pipes underground. It saves time and prevents damage during digging.
Follow expert tips to get accurate results and avoid costly mistakes when locating pipes.
Maximizing Efficiency
Prepare the pipe locator and site before you start. Check batteries and settings. Clear the area of debris for a good signal.
- Use the correct frequency for the pipe material.
- Hold the locator close to the ground for better detection.
- Mark the pipe location clearly as you find it.
- Move slowly and steadily to avoid missing signals.
- Cross-check the results with maps or blueprints.
Avoiding Common Mistakes
Many errors come from poor setup or rushing. Learn what to avoid to keep the process safe and accurate.
| Error | Cause | Solution |
| Weak signal | Low battery | Replace batteries before use |
| False reading | Interference from metal objects | Remove nearby metal or change location |
| Missing pipes | Moving too fast | Slow down and scan carefully |
| Incorrect marking | Poor visibility or unclear marks | Use bright paint or flags to mark |
Frequently Asked Questions
What Is A Pipe Locator Used For?
A pipe locator helps detect underground pipes and cables. It prevents accidental damage during digging or construction. Using it ensures safety and avoids costly repairs. It is essential for locating hidden utility lines accurately.
How Does A Pipe Locator Work?
A pipe locator sends signals through metal pipes or cables underground. It detects the signal with a receiver above ground. The device shows the pipe’s position and depth. This technology helps users trace hidden lines precisely without excavation.
Can I Use A Pipe Locator On Plastic Pipes?
Standard pipe locators detect metal pipes only. For plastic pipes, you need special locators with tracer wires or acoustic sensors. These devices help find non-metallic lines by detecting signals or vibrations. Always check your locator’s compatibility before use.
What Safety Tips Should I Follow Using A Pipe Locator?
Always read the user manual before operating the locator. Mark detected lines clearly to avoid digging mistakes. Wear protective gear and stay alert. Call local utility services for line maps if unsure. Proper use prevents accidents and equipment damage.
Conclusion
Using a pipe locator helps find hidden lines safely and quickly. It reduces the risk of damage during digging or repairs. Always follow the tool’s instructions for best results. Practice makes it easier to read signals and locate pipes. Taking time to check for pipes saves money and stress later.
Stay careful and use the locator to protect your work and property. This simple step makes projects smoother and safer for everyone involved.