Have you ever wanted to take your woodworking skills to the next level? Knowing how to use a plunge router can open up a world of precision and creativity for your projects.
Whether you’re shaping edges, cutting grooves, or making intricate designs, mastering this tool will save you time and give your work a professional finish. In this guide, you’ll discover simple steps and insider tips that make using a plunge router easy and safe.
Ready to transform your woodworking? Let’s dive in and unlock the full potential of your plunge router.

Credit: www.vevor.ca
Choosing The Right Plunge Router
A plunge router lets you cut wood with precision and control. Picking the right one makes your work easier and safer.
Learn what types of plunge routers exist and what features matter most. This helps you find the best tool for your projects.
Types Of Plunge Routers
There are different types of plunge routers. Each type fits certain tasks better than others.
- Fixed-base plunge routers: Good for steady depth control and simple tasks.
- Variable-speed plunge routers: Allow speed changes for different materials.
- Compact plunge routers: Smaller and lighter, easy for detailed work.
- Heavy-duty plunge routers: Strong motors for tough, long jobs.
Key Features To Look For
Some features make using a plunge router safer and easier. Look for these when choosing your tool.
- Depth adjustment: Lets you set how deep the router cuts.
- Power: Strong motors cut through hard wood smoothly.
- Soft start: Prevents sudden jerks when turning on.
- Ergonomic handles: Help you hold the router comfortably.
- Dust collection: Keeps your work area clean.
- Variable speed: Lets you match speed to the bit and wood type.
Selecting The Best Bit
The router bit shapes the cut. Choose the right bit for your project and wood type.
- Straight bits: Good for clean, straight cuts and grooves.
- Flush-trim bits: Help copy shapes and edges accurately.
- Round-over bits: Create smooth rounded edges.
- Chamfer bits: Cut angled edges for decoration.
- Dovetail bits: Make strong joints for furniture.

Credit: www.amazon.com
Setting Up Your Router
Setting up your plunge router correctly is important for safety and accuracy. Taking time to prepare your router helps you get clean cuts.
This guide covers installing the router bit, adjusting the depth stop, and securing your workpiece.
Installing The Router Bit
First, unplug the router before changing the bit. Use a wrench to loosen the collet nut and remove the old bit.
Insert the new bit into the collet, pushing it in about 3/4 of an inch. Tighten the collet nut firmly with the wrench.
- Unplug router for safety
- Use wrench to loosen collet nut
- Insert bit 3/4 inch into collet
- Tighten collet nut securely
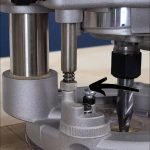
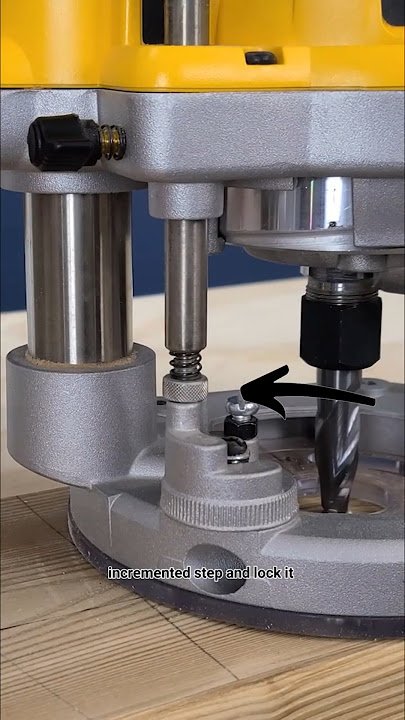
Adjusting The Depth Stop
The depth stop controls how deep the router bit cuts. Set it before starting your work to get the right depth.
Loosen the depth stop adjustment knob. Lower the router base until the bit reaches the desired depth. Tighten the knob to lock it in place.
- Loosen depth stop knob
- Lower router base to depth
- Tighten knob to secure setting
Securing The Workpiece
Hold your workpiece steady to avoid mistakes or injury. Use clamps to fasten it to your workbench or table.
Make sure the workpiece cannot move before you start routing. Check that clamps are tight but do not damage the wood.
- Place workpiece on stable surface
- Use clamps to hold it firmly
- Check for any movement
- Adjust clamps if needed
Basic Techniques For Precision
A plunge router helps cut wood with accuracy. Using it right keeps your work clean and safe.
Learn simple ways to control the tool. These tips will improve your cutting skills.
Starting The Cut Safely
Set the router depth before turning it on. This helps avoid deep cuts at the start.
Hold the router firmly with both hands. Keep the base flat on the wood.
- Check the bit is tight and sharp
- Wear safety glasses and ear protection
- Start the router away from the wood
- Lower the bit slowly into the wood
Controlling Speed And Feed
Adjust the router speed based on the wood type. Hard woods need slower speeds.
Move the router steadily without forcing it. Feed too fast can cause rough cuts.
- Use slower speed for hardwoods
- Faster speed works for softwoods
- Keep a steady feed rate for smooth edges
- Pause to clear chips if needed
Maintaining Steady Movement
Keep your hands steady and grip firm. Sudden moves can ruin the cut.
Use guides or fences to help keep a straight line. This improves precision.
- Hold the router with both hands
- Move the tool at a consistent speed
- Follow marked lines carefully
- Use clamps to secure the wood
Advanced Routing Tips
Using a plunge router gives you great control over your woodworking projects. Learning advanced tips helps improve your accuracy and efficiency.
These tips focus on using templates, making repetitive cuts, and avoiding common mistakes.
Using Templates And Guides
Templates help you create consistent shapes and patterns. You can clamp a template to your workpiece to guide the router along a fixed path.
Router guides, like edge guides or bushings, keep the router steady and follow the template smoothly. This reduces errors and saves time.
- Secure the template tightly to avoid movement
- Use a router bushing or guide that matches your bit size
- Test on scrap wood before routing the final piece
- Move the router slowly for clean edges
Making Repetitive Cuts
Repetitive cuts require consistency to make all pieces identical. Use fences or stops on your router table to set the cut length.
Mark your settings and double-check measurements before each cut. This helps avoid mistakes and saves material.
- Use a clamping fence for repeatable edge cuts
- Set a stop block for repeated depth cuts
- Check bit tightness regularly
- Wear eye and ear protection for safety
Avoiding Common Mistakes
Common mistakes with a plunge router include starting the cut at full depth and rushing the feed rate. Both can damage the wood and bit.
Always start with the bit above the wood. Lower it slowly to the cut depth. Keep the router moving steadily to avoid burns and chips.
- Do not force the router; let the bit cut at its own speed
- Use sharp bits to reduce tear-out
- Secure workpieces firmly before routing
- Check for loose parts on the router before use
Maintenance And Safety
Using a plunge router safely and keeping it in good shape helps it work well. Regular care can stop problems before they start.
This guide covers how to clean and oil your router, change bits, and stay safe while working.
Cleaning And Lubricating
Keep your plunge router clean to avoid dust buildup. Use a soft brush to remove sawdust from all parts. Wipe the surface with a dry cloth after each use.
Lubricate the plunge mechanism to keep it moving smoothly. Use light machine oil on the plunge rods and any moving joints. Avoid over-oiling to prevent dirt sticking.
- Unplug the router before cleaning or oiling.
- Brush away dust from vents and motor housing.
- Use a cloth to clean the base plate.
- Apply oil sparingly to the plunge rods.
- Check for rust or damage during cleaning.
Replacing Router Bits
Router bits wear out or get dull with use. Replace them to keep cuts clean and accurate. Always choose bits that fit your router’s collet size.
| Task | Instructions |
| Unplug Router | Always disconnect power before changing bits. |
| Loosen Collet | Use the correct wrench to loosen the collet nut. |
| Remove Bit | Pull out the old bit carefully without touching sharp edges. |
| Insert New Bit | Push the new bit fully into the collet but do not bottom it out. |
| Tighten Collet | Secure the collet nut firmly but avoid over-tightening. |
Safety Gear And Best Practices
Wear safety gear every time you use a plunge router. This protects you from dust, noise, and flying debris.
- Always wear safety glasses or goggles.
- Use ear protection to reduce noise exposure.
- Wear a dust mask to avoid breathing sawdust.
- Keep your hands clear of the bit while the router runs.
- Secure your workpiece firmly before routing.
- Work in a well-lit, clutter-free area.

Credit: www.amazon.com
Frequently Asked Questions
What Is A Plunge Router Used For?
A plunge router allows precise depth control for cutting grooves, dados, and mortises. It’s ideal for woodworking tasks requiring variable depth adjustments.
How Do You Set The Depth On A Plunge Router?
Unlock the plunge mechanism, lower the bit to the desired depth, then lock it. This ensures consistent and accurate cutting depth.
Can A Plunge Router Make Edge Cuts?
Yes, plunge routers can make edge cuts by adjusting the depth and using edge guides. They offer versatility for various woodworking edges.
What Safety Tips Should I Follow Using A Plunge Router?
Always wear safety gear, secure your workpiece, and keep hands away from the bit. Follow the manufacturer’s guidelines to prevent accidents.
Conclusion
Using a plunge router can enhance your woodworking projects. Practice the basics first. Ensure you have the right tools and safety gear. Familiarize yourself with the router’s settings and controls. Experiment with different techniques on scrap wood. Gradually, your confidence will grow.
Always prioritize safety while working. Clean and maintain your router for long-term use. Enjoy crafting unique designs and improving your skills. With patience, you’ll see great results. Remember, practice makes perfect. Keep experimenting and learning. Happy woodworking!