Shaping wood can be a rewarding experience, especially when you have the right tools. A power planer is one such tool that can transform your woodworking projects, making them smoother and more precise.
But how do you use a power planer effectively? Imagine being able to glide through wood like a hot knife through butter, achieving the perfect finish every time. With the right techniques, this can be your reality. Whether you’re a seasoned woodworker or a passionate DIY enthusiast, mastering the power planer can elevate your craft to new heights.
In this guide, you’ll discover step-by-step instructions to harness the full potential of a power planer. We’ll walk you through essential tips and tricks that will not only simplify your work but also save you time. Are you ready to take your woodworking skills to the next level? Read on to unlock the secrets of shaping wood like a pro.
Choosing The Right Power Planer
Using a power planer helps shape wood quickly and smoothly. Picking the right tool is important for good results.
Learn about different types of power planers, key features to check, and safety gear you need.
Types Of Power Planers
Power planers come in different styles. Each type fits certain jobs better than others.
- Handheld Planers: Light and easy to use for small projects.
- Benchtop Planers: Fixed on a table, good for precise thicknessing.
- Electric Hand Planers: Fast and powerful for larger tasks.
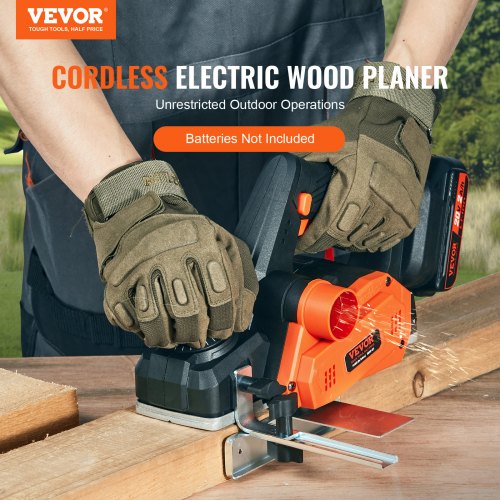
- Cordless Planers: Portable but may have less power.
Key Features To Consider
Look for features that improve control and quality. These help you work safer and better.
| Feature | Benefit |
| Adjustable Depth | Control how much wood you remove |
| Power Rating | Stronger motors handle tough wood types |
| Ergonomic Handles | Comfortable grip reduces fatigue |
| Dust Collection | Keeps work area clean and clear |
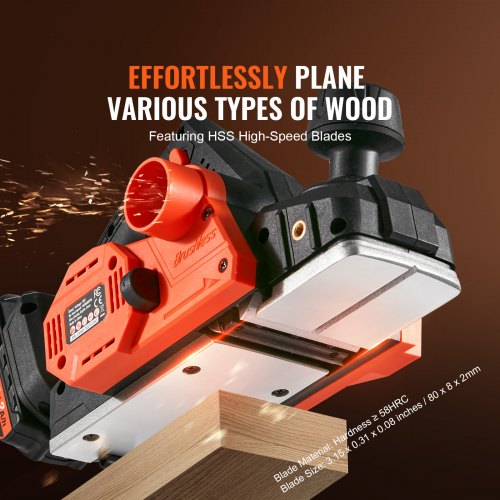
| Blade Quality | Sharp blades give smooth finishes |
Safety Gear Essentials
Wear safety gear to protect yourself from dust and sharp edges. Always follow safety rules.
- Safety Glasses: Protect your eyes from flying wood chips.
- Ear Protection: Reduce noise damage from the planer.
- Dust Mask: Avoid breathing in wood dust.
- Gloves: Protect hands while handling wood and tools.
- Proper Clothing: Avoid loose clothes that could catch in the planer.
Credit: www.vevor.ca
Preparing Your Workspace
Before using a power planer, getting your workspace ready is important. A clean and stable area helps you work safely and well.
Organizing your tools and materials can make shaping wood easier. Take time to prepare your space before starting.
Setting Up A Stable Surface
Use a strong, flat surface to work on. A sturdy workbench or table works best for planing wood.
Make sure the surface does not wobble or move. This keeps your wood steady and prevents mistakes.
Clamping And Securing Wood
Hold the wood firmly in place with clamps. This stops the wood from moving while you use the planer.
Place clamps on both ends or sides of the wood. Check that the wood is tight and will not slip.
- Use quick-release clamps for easy adjustments
- Apply enough pressure to keep wood still without damage
- Check clamps before starting the planer
Clearing The Work Area
Remove any tools or objects near your workspace. This reduces the chance of accidents or damage.
Keep your power cord away from the planer path. Clear space helps you move safely and freely.
- Pick up scrap wood and sawdust regularly
- Organize your tools within easy reach
- Ensure good lighting in the work area
Basic Power Planer Techniques
A power planer helps shape wood by shaving off thin layers. It makes wood smooth and even.
Using a power planer correctly keeps your work safe and neat. Learn the basic ways to hold, adjust, and control it.
Holding And Positioning The Planer
Hold the power planer firmly with both hands. One hand should grip the front handle, and the other should hold the rear handle.
Keep the planer flat and steady on the wood. Position it so the blade meets the surface evenly for smooth cuts.
- Use a firm grip to avoid slipping
- Keep the planer flat against the wood
- Start at the edge and move in a straight line
Adjusting Depth Settings
Set the depth to control how much wood the planer removes. A shallow depth removes thin layers for fine smoothing.
Increase the depth for faster removal, but avoid cutting too deep at once. Adjust the depth dial before starting.
- Start with a shallow depth for control
- Increase depth gradually for rough shaping
- Check the depth dial before each use
Controlling Speed And Pressure
Move the planer at a steady speed. Moving too fast can cause uneven cuts, while moving too slow may damage the wood.
Apply even pressure, pushing the planer forward without forcing it. Let the blade do the work for best results.
- Keep a steady forward motion
- Do not push too hard on the planer
- Maintain even pressure for smooth cuts
Credit: www.vevor.ca
Shaping Wood With Precision
Using a power planer helps you shape wood with accuracy and ease. It smooths rough surfaces and forms clean edges quickly.
Follow simple techniques to get precise results. This guide covers creating smooth surfaces, shaping edges and bevels, and handling curves.
Creating Smooth Surfaces
Start by adjusting the depth of the planer blade. Set it shallow for a fine finish and deeper for removing more wood.
Move the planer steadily along the wood grain. Avoid stopping in the middle to prevent uneven spots.
Forming Edges And Bevels
Edges and bevels add shape and style to your woodwork. Use the planer to trim edges cleanly and create angled bevels.
- Secure the wood firmly to avoid movement.
- Hold the planer steady and guide it along the edge.
- Adjust blade depth for the desired bevel angle.
- Make several light passes instead of one deep cut.
Handling Curves And Contours
Curves require careful control of the planer. Use slow, steady movements to follow the wood’s shape.
| Technique | Tip |
|---|---|
| Adjust Blade Depth | Use shallow cuts for curves to avoid gouges. |
| Hand Pressure | Apply even pressure to keep contact on curved areas. |
| Planer Angle | Change angle slightly to match the curve’s direction. |
| Multiple Passes | Take several light passes for smooth contours. |
Maintaining Your Power Planer
Keeping your power planer in good shape helps it work well and last longer. Regular care stops problems before they start.
Learn simple ways to clean, maintain, and fix common issues with your power planer.
Cleaning And Blade Care
Clean the planer after every use. Dust and wood chips can build up and cause damage.
Keep the blades sharp. Dull blades make the planer work harder and give rough cuts.
- Unplug the tool before cleaning.
- Use a brush or compressed air to remove dust.
- Check blades for dullness or damage.
- Replace or sharpen blades if needed.
- Wipe the planer with a dry cloth.
Regular Maintenance Tips
Check your power planer often to keep it running smoothly. Small fixes prevent big problems.
Look at the motor, power cord, and moving parts for wear and tear.
- Lubricate moving parts to reduce friction.
- Tighten screws and bolts if loose.
- Inspect the power cord for cuts or frays.
- Test the switch and safety features regularly.
- Store the planer in a dry, clean place.
Troubleshooting Common Issues
If the planer does not start, check the power supply and switch. Fix or replace damaged parts.
Unusual sounds or vibrations may mean worn blades or loose parts. Stop using the planer until fixed.
- Power planer won’t start: check cord and outlet.
- Planer stops suddenly: motor may overheat or jam.
- Uneven cuts: blades may be dull or misaligned.
- Excessive vibration: check for loose screws and blade balance.
- Burn marks on wood: blades need sharpening.
Advanced Tips For Experts
Using a power planer can speed up wood shaping. Experts need special tips to improve skills. These tips help create smooth, precise results.
Focus on tool combinations, wood types, and ways to work safely and fast. Each area offers tricks to get the best from your power planer.
Combining Tools For Better Results
Using other tools with your power planer makes shaping easier. Plan your tool use to get smooth edges and perfect shapes.
- Start with a rough saw cut before planing
- Use a sanding block after planing for fine finish
- Try a chisel for tight corners and detailed work
- Combine clamps to hold wood steady while planing
- Use a straightedge guide to keep the planer on track
Working With Different Wood Types
Different woods need different planing techniques. Know the wood grain and hardness to avoid damage and get smooth cuts.
| Wood Type | Grain Direction | Planer Speed | Blade Sharpness |
| Softwood | Follow grain | Medium | Normal |
| Hardwood | With grain | Slow | Extra sharp |
| Reclaimed wood | Check knots | Slow | Sharp |
| Exotic wood | Test small area | Slow | Very sharp |
Optimizing Efficiency And Safety
Work fast but safely. Use the right setup and protect yourself to avoid accidents and keep good results.
- Wear safety glasses and ear protection
- Keep hands away from the blade path
- Secure wood firmly before planing
- Check blade depth before each use
- Use consistent, steady pressure
- Clean the planer after every session

Credit: www.amazon.co.uk
Frequently Asked Questions
What Is The Primary Use Of A Power Planer?
A power planer is used to smooth, shape, and reduce wood thickness. It helps create even surfaces and precise edges quickly. It’s ideal for woodworking projects requiring clean, flat wood surfaces or adjusting door fits and furniture parts efficiently.
How Do You Safely Operate A Power Planer?
To operate safely, always wear eye and ear protection. Secure the wood firmly and keep hands away from the blade. Start the planer before contacting the wood and move it steadily along the grain. Follow the manufacturer’s guidelines closely for best safety practices.
Can A Power Planer Replace A Hand Planer?
A power planer offers faster, more consistent results than a hand planer. However, hand planers provide better control for fine detail work. Use a power planer for large, flat surfaces and a hand planer for precision shaping and small touch-ups.
What Wood Types Work Best With A Power Planer?
Power planers work well on softwoods like pine and fir, and hardwoods like oak and maple. Always adjust the blade depth based on wood hardness. Avoid using on very thin or delicate wood to prevent damage or uneven planing.
Conclusion
Using a power planer can make wood shaping easier and faster. Always keep your hands safe and follow the tool’s instructions. Take your time to guide the planer smoothly for the best results. Practice on scrap wood to build your confidence.
With patience and care, you can create clean, even surfaces. Keep your blades sharp and check your work often. Power planers are useful tools that help you shape wood with control. Try different angles and depths to see what works best.
Enjoy the process and watch your woodworking skills grow.