Are you looking to elevate your woodworking skills and achieve that flawless finish on your projects? A power planer might just be the tool you need.
Imagine transforming rough, uneven wood into smooth, perfectly flat surfaces with ease. Whether you’re a seasoned craftsman or a DIY enthusiast, mastering the use of a power planer can significantly enhance the quality of your work. In this guide, we’ll uncover the secrets to using a power planer effectively, ensuring your woodworking projects are not only efficient but also impressive.
Stay with us as we delve into practical tips and techniques that will make you wonder how you ever worked without this tool in your arsenal.

Credit: www.findbuytool.com
Choosing The Right Power Planer
Using a power planer helps you smooth and shape wood quickly. Choosing the right one makes your work easier and safer.
This guide explains different types of power planers, important features to check, and safety ratings to trust.
Types Of Power Planers
There are several types of power planers for woodworking. Each type fits different needs and projects.
- Handheld Planers:Portable and easy to use for small jobs.
- Benchtop Planers:Fixed machines for precise and larger tasks.
- Thickness Planers:Used to make wood pieces uniform in thickness.
Key Features To Consider
Check features to find a power planer that suits your woodworking projects.
- Blade Width:Wider blades cover more surface quickly.
- Cutting Depth:Deeper cuts remove more wood in one pass.
- Power Source:Corded models offer continuous power; cordless gives mobility.
- Adjustable Speed:Helps control the finish quality on different woods.
- Ergonomic Design:Comfortable handles reduce hand fatigue.
Safety Ratings And Certifications
Safety ratings show if a power planer meets industry standards. Look for trusted certifications.
- UL Certification:Confirms the tool passed safety testing.
- CE Marking:Shows compliance with European safety standards.
- CSA Certification:Indicates the tool is safe for use in Canada.
- Safety Features:Look for blade guards and automatic shut-off systems.
Preparing Your Workspace
Before using a power planer, you must prepare your workspace well. A clean and safe area helps you work better and avoid accidents.
Organizing your tools and wood pieces makes the planing process smooth and efficient.
Clearing And Organizing The Area
Remove all unnecessary items from your workbench and floor. This keeps your workspace free from clutter and hazards.
- Clear dust and debris from the surface
- Arrange your tools within easy reach
- Keep cords and cables tidy and away from your work path
- Make space for the wood piece and finished parts
Securing The Woodpiece
Hold the wood firmly before planing to avoid slips. Use clamps or a vise to keep the piece steady.
| Method | Description | Tip |
| Clamps | Attach wood to the bench | Use soft pads to prevent marks |
| Vise | Hold wood vertically or horizontally | Check tightness before starting |
| Non-slip Mat | Place under wood for extra grip | Best for small or flat pieces |
Ensuring Proper Lighting And Ventilation
Good lighting helps you see the wood surface clearly. Proper ventilation removes dust and keeps air fresh.
- Work near a window or use bright lamps
- Wear safety glasses to protect your eyes
- Use a dust extractor or fan to clear particles
- Keep doors or windows open for air flow
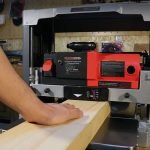
Setting Up The Power Planer
Setting up a power planer correctly is important for safe and smooth work. You need to prepare the tool before starting your woodworking project.
Check the parts and adjust settings to match the wood you will plane. Proper setup helps you get clean and even surfaces.
Installing And Adjusting Blades
Always install sharp blades for the best results. Dull blades can cause rough cuts and damage the wood.
Use the tool’s instructions to remove old blades and fit new ones carefully. Make sure blades are tight and aligned correctly.
- Unplug the planer before changing blades
- Use the correct type of blade for your model
- Check blade alignment to avoid uneven cuts
- Tighten screws securely to prevent blade movement
Calibrating Depth Settings
Set the depth of cut based on how much wood you want to remove. Too deep cuts can damage the wood or strain the tool.
Adjust the depth dial or lever carefully. Test the setting on a scrap piece of wood before starting your project.
- Start with a shallow cut for a smooth finish
- Increase depth in small steps if needed
- Keep depth consistent for even planing
- Use the depth gauge to check settings
Checking Power And Cord Conditions
Inspect the power cord for any cuts, cracks, or damage before use. A damaged cord is a safety hazard.
Make sure the plug fits securely in the outlet. Test the power switch to confirm it works properly.
- Unplug the planer when checking the cord
- Do not use if the cord is damaged
- Check for loose connections at the plug
- Use a grounded outlet to prevent shocks
Basic Techniques For Smooth Planing
Using a power planer helps make wood surfaces even and smooth. You need the right techniques to get good results safely and easily.
Focus on how you hold the tool, control its speed and pressure, and keep your movement steady. These basics improve your woodworking projects.
Proper Hand Positioning
Hold the power planer with both hands for better control. Place one hand on the front handle to guide the tool. Use the other hand on the rear handle to push forward.
Keep your fingers clear of the blades. A firm but relaxed grip helps reduce fatigue and increases accuracy.
Controlling Speed And Pressure
Start the planer before touching the wood. Move at a steady speed to avoid gouges or rough spots. Too fast can cause uneven cuts, too slow can dig in too deep.
Apply light, even pressure. Let the planer do the work without forcing it. Pressing too hard can damage the wood and strain the tool.
- Begin with low speed settings if available
- Use moderate forward pressure, not pushing hard
- Adjust speed based on wood type and grain
Maintaining Consistent Movement
Keep the planer moving in straight lines along the wood grain. Consistent movement avoids uneven surfaces and marks.
Do not stop or pause mid-cut. Lift the planer off the wood at the end of each pass before moving back to start a new one.
- Move slowly and steadily along the grain
- Overlap each pass slightly for full coverage
- Lift tool before changing direction or stopping
Advanced Planing Tips
Using a power planer can improve your woodworking projects. Learning advanced tips helps you get smooth, even surfaces.
These tips focus on handling tough wood, avoiding errors, and using helpful tools for better results.
Handling Difficult Wood Types
Some woods like oak, maple, or cedar are hard to plane. They can cause tear-out or damage the blade.
To handle these woods, use sharp blades and take light cuts. Move the planer slowly and steady.
- Use high-quality, sharp blades for hard woods
- Set the depth to remove thin layers at a time
- Plane with the wood grain to avoid tear-out
- Keep the wood firmly clamped to prevent movement
Avoiding Common Mistakes
Many woodworkers make simple mistakes with a power planer. These can cause uneven surfaces or damage the wood.
Check your setup before starting. Keep the planer flat and steady. Do not remove too much wood at once.
- Do not force the planer; let it cut at its own speed
- Always check blade sharpness before use
- Keep your hands and fingers away from the blades
- Test on scrap wood before working on the project piece
- Clean the planer regularly to avoid clogging
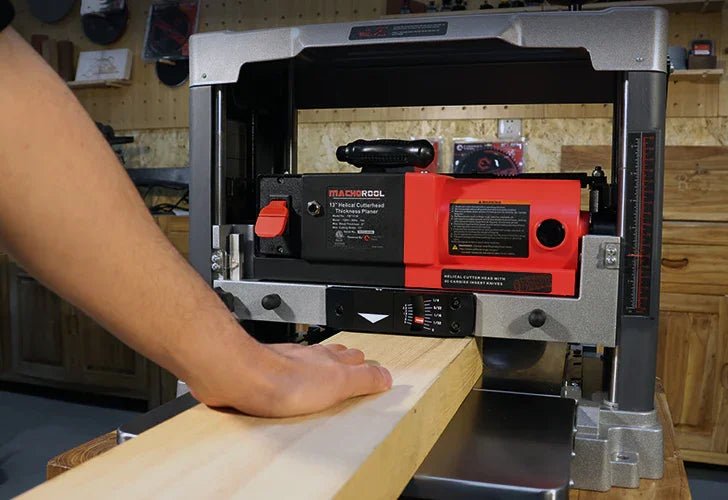
Using Jigs And Guides
Jigs and guides help keep the planer steady and straight. They make it easier to get perfect edges and surfaces.
You can use fences, straight edges, or custom jigs for specific angles. Clamp them tightly to the wood for best results.
- Use a straight edge as a guide for long boards
- Build a jig to hold small pieces steady
- Clamp fences to keep consistent thickness
- Adjust guides to control the depth of cut

Credit: www.youtube.com
Maintaining Your Power Planer
Keeping your power planer in good shape helps it work better and last longer. Regular care avoids problems and keeps your projects smooth.
Follow simple maintenance steps to clean, sharpen, and store your planer properly. This will keep it safe and ready for every woodworking job.
Cleaning And Lubrication
After each use, clean the planer to remove wood chips and dust. Dust buildup can cause parts to stick or wear out faster.
Use a brush or compressed air to clear tight spaces. Apply a light machine oil to moving parts to keep them running smoothly.
- Unplug the planer before cleaning
- Brush away wood chips and dust
- Use compressed air for hard-to-reach areas
- Apply oil on the blades and moving parts
- Wipe off excess oil to prevent dirt buildup
Blade Sharpening And Replacement
Dull blades make rough cuts and strain the motor. Check blades often for sharpness and damage.
Sharpen blades using a sharpening tool or replace them if they are chipped or worn out. Always handle blades carefully to avoid injury.
- Inspect blades before each use
- Use a sharpening stone or tool for dull blades
- Replace blades if damaged or too worn
- Wear gloves when handling blades
- Follow the manufacturer’s instructions for blade changes
Storage Best Practices
Store your power planer in a dry, clean place. Moisture can cause rust and damage electrical parts.
Keep the planer in its case or cover it with a cloth to protect it from dust. Store blades separately to avoid accidents.
- Choose a dry, cool storage area
- Use a protective case or cover
- Remove blades and store safely
- Keep away from children and pets
- Check the planer before use after storage
Safety Precautions
Using a power planer can make woodworking easier and faster. Safety is very important to avoid injuries.
Always follow safety rules before and during work with a power planer. Protect yourself and others nearby.
Protective Gear Essentials
Wear the right gear to protect your eyes, ears, and hands. This helps prevent accidents and injuries.
- Safety goggles to protect eyes from flying wood chips
- Ear protection like earplugs or earmuffs to reduce noise
- Dust mask to avoid breathing in wood dust
- Work gloves to protect hands from cuts and splinters
- Close-fitting clothes to prevent getting caught in the planer
Safe Operating Procedures
Check the power planer before use. Make sure blades are sharp and properly fixed.
Keep your work area clean and well-lit. Hold the wood firmly and use steady, even pressure.
- Inspect the tool for damage before starting
- Secure the wood piece tightly to a stable surface
- Keep hands away from the blades at all times
- Turn off the planer before making adjustments
- Unplug the tool when not in use
Emergency Response Tips
If an accident happens, stay calm and act quickly. Know basic first aid and emergency contacts.
Turn off the power immediately if the planer jams or stops working. Do not try to fix it while plugged in.
- Stop the machine and unplug it in an emergency
- Use a first aid kit for minor cuts and injuries
- Call emergency services for serious injuries
- Tell someone nearby about the accident
- Keep a fire extinguisher close in case of sparks

Credit: www.familyhandyman.com
Frequently Asked Questions
What Is The Primary Use Of A Power Planer?
A power planer smooths and levels wooden surfaces quickly. It removes thin layers of wood, shaping and refining boards. This tool is ideal for flattening rough lumber and adjusting thickness. It saves time compared to manual planing methods in woodworking projects.
How Do You Adjust The Depth On A Power Planer?
Depth adjustment is done using the depth knob or lever. Turn it to control how much wood the blade removes. Start with shallow cuts for precision and safety. Always test on scrap wood before working on your project.
What Safety Tips Should I Follow When Using A Power Planer?
Wear safety goggles, ear protection, and avoid loose clothing. Keep hands away from the blade and use both hands to guide the tool. Work on a stable surface and unplug when adjusting or changing blades. Follow the manufacturer’s instructions carefully.
Can A Power Planer Fix Warped Or Uneven Wood?
Yes, a power planer can flatten warped or uneven boards. It removes high spots and smooths the surface for a uniform finish. Multiple shallow passes are recommended to avoid damaging the wood. This makes it easier to join and assemble wood pieces.
Conclusion
Using a power planer makes woodworking faster and easier. Always keep safety in mind while working. Practice on scrap wood to gain confidence. Adjust the blade depth for smooth, even cuts. Clean and maintain your planer regularly for best results.
With patience and care, you can create beautiful wood pieces. Enjoy the process and learn from each project. Your skills will improve with time and effort.