Imagine transforming ordinary objects into personalized masterpieces with just a touch of creativity and the right tool in your hands. If you’ve ever admired intricate designs on wood, metal, or glass and wished you could create them yourself, you’re in the right place.
Engraving with a rotary tool is not only accessible but incredibly rewarding. Whether you’re a hobbyist looking to spice up your DIY projects or someone eager to add a personal touch to gifts, learning to use a rotary tool for engraving can open up a world of artistic possibilities.
Dive into this guide to discover how you can harness the power of this versatile tool to craft designs that leave a lasting impression. Your next creative adventure begins now!
Choosing The Right Rotary Tool
Using a rotary tool for engraving needs the right tool choice. A good tool helps you create clear and detailed designs.
Picking the right rotary tool makes engraving easier and more accurate. Learn what to look for before you start.
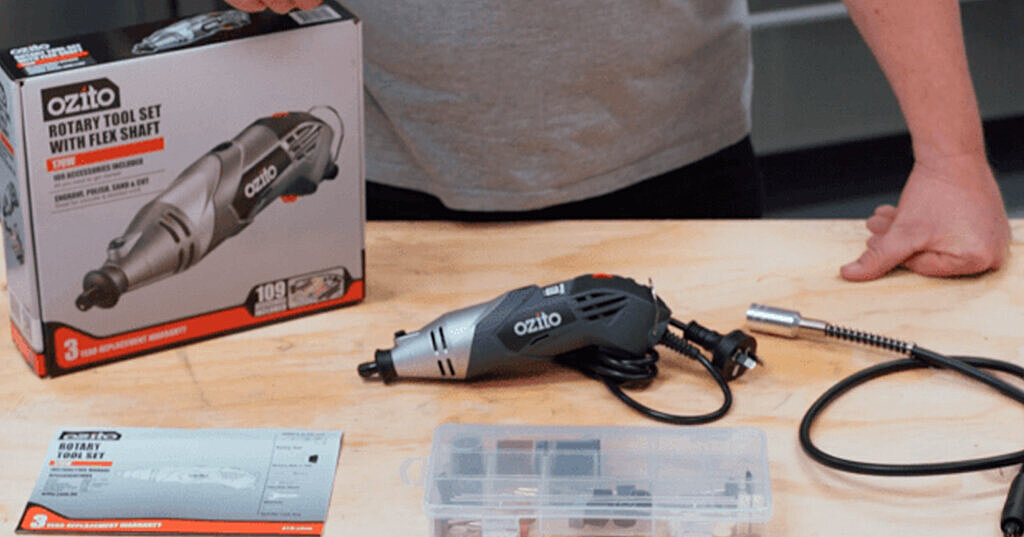
Types Of Rotary Tools
Rotary tools come in many types. Some are small and light, while others are more powerful for tough jobs.
Choose a tool that fits your project size and detail level. A lighter tool is good for fine work.
- Electric rotary tools: Common and easy to find
- Cordless rotary tools: Offer more freedom of movement
- Pneumatic rotary tools: Use air pressure, for heavy-duty tasks
Essential Attachments For Engraving
Attachments change how your rotary tool works. Some bits are best for engraving on wood, others for metal or glass.
Use the right attachments to get clean and sharp designs. Different shapes and sizes help with detail and depth.
- Diamond-tipped bits: Great for glass and stone
- Carbide bits: Best for metal engraving
- High-speed steel bits: Good for wood and plastic
- Sanding drums: For smoothing edges
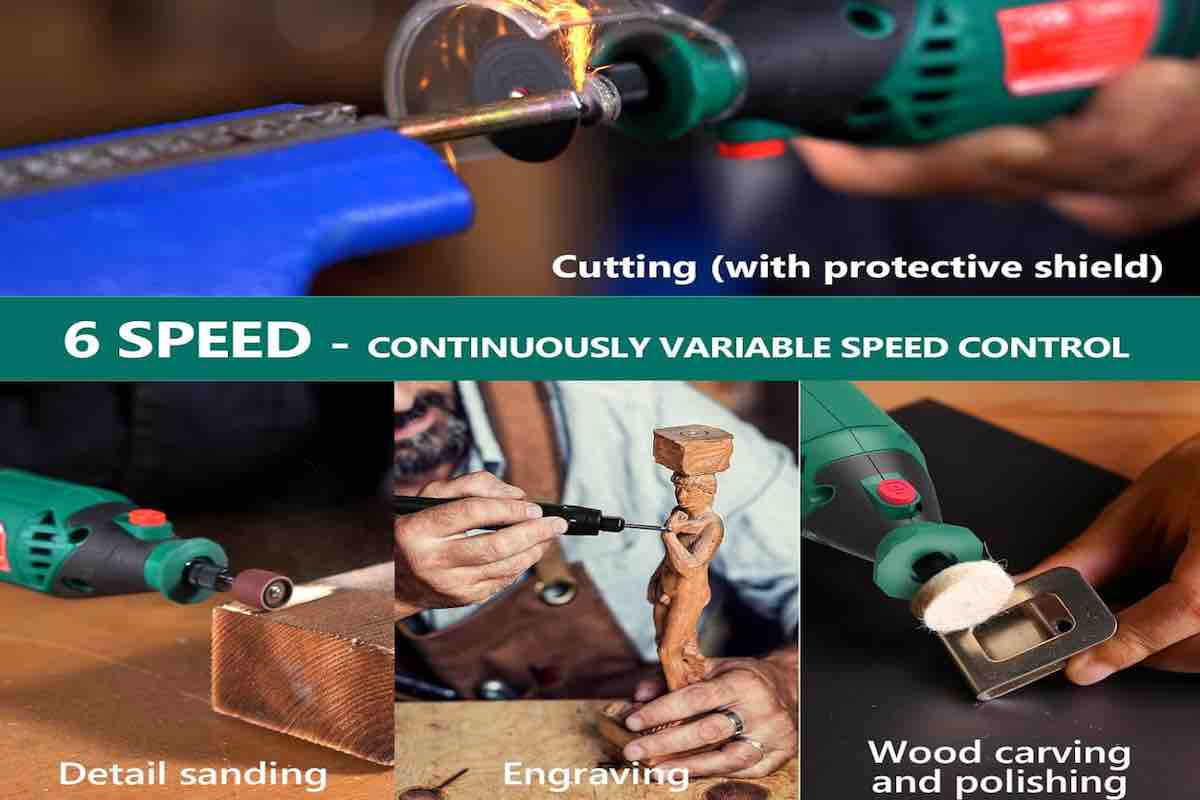
Power And Speed Settings
Control power and speed for the best engraving results. Too fast or too slow can ruin your work.
Start with low speed on delicate materials. Increase speed for harder surfaces or deeper cuts.
- Low speed: Good for soft materials like wood or plastic
- Medium speed: Works well on most metals
- High speed: Needed for glass or stone engraving
Selecting Materials For Engraving
Choosing the right material is key for good engraving results. Different materials need different tools and settings.
Some materials are easy to work with, while others require more care. Learn what works best for your rotary tool.
Wood And Soft Materials
Wood is popular for engraving. Soft materials like leather and plastic also work well. They cut smoothly with a rotary tool.
- Use light pressure to avoid deep cuts
- Test on scrap pieces first
- Choose fine bits for detailed designs
- Avoid very soft plastics that may melt
Metal And Hard Surfaces
Metal needs special bits made for hard surfaces. Harder metals like steel take more time and care.
| Metal Type | Recommended Bit | Engraving Tips |
|---|---|---|
| Aluminum | Tungsten Carbide | Use slow speed and steady pressure |
| Steel | Diamond-coated | Engrave slowly to avoid bit wear |
| Brass | High-speed steel | Can engrave at medium speed |
Glass And Ceramics
Glass and ceramics need bits made for engraving brittle materials. Use light pressure to prevent cracks.
Tips for engraving glass and ceramics:
- Keep the surface wet to reduce heat
- Use diamond-tipped bits
- Work slowly and carefully
- Practice on small pieces first
Preparing Your Workspace
Setting up your workspace is important for engraving with a rotary tool. A tidy area helps you work safely and well.
Before you start, make sure your space is organized and ready for the task. This will make engraving easier and safer.
Safety Gear And Precautions
Wear safety gear to protect your eyes, hands, and lungs. Rotary tools create dust and small particles.
- Use safety glasses or goggles to protect your eyes.
- Wear a dust mask to avoid breathing in particles.
- Use gloves to protect your hands from sharp bits.
- Keep long hair tied back and avoid loose clothing.
- Work on a stable surface to prevent slips.
Organizing Tools And Materials
Arrange your rotary tool, bits, and materials neatly before starting. This saves time and stops mistakes.
- Keep the rotary tool and bits within easy reach.
- Place your materials on a flat, stable surface.
- Have a small container for holding tiny parts and screws.
- Keep cleaning cloths nearby to wipe dust away.
Lighting And Ventilation
Good lighting helps you see fine details while engraving. Proper airflow removes dust and fumes.
- Use a bright desk lamp or overhead light.
- Work near a window or use a fan for fresh air.
- Avoid working in dark or cramped spaces.
- Consider a small air purifier to reduce dust.

Credit: hardell.com
Basic Engraving Techniques
Using a rotary tool for engraving can add detail and style to your projects. It is important to learn basic techniques to get clean and precise designs.
Start with understanding how to hold the tool, control its speed, and guide it to create lines and curves.
Holding The Rotary Tool
Hold the rotary tool like a pen for better control. Use your fingers close to the tip to guide the tool precisely.
Keep a steady grip but do not hold too tight to avoid hand fatigue. Rest your hand on the work surface for stability.
Controlling Speed And Pressure
Adjust the speed of the rotary tool depending on the material you are engraving. Softer materials need slower speeds.
- Start at a low speed to test the tool on a scrap piece.
- Use light pressure to avoid deep cuts or tool slipping.
- Increase speed or pressure slightly if the tool stalls or does not engrave well.
- Keep the tool moving steadily to prevent burning or uneven marks.
Creating Straight Lines And Curves
Practice steady hand movements for straight lines. Move the tool slowly and keep your wrist firm.
| Technique | Description |
|---|---|
| Straight Lines | Use a ruler or guide to keep the line straight. Move tool at a steady pace. |
| Curves | Turn your wrist gently. Follow the design shape slowly for smooth curves. |
Design Tips For Precision
Using a rotary tool for engraving lets you create detailed and precise designs. Careful planning and technique help improve your results.
Focus on transferring your design clearly and using guides to stay accurate. Adding layers can give your work depth and style.
Transferring Designs To Surfaces
Start by choosing a clear and simple design for engraving. Use tracing paper or carbon paper to move the design onto your surface.
- Print or draw the design on tracing paper.
- Place carbon paper between the tracing paper and surface.
- Trace over the design with a pencil to transfer it.
- Check the surface for clear lines before engraving.
Using Stencils And Guides
Stencils help keep your engraving steady and uniform. You can use store-bought stencils or cut your own from plastic sheets.
| Stencil Type | Best For | Material |
|---|---|---|
| Adhesive Stencils | Small, detailed work | Vinyl |
| Plastic Sheet Stencils | Repeated patterns | Mylar or acetate |
| Paper Stencils | One-time use designs | Cardstock |
Use painter’s tape to hold stencils firmly. Slowly move the rotary tool along the stencil edges to avoid slips.
Layering And Depth Effects
Build your design by engraving shallow layers first. Deeper cuts add contrast and style to your work.
- Start with light pressure for the outline.
- Engrave deeper in areas that need shadow.
- Use different tool bits for varied textures.
- Check progress often to keep depth even.
Credit: www.ozito.co.nz
Advanced Engraving Methods
Engraving with a rotary tool offers many ways to create detailed designs. Using advanced methods helps you add depth and style. These techniques require patience and steady hands.
In this guide, you will learn about text and lettering, shading and texturing, and how to combine different techniques for better results.
Text And Lettering
Engraving letters demands precision and control. Use fine tips on the rotary tool to carve thin lines. Practice steady movements to keep letters clear and sharp.
- Choose a simple font for beginners
- Draw the design on the surface before engraving
- Use slow speed settings for better control
- Keep the tool steady and avoid pressing too hard
Shading And Texturing
Shading adds depth by varying the engraving depth and spacing. Texturing creates patterns that change how light hits the surface. Both make your design more dynamic.
| Technique | Description | Tool Tip |
| Cross-Hatching | Engraving overlapping lines | Fine point |
| Dotting | Making small dots for texture | Ball-shaped tip |
| Scoring | Shallow, parallel lines for shading | Flat tip |
Combining Multiple Techniques
Using more than one method makes your engraving stand out. Start with lettering, add shading, then finish with texture. This layering creates a rich, detailed design.
Tips for combining techniques:
- Plan your design on paper first
- Work from large areas to small details
- Adjust tool speed for different effects
- Wear safety glasses to protect your eyes
Maintenance And Care
Keeping your rotary tool in good condition helps it work well for a long time. Regular care makes engraving easier and safer.
Follow simple steps to clean, replace parts, and store your tool properly.
Cleaning Rotary Tool Components
Clean your rotary tool after every use. Remove dust and debris from vents and moving parts. Use a soft brush or compressed air for cleaning.
Wipe the tool’s body with a dry cloth. Avoid water or liquid cleaners on electrical parts to prevent damage.
Replacing Bits And Accessories
Bits wear out or get dull over time. Replace them to keep engraving sharp and precise. Use the right size and type for your project.
- Turn off and unplug the tool before changing bits.
- Use the tool’s wrench or collet to loosen the bit.
- Remove the old bit carefully.
- Insert the new bit fully and tighten securely.
- Test the bit at low speed before starting your work.
Storing Your Tool Safely
| Storage Tip | Reason |
|---|---|
| Keep in a dry place | Prevents rust and damage |
| Store with bits removed | Avoids damage to bits and tool |
| Use original case or box | Protects from dust and impacts |
| Place away from children | Ensures safety |
Proper storage keeps your rotary tool ready for the next engraving project.
Troubleshooting Common Issues
Using a rotary tool for engraving can bring creative results. Some issues may happen during use. Knowing how to fix them helps your work go smoothly.
This guide covers common problems like tool overheating, uneven engraving, and material damage. Follow these tips to keep your projects on track.
Avoiding Tool Overheating
Rotary tools can get hot if used too long without breaks. Overheating can damage the motor or reduce tool life. Take these steps to prevent it.
- Work in short sessions and pause often.
- Keep the tool clean and free of dust.
- Use the right speed for your material.
- Let the tool cool down before heavy use.
- Check for worn brushes and replace if needed.
Fixing Uneven Engraving
Uneven engraving lines can spoil your design. This issue happens due to tool control or material settings. Try these fixes to improve results.
| Cause | Solution |
| Inconsistent hand pressure | Hold tool steady and apply even pressure |
| Wrong bit type or size | Use the correct bit for your design and material |
| Incorrect speed setting | Adjust speed to match material hardness |
| Material movement | Secure material firmly before engraving |
Dealing With Material Damage
Material damage like chipping or burning can ruin your project. Avoid damage by preparing and handling materials properly.
- Test on scrap material before starting.
- Use slower speed on delicate materials.
- Keep the rotary bit sharp and clean.
- Avoid pressing too hard on the material.
- Use proper ventilation to prevent heat buildup.
Credit: tendsupplies.com
Frequently Asked Questions
What Materials Can I Engrave With A Rotary Tool?
You can engrave wood, metal, glass, plastic, and leather. Each material may require specific bits and speed settings. Always test on scrap material first to ensure optimal results and prevent damage.
How Do I Choose The Right Rotary Tool Bit?
Select bits based on your material and design detail. Diamond bits work well for glass and metal. Carbide bits suit wood and plastic. Using the correct bit improves precision and extends bit life.
What Safety Precautions Should I Take When Engraving?
Wear safety glasses and a dust mask to protect your eyes and lungs. Work in a well-ventilated area. Secure your material firmly to avoid slips. Keep fingers clear of the rotating bit.
Can Beginners Use Rotary Tools For Detailed Engraving?
Yes, beginners can start with simple designs and slower speeds. Practice steady hand movements and maintain light pressure. Gradually increase complexity as your confidence and skill improve.
Conclusion
Using a rotary tool for engraving designs can be simple and fun. Start slow and practice on scrap material first. Choose the right bit for your project to get clean lines. Keep your hand steady and work carefully. With time, your skills will improve.
Enjoy creating unique designs that show your style. Remember, patience and practice bring the best results. Grab your rotary tool and start engraving today!