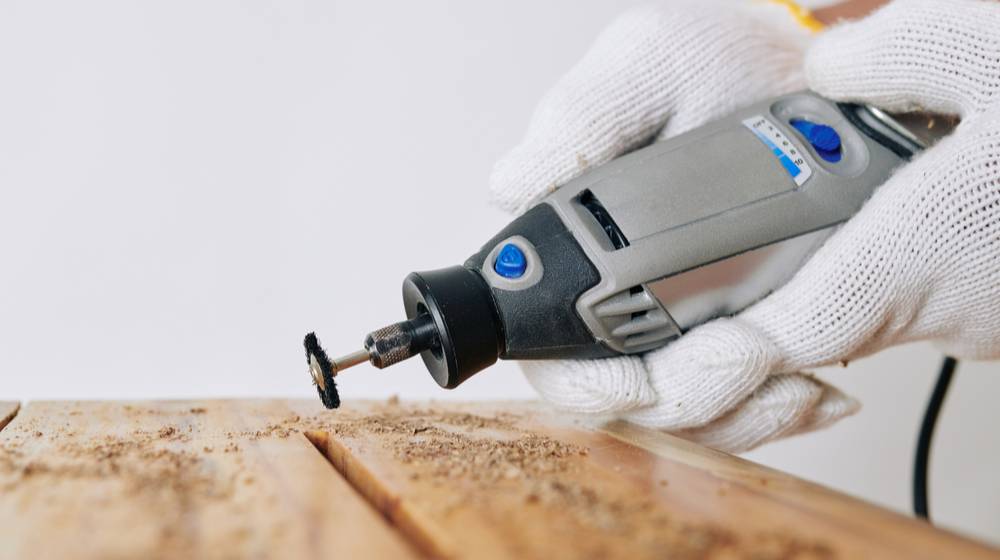
Are you ready to take your small, detailed projects to the next level? A rotary tool can be your best friend when it comes to precision and control.
Whether you’re carving, sanding, engraving, or polishing, knowing how to use this versatile tool correctly can save you time and give your work a professional finish. In this guide, you’ll discover simple tips and techniques that make even the trickiest tasks easier.
Keep reading, and you’ll unlock the full potential of your rotary tool for your next creative project.
Credit: hardell.com
Choosing The Right Rotary Tool
Using a rotary tool for small detailed projects needs the right choice of tool. A good rotary tool makes your work easier and more precise.
Learn about types of rotary tools, essential attachments, and how power and speed settings affect your project.
Types Of Rotary Tools
Rotary tools come in many styles. Pick one that fits your project size and detail level. Corded rotary tools offer steady power. Cordless ones give more freedom to move.
- Mini rotary tools: good for very small jobs
- Standard rotary tools: fit most projects
- Heavy-duty rotary tools: best for tough materials
Essential Attachments
Attachments help your rotary tool do many jobs. Choose the right ones to get the best results on small projects.
| Attachment | Use |
|---|---|
| Cutting wheels | Cut thin metal and plastic |
| Sanding drums | Smooth rough edges |
| Grinding stones | Sharpen and shape |
| Polishing bits | Give a shiny finish |
Power And Speed Settings
Power and speed control how the tool works on different materials. Use lower speeds for soft materials to avoid damage.
- Low speed: good for sanding and polishing
- Medium speed: fits most cutting and grinding
- High speed: best for hard materials and fast cuts
Preparing For Detailed Work
Using a rotary tool for small projects needs careful preparation. Preparing well helps you work safely and get good results.
Focus on setting up your workspace, following safety rules, and choosing the right materials before starting.
Workspace Setup
Set up a clean and bright workspace to see small details clearly. Use a sturdy table and good lighting to avoid mistakes.
Keep all tools and materials within reach. Organize bits and attachments in small containers to save time.
- Work on a flat, stable surface
- Use bright, focused lighting
- Arrange tools and parts neatly
- Keep a magnifying glass nearby if needed
Safety Precautions
Wear safety glasses to protect your eyes from dust and debris. Use a dust mask if you work with fine particles.
Keep your fingers away from spinning parts. Hold the rotary tool firmly and work slowly to avoid slips.
- Wear safety glasses and a dust mask
- Keep long hair tied back
- Remove loose clothing or jewelry
- Work in a well-ventilated area
Material Selection
Choose materials that suit your tool’s speed and bits. Softer materials like wood or plastic are easier to shape.
Test a small piece first to see how the tool reacts. Avoid very hard or brittle materials without proper bits.
- Use soft wood, plastic, or soft metals
- Check material hardness before starting
- Test on scrap pieces first
- Match bits to the material type
Techniques For Precision
Using a rotary tool for small, detailed projects needs care and focus. Precision helps you get clean and accurate results.
Learning the right techniques makes your work easier and safer. This guide covers key tips for better control.
Holding The Tool Correctly
Hold the rotary tool like a pencil for better control. Keep a firm but relaxed grip to avoid fatigue.
Use your fingers to guide the tool gently. Support your hand on a steady surface to reduce shaking.
- Grip near the tip for detailed work
- Keep your wrist steady
- Rest your hand on the work surface
Controlling Speed And Pressure
Use low speeds for fine details. High speed can cause mistakes or damage the material.
Apply light pressure. Let the tool do the work. Pressing too hard can break bits or ruin your project.
- Start at low speed
- Increase speed slowly if needed
- Use gentle pressure
- Stop if the tool feels hot or noisy
Using Guides And Templates
Use guides or templates to keep shapes accurate. They help you follow lines and patterns easily.
Attach your template securely. Trace it lightly with the tool before deeper cuts or engraving.
- Use stencils for repeating shapes
- Clamp or tape templates to the workpiece
- Trace outlines before detailed work
Common Small Project Ideas
Rotary tools are great for small, detailed projects. They help you work on fine parts with ease. Many people use them for hobbies or home crafts.
This guide covers three popular uses: jewelry making, model crafting, and engraving. Each has projects suited for rotary tools.
Jewelry Making
Rotary tools help shape and polish small jewelry parts. You can make rings, earrings, or pendants. They cut metal, smooth edges, and add details.
- Cut thin metal sheets for pendants
- Polish silver or gold surfaces
- Drill holes for chains or clasps
- Engrave initials or patterns
- Shape beads or small stones
Model Crafting
Use a rotary tool to build detailed models. It works on plastic, wood, and metal parts. You can sand, carve, and drill small pieces.
| Project Type | Tool Use | Material |
| Scale Cars | Cutting and sanding | Plastic and wood |
| Miniature Figures | Carving and engraving | Wood and resin |
| Model Trains | Drilling and shaping | Metal and plastic |
Engraving And Carving
Rotary tools carve wood, glass, and metal with precision. Use them to add designs or text to small items. Choose the right bit for clean lines.
Tips for engraving:
- Secure the object firmly
- Start with a shallow cut
- Use slow speed for control
- Wear safety goggles
- Practice on scrap material first
Troubleshooting Tips
Using a rotary tool for small detailed projects can be tricky. You might face problems like tool slipping or material damage. Knowing how to fix these issues helps you work better.
This guide shares useful tips to avoid common problems and keep your tool working well for long.
Avoiding Tool Slippage
Tool slippage can ruin your project and waste time. It happens if the bit is not tight or the grip is weak.
- Check the collet nut and tighten it securely before starting.
- Use the right bit size for your task to avoid loose fitting.
- Hold the tool firmly but do not squeeze too hard to keep control.
- Replace worn or damaged bits to prevent slipping.
Preventing Material Damage
Small detailed projects need careful handling to stop breaking or burning the material. The right speed and pressure matter.
| Problem | Cause | Solution |
|---|---|---|
| Burn marks on wood | Too high speed or too much pressure | Lower speed; apply light pressure |
| Cracks in plastic | Using a rough bit or pushing too hard | Use a smooth bit; work gently |
| Chipped edges on metal | Wrong bit type or fast speed | Use metal-specific bits; reduce speed |
Maintaining Tool Performance
Good care keeps your rotary tool working well. Clean and inspect it often to avoid problems.
- Unplug the tool before cleaning.
- Remove dust and debris from vents and collet area.
- Check the power cord for damage regularly.
- Lubricate moving parts if the manual suggests it.
- Store the tool in a dry, safe place.
Credit: diyprojects.com
Cleaning And Maintenance
Using a rotary tool for small detailed projects means keeping it clean and well maintained. This helps the tool last longer and work better every time.
Regular cleaning and proper storage keep your rotary tool safe from damage. Changing worn parts keeps your work precise and smooth.
Proper Cleaning Methods
After each use, clean dust and debris from the tool. Use a soft brush to remove dirt from small parts. Avoid water or harsh liquids on the motor area.
- Unplug the tool before cleaning
- Use a dry cloth or soft brush
- Blow air gently to clear dust from vents
- Do not soak attachments in water
- Wipe attachments with a damp cloth if needed
Storing Your Rotary Tool
Store your rotary tool in a dry and cool place. Keep it away from dust and moisture. Use the original case or a sturdy box for protection.
| Storage Tip | Reason |
|---|---|
| Keep tool in case | Protect from dust and damage |
| Store in dry place | Prevent rust and corrosion |
| Separate attachments | Keep organized and avoid loss |
| Unplug before storing | Ensure safety and save energy |
Replacing Worn Attachments
Check attachments often for wear or damage. Replace worn bits to keep cutting and sanding smooth. Using damaged parts can harm your project and tool.
- Turn off and unplug the rotary tool
- Remove the worn attachment carefully
- Select the correct replacement bit
- Secure the new attachment firmly
- Test the tool at low speed before use

Credit: eternaltools.com
Frequently Asked Questions
What Are Rotary Tools Used For?
Rotary tools are versatile handheld devices used for cutting, sanding, polishing, and engraving. They are ideal for small detailed projects. With various attachments, they can work on wood, metal, plastic, and more. Their precision makes them perfect for DIY enthusiasts and professionals alike.
How Do You Choose The Right Attachment?
Choosing the right attachment depends on your project requirements. For cutting, use a cutting wheel; for sanding, use a sanding drum. Polishing requires a buffing pad. Always ensure the attachment is compatible with your rotary tool model for optimal performance.
Can Beginners Use Rotary Tools Safely?
Yes, beginners can use rotary tools safely by following instructions and wearing protective gear. Start with low-speed settings to gain control and experience. Always read the manual, use the right attachments, and practice on scrap materials before starting detailed projects.
How Do You Maintain A Rotary Tool?
Maintain a rotary tool by regularly cleaning it and checking for wear on attachments. Lubricate moving parts as per the manufacturer’s instructions. Store it in a dry place and ensure it’s unplugged when not in use. Regular maintenance ensures longevity and optimal performance.
Conclusion
Using a rotary tool can make small projects easier and more fun. Start slow and practice on simple tasks first. Choose the right bit for your project and keep your hands steady. Safety matters, so wear goggles and work in a clean space.
With patience, your skills will improve quickly. Rotary tools give you control for detailed work. Try different techniques to see what works best. Soon, you will create neat and precise results every time. Keep experimenting and enjoy your crafting journey.