Are you ready to take your woodworking skills to the next level? If you’ve ever struggled with uneven cuts or wasted material, mastering the art of using a table saw for cutting panels could be your game-changer.
Imagine making precise, clean cuts every time and transforming your projects with ease. You’ll discover straightforward techniques and insider tips that will not only enhance your craftsmanship but also boost your confidence in using this powerful tool. Whether you’re a beginner or looking to refine your skills, this guide is crafted just for you.
Dive in and unlock the secrets to flawless panel cuts!
Choosing The Right Table Saw
Using a table saw to cut panels needs the right tool. Picking the correct table saw makes your work safer and easier.
This guide explains types of table saws, blade choices, and safety features to help you choose well.
Types Of Table Saws
There are three main types of table saws for cutting panels: cabinet, contractor, and portable. Each has different power and size.
- Cabinet sawsare heavy and strong. They work well for big jobs and thick panels.
- Contractor sawsare lighter but still powerful. They fit medium jobs and can be moved if needed.
- Portable sawsare small and easy to carry. They are good for light jobs and small panels.
Blade Selection For Panel Cutting
Choosing the right blade affects the cut quality and speed. Use blades made for panel cutting to avoid damage.
| Blade Type | Teeth Count | Best For |
| Fine-tooth blade | 80-100 teeth | Smooth cuts on thin panels |
| Combination blade | 40-50 teeth | General use on wood panels |
| Rip blade | 24-30 teeth | Fast cutting along the grain |
Safety Features To Look For
Safety is very important when cutting panels with a table saw. Look for these features before buying.
- Blade guard to cover the blade and prevent accidents
- Riving knife to stop kickbacks during cuts
- Anti-kickback pawls that hold the panel in place
- Emergency stop button for quick power off
- Sturdy fence to guide panels straight

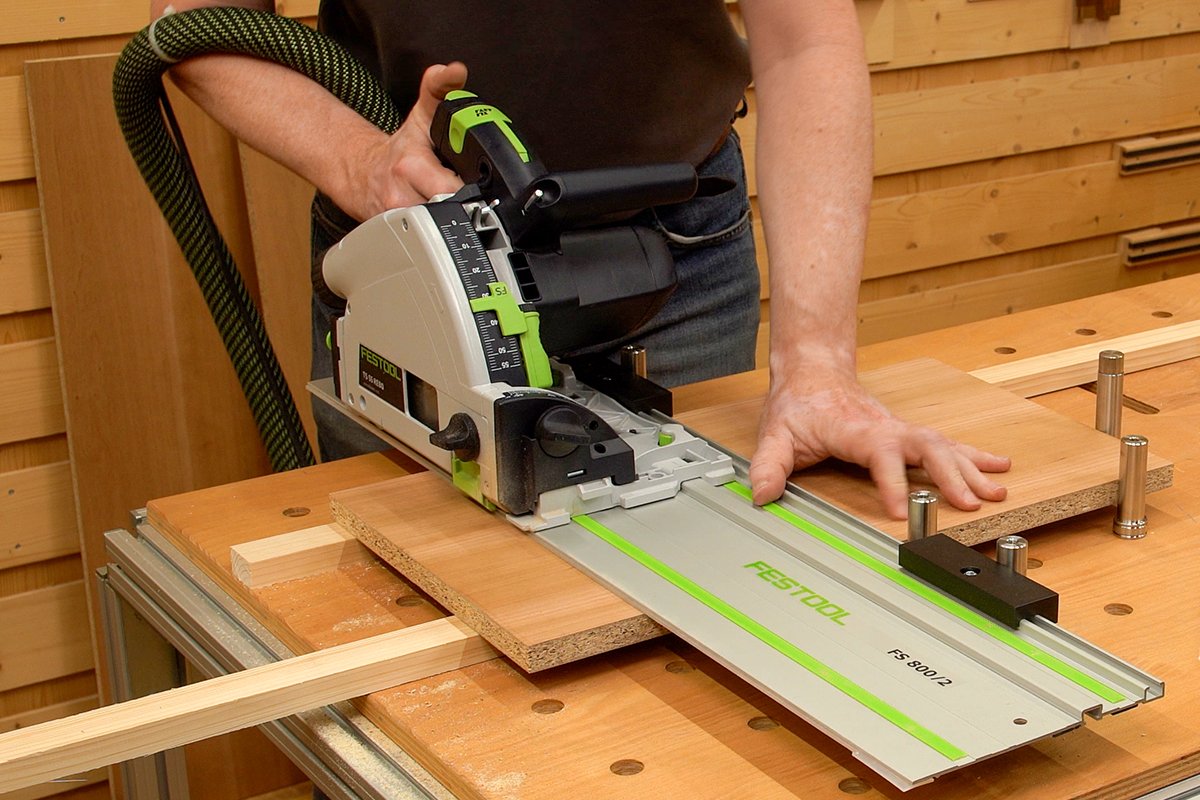
Credit: www.youtube.com
Preparing Your Workspace
Before cutting panels with a table saw, prepare your workspace well. A clean and organized area helps you work safely and quickly.
Focus on setting up the saw, lighting, ventilation, and organizing your tools. These steps reduce risks and make your work easier.
Setting Up The Saw Station
Place your table saw on a flat, stable surface. Make sure it does not wobble or move during use. Keep the area around the saw clear of clutter.
- Check the saw blade is sharp and clean.
- Adjust the blade height for the panel thickness.
- Set the fence square to the blade for straight cuts.
- Keep a push stick nearby for safety.
- Test the power cord and switch before starting.
Ensuring Proper Lighting And Ventilation
Good lighting helps you see the cut lines clearly. Proper ventilation removes dust and keeps the air fresh. Both protect your health and improve accuracy.
| Lighting Type | Recommended Setup |
| Overhead Lights | Bright, white light above the saw |
| Task Lights | Adjustable lamps for focused brightness |
| Ventilation | Use fans or dust collectors near the saw |
| Windows | Open if safe, for fresh air flow |
Organizing Tools And Materials
Keep your tools and materials within arm’s reach. This saves time and avoids distractions. Organize items by type and size.
- Place measuring tools on a small table or shelf.
- Store blades and push sticks in labeled containers.
- Stack panels neatly to prevent warping.
- Clear scrap wood regularly to avoid tripping.
Panel Material Considerations
Using a table saw to cut panels requires understanding different panel materials. Each type behaves differently on the saw blade.
Knowing how to handle various thicknesses and finishes helps you make precise cuts. It also protects the saw blade and the panel surface.
Common Panel Types
Panels come in wood, plywood, MDF, particle board, and plastic. Each type cuts differently and needs special care.
- Wood:Solid wood panels are strong but can warp or splinter.
- Plywood:Layers of wood glued together. Watch for splintering on edges.
- MDF:Made from wood fibers and resin. It cuts smoothly but produces fine dust.
- Particle board:Made from wood chips and glue. It is less stable and chips easily.
- Plastic:Some plastics can melt or crack if cut too fast.
Handling Different Thicknesses
Panel thickness affects how you set the table saw blade height and feed speed. Thicker panels need slower cuts.
| Panel Thickness | Blade Height Setting | Recommended Feed Speed |
| Thin (up to 1/4 inch) | Blade just above panel | Fast |
| Medium (1/4 to 3/4 inch) | Blade about 1/8 inch above panel | Medium |
| Thick (over 3/4 inch) | Blade higher for full cut depth | Slow |
Dealing With Veneered And Laminated Panels
Veneered and laminated panels have thin layers glued to the surface. These layers can chip or peel if cut wrong.
- Use a fine-tooth blade for cleaner cuts.
- Cut with the veneer side down to reduce splintering.
- Apply masking tape on the cut line to protect the surface.
- Feed the panel slowly and steadily to avoid tearing the veneer.
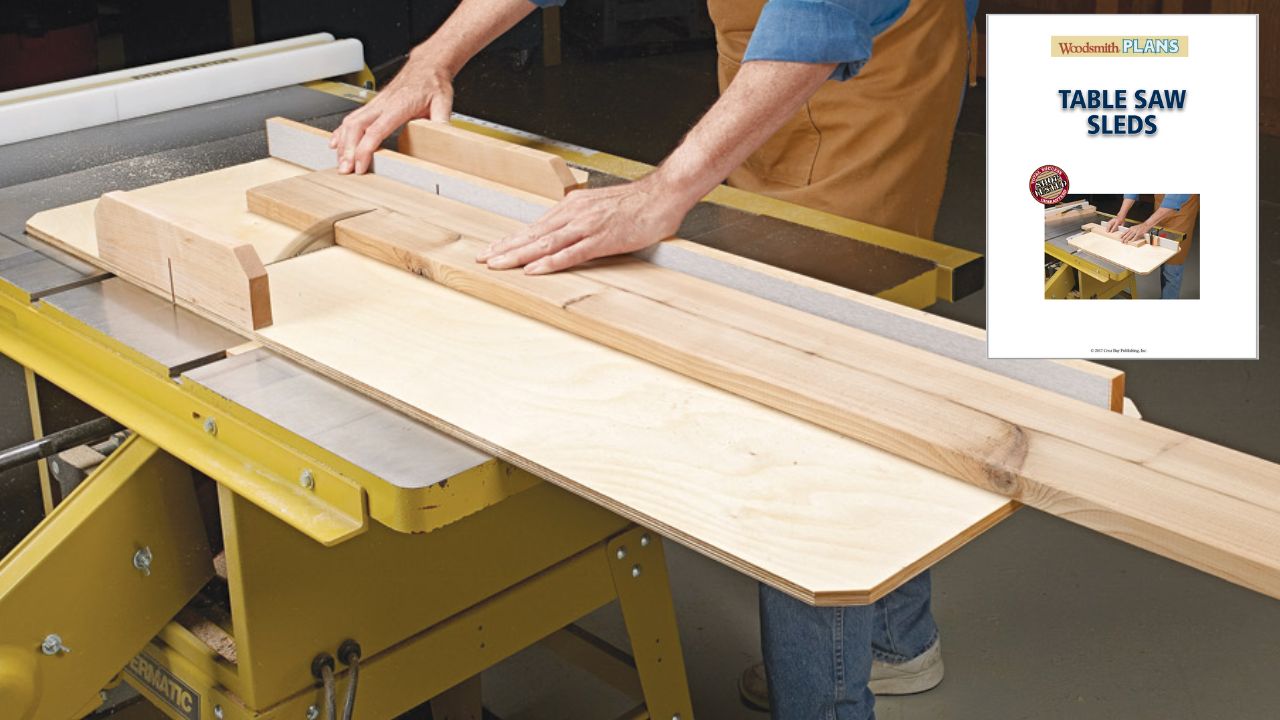
Credit: www.woodsmith.com
Setting Up The Table Saw For Panels
Cutting panels on a table saw needs careful setup. Proper setup helps make clean and safe cuts. This guide covers key setup parts for cutting panels well.
Focus on adjusting the fence and miter gauge, setting the blade height and angle, and using zero-clearance inserts. These steps improve accuracy and safety.
Adjusting The Fence And Miter Gauge
The fence keeps your panel straight during a cut. Adjust it to the right distance from the blade for the panel size. Tighten the fence to stop it from moving.
The miter gauge helps make angled cuts or crosscuts. Set it to the needed angle and lock it in place. Use it to guide smaller panels safely.
- Check the fence is parallel to the blade
- Use a measuring tape for exact distances
- Set the miter gauge angle clearly
- Lock both fence and gauge firmly
Blade Height And Angle Settings
Set the blade height to cut through the panel fully. Raise the blade just above the panel thickness for a clean cut. Too high or low height can cause rough edges or kickback.
Adjust the blade angle if you need bevel cuts. Most panels need a 90-degree blade angle. Use the saw’s angle gauge to set the correct tilt.
- Blade height: about 1/8 inch above panel
- Blade angle: usually 90 degrees for straight cuts
- Use the saw’s built-in height and angle gauges
- Double-check settings before cutting
Using Zero-clearance Inserts
Zero-clearance inserts reduce tear-out on panel edges. They fill the gap around the blade, supporting the panel as you cut. This helps make smooth, clean cuts.
Use an insert made for your table saw or make one yourself. Replace the insert if it gets damaged or worn out to keep cuts clean.
- Zero-clearance inserts fit tightly around the blade
- They reduce splintering and tear-out
- Replace inserts regularly for best results
- Ensure the insert is flush with the table surface
Cutting Techniques For Clean Edges
Using a table saw to cut panels requires skill to get clean edges. The right techniques help avoid rough cuts and splinters.
Following safe feeding methods and proper cutting steps improves the quality of your work. This guide covers key tips for smooth cuts.
Feeding Panels Safely
Always keep your hands away from the blade while feeding panels. Use push sticks or push blocks for control and safety.
Feed the panel steadily and avoid forcing it into the blade. Keep the panel flat against the fence and table for accuracy.
- Use push sticks for narrow panels
- Hold the panel firmly but not tightly
- Feed at a consistent speed
- Keep fingers clear of the blade path
Avoiding Tear-out And Splintering
Tear-out happens when wood fibers break away from the panel’s surface. Use a sharp blade to reduce this problem.
Place painter’s tape along the cut line. This helps hold fibers in place. Cutting from the good side of the panel also lowers tear-out.
- Choose a fine-tooth blade for clean cuts
- Apply painter’s tape on the cut line
- Cut with the finished side facing down
- Make slow, steady cuts without stopping
Multiple Pass Cuts
Cutting thick or wide panels in one pass can cause rough edges. Multiple passes help you cut cleanly and safely.
Start with a shallow cut to score the wood. Then, make deeper passes until you reach the full depth. This reduces stress on the blade and panel.
- Set blade height for a shallow first cut
- Feed the panel through slowly
- Increase blade height for each pass
- Repeat until the panel is fully cut

Credit: www.reddit.com
Safety Tips While Cutting Panels
Cutting panels on a table saw can be dangerous without the right safety measures. Always follow safety tips to protect yourself and others.
Using safety tools and knowing what to do in emergencies helps prevent accidents. Stay focused and prepared every time you work.
Using Push Sticks And Featherboards
Push sticks and featherboards keep your hands away from the blade. They also help control the panel while cutting.
- Always use a push stick to guide small or narrow panels.
- Attach featherboards to keep the panel pressed firmly against the fence.
- Check that these tools are securely placed before starting the saw.
- Never remove push sticks or featherboards during a cut.
Personal Protective Equipment
Wear the right protective gear to avoid injuries. Eyes, ears, and hands need special care.
| Equipment | Purpose |
| Safety glasses | Protect eyes from flying dust and debris |
| Hearing protection | Reduce noise damage from the saw |
| Gloves | Protect hands but avoid loose fitting gloves |
| Dust mask | Prevent inhaling sawdust |
Emergency Procedures
Know what to do if an accident happens. Quick action can reduce harm.
- Stop the saw immediately by pressing the emergency stop button or unplugging it.
- Check yourself and others for injuries.
- Use a first aid kit for minor cuts or bruises.
- Call emergency services for serious injuries.
- Report the incident to a supervisor or responsible person.
Troubleshooting Common Issues
Using a table saw to cut panels can bring some challenges. Knowing how to fix problems helps keep your work safe and accurate.
This guide covers common issues like blade drift, burn marks, and kickback. Learn simple tips to solve them.
Blade Drift And Alignment Problems
Blade drift happens when the blade moves away from the fence during a cut. It causes uneven edges and waste.
Check if your fence is parallel to the blade. Adjust it to stop the blade from drifting. Also, inspect the blade alignment with the table saw’s manual.
- Use a combination square to check fence and blade alignment
- Tighten loose parts on the fence and blade assembly
- Replace bent or dull blades causing drift
Burn Marks On Panels
Burn marks appear when the blade is dull or cutting too slowly. They ruin the panel’s surface and look bad.
Keep your blade sharp and clean. Feed the panel at a steady pace without pushing too hard. This prevents heat build-up and burn marks.
- Sharpen or replace dull blades regularly
- Keep the blade free of resin and dirt
- Push panels smoothly and evenly through the cut
Dealing With Kickback
Kickback is when the panel is thrown back toward the operator. It is very dangerous and can cause injuries.
Use safety features like riving knives and blade guards. Keep the fence tight and feed the panel with control. Never stand directly behind the blade.
- Install and use the riving knife to prevent panel pinching
- Keep the blade guard in place during cuts
- Feed panels slowly to avoid sudden catches
- Stand to the side, not behind the panel
Maintenance For Optimal Performance
Using a table saw regularly needs proper care. Maintenance helps keep it safe and working well.
Clean parts and check adjustments often. This prevents damage and ensures smooth cuts on panels.
Blade Cleaning And Sharpening
A clean, sharp blade cuts better and lasts longer. Dirt and resin buildup slow the blade and cause rough cuts.
Remove the blade carefully before cleaning. Use a soft brush and a blade cleaner or mild solvent to clean it.
- Wear gloves to protect your hands
- Clean teeth and edges thoroughly
- Sharpen dull blades or replace them if needed
- Check blade teeth for damage or missing parts
Lubricating Moving Parts
Lubricate parts that move to stop rust and reduce wear. This keeps the saw running smoothly.
Use light machine oil or a silicone spray on the gears, trunnions, and elevation screws. Avoid oil on the table surface.
- Apply lubricant to adjustment knobs and levers
- Wipe off extra oil to prevent dust buildup
- Lubricate moving parts every few weeks or after heavy use
Regular Calibration Checks
Check the saw’s settings to keep cuts accurate. Calibration prevents mistakes and wasted materials.
Use a square tool to check the blade angle and fence alignment. Adjust if the blade is not at 90 degrees or the fence is off.
- Test blade height and bevel angle
- Check fence parallelism with the blade
- Adjust the miter gauge for correct angles
- Repeat calibration monthly or if cuts look uneven
Frequently Asked Questions
How Do I Safely Set Up A Table Saw For Panel Cutting?
Always wear safety gear and check blade alignment. Adjust fence and blade height properly. Ensure the panel is flat and secure before cutting.
What Blade Type Is Best For Cutting Panels?
Use a fine-toothed, carbide-tipped blade. It ensures smooth, clean cuts and reduces chipping on panel surfaces.
How Can I Avoid Panel Tear-out When Cutting?
Cut with the finished side down. Use a zero-clearance insert and a sharp blade to minimize splintering.
What Is The Correct Fence Position For Panel Cuts?
Align the fence parallel to the blade. Measure twice and lock the fence firmly for accurate, straight cuts.
Conclusion
Using a table saw to cut panels is safe and simple. Always follow safety rules and measure twice before cutting. Keep your hands clear from the blade. Use a guide to make straight cuts every time. Clean your work area to avoid accidents.
Practice on scrap wood to build confidence. With patience and care, you can cut panels well. Enjoy your woodworking projects and stay safe.