Unlocking the secrets to precision in woodworking can transform your projects from average to extraordinary. If you’re diving into the world of small woodworking projects, the try square is a tool you simply can’t ignore.
Imagine creating perfectly aligned edges and flawless right angles with ease. It might sound like a dream, but with the right guidance, you can make it your reality. In this guide, you’ll discover how to use a try square effectively, ensuring your creations are not only functional but also beautifully crafted.
Stick around, and you’ll gain insights that could elevate your woodworking skills to new heights. Are you ready to see how mastering this simple tool can change the way you work with wood? Let’s get started!

Credit: www.wikihow.com
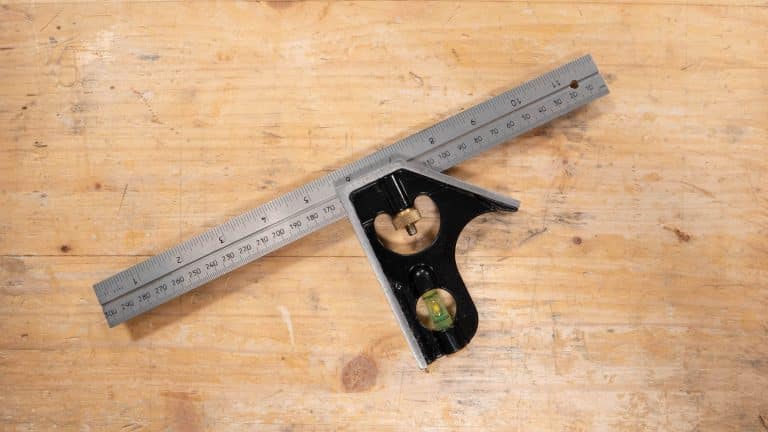
Choosing The Right Try Square
A try square is a simple tool used to check right angles in woodworking. Picking the right one helps you make accurate cuts and joints.
There are different types and materials for try squares. Knowing these helps you find one that fits your small woodworking projects.
Types Of Try Squares
Try squares come in several styles. Each type works well for certain tasks and preferences.
- Carpenter’s Try Square:Has a wooden handle and steel blade. Good for general use.
- Engineer’s Try Square:Made of metal. Offers higher precision for fine work.
- Combination Square:Has an adjustable blade. Useful for measuring and marking multiple angles.
- T-bevel Square:Adjustable angle, not just 90 degrees. Helps with custom angles.
Materials And Build Quality
Material affects the tool’s durability and accuracy. Good build quality means the try square lasts longer and stays true.
Wooden handles are light but can warp with moisture. Metal handles resist damage but may feel heavier. Steel blades keep their edge and straightness over time.
- Wood:Traditional look, lighter, may warp.
- Steel:Durable, precise, heavier.
- Aluminum:Lightweight, rust-resistant, less durable than steel.
- Plastic:Cheap, less accurate, good for beginners.
Preparing Your Workspace
Setting up a good workspace is key for small woodworking projects. A clean and organized area helps you work safely and accurately.
Before using a try square, prepare your tools and surface to make your work easier and more precise.
Organizing Tools
Keep all your tools in one place to avoid wasting time searching. Arrange them so you can reach everything quickly.
- Place your try square near your workbench.
- Group measuring tools like rulers and tape measures together.
- Store cutting tools safely to prevent accidents.
- Keep pencils and marking tools handy for quick use.
- Clear away any tools you do not need for the current project.
Setting Up A Stable Surface
A firm and level surface helps you make accurate marks with your try square. It also keeps wood steady while you work.
| Surface Type | Advantages | Tips |
| Workbench | Strong and steady | Use clamps to hold wood in place |
| Workbench with Mat | Protects wood and tools | Choose a non-slip mat |
| Flat Table | Easy to clean and access | Check for any warps or uneven spots |
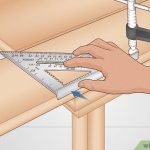
Basic Try Square Techniques
A try square is a simple tool that helps you check right angles and mark straight lines. It is very useful in small woodworking projects.
Knowing how to use a try square correctly will improve your work’s accuracy and quality.
Checking Right Angles
Place the try square blade firmly against the edge of your wood. The handle should lie flat on the surface.
Look along the edge to see if it matches the square’s blade. If it fits perfectly, your angle is 90 degrees.
- Hold the try square steady against the wood edge.
- Check for any gaps between the wood and the blade.
- If gaps appear, the angle is not a true right angle.
- Adjust your wood piece or cut to fix the angle.
Marking Straight Lines
Place the try square blade flat on the wood surface. The handle should be against the wood’s edge.
Use a pencil to draw a line along the blade edge. This line will be straight and at a right angle to the edge.
- Make sure the try square does not move while marking.
- Draw lightly at first to avoid mistakes.
- Darken the line after you confirm it is straight.
- Use the line to guide your cuts or measurements.
Measuring And Marking Tips
Using a try square helps you measure and mark wood accurately. It is a simple tool that ensures your cuts are straight and precise. Learning to use it well saves time and improves your project quality.
Below are some tips on how to align the blade and use the stock for stable measuring and marking in small woodworking tasks.
Aligning The Blade Accurately
Make sure the try square’s blade is flush against the wood edge. This prevents slanting when marking your cut line. Check the blade for any damage or warping before use. A bent blade can cause errors.
- Place the stock firmly against the wood edge.
- Hold the blade tight to the surface.
- Use a sharp pencil for clear, thin lines.
- Double-check the angle by flipping the try square.
- Mark lightly at first, then darken the line if needed.
Using The Stock For Stability
The stock is the thick part of the try square. It helps keep the tool steady while measuring. Using the stock correctly reduces movement and improves accuracy.
| Tip | Why It Helps |
|---|---|
| Press the stock flat against the wood | Keeps the square from shifting |
| Hold the stock with your fingers | Provides a firm grip and control |
| Work on a clean, flat surface | Ensures consistent contact |
| Use a clamp if needed | Holds wood and square steady for precise lines |
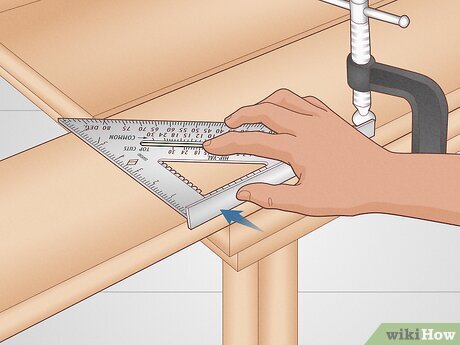
Common Mistakes To Avoid
Using a try square can be simple, but small errors can cause big problems. Avoiding common mistakes helps you get precise cuts and measurements.
Focus on clear steps and careful handling. This will improve your woodworking results every time.
Misreading Measurements
One common mistake is misreading the scale on the try square. This leads to cuts that do not fit well or pieces that are uneven.
Always check the numbers closely. Make sure you read from the right side and note the smallest marks.
- Use good lighting to see the scale clearly
- Keep your eyes level with the measuring marks
- Double-check measurements before marking
- Mark measurements lightly to avoid errors
Applying Uneven Pressure
Pressing unevenly on the try square can shift it out of place. This causes lines that are not straight or square.
Hold the try square firmly but gently. Keep it flush against the edge of your wood for the best results.
- Use your fingers to keep the try square steady
- Avoid pressing too hard in one spot
- Check that the blade is flat against the wood
- Practice steady hand placement before marking

Credit: www.wikihow.com
Maintaining Your Try Square
A try square is a simple tool but needs care to stay accurate. Proper maintenance helps you get clean, precise cuts every time.
Keep your try square free from rust and damage. Check it regularly for wear and tear to maintain its accuracy.
Cleaning And Storage
After use, clean your try square with a soft cloth to remove dust and wood particles. Avoid using water, which can cause rust.
- Wipe the blade and handle with a dry cloth
- Use a light oil to protect metal parts from rust
- Store the tool in a dry place away from moisture
- Keep it in a tool box or hang it on a pegboard
Calibration Checks
Check your try square’s accuracy often. A quick test helps you know if it needs adjustment or replacement.
| Test Method | What to Look For | Action |
| Mark a straight line using the try square | Line should be perfectly perpendicular | If not, adjust or replace the tool |
| Flip the try square and mark the same line | Both lines should align exactly | Misalignment means the square is out of calibration |
Credit: commonwoodworking.com
Frequently Asked Questions
What Is A Try Square Used For In Woodworking?
A try square checks the accuracy of right angles in woodworking. It ensures edges and joints are perfectly square for precise cuts and assembly. This tool is essential for small projects requiring accurate measurements and clean finishes.
How Do You Properly Hold A Try Square?
Hold the try square firmly with the stock against the wood edge. Keep the blade flat on the surface. This position allows accurate marking or checking of 90-degree angles without slipping.
Can A Try Square Measure Internal Angles?
No, a try square is designed for external 90-degree angles only. For internal angles, use a bevel gauge or protractor. The try square ensures precise right-angle measurements on edges and corners.
How To Maintain The Accuracy Of A Try Square?
Store the try square in a dry place to prevent rust. Avoid dropping or bending it. Regularly check against a known square to ensure it remains accurate for reliable measurements.
Conclusion
Using a try square helps keep your cuts straight and your projects neat. It makes measuring easier and more accurate. This tool saves time and reduces mistakes. Practicing with a try square improves your woodworking skills. Remember to check your angles often for the best results.
Small projects become more professional with careful measuring. Keep your try square clean and store it safely. Simple tools, like this, make woodworking more enjoyable. Give it a try on your next project. You will see the difference it makes.