Are you tired of digging through messy drawers every time you need a screw or nail? Imagine having all your small hardware perfectly organized and easy to find in seconds.
Using bins for screws and nails can save you time, reduce frustration, and make your projects run smoother. You’ll discover simple, effective ways to sort and store your screws and nails so you can focus on what really matters—getting the job done.
Keep reading, and transform your workspace into a neat, efficient zone you’ll actually enjoy working in.
Choosing The Right Bins
Organizing screws and nails helps you work faster and keep your space tidy. Choosing the right bins makes storing easier.
Think about what you need before buying bins. The material, size, and style affect how well they work for you.
Material Options
Bins come in different materials like plastic, metal, and wood. Each has good and bad points.
Plastic bins are light and easy to clean. Metal bins are strong but can rust. Wood bins look nice but may not last as long.
- Plastic: lightweight, easy to clean, affordable
- Metal: durable, strong, may rust
- Wood: sturdy, stylish, can wear out
Size And Capacity
Pick a bin size that fits your screws and nails. Small bins work for tiny items. Big bins hold many pieces.
Think about how much space you have to store bins. Large bins take more room but reduce the need to refill.
- Small bins: best for small screws and nails
- Medium bins: good for mixed sizes
- Large bins: hold many fasteners, need more space
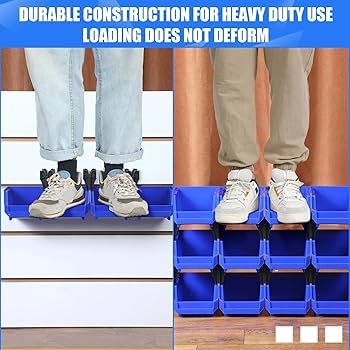
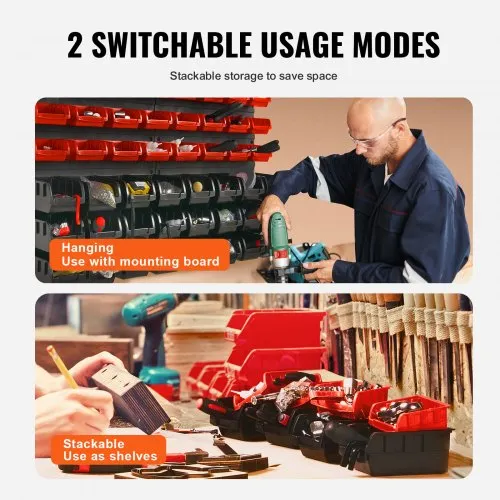
Stackable Vs. Modular
Stackable bins let you pile them up to save space. They fit tightly and keep things neat.
Modular bins connect side by side or in rows. You can add or remove bins easily without unstacking.
- Stackable: saves vertical space, stable piles
- Modular: flexible layout, easy to expand
Credit: www.vevor.ca
Sorting Screws And Nails
Keeping screws and nails organized saves time and effort. Proper sorting helps you find the right fastener quickly.
Use bins to separate screws and nails by different characteristics. This method keeps your workspace neat and efficient.
By Type And Size
Sort screws and nails based on their type and size. This makes it easier to pick the correct one for your project.
- Group screws by head shape like flat, Phillips, or hex
- Separate nails by length and thickness
- Keep specialty fasteners in their own bins
By Material And Finish
Sort fasteners by the material they are made from and their finish. This protects them and helps you choose the right type.
| Material | Common Finish |
| Steel | Galvanized, Zinc-Plated |
| Brass | Polished |
| Stainless Steel | Natural, Satin |
| Copper | Raw |
Labeling Techniques
Use clear labels on each bin to identify its contents. Good labeling prevents confusion and speeds up your work.
- Write type and size on the label
- Include material or finish if possible
- Use waterproof markers or printed labels
- Place labels where they are easy to read
Organizing Bins Efficiently
Organizing bins for screws and nails helps keep your workspace tidy. It also saves time by making items easy to find.
Using the right methods can make your storage system more effective and simple to manage.
Using Dividers And Inserts
Dividers and inserts separate screws and nails by size and type. This prevents mixing and confusion.
- Use plastic or wooden dividers to create compartments.
- Label each section clearly for quick identification.
- Choose adjustable inserts to customize bin space.
- Keep frequently used items in front compartments.
Maximizing Space
Maximize bin space by stacking and arranging items smartly. Use every inch without clutter.
| Tip | Benefit |
|---|---|
| Stack smaller bins inside larger ones | Save shelf space |
| Use clear bins | Easily see contents |
| Group similar sizes together | Reduce empty space |
| Store rarely used items on top shelves | Keep workspace clear |
Accessibility Tips
Make bins easy to reach and open. Accessibility improves efficiency.
- Place bins at waist or eye level.
- Use bins with clear lids or open tops.
- Label bins on multiple sides for visibility.
- Arrange bins by frequency of use.
Maintenance And Upkeep
Using bins for screws and nails keeps your workspace tidy. Proper maintenance helps these bins last longer.
Regular care ensures easy access and prevents mix-ups. It also protects your hardware from damage.
Regular Inventory Checks
Check your bins often to see what screws and nails you have. This stops you from running out or buying too much.
Count the items and note any low supplies. This helps you plan your next purchase and keeps your work smooth.
Cleaning Bins
Keep your bins clean to avoid rust and dirt on screws and nails. Clean bins also make it easier to find what you need.
Use a dry cloth to wipe the bins. If needed, wash plastic bins with mild soap and water, then dry them well.
Replacing Damaged Containers
Check bins for cracks or broken lids. Damaged containers can cause spills or let moisture in, harming your screws and nails.
Replace any broken bins quickly. Use sturdy containers to keep your hardware safe and organized.
Creative Storage Ideas
Keeping screws and nails organized saves time and reduces frustration. Using bins to store these small items can be both practical and creative.
Here are some smart ways to use bins that keep your workspace tidy and efficient.
Portable Bin Systems
Portable bin systems let you carry your screws and nails anywhere. These bins usually have clear lids and small compartments.
- Choose bins with adjustable dividers for different screw sizes.
- Label each compartment for quick identification.
- Stack bins to save space when not in use.
- Use bins with secure latches to avoid spills.
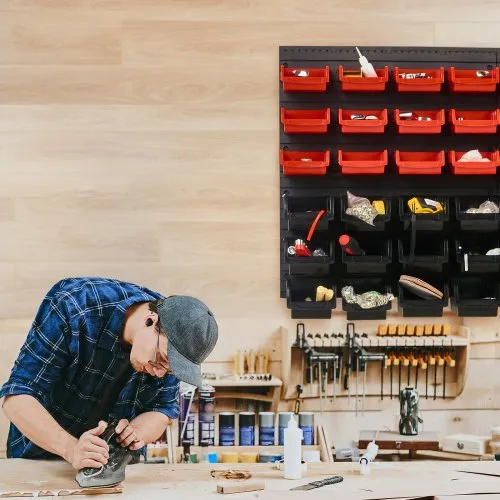
Wall-mounted Storage
Wall-mounted bins free up your workbench and keep supplies visible. You can attach small bins to pegboards or directly to the wall.
| Type | Best Use | Benefits |
| Clear plastic bins | Easy viewing | Quick access |
| Metal bins | Heavy items | Durable |
| Stackable bins | Small parts | Space-saving |
Repurposing Household Items
You can reuse common household items to store screws and nails creatively. This saves money and helps reduce waste.
Examples include:
- Empty ice cube trays for sorting small screws.
- Old muffin tins to separate nails by size.
- Glass jars with lids for storing mixed fasteners.
- Plastic egg cartons to hold tiny parts securely.
Credit: www.vevor.ca

Credit: www.temu.com
Frequently Asked Questions
What Are The Best Bins For Organizing Screws And Nails?
Plastic bins with adjustable compartments work best. They keep screws and nails sorted by size and type. Transparent bins help identify contents quickly. Choose bins with secure lids to prevent spills and maintain organization.
How Do Bins Prevent Screws And Nails From Mixing?
Bins with separate compartments create physical barriers. This separation stops small items from blending together. Labeling each section adds clarity. Proper bin use reduces sorting time and keeps your workspace tidy and efficient.
Can Bins Protect Screws And Nails From Rust?
Yes, bins can protect items from moisture when sealed. Use airtight or plastic bins to reduce exposure to humidity. Adding silica gel packets inside bins further prevents rust. Proper storage extends the life of your screws and nails.
How To Label Bins Effectively For Screws And Nails?
Use clear, readable labels on each bin compartment. Include size, type, and material information on the label. Use waterproof markers or printed labels for durability. Effective labeling speeds up finding the right screw or nail quickly.
Conclusion
Organizing screws and nails is simple with bins. These bins save time. No more searching for the right piece. Everything stays in place. Label each bin clearly. This helps find items quickly. Use stackable bins to save space. Choose durable materials for longevity.
Easy organization leads to efficient work. Tools and supplies remain within reach. Keep workspaces tidy and clutter-free. Enjoy a more productive environment. Happy organizing!