When you’re working on a painting project, protecting your lungs is just as important as getting the perfect coat. Wearing a respirator might seem like a hassle, but it’s the key to keeping yourself safe from harmful fumes and dust.
If you’re unsure how to wear a respirator correctly, you could be putting your health at risk without even knowing it. This guide will show you simple, step-by-step tips to make sure your respirator fits right and works effectively. Keep reading to learn how to protect yourself and paint with confidence every time.
Choosing The Right Respirator
Using a respirator is important for safety during painting projects. It protects your lungs from harmful paint fumes and dust.
Choosing the right respirator helps you work safely and comfortably. This guide explains how to pick one that fits your needs.
Types Of Respirators For Painting
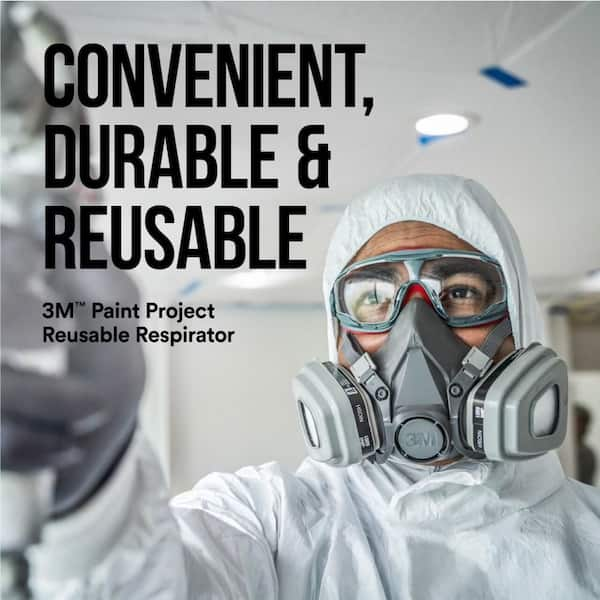
There are different respirators designed for painting. You can choose from disposable masks, half-face, or full-face respirators.
Disposable masks are easy to use but offer less protection. Half-face and full-face respirators provide better safety and are reusable.
- Disposable Masks:Lightweight and simple, for light work.
- Half-Face Respirators:Cover nose and mouth, use replaceable filters.
- Full-Face Respirators:Cover face and eyes, best for strong fumes.
Filter Selection For Paint Fumes
Filters block harmful chemicals in paint fumes. Pick filters that match the type of paint and fumes you face.
Organic vapor filters work well for many paint fumes. Some jobs may need combination filters for dust and gases.
- Organic Vapor Filters:Stop most paint fumes and solvents.
- Particulate Filters:Block dust and spray particles.
- Combination Filters:Protect against gases and particles.
Fit And Comfort Considerations
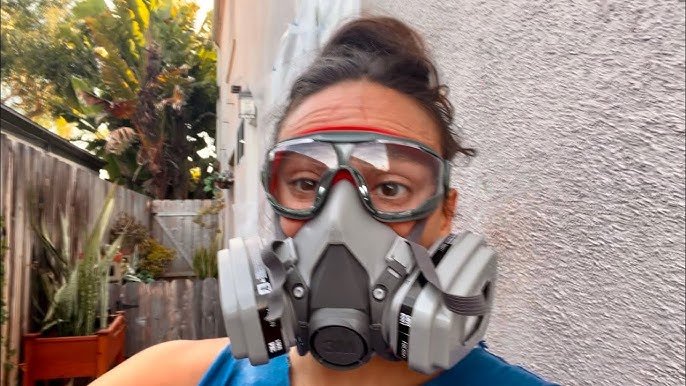
A good fit keeps paint fumes out and makes breathing easier. Make sure the respirator seals well around your face.
Comfort matters for long projects. Look for adjustable straps and soft materials. Test your respirator before painting.
- Check for gaps by doing a seal test.
- Adjust straps to fit snug but not tight.
- Choose respirators with soft face seals.
- Try on different models to find comfort.
Credit: www.homedepot.com
Preparing The Respirator
Wearing a respirator properly starts with good preparation. You must check and ready your equipment before painting.
Taking time to prepare the respirator helps protect your lungs from harmful paint fumes and dust.
Inspecting For Damage
Look closely at the respirator for cracks, tears, or worn parts. Check the facepiece, straps, and valves. Damaged parts can let in harmful particles.
Replace or fix any broken pieces before you use the respirator to keep it working well.
Cleaning Before Use
Clean the respirator before each use to remove dust and dirt. Use warm water and mild soap. Avoid harsh chemicals that can damage materials.
- Remove filters and cartridges before cleaning
- Wash the facepiece gently with a soft cloth
- Rinse thoroughly with clean water
- Let air dry completely before use
Assembling Filters And Cartridges
Attach the right filters and cartridges for your painting project. Make sure they fit tightly to prevent leaks.
| Filter Type | Use | Replacement Time |
| Particulate Filter | Blocks dust and spray particles | Replace when breathing becomes hard |
| Gas/Vapor Cartridge | Protects against paint fumes and chemicals | Replace after each painting session or as recommended |
| Combination Filter | Blocks both particles and gases | Follow manufacturer guidelines |
Proper Fit And Seal Check
Wearing a respirator correctly is key for safety during painting projects. A proper fit keeps harmful fumes away from your lungs.
Check the seal every time you wear your respirator. A good seal means better protection.
Adjusting Straps For Secure Fit
Start by placing the respirator on your face. Then adjust the straps so it feels snug but not too tight. The straps should hold the mask firmly in place.
- Loosen all straps before putting on the respirator.
- Position the mask over your nose and mouth.
- Tighten the top strap first, then the bottom strap.
- Make sure the mask does not move when you talk or move your head.
- If the straps cause discomfort, adjust them evenly on both sides.
Performing Seal Checks
Seal checks help confirm the respirator fits properly. Use these tests before starting your painting work.
- Cover the front of the respirator with your hand.
- Inhale gently to create suction inside the mask.
- Hold your breath for a few seconds.
- If the mask pulls in and stays tight, the seal is good.
- If air leaks in, readjust the straps and test again.
Common Fit Issues And Fixes
| Issue | Cause | Fix |
| Air leaks around nose | Mask too loose or nose clip not shaped | Tighten straps and press nose clip firmly |
| Mask slides down face | Straps too loose or wrong size mask | Adjust straps or try a smaller mask size |
| Discomfort on cheeks | Straps too tight or mask edges pressing hard | Loosen straps slightly or reposition mask |
| Glasses fogging up | Seal not tight at nose | Shape nose clip and check seal again |
Using Respirators During Painting
Painting projects can release harmful fumes and particles. Wearing a respirator protects your lungs.
Proper use of a respirator keeps you safe and helps you work longer without health risks.
When To Wear The Respirator
Always wear a respirator when working with paint that has strong fumes. This includes spray painting.
Use a respirator in closed or poorly ventilated spaces to avoid breathing harmful chemicals.
- During spray painting
- When using solvent-based paints
- In small or enclosed areas
- When sanding painted surfaces
Maintaining Respirator While Working
Check your respirator before use to make sure it fits well and is clean. Replace filters as needed.
Keep the respirator dry and avoid touching the mask surface to prevent contamination.
- Inspect straps and seals for damage
- Clean the mask after each use
- Store in a clean, dry place
- Replace filters regularly
Handling Breaks And Removal
Take breaks in fresh air to remove the respirator safely. Avoid removing it in the work area.
Store the respirator properly during breaks to keep it clean and ready for use.
- Step away from paint fumes before removal
- Handle by straps to avoid contamination
- Keep respirator in a clean bag or container
- Wash hands after removing the mask
Aftercare And Maintenance
Wearing a respirator for painting is important, but caring for it after use keeps it working well. Proper aftercare extends the life of your respirator and keeps you safe.
Follow simple steps for cleaning, storing, and replacing parts to get the best performance every time you paint.
Cleaning After Use
Clean your respirator right after using it to remove paint and dust. Use warm water and mild soap to wash the facepiece. Avoid harsh chemicals that can damage the material.
- Remove filters and cartridges before cleaning.
- Wash the facepiece gently with soap and water.
- Rinse well to remove all soap.
- Let it air dry completely before storing.
- Do not soak filters or cartridges in water.
Storage Tips
Store your respirator in a clean, dry place away from sunlight and dust. Keep it in a sealed container or bag to avoid damage and contamination.
| Storage Condition | Reason |
| Cool, dry area | Prevents mold and material breakdown |
| Sealed container or bag | Protects from dust and dirt |
| Away from direct sunlight | Stops material from cracking |
| Away from chemicals | Avoids damage from fumes |
Replacing Filters And Parts
Replace filters and parts regularly to keep the respirator effective. Filters lose their ability to block harmful particles over time.
- Check the manufacturer’s guide for replacement schedules.
- Replace filters if breathing becomes hard or you smell paint.
- Inspect the facepiece for cracks or damage before each use.
- Change parts like straps or valves if worn out.
- Use only parts made for your respirator model.

Credit: www.reddit.com
Additional Safety Tips
Wearing a respirator is important for your safety during painting projects. There are other safety measures you should follow. These tips help protect your health.
Always pay attention to your surroundings and use the right tools. These extra steps reduce risks and keep you safe.
Ventilation In Painting Areas
Good ventilation lowers the amount of paint fumes in the air. Open windows and doors to let fresh air flow. Use fans to help move air out of the room.
Keep the work area well-ventilated during and after painting. This reduces the chance of breathing harmful chemicals.
- Open windows and doors wide
- Use exhaust fans if available
- Work outside if possible
- Avoid small, closed rooms
Protective Clothing And Gear
Wear protective clothing to avoid skin contact with paint and chemicals. Use gloves, long sleeves, and pants. A hat can protect your hair and scalp.
Safety goggles protect your eyes from splashes. Use shoe covers or old shoes to keep paint off your feet. Clean your clothing after painting.
- Gloves made of nitrile or latex
- Long-sleeved shirts and pants
- Safety goggles or glasses
- Hat or head cover
- Shoe covers or dedicated shoes
Recognizing Signs Of Exposure
Know the signs of paint fume exposure. These signs tell you if the air is unsafe or if your respirator is not working well.
If you feel dizzy, headache, or nausea, stop work and get fresh air. Skin irritation and eye redness also show exposure. Seek medical help if symptoms get worse.
- Dizziness or lightheadedness
- Headache or nausea
- Eye redness or irritation
- Skin rash or itching
- Difficulty breathing

Credit: www.homedepot.com
Frequently Asked Questions
How Do I Properly Wear A Respirator For Painting?
First, choose the right respirator type for painting. Secure straps firmly but comfortably. Ensure a tight seal around your nose and mouth. Perform a fit check by covering filters and inhaling. No air should leak in. Replace filters as recommended.
What Type Of Respirator Is Best For Painting Projects?
Use a respirator with organic vapor cartridges for painting. N95 masks are not sufficient for paint fumes. Half-face or full-face respirators provide better protection. Make sure the respirator is approved by safety standards. Proper filter selection is crucial for effective protection.
How Often Should I Replace Respirator Filters When Painting?
Replace filters when breathing becomes difficult or filters smell paint. Follow manufacturer guidelines for filter lifespan. For heavy painting, change filters daily. Store filters properly to prevent contamination. Regular filter changes ensure optimal respiratory protection during painting.
Can I Reuse My Respirator For Multiple Painting Sessions?
Yes, reusable respirators can be used for multiple sessions. Clean the respirator after each use with mild soap and water. Replace filters as needed between sessions. Store in a clean, dry place. Proper maintenance extends respirator life and ensures safety.
Conclusion
Wearing respirators for painting keeps you safe. Choose the right fit first. Ensure a snug seal for full protection. Regularly check your respirator for wear and damage. Clean it after each use to prolong its life. Practice proper usage to maximize safety benefits.
Respirators are crucial for health during painting tasks. Prioritize your safety with the right equipment. Stay informed about respirator types and uses. Your well-being depends on it. Happy painting!
