
Are you ready to take your sanding projects to the next level? Mastering sanding techniques with a power sander can save you time, effort, and frustration.
Whether you’re smoothing rough wood or prepping surfaces for paint, the right approach makes all the difference. In this guide, you’ll discover simple tips and tricks that help you achieve flawless results every time. Keep reading to unlock the secrets that will transform your sanding skills and make your work look professional.

Credit: mrsander.co.uk
Choosing The Right Power Sander
Power sanders help smooth wood and other surfaces. Picking the right sander saves time and effort.
Different sanders fit different jobs. Knowing the types helps you choose the best one.
Types Of Power Sanders
There are several common types of power sanders. Each type works best for certain tasks.
- Orbital Sander:Moves in small circles. Good for fine finishing and light sanding.
- Random Orbital Sander:Moves in random orbits. Reduces swirl marks and works fast.
- Belt Sander:Uses a continuous loop of sandpaper. Best for heavy material removal.
- Detail Sander:Small and triangular. Ideal for tight corners and small spaces.
- Disc Sander:Has a spinning disc. Good for flat surfaces and shaping edges.
Selecting The Best Sander For Your Project
Consider the project size and surface type before choosing a sander. Each sander suits different needs.
For rough sanding, use a belt sander. For smooth finishing, pick an orbital or random orbital sander.
- Use a belt sander for large, rough surfaces.
- Use a random orbital sander for smooth, swirl-free finishes.
- Use an orbital sander for light sanding and finishing tasks.
- Use a detail sander for corners and small areas.
- Use a disc sander for shaping edges and flat surfaces.
Preparing The Surface
Preparing the surface is an important step before sanding with a power sander. It helps the sander work better and gives a smooth finish.
Cleaning and inspecting the surface ensures it is ready for sanding. Removing old finishes makes the new finish last longer.
Cleaning And Inspecting
Start by cleaning the surface to remove dust, dirt, and grease. Use a damp cloth or mild cleaner for this task.
After cleaning, check the surface for nails, screws, or any damage. Remove or fix these before sanding to avoid harm.
- Wipe with a soft cloth
- Use a mild soap solution if needed
- Look for loose nails or screws
- Check for cracks or holes
- Repair damage before sanding
Removing Old Finishes
Old paint, varnish, or stain can stop the sander from working well. Remove these finishes before sanding.
Use a chemical stripper or coarse sandpaper to get rid of old finishes. This step helps the new finish stick properly.
- Apply chemical stripper carefully
- Let it sit according to instructions
- Scrape off softened finish
- Sand rough areas with coarse grit
- Wear gloves and safety gear
Selecting Sandpaper Grit
Choosing the right sandpaper grit is key for good sanding results. The grit number shows how coarse or fine the sandpaper is.
Using the correct grit helps you smooth surfaces without damage. It also saves time and effort.
Coarse Vs. Fine Grits
Coarse grits remove material quickly but leave rough marks. Fine grits smooth surfaces and remove small scratches.
- Coarse grit: 40 to 60, used for heavy sanding and paint removal
- Medium grit: 80 to 120, good for general sanding and shaping
- Fine grit: 150 to 220, ideal for finishing and preparing for painting
- Very fine grit: 240 and above, used for polishing and final smoothing
When To Change Grit Levels
Changing grit levels at the right time improves sanding quality. Start with coarse grit to remove rough spots.
Switch to medium grit to smooth the surface. Finish with fine grit to get a clean, smooth finish.
| Grit Level | Use | When to Change |
| Coarse (40-60) | Remove paint, shape wood | When rough marks fade |
| Medium (80-120) | Even surface, remove coarse scratches | When surface feels smooth but dull |
| Fine (150-220) | Prepare for finishing, smooth scratches | When no rough spots remain |
| Very Fine (240+) | Polish, final sanding | Before applying paint or varnish |
Proper Sanding Techniques
Using a power sander can make your project smooth and even. Proper sanding helps prepare surfaces for painting or finishing.
Learning the right techniques avoids damage and gives a clean result. Focus on pressure, direction, and marks.
Maintaining Even Pressure
Keep steady pressure on the sander to avoid uneven surfaces. Pressing too hard can cause dips or gouges.
- Hold the sander firmly but do not push down too much
- Let the sander’s weight do most of the work
- Move the sander smoothly over the surface
- Check your progress often to avoid over-sanding
Sanding With The Grain
Always sand in the direction of the wood grain. Sanding against the grain can cause scratches and rough spots.
Follow these tips for sanding with the grain:
- Identify the direction of the grain before you start
- Use long, even strokes that match the grain lines
- Change the sandpaper grit gradually for a smooth finish
Avoiding Swirl Marks
Swirl marks are circular scratches caused by fast sanding or wrong motion. They ruin the smooth look of your surface.
| Cause | How to Prevent |
| Using too coarse sandpaper | Start with medium grit and move to finer grit gradually |
| Moving sander in circles | Move sander in straight lines along the grain |
| Applying uneven pressure | Keep pressure even and steady |
Handling Edges And Corners
Edges and corners need extra care when sanding. Power sanders can remove material fast, so control is key. This guide covers ways to handle these tricky spots well.
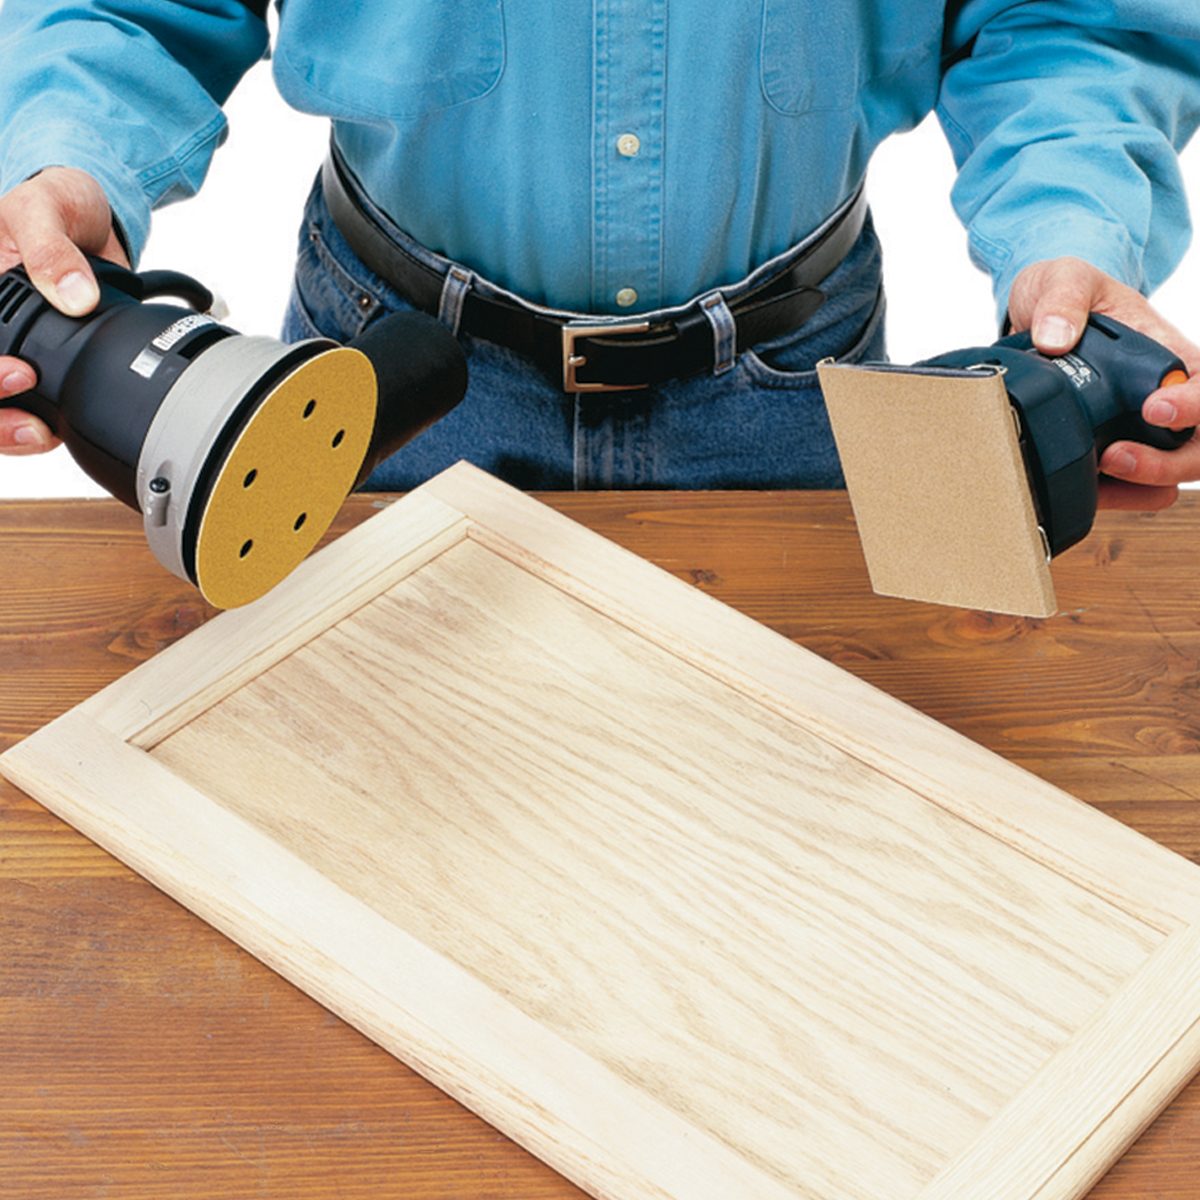
Using the right tools and techniques helps keep edges smooth without damage. Let’s look at two main methods: detail sanders and manual touch-ups.
Using Detail Sanders
Detail sanders are small and have pointed pads. They reach tight corners and edges that bigger sanders miss. Use light pressure and move slowly to avoid rounding edges.
- Choose a fine-grit sandpaper for final sanding.
- Keep the sander flat against the surface near edges.
- Use gentle, even strokes along the edge direction.
- Check your work often to avoid over-sanding.
- Change sandpaper if it clogs or tears.
Manual Touch-ups
Manual touch-ups fix spots that machines miss. Use sanding blocks or folded sandpaper for more control. This method helps keep sharp edges and clean corners.
| Tool | Use | Tip |
| Sanding Block | Flat edges and straight corners | Wrap sandpaper tightly for even pressure |
| Folded Sandpaper | Tight corners and detailed areas | Fold to fit shape and sand gently |
| Hand Sanding Sponge | Curved edges and irregular shapes | Use light strokes to avoid damage |
Credit: www.familyhandyman.com
Safety Tips For Power Sanding
Power sanding is a fast way to smooth wood and other materials. It can create dust and noise that harm your health.
Using the right safety tools helps protect your body. Always prepare your workspace before starting.
Protective Gear Essentials
Wear safety gear to protect your eyes, lungs, and ears from harm. Power sanders can throw off tiny particles and loud noise.
- Safety glasses shield your eyes from dust and debris.
- A dust mask or respirator stops fine dust from entering your lungs.
- Ear protection reduces noise damage from the sander.
- Gloves protect your hands from rough surfaces and vibration.
- Wear long sleeves to guard your skin from dust and splinters.
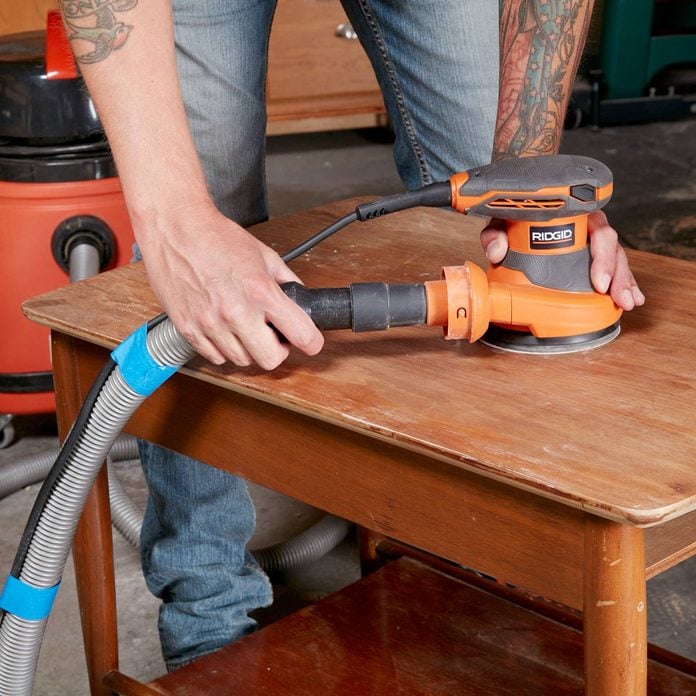
Dust Management
Dust from sanding can cause breathing problems and make your workspace messy. Manage dust to stay safe and clean.
Use a vacuum or dust collection system on your power sander. Work in a well-ventilated area to reduce dust buildup.
- Attach a dust bag or vacuum to your sander if possible.
- Open windows or use fans to improve airflow.
- Clean the workspace often to remove dust layers.
- Wear a mask to avoid breathing in fine particles.
Finishing Touches
Sanding with a power sander smooths the wood surface well. The final steps help prepare the wood for the next finish.
Cleaning and preparing the surface ensures a neat and long-lasting result. These steps are important after sanding.
Cleaning After Sanding
After sanding, dust covers the wood. Removing this dust prevents bumps under paint or stain.
Use a brush, vacuum, or tack cloth to clean the surface. Make sure all dust is gone before moving on.
- Use a soft brush or vacuum to remove loose dust
- Wipe the surface with a tack cloth to catch fine particles
- Blow off dust with compressed air if available
- Wear a mask to avoid breathing dust
Preparing For Staining Or Painting
Once clean, check the wood for rough spots or scratches. Lightly sand these areas again if needed.
Make sure the wood is dry and smooth before applying stain or paint. This helps the finish stick better.
- Lightly sand any rough spots after cleaning
- Remove sanding dust again before finishing
- Test stain or paint on a small area first
- Follow the instructions on your stain or paint product
Credit: www.familyhandyman.com
Frequently Asked Questions
What Are The Basic Power Sanding Techniques?
Start with coarse grit sandpaper for rough surfaces. Use smooth, even strokes. Gradually switch to finer grits for a polished finish. Always sand with the grain of the wood. This technique ensures an even, smooth surface without scratches or gouges.
How To Choose The Right Sandpaper Grit?
Coarse grits (40-60) remove old finishes quickly. Medium grits (80-120) smooth rough surfaces. Fine grits (150-220) prepare surfaces for finishing. Use grit based on your sanding stage. Correct grit choice improves efficiency and surface quality.
Can Power Sanders Damage Wood Surfaces?
Yes, if used incorrectly. Excessive pressure or wrong grit can cause gouges. Always use light, consistent pressure. Keep the sander moving to avoid uneven spots. Proper technique prevents damage and ensures smooth results.
How To Maintain A Power Sander For Best Results?
Clean the sander regularly to remove dust buildup. Check and replace worn sandpaper often. Lubricate moving parts as recommended by the manufacturer. Proper maintenance extends tool life and maintains sanding efficiency.
Conclusion
Mastering sanding techniques enhances your woodworking projects. A power sander saves time and effort. It provides smooth, even surfaces. Remember to choose the right grit for each task. Start with coarse, move to fine. Always keep safety in mind. Wear protective gear.
Regular maintenance keeps your sander efficient. Clean dust and check for wear. Practice makes perfect. As you gain experience, results improve. Experiment with different techniques. Find what works best for you. With patience and practice, your skills will grow. Enjoy creating beautiful finishes with ease.
Happy sanding!