If you use a belt sander, you know how important it is to keep it clean. A dusty, clogged sander won’t work as well and can even wear out faster.
But cleaning your belt sander doesn’t have to be a chore. With the right tips, you can keep your tool running smoothly and extend its life. Ready to learn simple, effective ways to clean your belt sander and get the best results every time?
Keep reading—you’ll be amazed at how easy it is to maintain your tool like a pro.
Credit: www.familyhandyman.com
Choosing The Right Cleaning Tools
Keeping your belt sander clean helps it work well and last longer. Using the right tools makes cleaning easier and safer.
Pick tools that remove dust and debris without hurting the sander parts. This guide covers the best brushes, cloths, and air tools.
Essential Brushes And Cloths
Soft brushes remove dust from the belt sander’s surface and crevices. Use brushes with nylon or natural bristles to avoid damage.
Microfiber cloths trap fine dust and clean without scratching. Avoid rough fabrics that may leave fibers behind.
- Use a small brush for tight spots
- Choose a wide brush for large flat areas
- Pick lint-free microfiber cloths
- Clean brushes and cloths regularly
Using Compressed Air Safely
Compressed air helps blow out dust inside the sander. Use it carefully to avoid damage or injury.
Keep the air nozzle a few inches from the tool. Use short bursts to clear dust without pushing it deeper.
- Wear safety glasses to protect your eyes
- Use air pressure under 30 PSI for safety
- Hold the sander in a way that dust blows away from you
- Clean in a well-ventilated area
Disassembling The Belt Sander
Cleaning a belt sander helps it work better and last longer. Taking it apart carefully makes cleaning easier.
Disassembly lets you reach parts that collect dust and debris. Follow simple steps to avoid damage.
Removing The Sanding Belt
First, unplug the sander to stay safe. Find the lever or knob that holds the sanding belt tight.
Release the tension by moving the lever or turning the knob. Slide the old sanding belt off the rollers.
- Always wear gloves to protect your hands
- Check the belt for tears or wear before removing
- Keep the belt away from sharp objects
Accessing Internal Components
After removing the belt, open the cover or housing to see inside. Use a screwdriver if needed to remove screws.
Inside, you can clean the rollers, motor, and dust channels. Remove dust and debris with a brush or compressed air.
- Keep screws safe to avoid losing them
- Use soft brushes to avoid damage
- Check for worn or broken parts while inside
Cleaning The Sanding Belt And Rollers
Keeping your belt sander clean helps it work better and last longer. Dirt and dust can cause problems if not removed often.
Focus on cleaning the sanding belt and rollers. These parts collect dust and debris during use.
Removing Dust And Debris
Dust builds up on the sanding belt and rollers. This reduces sanding power and can damage the machine.
Use a soft brush or compressed air to clean these parts. Be gentle to avoid damage.
- Turn off and unplug the sander before cleaning
- Brush off dust from the belt surface
- Use compressed air to blow dust from rollers
- Wipe rollers with a dry cloth if needed
- Repeat cleaning after heavy use
Checking For Wear And Tear
Check the sanding belt for tears, holes, or worn spots. A damaged belt lowers sanding quality and can break.
Look at the rollers for cracks or rough spots. Damaged rollers can cause belt slippage or uneven sanding.
- Inspect the belt before and after each use
- Replace the belt if it shows damage or heavy wear
- Check rollers for smooth rotation and surface condition
- Clean rollers regularly to avoid buildup that causes wear
- Replace rollers if damaged or worn out
Maintaining The Motor And Electrical Parts
Cleaning your belt sander is key to keeping it working well. The motor and electrical parts need special care. Dirt and dust can cause damage and reduce power.
Regular maintenance helps avoid costly repairs. It also keeps the tool safe to use. Focus on cleaning motor vents and checking electrical connections.
Cleaning Motor Vents
Motor vents let air flow through the motor. Dust and debris can block these vents. Blocked vents cause the motor to overheat and fail.
Use a small brush or compressed air to clean the vents. Do this regularly to keep air flowing freely. Avoid using water or wet cloths near vents.
- Turn off and unplug the sander before cleaning.
- Use a soft brush to remove dust from vents.
- Blow compressed air into vents to clear debris.
- Repeat cleaning every few uses or after dusty jobs.
Inspecting Electrical Connections
Electrical parts carry power to the motor. Loose or damaged connections cause poor performance or sparks. They can be a safety hazard.
Check wires and plugs for signs of wear or damage. Tighten any loose screws or connectors. Replace damaged parts right away.
- Unplug the sander before inspection.
- Look for frayed wires or cracked insulation.
- Check plug pins for corrosion or bending.
- Tighten screws on terminal connections.
- Replace damaged cables or plugs immediately.
Lubricating Moving Parts
Keeping your belt sander clean is important for its performance. Lubricating the moving parts helps reduce friction and wear.
Regular lubrication keeps the sander running smoothly and extends its life.
Choosing The Right Lubricant
Use lubricants that are designed for power tools. Avoid thick greases that can attract dust and dirt.
Light machine oil or silicone spray works best for belt sanders. These keep parts moving without causing buildup.
- Choose oils labeled for electric tools
- Avoid heavy grease or automotive oils
- Check the sander manual for recommended types
Applying Lubricant Safely
Before applying lubricant, unplug the sander. This prevents accidents while you work on it.
Use only a small amount of lubricant on moving parts. Wipe off any extra to avoid dust buildup.
- Wear gloves to protect your skin
- Apply lubricant to bearings and rollers
- Keep lubricant away from sanding belts
- Clean parts before lubricating for best results
Preventive Tips For Longer Belt Life
Cleaning and caring for your belt sander helps it work well for a long time. Taking simple steps can stop damage and save money.
Using the right ways to store and operate your sander keeps the belt strong and ready to use.
Proper Storage Techniques
Store your belt sander in a dry place away from dust. Keep it in a spot where it will not fall or get hit.
Remove the sanding belt before storing. This stops the belt from getting bent or damaged.
- Keep the sander off the floor to avoid moisture
- Use a case or cover to protect from dust
- Store sanding belts flat or hung to avoid creases
- Check belts before storage for any wear or tears
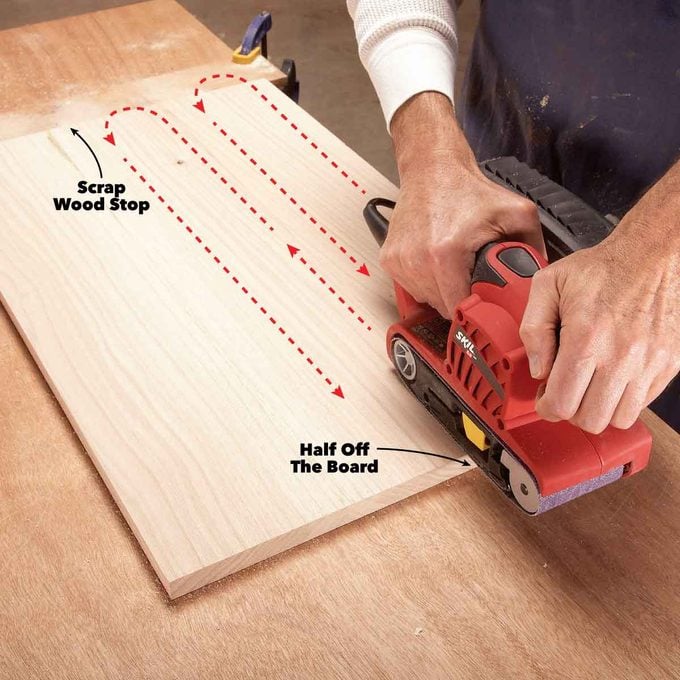
Avoiding Overheating During Use
Overheating can wear out the belt quickly. Use the sander with light pressure and move it smoothly.
Take breaks during long sanding jobs. This lets the belt cool down and stay strong.
- Do not press too hard on the sander
- Keep the belt moving to avoid hot spots
- Turn off the sander if it smells hot or burns
- Replace belts that show signs of heat damage
Troubleshooting Common Issues
Keeping your belt sander clean helps it work better. Dirt and dust can cause problems during sanding.
This guide covers two common issues: belt slippage and uneven sanding. Learn simple fixes to keep your sander running smoothly.
Handling Belt Slippage
Belt slippage happens when the sanding belt moves off the rollers. This stops the sander from working well.
Check if the belt is tight enough. A loose belt can slip easily. Clean any dust or debris from the rollers and belt.
- Tighten the belt using the sander’s adjustment knob
- Remove dust from rollers with a dry cloth
- Replace worn belts to ensure good grip
- Make sure the belt is installed in the right direction
Fixing Uneven Sanding
Uneven sanding leaves rough or wavy spots on your workpiece. It can be caused by dirty or damaged belts.
Clean the sanding belt and check for tears or wear. Also, check the sander’s base plate for dirt or damage.
- Replace belts that have tears or heavy wear
- Clean the base plate to keep it flat
- Hold the sander steady and move it evenly
- Check the tracking to keep the belt centered

Credit: 2sand.com

Credit: www.youtube.com
Frequently Asked Questions
How Often Should I Clean My Belt Sander?
Cleaning your belt sander after each use is ideal. Regular maintenance prevents dust buildup and ensures optimal performance. If used heavily, consider a more thorough cleaning weekly. Consistent cleaning prolongs the tool’s lifespan and enhances efficiency.
What Tools Are Needed To Clean A Belt Sander?
Basic tools include a soft brush, vacuum, and air compressor. Use the brush to remove loose dust and debris. The vacuum and air compressor help clear remaining particles. These tools ensure a thorough cleaning without damaging the sander.
Can I Use Water To Clean A Belt Sander?
Avoid using water when cleaning a belt sander. Moisture can damage the motor and internal components. Instead, use dry methods like brushes or compressed air. These techniques effectively remove dust without risking water-related damage.
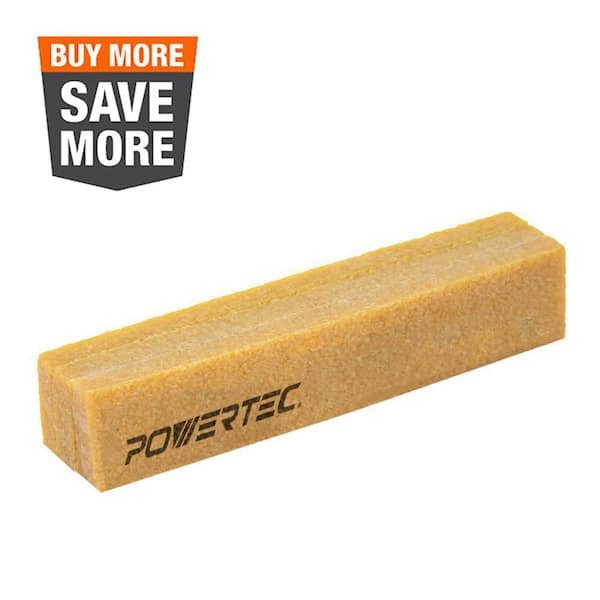
How Do I Remove Resin Buildup On The Belt?
To remove resin, use a belt cleaning stick or abrasive cleaner. Gently rub the stick against the moving belt. This method effectively removes resin and other stubborn residues. Regular cleaning prevents buildup and maintains belt efficiency.
Conclusion
Cleaning your belt sander keeps it working well and lasting longer. Regular maintenance stops dust and debris from building up. Use simple tools like brushes and cloths for easy cleaning. Always unplug the sander before you start. A clean tool is safer and gives better results.
Small efforts save time and money in the future. Keep your belt sander ready for every job by cleaning it often. Simple care makes a big difference in performance and safety.