When it comes to woodworking, getting your measurements and markings just right can make all the difference between a perfect project and a frustrating mistake. You might think it’s a simple step, but even small errors can ruin your work or waste valuable material.
What if you could avoid those common pitfalls and make every cut count? You’ll discover easy-to-follow tips that will help you mark and measure wood with confidence and precision. Whether you’re a beginner or looking to sharpen your skills, these insights will save you time, reduce stress, and boost your results.
Keep reading—you’re about to take your woodworking to the next level.
Credit: www.popularwoodworking.com
Choosing The Right Tools
Marking and measuring wood need the right tools. Good tools help you work faster and get better results.
Picking tools that fit your project keeps your work accurate and neat. Let’s look at some key tools you need.
Types Of Marking Tools
Marking tools show where to cut or join wood. Use tools that make clear, easy-to-see marks.
- Pencils: Easy to erase and common for wood marking
- Marking knives: Make sharp, thin lines for precision
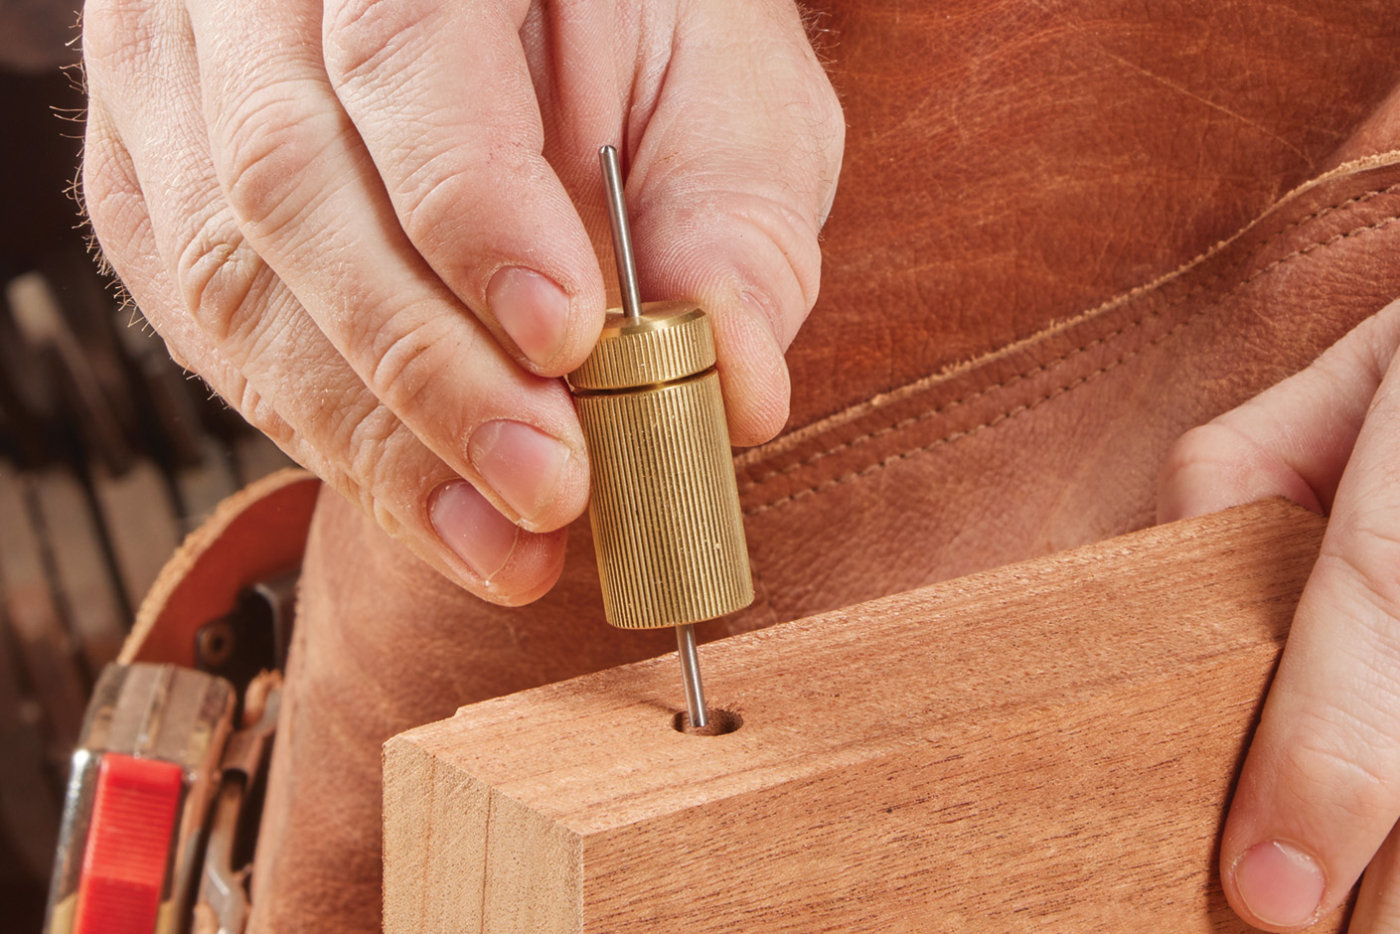
- Scratch awls: Create small holes or marks for drilling points
- Soapstone: Leaves white marks that stand out on dark wood
Measuring Instruments For Precision
Measuring tools help you get exact sizes and distances. Choose tools that suit your task and wood size.
- Tape measures: Good for long measurements and rough cuts
- Combination squares: Help measure and check right angles
- Calipers: Measure thickness and small distances with accuracy
- Rulers and straight edges: Useful for drawing straight lines
Maintaining Your Tools
Clean and store your tools properly. Well-kept tools work better and last longer.
- Wipe off dust and wood chips after use
- Sharpen blades regularly for clear marks
- Keep metal parts dry to avoid rust
- Store tools in a dry, safe place

Credit: www.familyhandyman.com
Preparing Wood For Accurate Marking
Marking wood correctly helps you cut and join pieces with precision. Preparing wood well makes your measurements clear and easy to follow.
Good preparation stops mistakes and saves time in your woodworking projects. Clean, smooth, and stable wood surfaces give the best results.
Selecting The Best Wood Surface
Choose a flat and even wood surface to mark on. Avoid surfaces with rough patches or deep grain patterns that can affect your lines.
Look for wood that is free from knots and splits. These areas can make your measurements less accurate and hard to follow.
- Pick a flat face for marking
- Avoid rough or damaged spots
- Choose wood with few knots or cracks
Cleaning And Smoothing Techniques
Remove dust, dirt, and debris before marking. A clean surface helps you see your pencil or pen lines clearly.
Smooth the surface with sandpaper if it feels rough. Use fine grit sandpaper to avoid changing the wood’s shape.
- Wipe wood with a dry cloth
- Use fine sandpaper for rough spots
- Clean off sanding dust before marking
Securing Wood For Stability
Hold your wood firmly to stop it from moving. Unsteady wood causes inaccurate marks and cuts.
Use clamps or a workbench to keep the wood still. Make sure the wood does not shift while you mark it.
- Clamp wood to a solid surface
- Check that wood does not wobble
- Use a flat workbench if possible
Marking Techniques For Precision
Marking wood accurately is key to good woodworking. Clear marks guide your cuts and joints. Use the right tools and methods to get precise lines every time.
Choosing the best marking technique helps avoid mistakes. It saves time and materials. Let’s look at some common marking methods and tips.
Using Marking Gauges Effectively
Marking gauges create fine, consistent lines parallel to the wood edge. Set the gauge to the desired width and hold it firmly while dragging across the surface. This tool works well for marking tenons and dadoes.
- Adjust the marking gauge to the exact measurement needed.
- Lock the setting tightly to avoid slipping.
- Hold the fence flush against the edge of the wood.
- Draw the pin or knife smoothly along the wood without lifting.
- Check the line before cutting to ensure accuracy.
Pencil Vs. Knife Marking
Pencils are simple and quick for marking wood, but their lines can be thick and less accurate. Knives make fine, sharp lines that show exactly where to cut. They also help parts fit tightly together.
| Marking Tool | Advantages | Disadvantages |
| Pencil | Easy to use, visible on many surfaces | Lines may be thick, can smudge |
| Knife | Precise, creates thin lines, helps with fitting | Requires skill, can damage wood if used wrong |
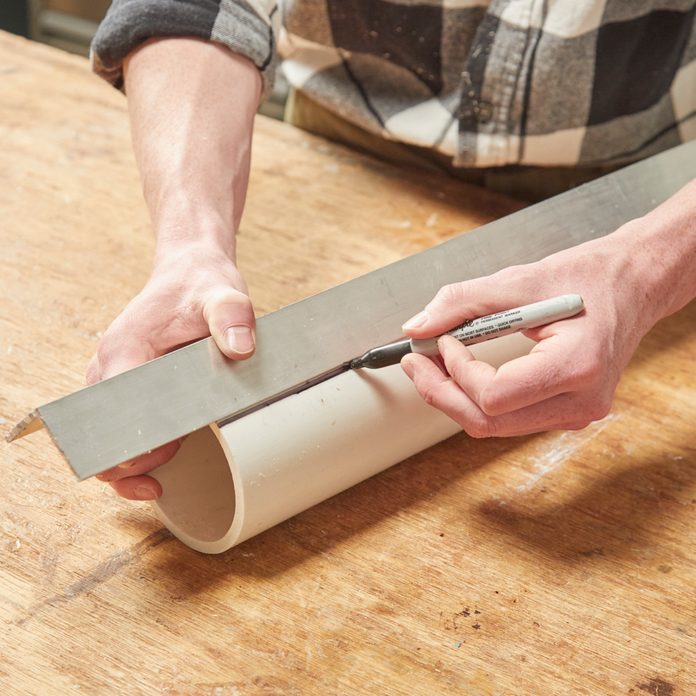
Marking Angles And Curves
Marking angles and curves needs special care. Use tools like protractors and flexible curves to draw shapes accurately. Mark light lines first, then darken them after confirming the shape.
Tips for marking angles and curves:
- Use a bevel gauge to copy angles from one piece to another.
- Draw curves with a flexible curve ruler or a template.
- Keep your hand steady to avoid wobbly lines.
- Test the shape on scrap wood before marking your project.
Credit: www.familyhandyman.com
Measuring Strategies
Measuring wood accurately is important for any project. Good measuring helps avoid mistakes and waste.
Using the right tools and techniques makes measuring easier. This guide covers key strategies for better results.
Reading Tape Measures Accurately
Tape measures show inches, fractions, and sometimes centimeters. Understanding these marks helps get correct lengths.
Look closely at the smallest lines. They often show 1/16 or 1/32 inch steps. Use these for precise cuts.
- Start measuring from the tape’s end hook
- Read the number closest to your mark
- Use fractions for small adjustments
- Keep the tape flat for accurate readings
Using Squares And Calipers
Squares help check right angles on wood edges. Calipers measure thickness and small distances precisely.
Use a square by placing it firmly against the wood. For calipers, close the jaws gently on the piece.
- Try a speed square for quick angle checks
- Use a combination square for marking lines
- Calipers work well for measuring inside and outside widths
- Keep tools clean for best accuracy
Double Checking Measurements
Always measure twice before cutting wood. This simple habit reduces errors and wasted material.
Mark your measurement clearly. Then measure again to confirm the mark is correct.
- Measure from the same starting point both times
- Check your marks with a square or ruler
- Use a pencil to make clear marks
- Ask someone to check your measurements if possible
Common Mistakes To Avoid
Marking and measuring wood are important skills for good woodworking. Small errors can cause big problems in your project. Avoiding common mistakes will save you time and materials.
Pay close attention to your tools and techniques. Below are some usual errors that beginners and experienced woodworkers make.
Misreading Scales
Many woodworkers read measuring scales wrong. This leads to wrong cuts and wasted wood. Scales on rulers and tape measures can be confusing if you do not look carefully.
- Check if the scale is in inches or centimeters.
- Look closely at the small marks for fractions.
- Use a magnifier if the marks are hard to see.
- Double-check measurements before marking.
- Keep your eyes level with the scale to avoid parallax error.
Inconsistent Marking Pressure
Applying different pressure when marking causes uneven lines. Some lines may be too faint to see. Others may be too deep and hard to erase. Consistent pressure makes your marks clear and easy to follow.
| Pressure Level | Effect on Mark |
|---|---|
| Too Light | Hard to see, easily missed |
| Too Hard | Deep groove, hard to correct |
| Just Right | Clear line, easy to remove if needed |
Ignoring Wood Grain Direction
Wood grain affects how you mark and cut wood. Ignoring grain direction can cause splintering or rough edges. Always note the grain before you start.
- Mark along the grain for cleaner cuts.
- Use sharp tools to avoid tearing the grain.
- Sand against the grain gently to smooth edges.
- Plan your cuts to minimize damage to the wood fibers.
Advanced Tips From Experts
Marking and measuring wood precisely is key to good woodworking. Experts use special methods to improve accuracy and save time.
These tips cover making custom jigs, combining tools, and fixing common measurement mistakes.
Custom Jigs For Repetitive Marks
Custom jigs help you make the same mark many times without errors. They keep your measurements steady and reduce guesswork.
- Build a simple block with a fixed notch for common lengths.
- Use clamps to hold the jig firmly on the wood.
- Label your jig clearly for easy use by others.
- Test the jig on scrap wood before using it on the project.
Combining Tools For Efficiency
Using more than one tool at once speeds up marking and measuring. It also lowers the chance of mistakes.
| Tool Combination | Benefit | Tip |
| Combination Square + Marking Knife | Clear, sharp lines | Hold square tightly to edge |
| Tape Measure + Pencil Gauge | Fast repetitive marks | Set gauge once for all marks |
| Speed Square + Pencil | Quick angle marks | Use square’s lip to brace |
Troubleshooting Measurement Errors
Errors happen but you can fix them by checking your tools and methods carefully.
Common causes of errors:
- Loose tape measure hook
- Worn pencil tips
- Misreading numbers on the scale
- Uneven wood surface
Quick fixes:
- Secure tape hook with pliers
- Sharpen or replace pencils often
- Double-check measurements before marking
- Smooth wood surface with sandpaper
Frequently Asked Questions
What Tools Are Best For Marking Wood Accurately?
Use a sharp pencil, marking knife, or a fine-tip pen for precise wood markings. A combination square and marking gauge help ensure straight, consistent lines. These tools improve accuracy and reduce errors in cutting or joining wood pieces.
How Do You Measure Wood For Perfect Cuts?
Measure twice and cut once. Use a reliable tape measure or ruler to mark dimensions clearly. Double-check measurements before cutting to avoid costly mistakes. Accurate measuring ensures your wood pieces fit together seamlessly.
What Techniques Improve Wood Marking Precision?
Use a marking knife for crisp, thin lines that guide saws effectively. Clamp the wood to prevent movement. Lightly score the surface before marking. These methods increase accuracy and reduce splintering when cutting.
Why Is Proper Wood Marking Important?
Proper marking ensures precise cuts and fit, saving time and materials. It minimizes errors and improves the quality of woodworking projects. Clear markings guide tools accurately, resulting in professional finishes and sturdy joints.
Conclusion
Marking and measuring wood accurately is crucial for any woodworking project. Consistent practice makes you better at it. Use the right tools for the best results. A reliable tape measure ensures precise measurements. Pencils and chalks help in marking clearly.
Always double-check your measurements. It avoids costly mistakes. A square and level keep your lines straight. Safety is important; handle tools with care. Remember, practice leads to perfection. Start small, and build your skills. With time, you’ll gain confidence. Happy woodworking!