
Are you tired of struggling to draw perfect circles every time? Whether you’re working on a craft project, a DIY task, or technical drawing, marking circles accurately can make all the difference.
Imagine how much easier your work will be when your circles are precise, clean, and flawless. You’ll discover simple and effective tips that will help you mark circles with confidence and accuracy every single time. Keep reading to unlock the secrets that will transform your skills and save you time and frustration.
Credit: www.familyhandyman.com
Choosing The Right Tools
Marking circles accurately needs the right tools. Using proper tools makes your work neat and precise.
Choosing tools that fit your project helps you draw circles easily and correctly every time.
Types Of Compasses
Compasses are common tools for drawing circles. They have a sharp point and a pencil or pen on the other end.
There are different types of compasses. Some are simple, and others have more features for accuracy.
- Standard Compass: Good for most circle sizes and easy to use.
- Beam Compass: Best for large circles over 6 inches in diameter.
- Spring Compass: Has adjustable tension for smoother drawing.
- Divider Compass: Used to mark equal distances, useful in technical drawing.
Using Templates And Stencils
Templates and stencils help you draw circles quickly. They come with fixed circle sizes.
They are useful when you need many circles of the same size. You just trace the shape on your paper.
- Plastic Stencils: Durable and easy to clean.
- Metal Templates: Provide sharp and smooth edges.
- Flexible Templates: Can bend to fit curved surfaces.
Selecting Suitable Pens And Pencils
Using the right pen or pencil affects how clear your circles look. Sharp tips draw thin, neat lines.
Choose pencils with hard leads for fine lines. Softer leads make darker, thicker lines but can smudge.
- Mechanical Pencils: Always sharp and consistent line width.
- Hard Lead Pencils (H or 2H): Good for precise, light lines.
- Fine Tip Pens: Offer smooth, permanent lines.
- Colored Pencils: Help highlight or differentiate circles.
Preparing Your Surface
Marking circles accurately starts with a good surface. A well-prepared workspace helps you draw clean and even lines.
Taking time to set up your surface will make your circle marking easier and more precise.
Ensuring A Flat Workspace
A flat surface keeps your tools steady. Uneven areas can cause your compass or pencil to slip.
Use a table or desk that does not wobble. Check for bumps or dips before you start drawing.
- Choose a solid table or board
- Use a level to check flatness
- Add a flat board if your surface is uneven
Securing Your Paper Or Material
Keep your paper or material from moving. Movement can cause your circle to be off-center or jagged.
Use tape or clips to hold your work firmly in place. Avoid using too much tape to prevent damage.
- Apply small strips of painter’s tape at edges
- Use binder clips for thicker materials
- Make sure the paper is flat and tight
Cleaning The Drawing Area
Remove dust, dirt, and debris from your workspace. Small particles can cause bumps and affect your lines.
Wipe your surface with a clean cloth before starting. Check your tools for dirt as well.
- Use a damp cloth to clean the table or board
- Dry the surface completely before drawing
- Brush off erasers and pencils to keep marks clear
Techniques For Accurate Marking
Marking circles accurately is key for many projects. It helps to get precise shapes and clean results.
Using the right methods will make your work easier and your circles perfect every time.
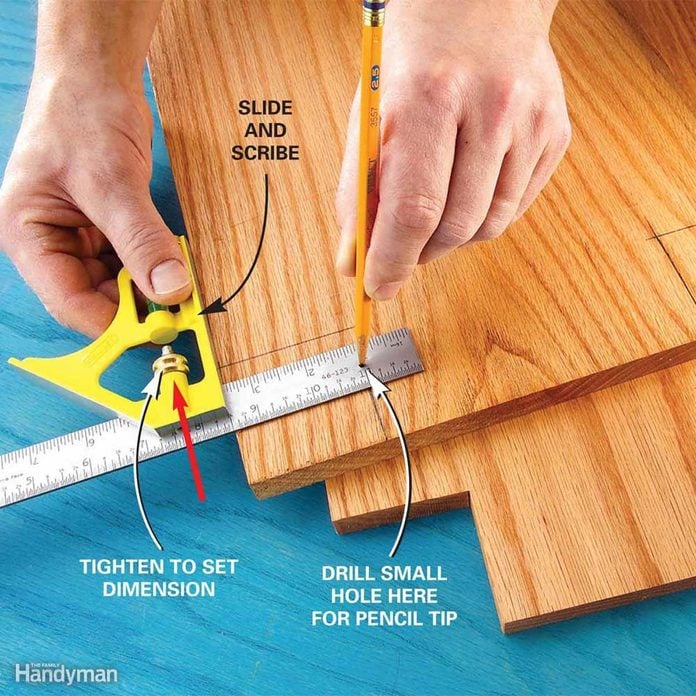
Setting The Compass Correctly
Adjust your compass to the exact radius you need before you start. Tighten the screw or clasp firmly to avoid slipping.
- Place the compass point on the center mark of your circle.
- Hold the compass straight to keep the radius steady.
- Check the radius by measuring it with a ruler before marking.
- Practice drawing light circles first to ensure the size is right.
Maintaining Steady Hand Pressure
Keep your hand steady and apply even pressure while drawing. This stops the compass from wobbling or slipping.
| Tip | Effect |
|---|---|
| Hold compass firmly but not too tight | Prevents slipping and keeps circle smooth |
| Keep the drawing surface stable | Reduces unwanted movement |
| Use light pressure for initial mark | Allows easy correction if needed |
| Practice slow, steady motion | Improves accuracy and smoothness |
Avoiding Common Mistakes
Watch out for these errors to keep your circles clean and precise.
- Do not move the compass point once set.
- Avoid pressing too hard; it can tear the paper.
- Check compass tips for wear or damage regularly.
- Keep the compass vertical to prevent oval shapes.
- Use sharp pencil tips for clear lines.
Credit: www.familyhandyman.com
Measuring And Adjusting Radii
Marking circles accurately is important for many projects. Measuring and adjusting the radius helps get the perfect shape.
Using the right tools and checking your work can save time and improve results.
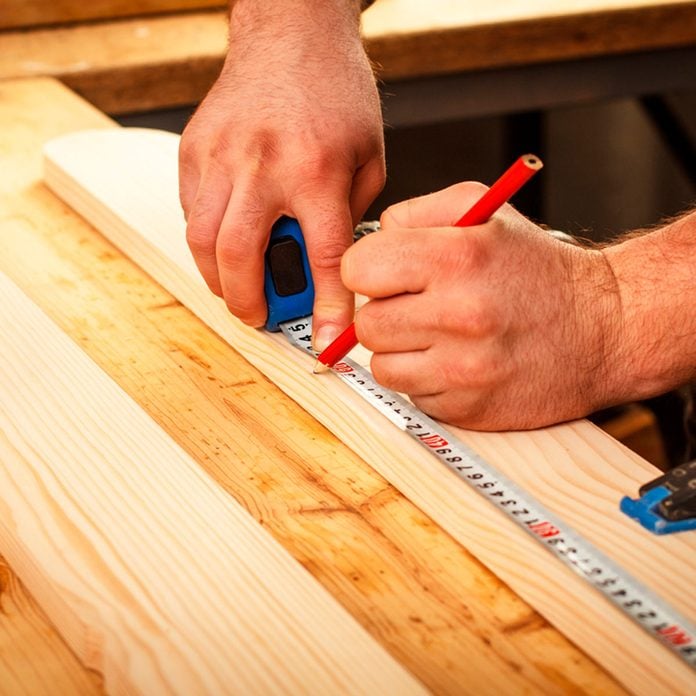
Using Rulers And Calipers
Rulers help measure the radius by showing the distance from the center to the edge. Calipers give more precise readings.
Place the ruler or caliper carefully to avoid errors in measurement.
- Use a ruler for rough measurements.
- Use calipers for fine measurements.
- Hold tools steady while measuring.
Double-checking Measurements
Check the radius more than once to ensure accuracy. Small mistakes can change the circle size.
Measure from different angles and compare results to find mistakes early.
- Measure the radius twice or thrice.
- Check both sides of the circle.
- Use different tools to compare.
Making Fine Adjustments
After measuring, adjust the radius carefully. Small changes improve the circle’s accuracy.
Use light marks and erase mistakes before finalizing the circle.
- Make small marks to guide adjustments.
- Erase and redraw if needed.
- Use a compass for smooth curves.
Marking Circles On Different Materials
Marking circles accurately helps in crafting and building projects.
Each material needs a special approach to get the best results.
Paper And Cardboard
Use a compass or a round object to trace circles on paper and cardboard. A sharp pencil works best for clear lines.
- Place the compass point or object firmly on the surface.
- Hold the pencil straight to avoid smudges.
- Draw slowly to keep the circle smooth.
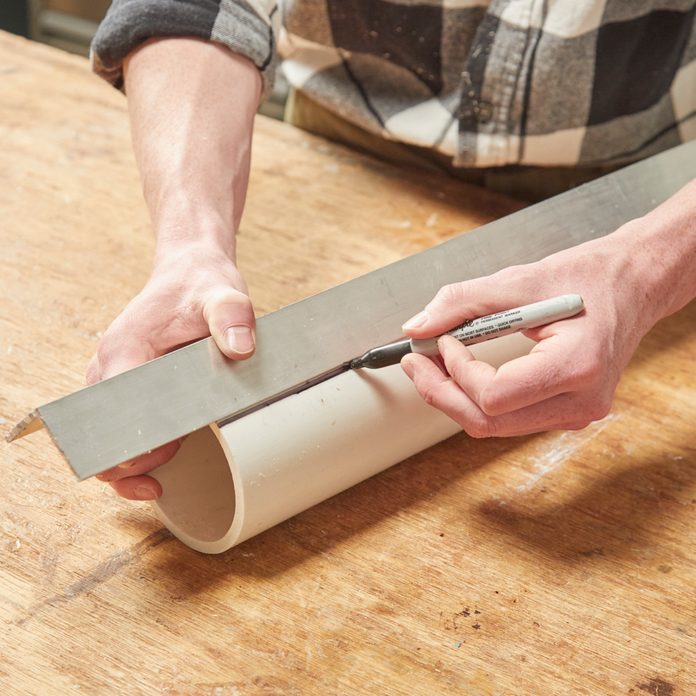
Wood And Metal Surfaces
Marking circles on wood and metal requires tools that leave a permanent mark. Use a scribe or a fine-tip marker for metal. For wood, a pencil or chalk can work well.
| Material | Recommended Tool | Tip |
| Wood | Pencil or chalk | Sand the surface first |
| Metal | Scribe or fine-tip marker | Use steady pressure |
Fabric And Soft Materials
Marking circles on fabric needs gentle tools that do not damage the material. Fabric chalk, washable markers, or tailor’s pencils are good choices.
- Place a round template on the fabric.
- Hold it steady with one hand.
- Trace around it lightly.
- Test the marker on a scrap piece first.
Troubleshooting Common Issues
Marking circles accurately can be tricky. Small mistakes cause big problems in your project.
Use these tips to fix common problems when drawing circles. Keep your lines clean and your circles centered.
Fixing Wobbly Lines
Wobbly lines often happen because of shaky hands or poor tools. Use a steady grip and a sharp pencil.
- Hold your marking tool firmly but relaxed.
- Use a compass or circle template for smooth curves.
- Draw slowly and steadily to avoid uneven lines.
- Practice on scrap paper before marking your project.
Dealing With Slippage
Slippage happens when your tool moves from the starting point. It causes circles to be off or uneven.
| Cause | Solution |
| Slippery surface | Use a non-slip mat or tape to hold material |
| Loose compass point | Tighten the compass screw or replace the tip |
| Too much pressure | Apply gentle pressure while drawing |
| Uneven workspace | Use a flat and stable surface |
Correcting Off-center Circles
Circles that are off-center ruin symmetry. Check your center point before drawing.
Tips to center circles better:
- Mark the center point clearly with a fine pencil.
- Use a ruler to measure equal distances from the center.
- Double-check measurements before drawing.
- Use a compass with a fixed center point.
Maintaining Your Tools
Keeping your marking tools in good shape helps you draw perfect circles every time. Proper care improves accuracy and tool life.
Simple maintenance steps prevent errors and save time during your projects.
Cleaning And Sharpening
Clean your compasses and dividers after each use to remove dust and debris. Dirt can cause slips or uneven marks.
Sharpen pencil tips and metal points regularly. Sharp points give clear, precise lines and better control.
- Use a soft cloth to wipe tools clean
- Sharpen pencil leads with a fine sharpener
- Use a small file to sharpen metal points gently
- Avoid water or harsh chemicals on metal parts
Storage Tips
Store your marking tools in a dry, safe place to avoid damage. Proper storage stops rust and bending.
Use a case or container with compartments to keep tools organized and protected.
- Keep tools away from moisture and heat
- Store metal points covered or capped
- Use small boxes or pouches for easy access
- Place tools where they won’t get crushed or dropped
Regular Calibration
Check your tools often to ensure they measure accurately. Calibration keeps circle sizes consistent.
Adjust screws or joints if the tool feels loose or the arms do not move smoothly.
- Test your compass on paper before marking work
- Tighten or loosen adjustment screws as needed
- Replace worn parts like pencil leads or points
- Keep hinges clean and lubricated for smooth motion
Credit: www.familyhandyman.com
Frequently Asked Questions
How Do I Mark Circles Accurately Without A Compass?
Use a string tied to a pencil as a makeshift compass. Secure the string’s other end at the center point. Keep the string taut while drawing to maintain an even radius.
What Tools Help In Marking Perfect Circles?
A compass, a circle template, or a protractor are ideal. For larger circles, use a string and pencil method. Ensure the tool is stable for precise circles.
How Can I Avoid Uneven Circle Edges?
Draw slowly and steadily while keeping the drawing tool firm. Use smooth, continuous movements instead of short strokes. Proper tool control prevents jagged or uneven edges.
Why Is A Stable Surface Important For Circle Marking?
A flat, stable surface prevents the paper or material from shifting. This stability ensures the circle stays consistent and accurate. Uneven surfaces cause distortions in the circle shape.
Conclusion
Accurate circle marking takes practice and patience. Use the right tools to help guide you. Keep your hand steady and measure carefully. Check your marks before cutting or drilling. Small steps lead to better results. Stay focused and take your time.
With these tips, your circles will look neat. Keep practicing, and you will improve quickly. Simple methods work best for clear, precise markings. Trust your skills and enjoy the process.
