If you want your mortise and tenon joints to fit perfectly every time, the first step is mastering how to mark your wood accurately. Getting this right can save you hours of frustration and ensure your project is strong and looks professional.
You’ll discover simple, effective tips to mark your wood with precision. Whether you’re a beginner or looking to sharpen your skills, these easy-to-follow techniques will help you work smarter, not harder. Keep reading to make your next woodworking project a true success.

Credit: www.findbuytool.com
Choosing The Right Tools
Marking wood for mortise and tenon joints needs care and the right tools. Using proper tools helps create accurate and clean marks on wood surfaces.
Selecting tools that fit your project and skill level makes the process easier and improves your results.
Essential Marking Tools
Good marking tools include marking gauges, marking knives, and pencils made for woodworking. These tools help you draw clear lines and shapes on wood.
- Marking gauge: sets consistent line distances from edges
- Marking knife: cuts thin, sharp lines on wood
- Carpenter’s pencil: draws visible lines on rough surfaces
- Try square: checks right angles and guides lines
Selecting Sharp Marking Gauges
Sharp marking gauges give clean and precise lines. Dull points cause rough marks that can mislead your cuts.
| Gauge Type | Best Use | Tip Care |
| Wheel gauge | Fine lines on hardwood | Keep wheel clean and sharp |
| Pin gauge | Softwoods and general use | Sharpen pin with fine file |
| Knife gauge | Sharp, deep scribe lines | Regularly hone blade edge |
Using Marking Knives Effectively
Marking knives cut thin, clear lines that guide saws and chisels. Hold the knife firmly and cut with steady pressure.
- Use the knife tip to start the line sharply
- Draw the blade along wood grain for cleaner cuts
- Keep your knife sharp by honing it regularly
- Practice to keep your lines straight and thin

Credit: www.youtube.com
Preparing The Wood Surface
Marking wood correctly is key for strong mortise and tenon joints. Preparing the wood surface helps you make clear and accurate marks.
Start with a smooth, clean surface and know the wood grain direction. This makes your work easier and more precise.
Smoothing And Cleaning
Use sandpaper to smooth the wood where you will mark. Remove any rough spots that might cause mistakes.
Clean the surface with a dry cloth. Dust or dirt can blur your pencil lines or marks.
- Sand with fine-grit paper for a smooth finish
- Wipe the wood to clear dust and debris
- A clean surface shows marks clearly
Identifying Grain Direction
Look closely at the wood to find the grain direction. Marking along the grain helps avoid splintering.
Knowing grain direction also helps you place your marks where cutting will be easier and cleaner.
- Grain runs in the direction of the wood fibers
- Marks along grain reduce tear-out
- Cutting with grain makes smoother joints
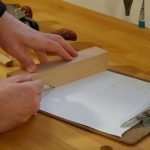
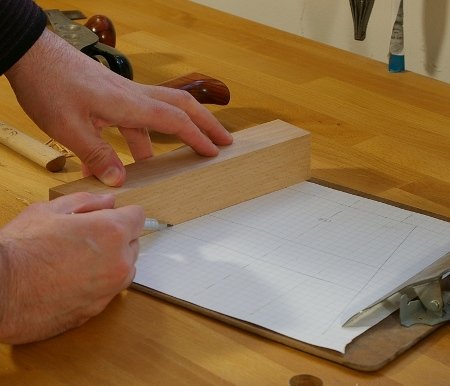
Marking The Mortise
Marking the mortise correctly is key to making strong mortise and tenon joints. Accurate marks help guide your cuts and chiseling.
Taking time to mark the mortise well saves wood and effort during assembly. Use the right tools and methods for best results.
Setting Accurate Measurements
Start by measuring the mortise size with a ruler or caliper. Check the width, length, and depth carefully.
Mark the measurements lightly on the wood to avoid mistakes. Double-check each measurement before moving on.
- Use a marking gauge for consistent width
- Measure twice to avoid errors
- Mark edges clearly but lightly
- Keep tools sharp for clean lines
Transferring Layout Lines
Transfer the mortise layout lines from your plan to the wood surface. Use a marking knife or pencil for clear lines.
Make sure lines are visible but not too thick. This helps when chiseling and cutting the mortise.
- Place the wood on a flat surface
- Use a try square to draw perpendicular lines
- Score lines with a knife for precision
- Check alignment before cutting
Avoiding Common Mistakes
Many woodworkers mark mortises too deep or wide. This weakens the joint and wastes wood.
Also, avoid marking with dull tools or rushing the process. These cause uneven or unclear lines.
- Do not guess measurements; always measure
- Avoid heavy marks that hide layout lines
- Keep marking tools sharp and clean
- Take your time to ensure accuracy
Marking The Tenon
Marking the tenon correctly is important for strong mortise and tenon joints. It helps the pieces fit tightly and align well.
Clear and precise marks guide your cutting and shaping. This saves time and reduces errors during assembly.
Determining Tenon Size
Choose the tenon size based on the thickness of the wood and the mortise dimensions. The tenon should be strong but not too big to weaken the wood.
- Measure the wood thickness carefully.
- Set the tenon thickness about two-thirds of the wood thickness.
- Decide the tenon length to fit the mortise depth.
- Check that the tenon shoulders will rest flat on the wood surface.
Aligning Tenon Marks With Mortise
Proper alignment between tenon marks and the mortise ensures a tight joint. Mark both parts using the same reference points.
| Marking Step | Tip |
| Transfer mortise outline | Use a marking knife for sharp lines |
| Mark tenon shoulders | Keep marks square to wood edges |
| Check alignment | Dry fit the pieces to test marks |
| Adjust if needed | Use fine sanding or a chisel |
Using Shouldering Techniques
Shoulders help locate the tenon and add strength to the joint. Marking shoulders clearly is key to cutting them well.
Here are tips for marking tenon shoulders:
- Use a marking gauge to set shoulder lines all around.
- Score the shoulder lines with a sharp knife for accuracy.
- Check that shoulder marks are square to the wood face.
- Keep shoulder width consistent to avoid gaps.
Ensuring Precision
Marking wood accurately is key to strong mortise and tenon joints. Precision helps parts fit well and hold tight.
Use careful methods to avoid mistakes before cutting. This saves time and wood from waste.
Double-checking Measurements
Always measure twice before making any marks on wood. Small errors can cause big fitting problems.
- Use a reliable ruler or tape measure.
- Mark clearly with a sharp pencil.
- Verify measurements against your plans.
- Check both length and width of the joint areas.
Using Test Fittings
Fit test pieces before cutting final joints. This shows if your marks are correct.
| Test Type | Purpose | What to Check |
| Dry Fit | Check alignment | Parts should fit snugly without gaps |
| Mock Cut | Practice cuts | See if marks guide the saw properly |
| Sanding Test | Adjust fit | Check if minor sanding improves fit |
Adjusting Marks As Needed
After test fittings, change your marks if the fit is too tight or loose. Accurate marks lead to better joints.
- Use an eraser or sharp knife to remove wrong marks.
- Make small adjustments to lines for a perfect fit.
- Keep notes on changes to avoid repeating errors.
- Mark clearly with fine pencils for next cuts.
Tips For Complex Joints
Marking wood accurately is key for strong mortise and tenon joints. Complex joints need extra care and precision.
Use clear marks to avoid mistakes. Good marking saves time and improves fit.
Handling Angled Mortise And Tenon
Angled joints require careful marking to keep the angle correct. Use a protractor or angle finder tool.
Mark the angle on both the mortise and tenon sides. Check your marks before cutting.
- Set the angle tool to the desired degree
- Draw the angle lines on the wood surfaces
- Double-check the angle with a square or protractor
- Mark shoulder and cheek lines clearly
Marking Multiple Joints Consistently
Consistency is important when marking several joints. Use templates or jigs for uniform marks.
Mark all parts before cutting to keep track of each piece. Number or label your joints clearly.
- Create a simple template for repeated joint shapes
- Use a marking gauge for consistent depth lines
- Label each joint part with pencil or tape
- Check all marks together before starting work
Maintenance Of Marking Tools
Marking tools need regular care for accurate wood marking. Proper maintenance keeps tools sharp and reliable. This helps create clean mortise and tenon joints.
Neglecting tool care can cause uneven lines and weak joints. Simple habits extend the life of your marking knives and gauges.
Sharpening Marking Knives
Sharp marking knives give clear, precise lines on wood. Use a fine sharpening stone or leather strop to maintain the edge. Avoid grinding too deep to keep the blade thin and sharp.
- Clean the blade before sharpening to remove debris.
- Use light, even strokes along the blade’s edge.
- Keep the blade angle consistent during sharpening.
- Finish with a leather strop to polish the edge.
- Store knives in a dry place to prevent rust.
Calibrating Marking Gauges
Marking gauges must be set accurately for consistent marks. Check the scale and fence for tightness and alignment. Calibrate regularly to avoid measurement errors.
| Task | How to Do It | Frequency |
| Check Scale Accuracy | Compare marks to a ruler | Monthly |
| Tighten Screws | Use screwdriver to secure fence | Before Each Use |
| Adjust Fence Alignment | Slide fence and lock at exact measurement | As Needed |
| Clean Gauge | Wipe dust and resin off parts | After Every Use |

Credit: www.bigsandwoodworking.com
Frequently Asked Questions
What Tools Are Best For Marking Mortise And Tenon Joints?
Use a marking gauge, pencil, try square, and chisel for precise markings. These tools help ensure accuracy and clean cuts in mortise and tenon joints.
How Do I Ensure Accurate Measurements For Mortise And Tenon?
Measure twice and mark clearly using a marking gauge and square. Double-check dimensions before cutting to avoid errors and ensure a tight fit.
What Is The Best Technique To Mark Tenon Shoulders?
Use a marking knife along with a try square for sharp, clean lines. This method prevents wood fibers from tearing and improves joint fit.
How Can I Avoid Marking Mistakes On Wood Joints?
Work on a clean surface and use sharp marking tools. Always mark on the waste side to keep visible surfaces clean.
Conclusion
Mastering mortise and tenon joints takes practice. Start with the right tools. Measure twice, cut once. Precision matters in woodworking. Use clear marks on your wood. This ensures accurate cuts. Patience is key in the process. Avoid rushing to prevent mistakes.
Try different marking methods. Find what works best for you. Consistency leads to better results. With these tips, your projects will improve. Keep learning and refining your skills. Happy woodworking and enjoy the process!